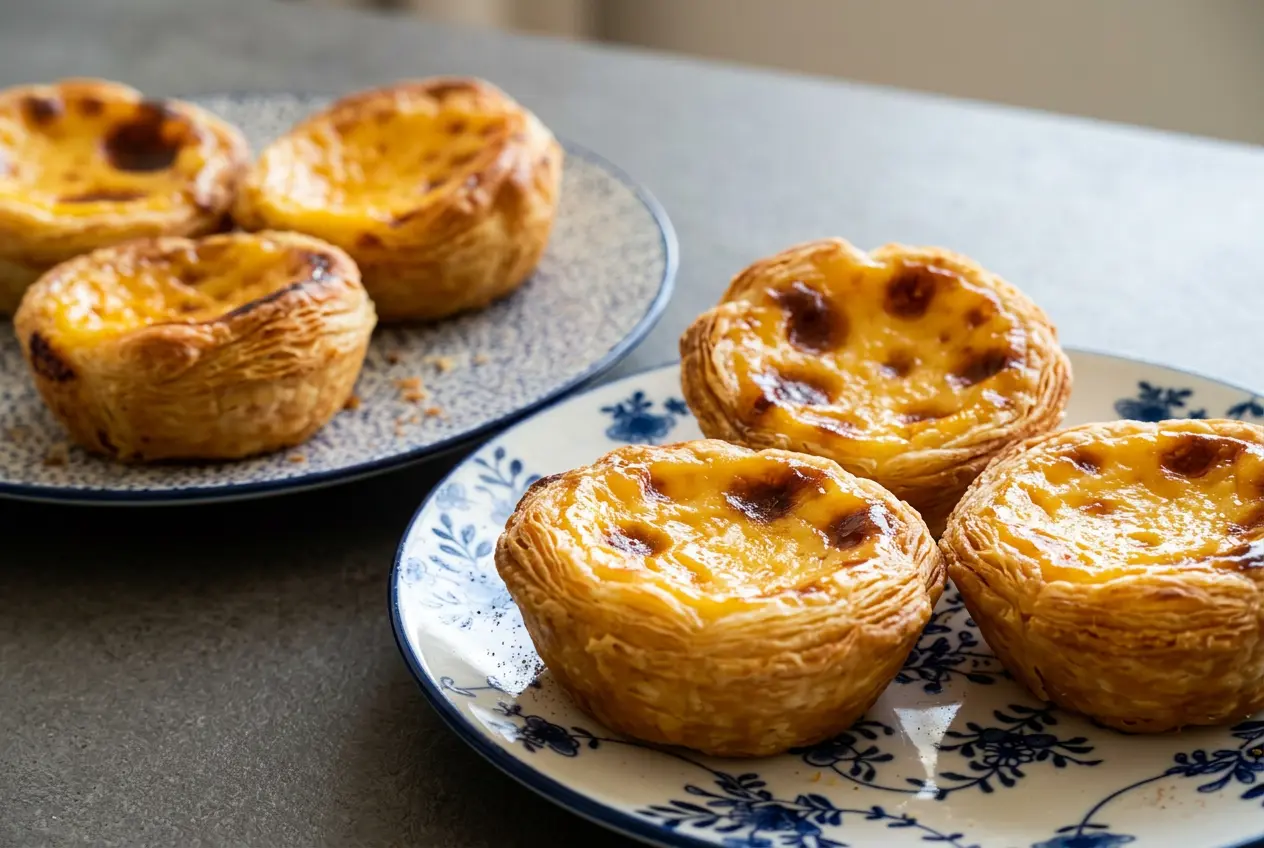
Portuguese custard tarts, or pastéis de nata, combine crisp spiral puff pastry with creamy egg-yolk custard flavored with cinnamon, lemon peel, and vanilla. Roll, slice, and thumb-press the pastry into molds, then fill and bake in a hot oven until the tops develop dark caramelized spots.
These Portuguese custard tarts use frozen puff pastry for the shells and a cinnamon-lemon sugar syrup for the filling. The contrast is the draw: delicate pastry that crackles around a rich, smooth center.
You don’t need specialty molds to make them. Standard and mini muffin pans work, with the baking adjustments below. The spiral starts with a tight roll.
Set a small bowl of water beside your pan so you can dampen your thumbs while shaping the pastry.
Key Ingredients and Essential Equipment
Puff pastry supplies the flaky shell, while milk, yolks, and flour give the custard richness and body. Sugar and water form the syrup; cinnamon, lemon peel, and vanilla bring warmth and citrus aroma.
- 1 pkg frozen puff pastry
- 3 tbsp all-purpose flour
- 1¼ cup whole milk
- 1⅓ cup granulated sugar
- ⅔ cup water
- ½ tsp vanilla
- 1 whole cinnamon stick
- ¼ tsp cinnamon
- ½ lemon peel, not zest
- 6 large egg yolks
Flour contributes body to the filling, whole milk supplies moisture, and egg yolks give it richness and color. Whisking the flour into a small portion of milk first makes lumps easier to spot before the mixture becomes more fluid.
The cinnamon stick and broad lemon peel pieces flavor the syrup and are removed afterward. Ground cinnamon and vanilla remain in the filling. Choose peel with as little bitter white pith attached as possible.
I prefer broad pieces of lemon peel here because they’re easy to retrieve from the syrup; finely grated zest isn’t the same ingredient.
Gather a small mixing bowl, whisk, small saucepan, mesh strainer, rolling pin, and your chosen tart molds or cupcake pan. Individual pastry molds also need a cookie sheet underneath them. See the pan comparison below before choosing your format.
Leftover egg whites can go toward meringues, macarons, or an egg-white omelet. The quantities and baking directions for the tarts follow here.
How to Make Portuguese Custard Tarts Step by Step
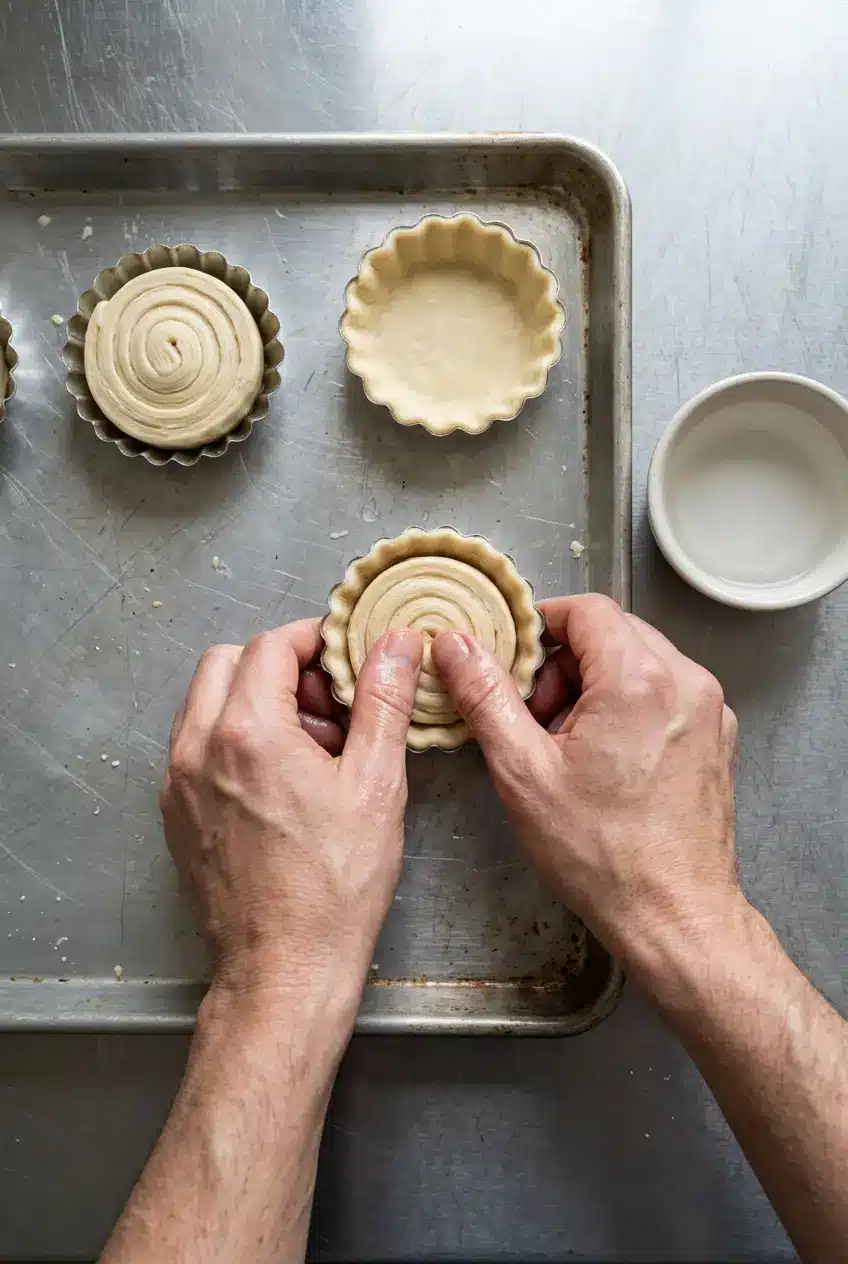
Work on the custard while the pastry thaws, then shape and fill the shells. Give the tempering stage your full attention: steady whisking matters more than speed.
Prep: 30 minutes. Cook: 15 minutes. Yield: 24 pastries. Follow the detailed baking range and pan adjustments below.
- Unbox the puff pastry and leave it on the counter to begin thawing about 45 minutes before baking.
Use this interval to prepare the custard filling. - Make a smooth slurry in a small bowl with 3 tbsp flour and ¼ cup whole milk, then whisk in the 6 yolks and remaining 1 cup milk.
Check the slurry for flour lumps before adding the yolks and remaining milk. - Combine ⅔ cup water, 1⅓ cup sugar, the cinnamon stick, and broad pieces of lemon peel in a small saucepan over medium-high heat, then boil for 1 minute or until the syrup reaches 220°F.
The syrup should contain no visible sugar grains when you take it off the heat and remove the cinnamon stick and peel. - Ladle a thin, steady stream of the milk-and-egg mixture into the hot syrup while whisking continuously, stopping once ⅓ to ½ of the milk mixture has been incorporated.
Keep the addition gradual so the mixture blends smoothly rather than forming scrambled egg pieces. - Whisk the warmed syrup mixture into the milk-and-egg mixture still in the bowl.
Continue whisking throughout the addition to keep the custard uniform. - Pass the custard through a mesh strainer into a clean bowl, then whisk in 1 tsp vanilla and ¼ tsp cinnamon and set it aside.
The strained filling should look smooth, without egg fragments or larger aromatic pieces. - Heat the oven to 475°F and, if desired, wipe the molds lightly with butter rather than cooking spray.
The butter coating is optional and should be light. - Roll the puff pastry to approximately ¼ inch thick, then form a tight log starting along its longest edge.
The cut end should show closely packed pastry spirals. - Slice the log crosswise into discs approximately ½ inch thick and set a disc in each mold.
Each round should sit with its spiral facing upward, ready for pressing. - Dampen both thumbs with water and press the center of each disc outward, then work the pastry up the mold walls.
Aim for a thin shell that reaches the top without leaving a thick mound at the bottom. - Pour custard into each shell until it is ⅔ full, and set individual pastry molds on a cookie sheet before placing them in the oven.
Leave the remaining headroom empty to allow for bubbling without overflow. - Bake for 15–17 minutes, using the cupcake-pan adjustments below when applicable.
Look for dark spots across the custard rather than an entirely blackened surface. - Let the tarts cool before gently releasing them from their molds or cupcake pan.
The shells should hold their shape as you lift them out. - Finish with a light sprinkle of cinnamon and powdered sugar if desired.
Keep the dusting light so the blistered tops remain visible.
Special Instructions for Using Cupcake Pans
- Allow an additional 2–3 minutes of baking when using a standard cupcake pan, if needed.
The centers should feel firm rather than jiggly. - Shorten the baking time by 2–3 minutes when using a mini cupcake pan.
Check for firm centers in these smaller tarts as well.
What Makes Pastéis de Nata Unique
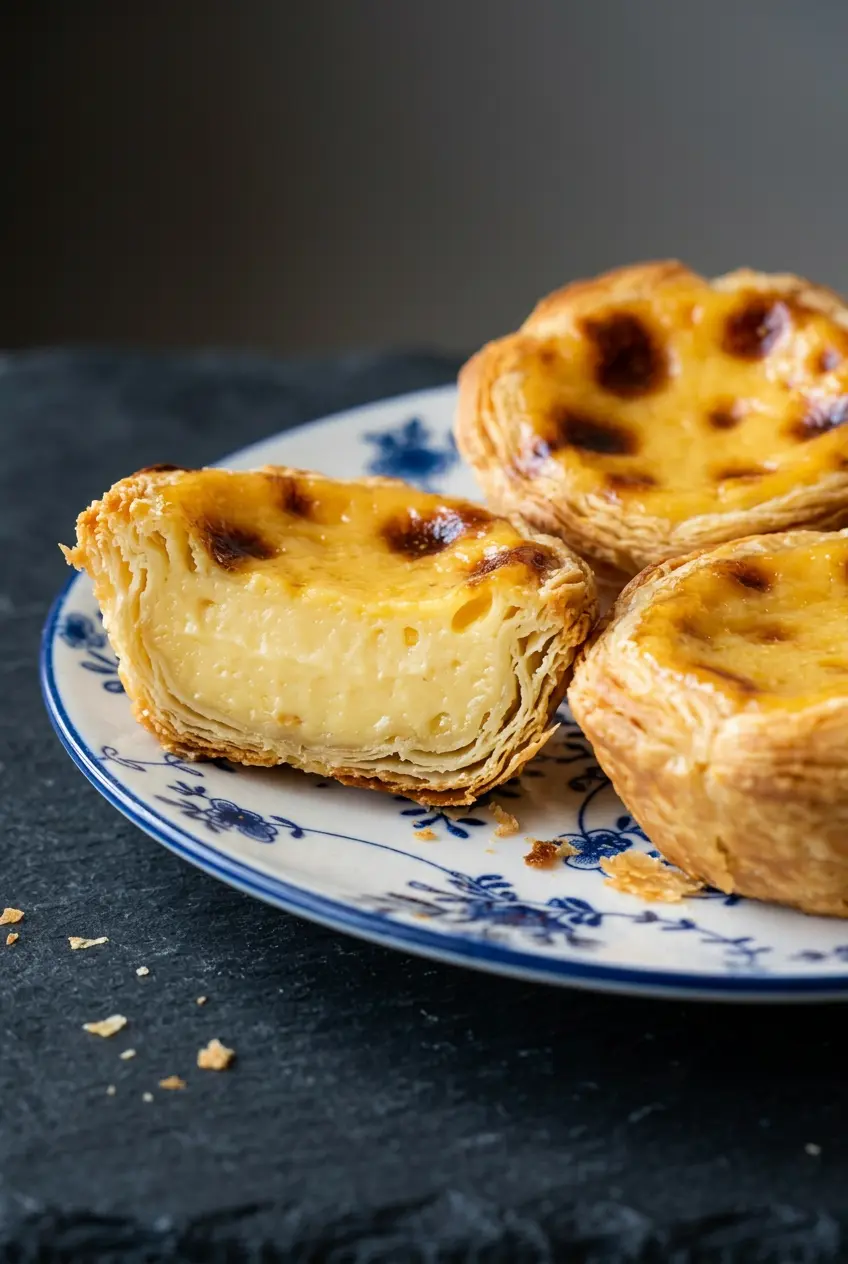
A pastel de nata is an individual Portuguese custard tart; pastéis de nata is the plural. Its defining combination is a layered spiral shell, creamy filling, and a top marked with dark caramelized spots.
The pastry doesn’t need a perfectly even rim. Those slightly irregular layers are part of its character, especially beside the smooth custard.
Portuguese Custard Tarts vs. Hong Kong and Classic Custard Tarts
Portuguese tarts emphasize laminated pastry and a blistered surface. Hong Kong egg tarts commonly have a smoother, glossy yellow filling and may use either shortcrust or a flaky shell, depending on the bakery.
British and French custard tarts often use shortcrust pastry and have a more uniformly colored surface. Styles vary, so the shell alone doesn’t tell the whole story. The spiral pastry and spotted top together distinguish this version.
Expert Tips and Troubleshooting for Flaky, Blistered Tarts
Most problems begin with uneven pastry thickness, rushed tempering, or too much filling. Check those details before changing the baking time.
The Preheated Baking Sheet and Chilled-Shell Trick
As an optional approach, briefly chill the pressed, unfilled shells and set the pan on a preheated rimmed baking sheet. This is a way to explore firmer pastry handling and more direct heat beneath the pan, not a requirement or a promise of a crisper result.
Metal pans are a practical choice for this hot-oven method. Don’t assume silicone will behave identically, and check any pan’s suitability for the specified oven temperature.
Common Mistakes to Avoid
- Lumpy or scrambled filling: Rushed mixing can leave flour lumps or egg pieces; smooth the initial slurry, temper gradually, and strain before filling.
- Thick, soft bottoms: A mound of pastry in the center makes an uneven shell; press outward from the middle before working up the walls.
- Uneven or low shell walls: Dough concentrated at the bottom leaves less pastry at the rim; aim for thin, continuous coverage up to the top.
- Overflow: Too much custard can spill during baking; stop at the stated fill level rather than filling to the rim.
- Pale tops or burned edges: An underheated oven or excessive baking can upset the balance; fully preheat and watch for scattered dark spots, not a uniformly burned surface.
- Broken shells during removal: Unmolding too soon can damage delicate pastry; allow the tarts to cool first.
Variations and Pan Options
Keep the individual puff-pastry tarts as your starting point. The ideas below are optional directions, not changes to the ingredient list or method above.
Standard Muffin Tin vs. Mini Muffin Tin vs. Traditional Tart Molds
- Traditional tart molds: Flared individual molds give the familiar open tart shape and sit on a cookie sheet for baking.
- Standard muffin pan: This convenient alternative makes a deeper-looking tart; follow the additional baking allowance above.
- Mini muffin pan: Choose this for smaller portions and follow the shorter baking adjustment.
From-Scratch Laminated Pastry Dough vs. Store-Bought Puff Pastry
Frozen puff pastry is the choice for this recipe. Homemade laminated pastry is an optional baking project for anyone who wants more control over the dough, but it needs its own complete formula. Both approaches aim for distinct layers rather than a short, crumbly shell.
Warm Spice Syrup Infusions (Cardamom and Clove)
- Cardamom: An optional aromatic direction with floral, citrusy notes alongside cinnamon and lemon.
- Clove: An optional warmer, more assertive spice direction that would noticeably change the custard’s character.
Large-Format Single Portuguese Egg Tart
A single, sliceable tart offers a family-style presentation, but it needs a separately developed formula rather than the individual-tart timing. For another sliceable dessert with citrus and custard, try lemon custard cake.
How to Serve Pastéis de Nata
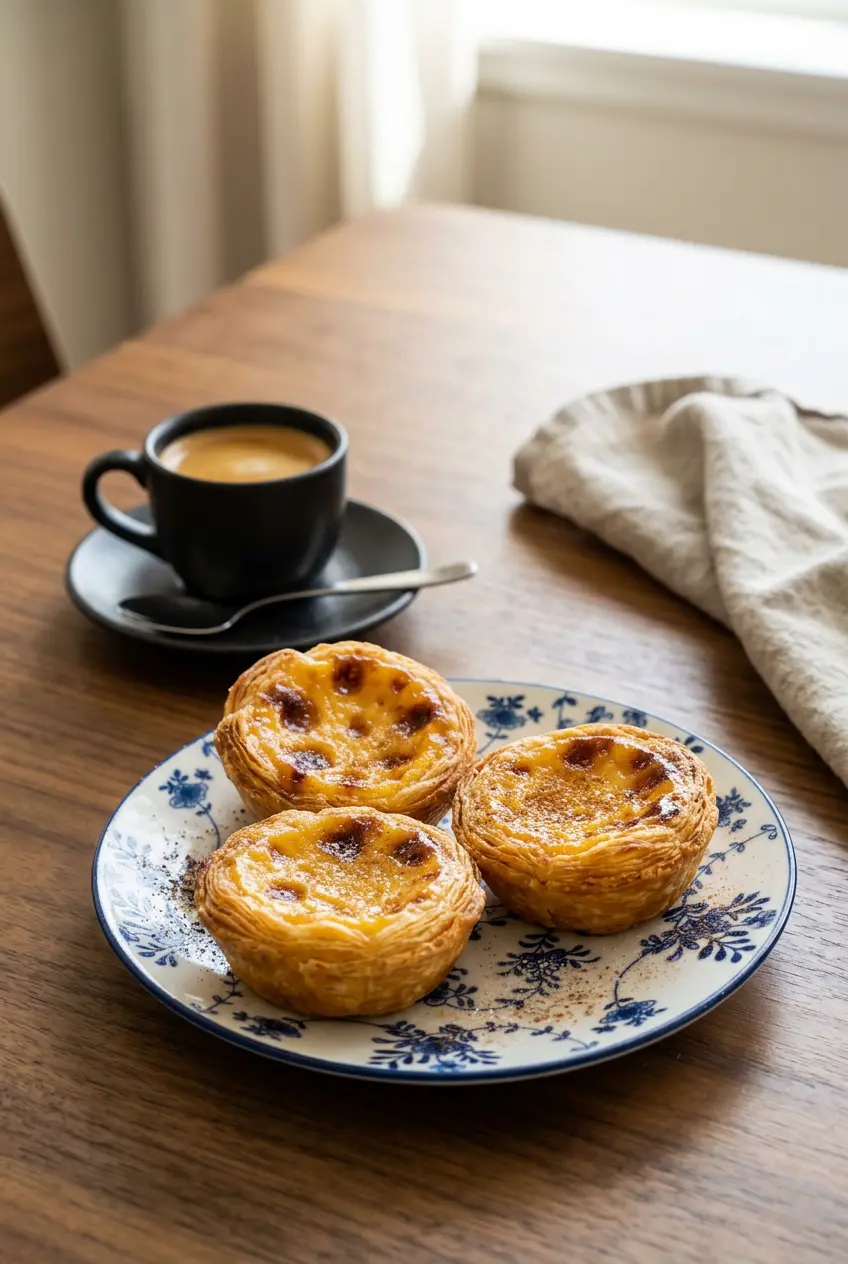
Finish the cooled tarts with cinnamon and powdered sugar, keeping the dusting light enough to leave the spotted custard visible. Enjoying them slightly warm or at room temperature is a texture preference, not storage guidance.
Espresso or strong black coffee makes a natural pairing with the sweet filling. For a larger coffee spread, a bright lemon loaf offers a contrasting cake texture.
Planning Your Baking Session
Organize the equipment before starting: place the whisk beside the saucepan, position the strainer over a clean bowl, and choose your pan. The method already gives you a useful overlap by preparing the filling while the pastry thaws.
Plan around baking and cooling before serving rather than adding an extended holding stage. This method does not establish advance component preparation, a leftover shelf life, or a reheating schedule.
Conclusion
Store-bought puff pastry and cinnamon-lemon custard bring together the defining pleasures of pastéis de nata: flaky shells, creamy centers, and dark-spotted tops.
Give the spiral shells careful attention and keep the custard below the rim. A little irregularity belongs here, so enjoy those rustic pastry edges.
Frequently Asked Questions
Is a Portuguese Tart the Same as a Custard Tart?
A Portuguese tart is a type of custard tart, but it has a distinctive spiral puff-pastry shell. This version pairs cinnamon-lemon custard with a blistered top rather than a uniformly pale surface.
What Does a Custard Tart Taste Like?
This Portuguese version tastes sweet, rich, and gently spiced, with lemon peel and vanilla in the filling. The creamy center contrasts with crisp pastry and darker caramelized notes on top.
Why Do You Roll the Puff Pastry Into a Spiral Log Instead of Cutting Flat Circles?
Crosswise slices from the log expose concentric pastry layers. Pressing those discs outward preserves the spiral arrangement rather than making a flat pastry lining.
Can I Bake Pastéis de Nata in a Standard Muffin Tin Instead of Special Tart Molds?
Yes, standard and mini cupcake pans are both included in the method. Follow the applicable baking adjustment and check for firm centers.
How Do I Get the Signature Caramelized Black Spots on Top of the Custard?
Fully preheat the oven to the temperature specified in the method before baking. Watch for scattered dark spots without letting the whole custard surface burn.
How Many Calories Are in a Portuguese Custard Tart and Are They Healthy?
No verified calorie calculation is available for this batch; the pastry brand and portion size affect the result. These are sweet pastries made with puff pastry, sugar, whole milk, and yolks, rather than a recipe designed around a particular nutrition goal.
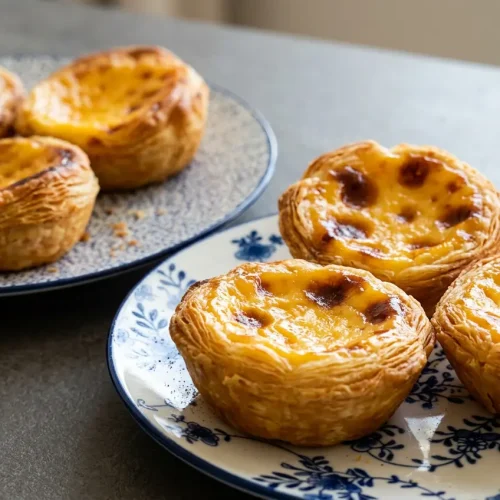
Portuguese Custard Tarts

Equipment
- Small mixing bowl
- Whisk
- Small saucepan
- mesh strainer
- Rolling Pin
- Tart molds or cupcake pan
- Cookie sheet
Ingredients
- 1 pkg frozen puff pastry
- 3 tbsp all-purpose flour
- 1¼ cup whole milk
- 1⅓ cup granulated sugar
- ⅔ cup water
- ½ tsp vanilla
- 1 whole cinnamon stick
- ¼ tsp cinnamon
- ½ lemon peel not zest
- 6 large egg yolks
Instructions
- Unbox the puff pastry and leave it on the counter to begin thawing about 45 minutes before baking. Use this interval to prepare the custard filling.
- Make a smooth slurry in a small bowl with 3 tbsp flour and ¼ cup whole milk, then whisk in the 6 yolks and remaining 1 cup milk. Check the slurry for flour lumps before adding the yolks and remaining milk.
- Combine ⅔ cup water, 1⅓ cup sugar, the cinnamon stick, and broad pieces of lemon peel in a small saucepan over medium-high heat, then boil for 1 minute or until the syrup reaches 220°F. The syrup should contain no visible sugar grains when you take it off the heat and remove the cinnamon stick and peel.
- Ladle a thin, steady stream of the milk-and-egg mixture into the hot syrup while whisking continuously, stopping once ⅓ to ½ of the milk mixture has been incorporated. Keep the addition gradual so the mixture blends smoothly rather than forming scrambled egg pieces.
- Whisk the warmed syrup mixture into the milk-and-egg mixture still in the bowl. Continue whisking throughout the addition to keep the custard uniform.
- Pass the custard through a mesh strainer into a clean bowl, then whisk in 1 tsp vanilla and ¼ tsp cinnamon and set it aside. The strained filling should look smooth, without egg fragments or larger aromatic pieces.
- Heat the oven to 475°F and, if desired, wipe the molds lightly with butter rather than cooking spray. The butter coating is optional and should be light.
- Roll the puff pastry to approximately ¼ inch thick, then form a tight log starting along its longest edge. The cut end should show closely packed pastry spirals.
- Slice the log crosswise into discs approximately ½ inch thick and set a disc in each mold. Each round should sit with its spiral facing upward, ready for pressing.
- Dampen both thumbs with water and press the center of each disc outward, then work the pastry up the mold walls. Aim for a thin shell that reaches the top without leaving a thick mound at the bottom.
- Pour custard into each shell until it is ⅔ full, and set individual pastry molds on a cookie sheet before placing them in the oven. Leave the remaining headroom empty to allow for bubbling without overflow.
- Bake for 15–17 minutes, using the cupcake-pan adjustments below when applicable. Look for dark spots across the custard rather than an entirely blackened surface.
- Let the tarts cool before gently releasing them from their molds or cupcake pan. The shells should hold their shape as you lift them out.
- Finish with a light sprinkle of cinnamon and powdered sugar if desired. Keep the dusting light so the blistered tops remain visible.
Special Instructions for Using Cupcake Pans
- Allow an additional 2–3 minutes of baking when using a standard cupcake pan, if needed. The centers should feel firm rather than jiggly.
- Shorten the baking time by 2–3 minutes when using a mini cupcake pan. Check for firm centers in these smaller tarts as well.