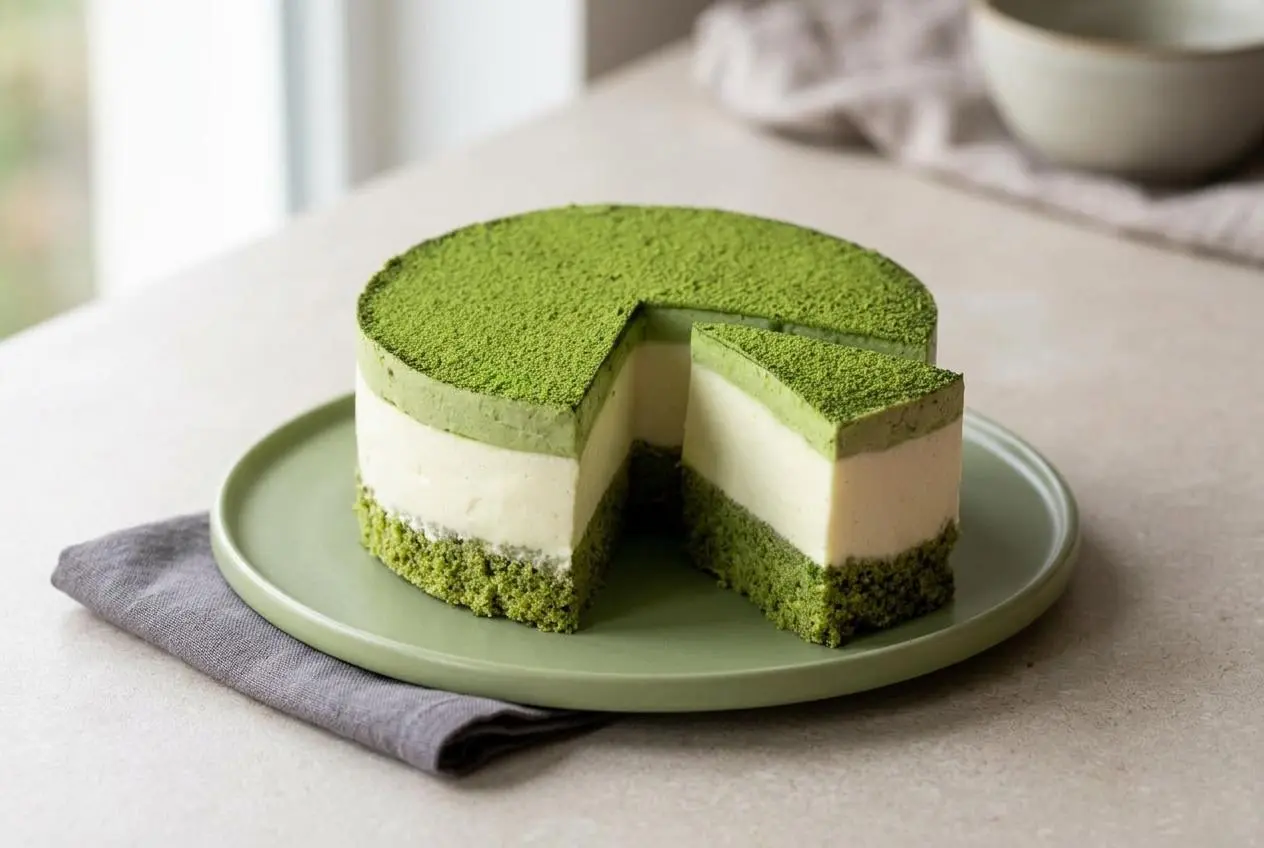
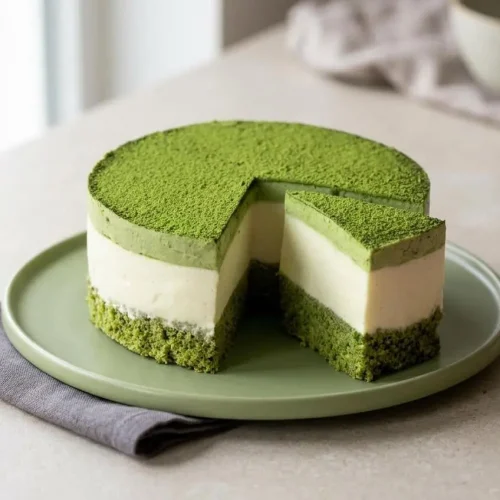
Matcha White Chocolate Mousse Cake starts with a light sponge, then gets layered with white chocolate mousse and matcha mousse, chilled until firm enough to slice cleanly.
It’s a dessert for anyone who loves the earthy scent of green tea softened by sweet, creamy white chocolate. The texture should feel airy and velvety, with layers that stay distinct instead of sliding around.
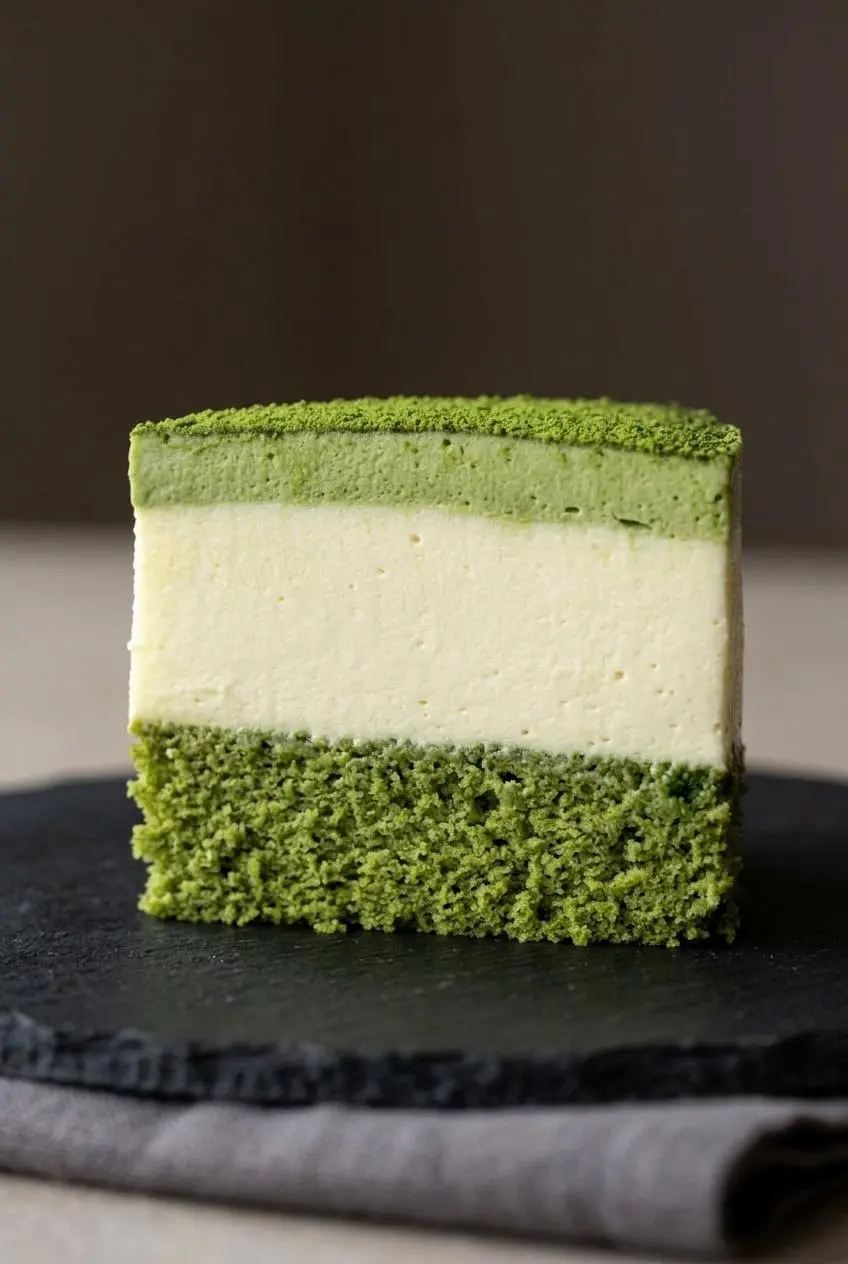
What makes it especially worth the effort is the contrast between the pale mousse, the green top, and the soft cake base. The folding temperature is the part that makes everything click.
Chill your bowl and beaters before whipping the cream if your kitchen runs warm, because stable peaks make the mousse much easier to layer neatly.
Essential Ingredients and Their Roles
Each ingredient does a specific job here, from keeping the sponge light to helping the mousse hold its shape, color, and creamy finish.
Matcha Sponge Cake
- 1/4 cup milk
- 3 tbsp unsalted butter, softened
- 1/2 cup caster sugar
- 4 large eggs
- 2 tbsp matcha tea powder
- 3/4 cup all-purpose flour
- 1 tsp vanilla extract
White Chocolate Mousse
- 6 gelatin leaves, OR 2 tbsp gelatin powder
- 2 tbsp cold water
- 1 cup white chocolate, melted and slightly cooled
- 2 1/2 cups heavy cream
Matcha Mousse
- 3 gelatin leaves, OR 1 tbsp gelatin powder
- 2 tbsp cold water
- 1 1/4 cups heavy cream
- 2 tbsp matcha tea powder
- 1/3 cup powdered sugar
Decorations
- 3 tbsp matcha tea powder
The sponge relies on whipped eggs for lift, so the batter stays tender without feeling heavy under the mousse. Milk and butter enrich it, while vanilla softens matcha’s grassy edge.
For the mousse layers, heavy whipping cream needs at least 35% fat so it can whip to stiff peaks and stay stable after folding. Lower-fat cream often looks fluffy at first, then loosens once the chocolate or matcha mixture goes in.
White chocolate matters more than people expect. Use one made with real cocoa butter, not a compound coating, because real white chocolate melts more smoothly and sets with a cleaner, firmer finish.
Matcha brings both color and balance. Culinary-grade matcha is usually the better fit for baking and mousse cakes because its deeper, slightly astringent flavor holds up against sweet cream and white chocolate. Ceremonial matcha can be brighter and softer in taste, but it’s often better saved for drinking.
I like to touch the outside of the melted chocolate bowl before folding. If it still feels warm, I wait, because cool-to-the-touch chocolate is much kinder to whipped cream.
Step-by-Step Matcha White Chocolate Mousse Cake Assembly
This cake works best when you think in stages: build the sponge, cool the mousse bases fully, then layer with patience so the colors stay crisp and the texture stays light.
Baking the Matcha Sponge
The double-pan setup is useful here. You bake the sponge in the larger pan, then trim it to fit the smaller lined pan so the final layers look sharp and even.
Matcha Sponge Cake
- Heat the oven to 175 °C or 350 °F, line an 8-inch cake tin with baking paper, and prepare a 7-inch cake tin that is 4 inches high with baking paper on the base and acetate around the sides.
The acetate helps the mousse set with smooth edges and makes unmolding much cleaner later. - Warm the milk and butter together in a small bowl in the microwave for about 30 seconds, then leave the mixture aside to cool.
The butter should be fully melted, and the bowl should no longer feel hot before it goes near the whipped eggs. - Beat the eggs, caster sugar, and vanilla extract in a large bowl with electric beaters until the mixture turns pale and expands to roughly triple its starting volume.
It should look thick and airy, and ribbons should briefly sit on the surface before sinking back. - Sift in the matcha tea powder and all-purpose flour, then fold gently with a spatula until the dry pockets disappear.
The batter should stay fluffy and evenly green without streaks of flour hiding at the bottom. - Pour the cooled milk mixture down the side of the bowl and fold only until incorporated.
Stop as soon as the batter looks smooth, because over-mixing will knock out the volume that keeps the sponge light. - Transfer the batter to the lined 8-inch tin and bake for 15 to 20 minutes.
The sponge should spring back lightly when touched and keep a soft, even surface. - Cut the baked sponge with a 7-inch cutter and place the trimmed round inside the lined 7-inch tin.
Brush or wipe away loose crumbs from the acetate so dark specks do not show through the white mousse.
If you want another flavor bridge between the sponge and mousse, a thin optional layer of sweet red bean paste can sit on top of the cake before the white chocolate mousse goes in. Keep it light so the mousse still sits flat. If berry and white chocolate is more your style, white chocolate raspberry cake gives a classic fruit version of that pairing.
Preparing the White Chocolate Mousse
This is the layer where temperature control matters most. If the chocolate base is too warm, it can melt the whipped cream and turn the mousse loose.
White Chocolate Mousse
- Place all 9 gelatin leaves in a large bowl of cold water so they can soften while you prepare the mousse bases.
The leaves should become flexible and slippery instead of stiff. - Whisk the cold water, 1/4 cup of the cream, and the melted white chocolate in a microwave-safe bowl, then heat the mixture for 90 seconds.
The mixture should look fluid and glossy rather than thick or clumpy. - Lift 6 softened gelatin leaves from the water, squeeze out the excess, and whisk them into the warm white chocolate mixture one at a time.
Each piece should dissolve before the next goes in so you do not end up with gelatin bits in the final mousse. - Let the white chocolate mixture cool to room temperature before moving on.
It should still pour easily but feel cool enough that it will not collapse the whipped cream. - Whip the remaining cream with powdered sugar and vanilla extract to stiff peaks, then fold the cooled white chocolate mixture in gently.
The mousse should hold soft ridges and look thick, smooth, and airy. - Spoon the mousse over the sponge in the 7-inch tin and smooth the top evenly.
The surface should level neatly with a spatula and sit in a thick, stable layer. - Refrigerate the cake until the white chocolate layer is set enough to support the next mousse.
A gentle shake should show only a slight wobble in the center, not a loose wave across the whole layer.
Whipping the Matcha Mousse Layer
The matcha layer is lighter in flavor but just as delicate. Whisk the matcha thoroughly so the color stays even and the mousse doesn’t end up speckled.
Matcha Mousse
- Whisk the cold water, 100ml cream, and matcha tea powder in a microwave-safe bowl, then microwave for 90 seconds.
The mixture should turn smooth and deep green with no dry matcha clinging to the edges. - Squeeze the water from the remaining 3 gelatin leaves and whisk them into the warm matcha mixture, then cool it to room temperature.
The base should look glossy and fluid, not hot, thick, or grainy. - Whip the remaining cream with powdered sugar and vanilla to stiff peaks, then fold in the cooled matcha mixture gently.
The mousse should look evenly green and airy, with enough body to mound lightly on the spatula. - Spoon the matcha mousse over the chilled white chocolate layer and smooth the top.
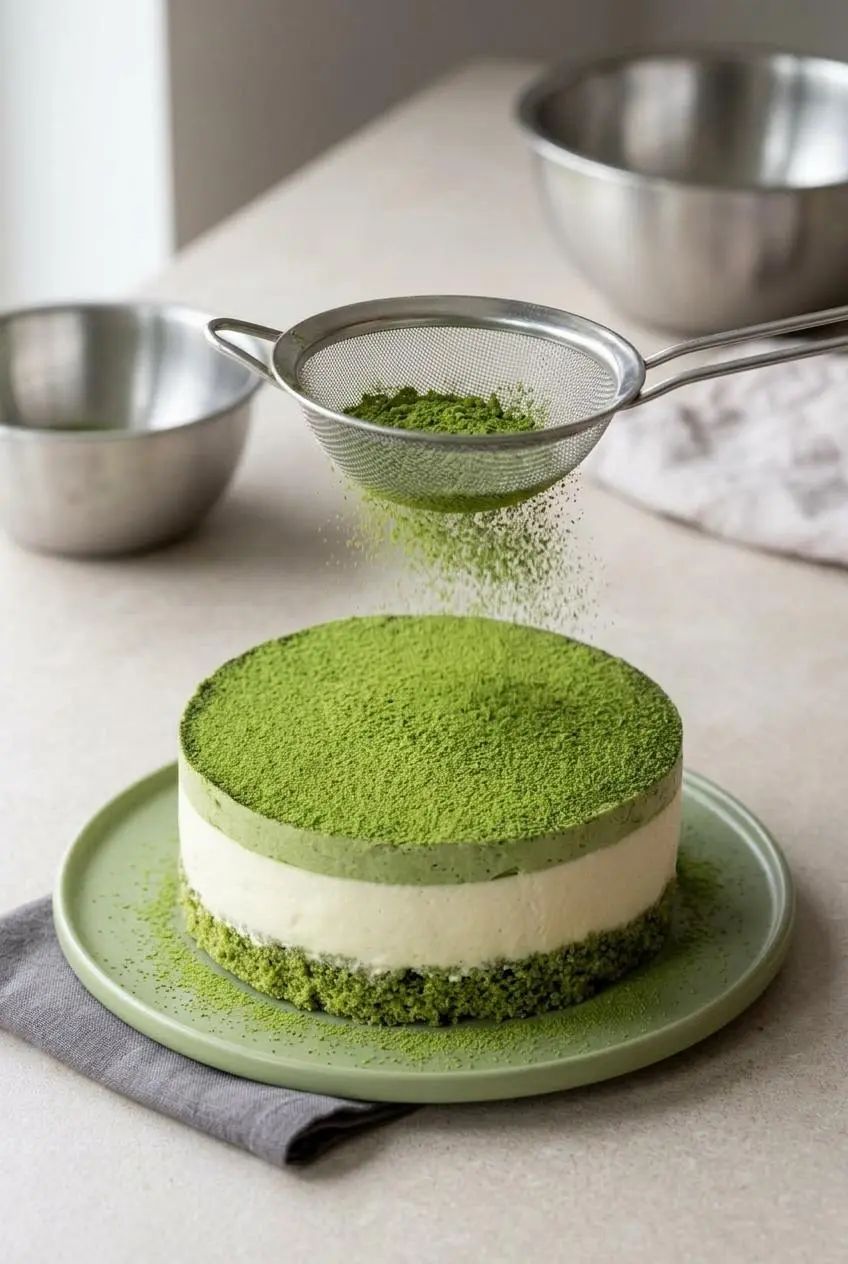
The layer should spread without sinking into the mousse below if the first layer is properly set. - Freeze the assembled cake for 4 hours, then lift it from the tin, dust the top with matcha powder, remove the acetate, slice, and serve.
The cake should feel firm enough to cut cleanly, with distinct layers visible from top to bottom.
Stunning Edging: How to Frame with Strawberries
If you want a bakery-style finish, place strawberry halves cut-side out against the acetate before pouring the mousse. Their bright red edge looks striking against the white and green layers, and the fruit adds a fresh contrast to the rich filling.
Press the berries in snugly so they stay upright, and make sure the cut faces are dry. Extra surface moisture can make them slide. For another creamy berry dessert with the same pretty color contrast, strawberry cheesecake mousse is a nice next stop.
Gelatin Mastery: Leaf vs Powder
Gelatin is what gives this cake clean slices instead of spoon-dessert softness, so it helps to know how each type behaves before you start.
- Gelatin leaves soak directly in cold water until softened, then get squeezed and added to a warm base. They dissolve neatly and are easy to portion when the recipe already names the number of leaves.
- Gelatin powder works well in the US and is easier to find in many grocery stores. For this recipe, 1 tablespoon of gelatin powder can replace 2 gelatin leaves.
- Powdered gelatin must bloom in cold liquid for 5 minutes before gentle warming. If it is heated hard right away, it can clump or weaken.
- Leaves usually give a very smooth finish, while powder is convenient and dependable once fully bloomed and dissolved.
- For either type, the base should be warm enough to melt the gelatin completely, but not so hot that it later deflates the whipped cream.
- If you see tiny gelatin threads or lumps, warm the mixture gently and whisk again before folding it into the cream.
Many home bakers also wonder about gelatin strength. Since leaf sizes and bloom strength can vary by brand, the safest move is to follow the exact leaf count or powder amount listed here instead of mixing systems loosely.
Troubleshooting Common Mousse Cake Mistakes
Mousse cakes can go wrong fast, but most problems are fixable if you catch them before layering everything together.
- Lumpy gelatin: This usually means the gelatin did not fully dissolve into the warm base. Warm the chocolate or matcha mixture gently and whisk until smooth before folding it into the whipped cream.
- White chocolate turns grainy or seizes: White chocolate is sensitive to overheating and even a little steam. Keep the bowl and tools dry, melt it gently, and if it tightens up, rewarm it slowly until it loosens instead of tossing it out.
- Mousse turns runny after folding: The chocolate or matcha base was likely still too warm. Let the mixture cool to room temperature first, then fold with broad strokes so the whipped cream keeps its structure.
- The sponge comes out dense: The egg mixture probably did not reach enough volume, or the flour and matcha were folded too aggressively. Beat until pale and thick, then fold only until combined.
- The white layer and green layer bleed together: The first mousse needed more chilling time. Before adding the top layer, give the pan a gentle shake and wait until the center shows only a small jiggle.
- The mousse will not set: Gelatin may have been inactive, insufficiently dissolved, or overheated during handling. If you catch this before assembly, remake the base with properly bloomed gelatin and fold it into freshly whipped cream.
- The color looks dull: Matcha quality makes a big difference. Culinary-grade matcha gives stronger baked flavor, while a fresher, brighter powder gives the mousse a cleaner green tone.
Make-Ahead, Storage, and Freezing Guidelines
This cake is a good choice for planning ahead because the mousse benefits from time in the cold, and the final texture slices best when fully set.
You can keep the undecorated cake wrapped tightly in the freezer for up to two weeks. Thaw it slowly in the refrigerator for 4 to 6 hours before slicing so the layers soften evenly without turning messy.
Wait to dust the top with matcha until right before serving. Matcha absorbs moisture quickly, so adding it too early can turn that velvety green finish patchy and damp.
Because this dessert is rich in cream and dairy, keep it chilled when not serving. For general dairy storage and handling in the US, use safe refrigeration guidance for cream and other dairy ingredients.
Dietary Swaps: Gluten-Free and No-Bake Options
The core recipe works as written, but the base can be changed if you need a different texture or want to skip the oven.
Gluten-Free Almond Flour Sponge
A gluten-free almond flour base gives the cake a richer, slightly more buttery foundation. It pairs well with matcha because the nutty flavor softens the tea’s bitterness, but it will be more tender and a little less springy than the original sponge.
You can also use a gluten-free flour blend for a result closer to the sponge cake texture. Either way, keep this as an optional swap rather than changing the mousse layers, since the structure above stays the same.
No-Bake Chocolate Cookie Crust
A chocolate cookie crust with melted butter gives you a firmer, crunchier contrast under the mousse and avoids baking altogether. It’s especially useful in warm weather when you want to keep oven time low.
Make sure the crust is well packed and fully chilled before adding mousse so it does not crumble into the white layer. If you like mousse cakes with an alternate base style, blueberry shortbread mousse cake is another good example of how a different foundation changes the final bite.
Conclusion
This cake delivers exactly what it promises: soft sponge, silky mousse, and that sweet earthy matcha aroma that makes each slice feel a little special.
If you keep the chocolate and matcha bases cool before folding, the rest becomes much easier. Take your time with the layers, and the cake will reward you with clean, beautiful slices.
Frequently Asked Questions
Can I use gelatin powder instead of gelatin leaves?
Yes. In this recipe, 1 tablespoon of gelatin powder replaces 2 gelatin leaves. Bloom the powder in cold water for 5 minutes before warming it gently to dissolve. Make sure it is fully smooth before folding it into whipped cream.
How long does it take for the mousse cake to set completely?
Freeze the finished cake for at least 4 hours for the cleanest structure. If you want a slightly softer texture, you can leave it in the refrigerator longer after assembly instead of serving it straight from a deep chill. Do not slice while the center still feels loose.
Why did my white chocolate seize and turn grainy?
That usually happens when white chocolate gets too hot or picks up moisture from steam or damp tools. Melt it gently and keep every bowl and whisk completely dry. If it seizes, warm it slowly and stir until it smooths out again.
What Is the Best Way to Slice This Cake Cleanly?
Use a long sharp knife dipped in hot water. Wipe the blade dry before every cut. This keeps the mousse layers sharp instead of dragging cream across the surface.
Matcha White Chocolate Mousse Cake

Equipment
- 7-inch cake tin
- 8-inch cake tin
- Electric hand beaters
- Acetate cake collar
- 7-inch cake cutter
- Fine-Mesh Sieve
Ingredients
Matcha Sponge Cake
- 1/4 cup milk
- 3 tbsp unsalted butter softened
- 1/2 cup caster sugar
- 4 large eggs
- 2 tbsp matcha tea powder
- 3/4 cup all-purpose flour
- 1 tsp vanilla extract
White Chocolate Mousse
- 6 leaves gelatin OR 2 tbsp gelatin powder
- 2 tbsp cold water
- 1 cup white chocolate melted and slightly cooled
- 2 1/2 cups heavy cream
Matcha Mousse
- 3 leaves gelatin OR 1 tbsp gelatin powder
- 2 tbsp cold water
- 1 1/4 cups heavy cream
- 2 tbsp matcha tea powder
- 1/3 cup powdered sugar
Decorations
- 3 tbsp matcha tea powder
Instructions
Matcha Sponge Cake
- Heat the oven to 175 °C or 350 °F, line an 8-inch cake tin with baking paper, and prepare a 7-inch cake tin that is 4 inches high with baking paper on the base and acetate around the sides. The acetate helps the mousse set with smooth edges and makes unmolding much cleaner later.
- Warm the milk and butter together in a small bowl in the microwave for about 30 seconds, then leave the mixture aside to cool. The butter should be fully melted, and the bowl should no longer feel hot before it goes near the whipped eggs.
- Beat the eggs, caster sugar, and vanilla extract in a large bowl with electric beaters until the mixture turns pale and expands to roughly triple its starting volume. It should look thick and airy, and ribbons should briefly sit on the surface before sinking back.
- Sift in the matcha tea powder and all-purpose flour, then fold gently with a spatula until the dry pockets disappear. The batter should stay fluffy and evenly green without streaks of flour hiding at the bottom.
- Pour the cooled milk mixture down the side of the bowl and fold only until incorporated. Stop as soon as the batter looks smooth, because over-mixing will knock out the volume that keeps the sponge light.
- Transfer the batter to the lined 8-inch tin and bake for 15 to 20 minutes. The sponge should spring back lightly when touched and keep a soft, even surface.
- Cut the baked sponge with a 7-inch cutter and place the trimmed round inside the lined 7-inch tin. Brush or wipe away loose crumbs from the acetate so dark specks do not show through the white mousse.
White Chocolate Mousse
- Place all 9 gelatin leaves in a large bowl of cold water so they can soften while you prepare the mousse bases. The leaves should become flexible and slippery instead of stiff.
- Whisk the cold water, 1/4 cup of the cream, and the melted white chocolate in a microwave-safe bowl, then heat the mixture for 90 seconds. The mixture should look fluid and glossy rather than thick or clumpy.
- Lift 6 softened gelatin leaves from the water, squeeze out the excess, and whisk them into the warm white chocolate mixture one at a time. Each piece should dissolve before the next goes in so you do not end up with gelatin bits in the final mousse.
- Let the white chocolate mixture cool to room temperature before moving on. It should still pour easily but feel cool enough that it will not collapse the whipped cream.
- Whip the remaining cream with powdered sugar and vanilla extract to stiff peaks, then fold the cooled white chocolate mixture in gently. The mousse should hold soft ridges and look thick, smooth, and airy.
- Spoon the mousse over the sponge in the 7-inch tin and smooth the top evenly. The surface should level neatly with a spatula and sit in a thick, stable layer.
- Refrigerate the cake until the white chocolate layer is set enough to support the next mousse. A gentle shake should show only a slight wobble in the center, not a loose wave across the whole layer.
Matcha Mousse
- Whisk the cold water, 100ml cream, and matcha tea powder in a microwave-safe bowl, then microwave for 90 seconds. The mixture should turn smooth and deep green with no dry matcha clinging to the edges.
- Squeeze the water from the remaining 3 gelatin leaves and whisk them into the warm matcha mixture, then cool it to room temperature. The base should look glossy and fluid, not hot, thick, or grainy.
- Whip the remaining cream with powdered sugar and vanilla to stiff peaks, then fold in the cooled matcha mixture gently. The mousse should look evenly green and airy, with enough body to mound lightly on the spatula.
- Spoon the matcha mousse over the chilled white chocolate layer and smooth the top. The layer should spread without sinking into the mousse below if the first layer is properly set.
- Freeze the assembled cake for 4 hours, then lift it from the tin, dust the top with matcha powder, remove the acetate, slice, and serve. The cake should feel firm enough to cut cleanly, with distinct layers visible from top to bottom.