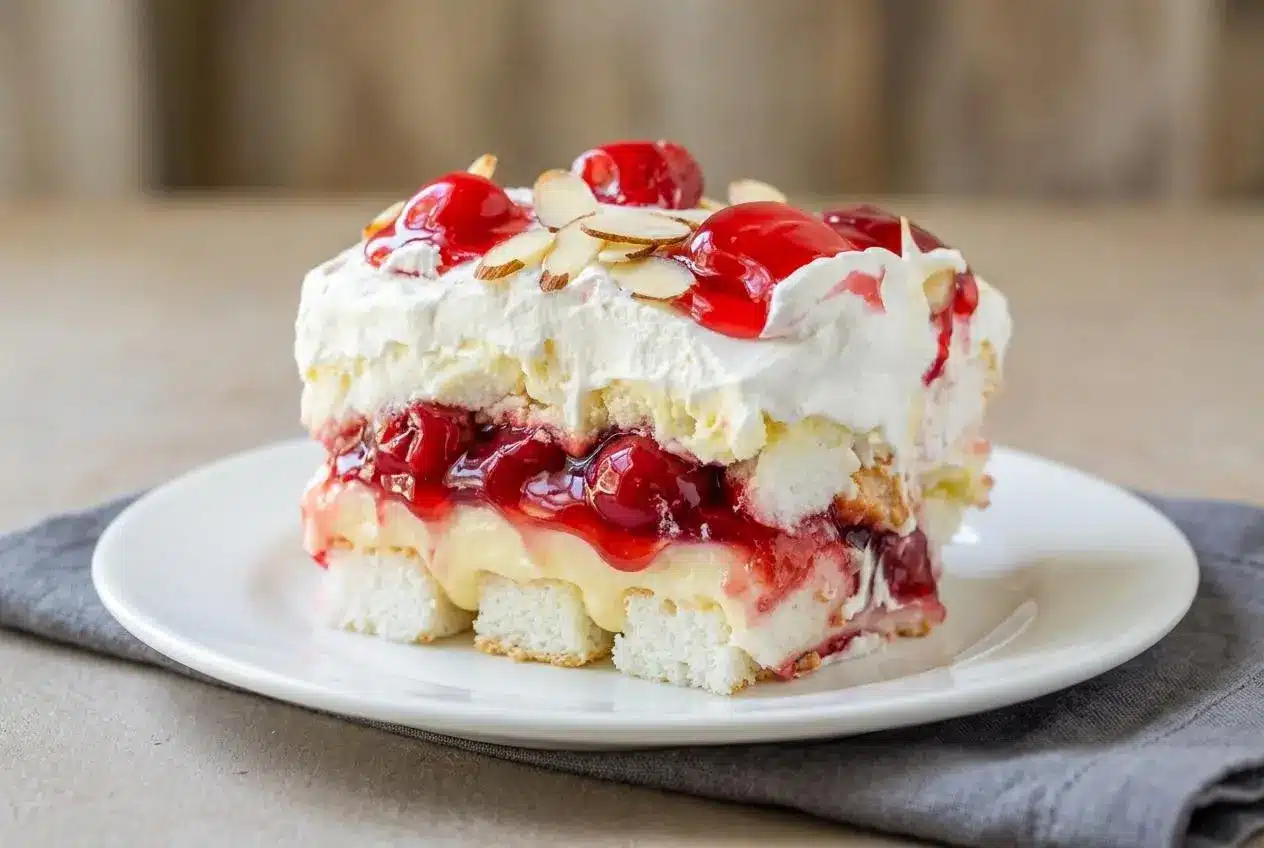
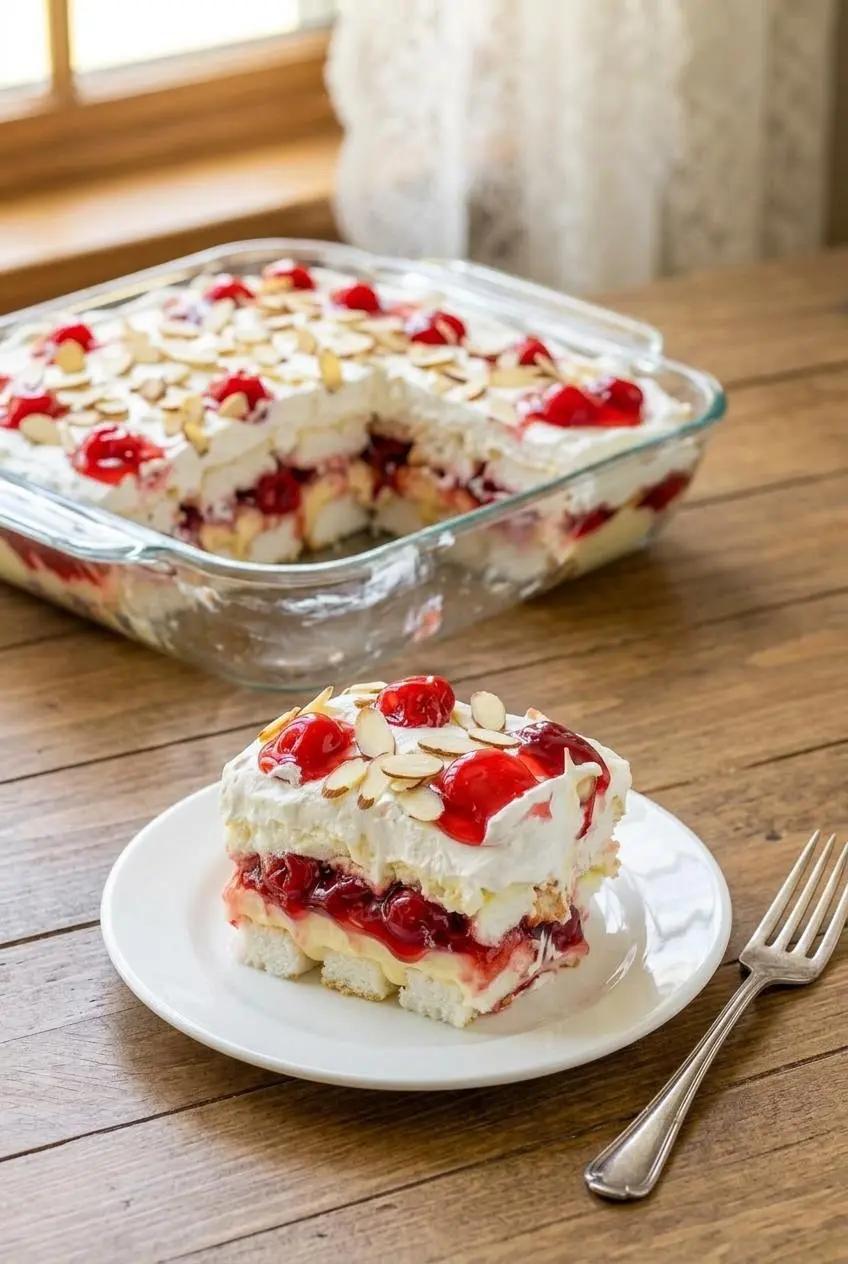
Heaven On Earth Cake is a chilled layered dessert made with angel food cake, cherry pie filling, instant vanilla pudding, sour cream, whipped topping, and toasted almonds.
It’s part icebox cake, part trifle, and all about soft cloud-like texture with creamy vanilla and bright cherry in every bite. The layers settle together as it chills, so it slices better than it looks at first.
This is the kind of dessert that works for potlucks, holidays, and hot afternoons when turning on the oven feels unnecessary if you start with a prepared cake. The pudding texture is the make-or-break detail.
Use a gentle sawing motion when cutting the cake so the cubes stay fluffy instead of compressed.
Ingredients
Each ingredient pulls its weight here, building airy structure, creamy body, fruity sweetness, and a little crunch on top for contrast.
- 1 box Angel food cake or 1 prepared Angel Food Cake
- 1 package (3.4 ounces) instant vanilla pudding
- 1 1/2 cups milk
- 1 cup sour cream
- 1 can (21 ounces) cherry pie filling
- 1 tub (8 ounces) Cool Whip
- 1 tablespoon almond slivers, toasted
The angel food cake acts like a sponge, but a very airy one. It soaks up moisture from the pudding and fruit without turning heavy when the layers are balanced well.
The instant vanilla pudding gives the dessert its sliceable creamy middle. Milk brings the pudding together, while sour cream adds tang and extra thickness so the filling tastes richer and holds its shape better.
Cherry pie filling gives you sweetness, color, and enough syrup to soften the cake in the right places. Cool Whip creates the final light layer, and the toasted almonds keep the top from feeling one-note.
I like to let the sour cream sit out for a few minutes before mixing, because very cold sour cream can stay a little lumpy even when the pudding is otherwise smooth.
Step-by-Step Assembly Instructions
- If using a boxed angel food cake, bake it according to the package directions, then let it cool completely before cutting it into even 1-inch cubes with a serrated knife.
The cubes should look clean and springy, not mashed or ragged. - Whisk the instant vanilla pudding, milk, and sour cream together in a mixing bowl for a full 2 minutes, then set the mixture aside briefly.
It should look smooth, thickened, and pourable, like a soft cream rather than thin milk. - Arrange half of the cake cubes across the bottom of a 9×13 baking dish in an even layer.
Leave just enough space between pieces for the filling to settle around them. - Spoon about 2/3 of the cherry pie filling over the first cake layer, spreading it gently so the fruit lands across the surface instead of pooling in one corner.
The cake should be dotted and lightly coated, not drowned. - Add the remaining cake cubes over the cherry layer, covering the fruit as evenly as possible.
This second layer creates structure so the pudding can spread across the top without sinking too deeply. - Pour the pudding mixture over the cake and smooth it from edge to edge with a spatula.
When it is spread evenly, the top will look creamy and level with no dry cake peeking through. - Spoon the whipped topping over the pudding layer and spread it into an even blanket.
A light touch keeps the layers distinct and prevents the pudding from mixing into the topping. - Finish with the remaining cherry pie filling and toasted almond slivers, swirling the cherries lightly for a marbled look instead of stirring them in.
The top should have streaks of red over white with almonds scattered for crunch. - Chill the dessert for about 4 to 5 hours before slicing and serving.
The layers should feel set, and the cake will soften enough to cut cleanly with a spoon or knife.
Ingredient Explanations and Substitutions
This dessert works because each layer does a different job. If you understand what those layers are doing, smart swaps become much easier.
The Chemistry of the Perfect Pudding Base
Instant pudding is essential here. It thickens as soon as it is whisked with milk, which is exactly what a no-bake layered dessert needs. Cook-and-serve pudding is designed for heat, so it will not give you the same quick set in this cold mixture.
Sour cream changes more than the flavor. Its tang keeps the filling from tasting flat, and its thickness helps the pudding layer stay creamy and sliceable instead of loose and runny. In practical kitchen terms, the pudding grabs onto the sour cream well and forms a fuller, sturdier layer.
If you want a lighter swap, plain Greek yogurt can replace the sour cream in a 1:1 swap. Whole-milk Greek yogurt gives the best texture. Lower-fat versions can work, but the filling may be softer and a little less rich.
Selecting the Best Angel Food Cake Base
Store-bought angel food cake is usually slightly firmer and a bit drier, which actually helps it hold tidy cubes. Homemade angel food cake often feels softer and more delicate to the touch, so cut it gently and expect a more tender finished texture.
Angel food cake is the classic choice because it absorbs the creamy layers without becoming dense. If you want a richer and sturdier variation, a dense pound cake can stand in, but the dessert will feel heavier and less airy.
Essential Tips for the Ultimate Icebox Cake Texture
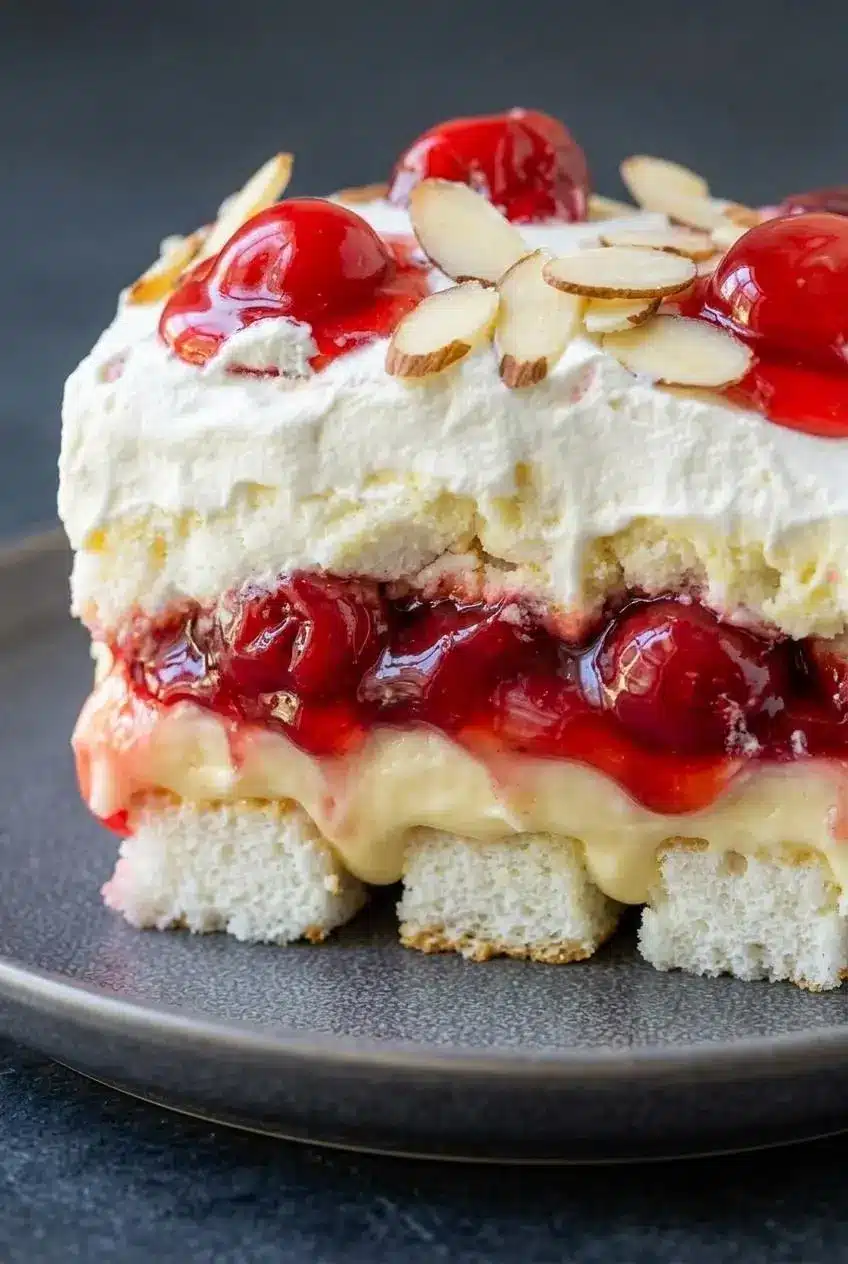
The difference between pretty layers and spoonable chaos usually comes down to moisture control and chill time.
At 4 to 5 hours, the dessert is set enough to serve and the official method works well. If you want the softest, most melded texture, a longer chill of 12 to 16 hours gives the cake more time to absorb the creamy layers and the slices come out neater.
For the cleanest portions, use a serrated knife to cut through the top and a small spatula to lift each serving. Pressing straight down with a blunt knife tends to squash the angel food cake.
Toast the almond slivers in a dry skillet over low heat just until they turn lightly golden and smell nutty. Pull them off the heat as soon as the aroma blooms, because they go from pale to burnt surprisingly fast.
Why Full-Fat Dairy Is Crucial
Whole milk and regular sour cream give the pudding layer body. That extra fat helps the filling taste rounder and keeps it from feeling thin once it sits against the fruit and cake.
Skim milk and fat-free sour cream can leave you with a looser layer that spreads too easily and makes the cake soggier over time. If you need to lighten it, whole-milk Greek yogurt is a better compromise than going fully fat-free.
Troubleshooting Common Layering Issues
Most problems here are fixable without starting over. A few small adjustments usually bring the dessert back on track.
- If the pudding layer looks runny, the usual cause is using cook-and-serve pudding, under-whisking, or using very low-fat dairy. Whisk for the full 2 minutes first, and if it still seems loose, add a small pinch of extra instant pudding mix and whisk again.
- If the cake turns soggy, too much fruit syrup likely landed in one area. Spread the cherry filling in gentle spoonfuls over the cubes so moisture is distributed instead of pooled.
- If the whipped topping sinks or blends into the pudding, the pudding was probably too loose or too warm from aggressive mixing. Let the pudding sit briefly until it thickens, then spread the topping with a soft hand.
- If the almonds lose their crunch, they were added too early. For the best contrast, scatter them on closer to serving time after they have cooled completely from toasting.
- If the cake cubes tear while layering, the cake may be extra soft. A serrated knife and a light sawing motion keep the structure intact much better than pressing down.
Make-Ahead and Storage Guidelines
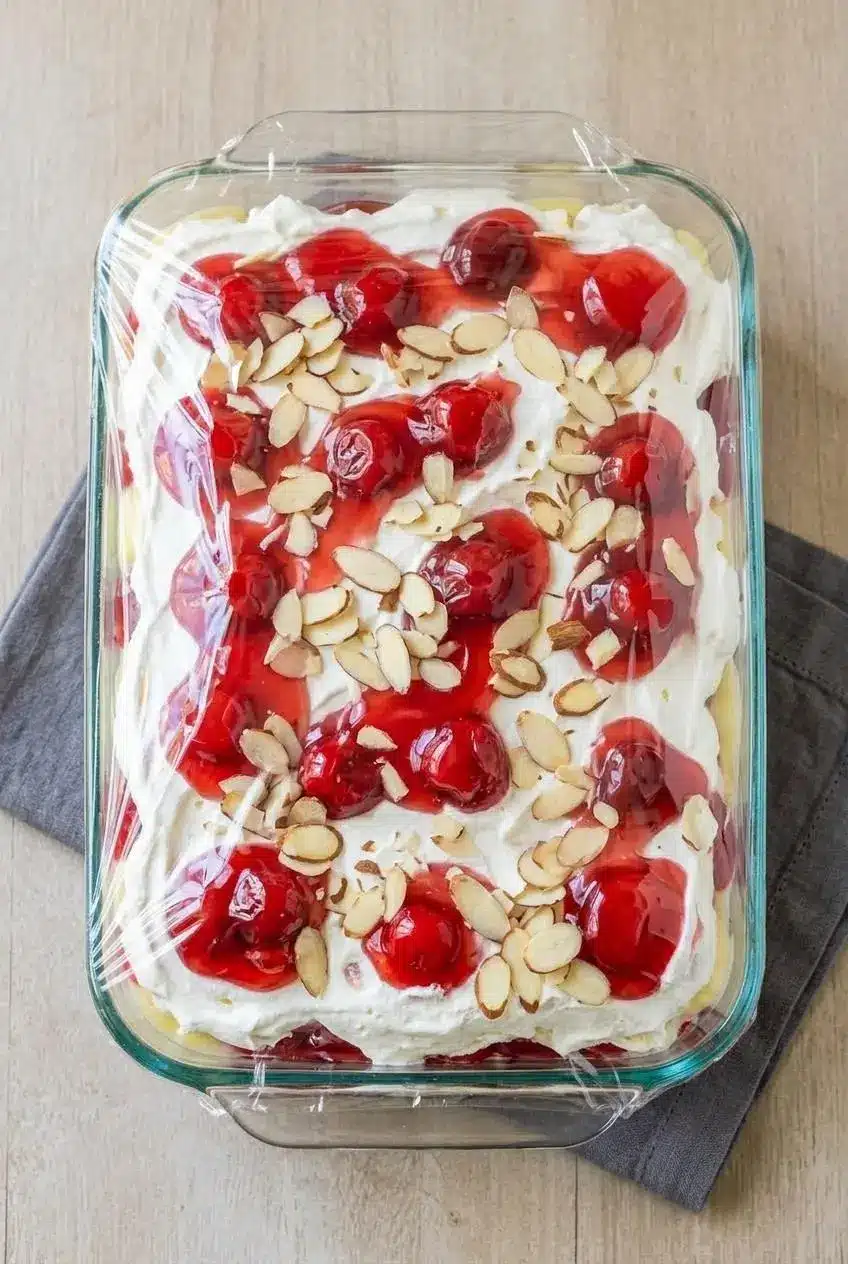
This dessert is a great make-ahead choice because chilling improves the texture rather than hurting it.
Making it 12 to 16 hours ahead gives the angel food cake time to soften and absorb the pudding and cherry juices more evenly. The result is smoother, creamier, and easier to slice than a rushed version.
Cover the baking dish tightly so the whipped topping and dairy layers stay fresh and do not pick up refrigerator odors. A snug layer of plastic wrap followed by foil works well if the dish does not have its own lid.
Keep leftovers chilled, and keep your refrigerator at 40 °F or below for dairy-based desserts, as outlined in USDA refrigeration guidance for dairy and other perishable foods.
- Cover the dish tightly before refrigerating.
- Store it on a level shelf so the layers stay neat.
- If transporting, keep it cold until serving.
- Add extra toasted almonds right before serving if you want maximum crunch.
Freezing is not a great fit for this dessert. Once thawed, the fruit and creamy layers tend to release extra water, and the cake loses its soft but structured texture.
Creative Flavor Variations
The classic cherry version is the one most people know, but this dessert is easy to nudge in a different direction when you want a new mood.
- Cheesecake-style flavor: swap the vanilla instant pudding for instant cheesecake pudding for a tangier, richer filling.
- Tropical version: use pineapple pie filling or well-drained crushed pineapple for a brighter, sunnier finish.
- Berry version: replace the cherry filling with strawberry or blueberry for a softer fruit flavor and a fresher look.
If you love pudding-based crowd desserts, a layered dirt cake scratches a similar itch in a more chocolatey direction.
Fresh Strawberry and Cream Cheese Hybrid
For a more from-scratch feel, cook fresh strawberries on the stove just until they break down into a spoonable sauce, then cool the mixture before layering it in place of the canned cherry filling. Keep it thick rather than jammy so it sits between the cake cubes instead of flooding them.
You can also use instant cheesecake pudding for this version to echo that strawberries-and-cream flavor. If you want even more dessert-table drama, this pairs especially well with a dusting of powdered sugar over the top just before serving.
Decadent Chocolate Black Forest Alternative
Swap the vanilla instant pudding for chocolate instant pudding and keep the cherry filling for a Black Forest vibe. The result is deeper, richer, and a little more dramatic without changing the easy layered method.
If chocolate fruit desserts are your thing, you might also like an easy dump cake for a warm baked option when chilled desserts are not the goal.
Conclusion
Heaven On Earth Cake earns its place at any dessert table because it’s creamy, cool, and easy to assemble without complicated steps. The texture is what makes it memorable.
Give it enough chill time, use instant pudding, and handle the cake gently. That’s the whole game, and it pays off in every soft, cherry-streaked slice.
Frequently Asked Questions
Can I Make Heaven on Earth Cake the Day Before?
Yes. It actually improves with a longer chill. Making it 12 to 16 hours ahead helps the cake soften evenly and the layers hold together better. Keep it tightly covered in the refrigerator until serving.
Can Greek Yogurt Replace the Sour Cream?
Yes. Use plain Greek yogurt in a 1:1 swap. Whole-milk Greek yogurt gives the best texture and tang. Lower-fat versions may make the pudding layer a bit softer.
Why Is My Pudding Layer Runny?
The most common causes are easy to spot. Cook-and-serve pudding will not set the same way as instant pudding in this cold dessert. Under-whisking matters here, so give the mixture a full 2 minutes. Very low-fat milk or fat-free sour cream can leave the layer too loose.
Can You Freeze Heaven on Earth Cake?
It’s better not to. After thawing, the fruit and cream layers tend to release water. That extra moisture makes the cake soft in the wrong way and weakens the layers. For the best texture, keep it refrigerated and serve it well chilled.
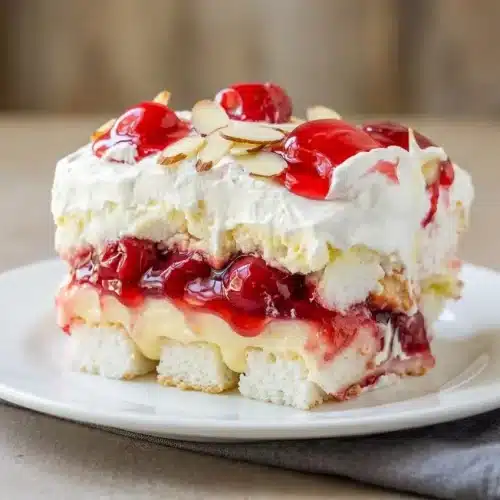
Heaven On Earth Cake

Equipment
- 9×13 Baking Dish
- Mixing Bowl
- wire whisk
- Serrated Knife
Ingredients
- 1 box Angel food cake or 1 prepared Angel Food Cake
- 1 package instant vanilla pudding 3.4 ounces
- 1 1/2 cups milk
- 1 cup sour cream
- 1 can cherry pie filling 21 ounces
- 1 tub Cool Whip 8 ounces
- 1 tablespoon almond slivers toasted
Instructions
- If using a boxed angel food cake, bake it according to the package directions, then let it cool completely before cutting it into even 1-inch cubes with a serrated knife. The cubes should look clean and springy, not mashed or ragged.
- Whisk the instant vanilla pudding, milk, and sour cream together in a mixing bowl for a full 2 minutes, then set the mixture aside briefly. It should look smooth, thickened, and pourable, like a soft cream rather than thin milk.
- Arrange half of the cake cubes across the bottom of a 9×13 baking dish in an even layer. Leave just enough space between pieces for the filling to settle around them.
- Spoon about 2/3 of the cherry pie filling over the first cake layer, spreading it gently so the fruit lands across the surface instead of pooling in one corner. The cake should be dotted and lightly coated, not drowned.
- Add the remaining cake cubes over the cherry layer, covering the fruit as evenly as possible. This second layer creates structure so the pudding can spread across the top without sinking too deeply.
- Pour the pudding mixture over the cake and smooth it from edge to edge with a spatula. When it is spread evenly, the top will look creamy and level with no dry cake peeking through.
- Spoon the whipped topping over the pudding layer and spread it into an even blanket. A light touch keeps the layers distinct and prevents the pudding from mixing into the topping.
- Finish with the remaining cherry pie filling and toasted almond slivers, swirling the cherries lightly for a marbled look instead of stirring them in. The top should have streaks of red over white with almonds scattered for crunch.
- Chill the dessert for about 4 to 5 hours before slicing and serving. The layers should feel set, and the cake will soften enough to cut cleanly with a spoon or knife.