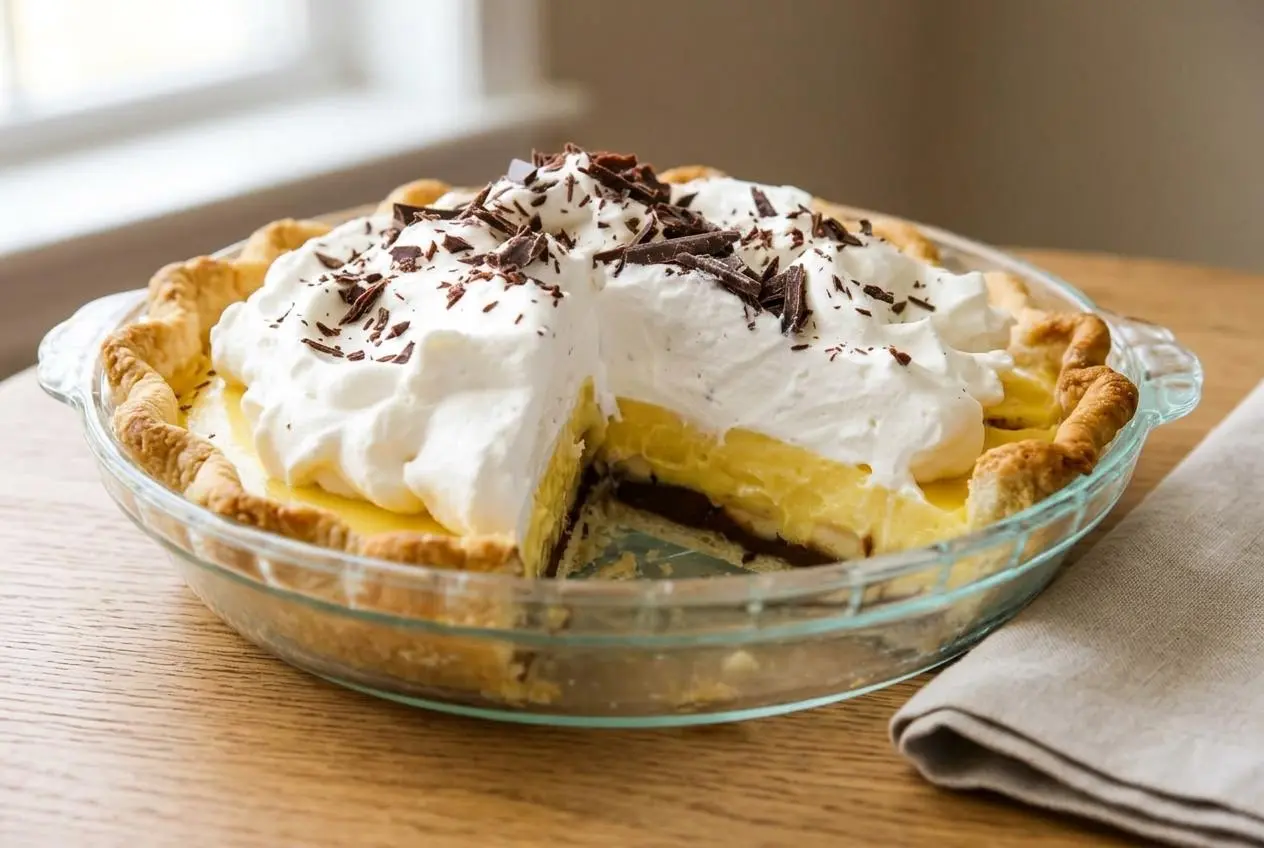
Chocolate banana cream pie works best with a crisp blind-baked crust, a thin chocolate barrier, cool banana slices, thick vanilla custard, and whipped cream chilled until set.
Fresh bananas and dark chocolate make this pie feel classic and a little fancy at the same time. The flavors are simple, but the texture contrast is what makes it memorable.
You get flaky pastry, glossy ganache, creamy pudding, and a cold cloud of whipped cream in one slice. The chocolate layer underneath is the trick worth keeping.
Keep every layer cool before assembly, especially the crust and pudding, so the filling sets neatly instead of sliding.
Ingredients and the Roles They Play
Each ingredient has a job here, from building flaky layers to thickening the custard, adding richness, and keeping the pie balanced instead of overly sweet.
For the pie crust
- 1 1/4 cup all-purpose flour
- 1 teaspoon granulated sugar
- ½ teaspoon salt
- 1/2 cup unsalted butter, cold and cut into cubes
- 1/4 cup cold water
For the vanilla pudding
- 2 cups whole milk
- 1/2 cup granulated sugar
- 3 large egg yolks
- 3 tablespoons cornstarch
- 1 1/2 teaspoon vanilla extract
- 2 tablespoons unsalted butter
For the chocolate ganache
- 4 oz bittersweet or semi-sweet chocolate, chopped or use chips
- 1/2 cup heavy whipping cream
For assembly
- 1 banana, sliced
- 1 cup heavy whipping cream
- 2 tablespoons granulated sugar
- 1/2 teaspoon vanilla extract
- Additional chopped chocolate or sliced bananas, for topping (optional)
Official Recipe Ingredients
Whole milk matters because the custard needs enough fat and body to thicken smoothly and hold its shape once chilled. Low-fat milk tends to make a looser filling, which is exactly what you do not want in a pie that needs clean slices.
Egg yolks bring richness, color, and that classic pastry-cream texture. They also need careful tempering. When hot milk goes in slowly, the yolks warm gradually and stay silky instead of turning into sweet scrambled eggs.
Cornstarch is the main stabilizer here. It thickens more cleanly than flour and gives the pudding a glossy, sliceable finish when fully cooked. Once the custard thickens enough to coat the back of a spoon, the starch has done its job.
The crust ingredients are straightforward but very exacting. Cold butter creates steam pockets in the oven, and those pockets make flaky layers. Sugar and salt sharpen the flavor so the pastry tastes like part of the dessert, not just a container.
Bittersweet or semi-sweet chocolate keeps the ganache from tasting flat against the banana and vanilla. Heavy cream softens the chocolate into a smooth spreadable layer, and the whipped cream topping adds a light finish to offset the rich filling.
I like to keep the butter cubed and cold right up until mixing, because even a few extra warm minutes can make the crust lose some of that crisp, layered bite.
The Gourmet Scratch-Made Approach
This pie is worth making from scratch because each layer brings a texture you cannot fake with shortcuts alone. The crust stays flaky, the custard tastes fuller, and the ganache adds a deep chocolate note that makes the banana feel more grown up.
Patience does most of the work. Chilled dough rolls more cleanly, fully baked pastry stays crisper, and cooled pudding stacks into tidy layers instead of blending into the whipped cream. None of that is flashy, but it is what makes the finished pie look bakery level.
If you love old-school custard desserts, a classic chocolate pie is another good path. This version keeps that same homemade feel, then adds banana and a chocolate bottom for more contrast.
Step-by-Step Guide to the Perfect Crust
A good crust gives this pie structure and crunch, so it deserves real attention. The goal is a dough that stays cold, rolls without fighting you, and bakes up golden all the way through.
To make the pie crust
- Whisk the flour, sugar, and salt in a bowl, then toss in the cold butter cubes and cut them into the dry mixture with a pastry blender or two knives until the pieces are pea-sized.
The mix should still show small butter bits, because those cold pockets help create flaky layers in the oven. - Stir in the cold water with a spatula, then use your hands just enough to bring the dough into a ball, adding more water a teaspoon at a time only if it will not hold together.
Stop as soon as the dough gathers, since overworking it can make the crust tougher instead of tender and crisp. - Press the dough into a disk, wrap it well, and chill it in the refrigerator for at least 1 hour and up to 5 days.
The dough should feel firm and cool, which helps control shrinkage when you roll and bake it later.
That flour-to-butter balance is what makes the crust flaky rather than crumbly. With 1 1/4 cup flour and 1/2 cup butter, you get enough fat for layered texture without crossing into greasy dough.
Cold ingredients are not a fussy extra step. They keep the butter from melting into the flour before baking. Once that butter hits high heat in the oven, it releases steam and lifts the pastry into distinct layers.
Baking with Pie Weights
Blind baking matters because this pie has a moist filling. If you skip it, the bottom crust can stay pale and soft under the custard.
Line the frozen shell with greased foil or parchment and fill it all the way up with pie weights, dried beans, or rice. The weight holds the sides in place, keeps the base from puffing, and gives you a cleaner shape with less shrinkage.
The success cue is visual and tactile. The edges should be golden after the first bake, and the base should look dry rather than shiny after the second bake. A fully blind-baked crust feels firm and crisp, not damp in the center.
Alternative Crust Options
If you want a different style, you have options without changing the main filling.
- An Oreo cookie crust gives the pie a deeper chocolate flavor and a more crumbly, dessert-bar texture.
- A graham cracker crust makes the pie sweeter and softer, and it works especially well for a quicker version.
- If you prefer pastry, stick with the original crust for the sharpest contrast between flaky shell and creamy filling.
How to Make the Ultimate Pastry Crust
This is where the chilled dough turns into a shell that can actually support the filling. Move gently, keep the dough cool, and do not skip the freeze before baking.
Official Rolling and Baking Instructions
- Let the chilled dough sit at room temperature for 5 minutes, then roll it on a lightly floured surface into a rough 13-inch circle about 1/4-inch thick.
If the dough softens too fast or sticks, it needs a brief chill so it stays easy to lift and shape. - Drape the rolled dough into a 9-inch pie dish, then fold and crimp the edges as you like without stretching the pastry.
Lowering it in gently helps prevent tears, and avoiding stretch keeps the crust from shrinking back in the oven. - Freeze the shaped crust for 30 minutes while the oven preheats to 425 °F.
The shell should feel firm and cold, which helps the edges hold their shape during blind baking. - Line the frozen crust with greased foil or parchment and fill it completely with pie weights, dry beans, or rice.
The liner should cover the dough snugly and the weights should reach the top so the sides stay supported. - Bake for 20 to 25 minutes until the edges are golden, then remove the liner and weights and let the crust continue baking for 5 to 10 minutes more until lightly browned all over.
The finished shell should look evenly baked and feel crisp, with no pale or damp-looking patch in the center.
To transfer the dough without tearing, roll it loosely around the rolling pin or fold it gently in half before lifting it into the dish. If a small crack appears, press it back together with your fingertips. Pie dough is forgiving when it is still cool.
Cooling the crust completely before adding ganache is part of the texture plan. Warm pastry can melt the chocolate and trap steam, which softens the bottom before the pie ever reaches the fridge.
How to Make Scratch-Made Custard & Ganache
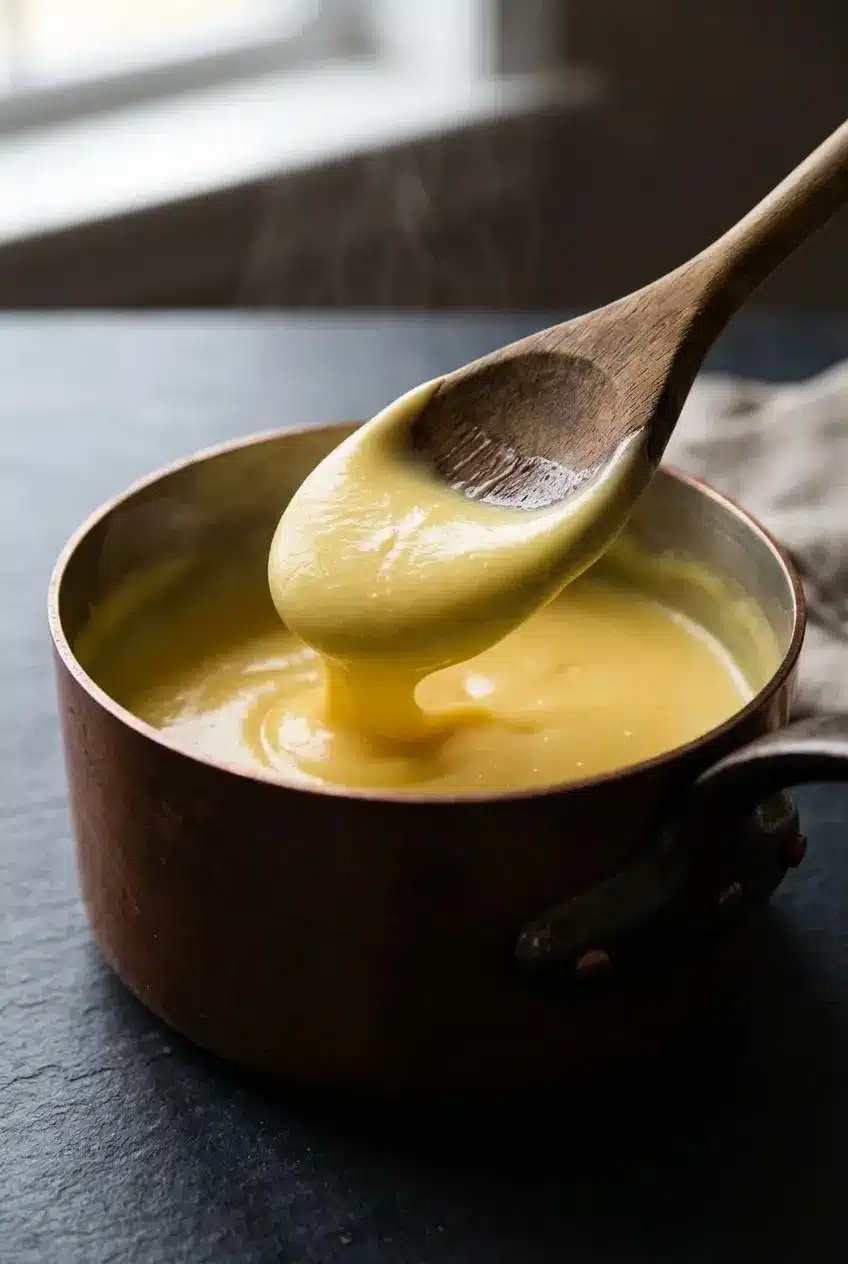
This layer is where the pie gets its creamy center and chocolate depth. Take your time here, because smooth custard and glossy ganache are the difference between elegant and messy.
To make the vanilla pudding
- Warm the milk and sugar in a medium saucepan over medium heat while whisking the egg yolks and cornstarch together in a separate bowl.
When the milk steams and tiny bubbles appear around the edge, it is hot enough to temper the yolks. - Pour the hot milk mixture slowly into the yolk mixture while whisking, then return everything to the saucepan and cook over medium heat, whisking constantly.
The custard will go from loose to noticeably thick, and it should stay smooth as it cooks. - Take the pan off the heat once thickened, then stir in the vanilla and butter until fully blended.
The finished pudding should look glossy and rich and coat the back of a spoon instead of running off quickly. - Let the pudding cool to room temperature, stirring from time to time as it cools.
It should still be creamy and spreadable, not hot, before it goes anywhere near the crust or bananas.
To make the ganache
- Heat the heavy whipping cream in the microwave until steaming, then pour it over the chopped chocolate in a medium bowl and leave it alone for 5 minutes.
The chocolate should soften quietly in the hot cream instead of being rushed with immediate stirring. - Stir the mixture until the ganache turns smooth and uniform.
It should look glossy with no unmelted bits or oily streaks.
If you like a darker chocolate note, a tiny pinch of espresso powder can go into the ganache as an optional extra. It deepens the flavor without turning the pie into a coffee dessert.
For the smoothest pudding, strain it through a mesh strainer if you see even tiny cooked egg bits. That quick step can rescue a nearly perfect custard and gives the final pie a silkier finish.
Tempering Egg Yolks Safely
Tempering simply means bringing the yolks up to temperature slowly. Pour the hot milk in a steady stream while whisking the yolks and cornstarch, rather than dumping it in all at once.
That gradual heat keeps the eggs from curdling. Since undercooked eggs call for extra caution for sensitive groups, it is smart to cook the custard thoroughly and use good egg handling practices described in guidance for avoiding raw or undercooked eggs.
Thickening Custard Perfectly
The pudding is ready when it has real body, not just steam. Look for a texture that coats the back of a spoon and leaves a clear line if you drag a finger through it.
If it still looks thin, keep whisking over medium heat until the cornstarch fully activates. A brief boil is helpful for starch thickening, but a hard vigorous boil for too long can make the custard less smooth.
Whole milk supports a more stable set than low-fat alternatives, and constant whisking helps prevent lumps from forming on the bottom edges of the pan where the heat is strongest.
Mastering the Dual-Layer Custard Filling
This section is optional, but it is a fun way to make the pie look striking without changing the basic method. Start with the same vanilla custard base, then divide it after cooking.
For a black-and-white layered look, melt dark chocolate into half of the warm custard and leave the other half vanilla. Cool both portions before assembly, then spread them in separate layers so they stay defined rather than blending together.
The key is temperature. If one half is warm and the other is cool, the layers can drag into each other. When both portions are thick and just cool, they stack much more cleanly.
Assembling the Ultimate Pie Layers
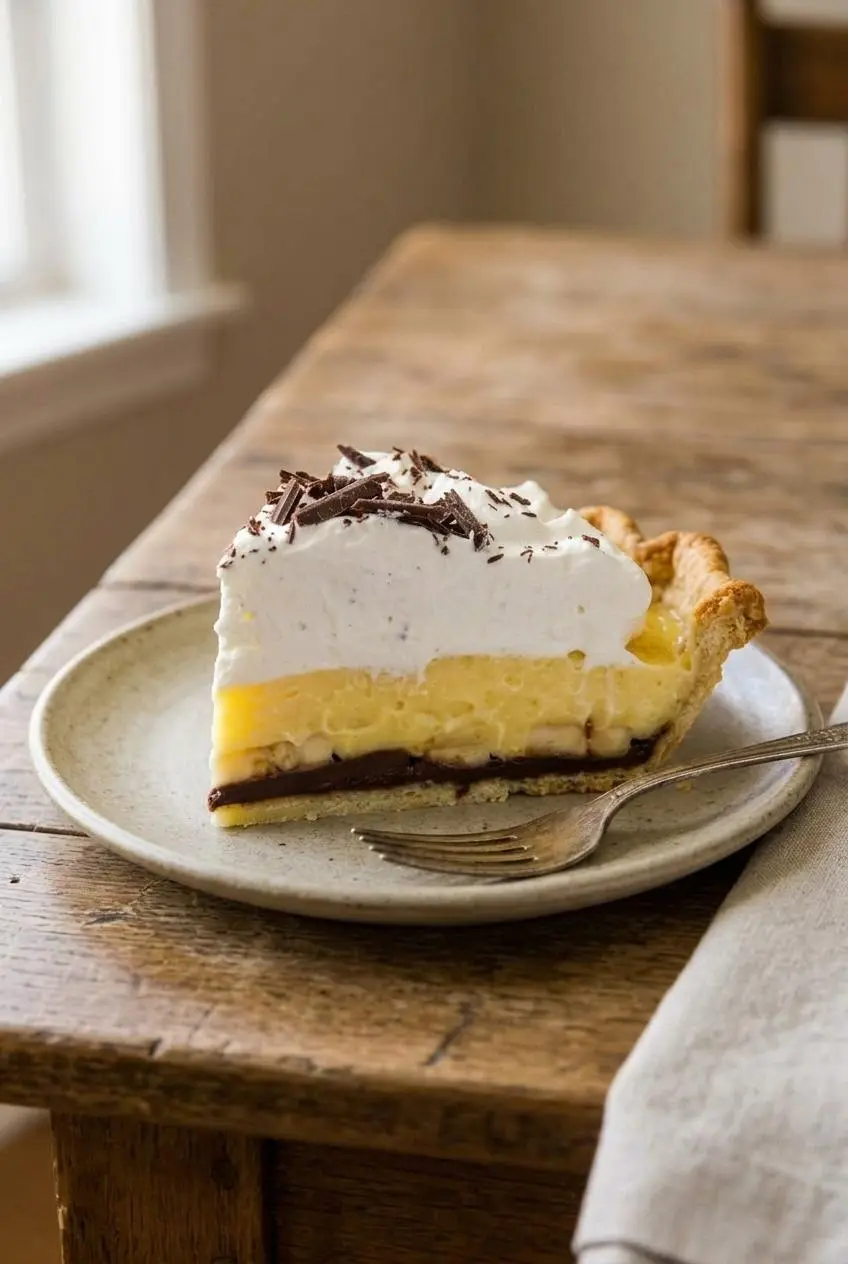
Assembly is easy once every component is cool. The order matters because each layer supports the next and protects the crust underneath.
To assemble the pie
- Beat the heavy whipping cream until it begins to thicken, then add the vanilla and sugar and continue beating to medium peaks.
The whipped cream should hold soft, curved peaks that stand up but still look smooth and spreadable. - Spread the ganache across the bottom of the cooled pie crust, arrange the sliced banana in an even layer, then spoon the cooled vanilla pudding over the fruit and smooth it to the edges before topping with the whipped cream.
Each layer should sit neatly in place, and the custard should fully cover the bananas so they are sealed from the air. - Chill the finished pie for at least 2 hours before serving, then add additional chopped chocolate or sliced bananas, for topping (optional), just before slicing if you like.
The filling should feel set and slice cleanly rather than slumping when the knife goes in.
Cool crust, cool ganache, and room-temperature or cool pudding are the safest texture combination here. Warm filling softens the chocolate layer and can make the whipped cream slide, which is why rushed assembly usually leads to messy slices.
For parties, the same layering idea also works nicely in mini banana cream pies if you want individual servings.
The Secret Chocolate Shield Technique
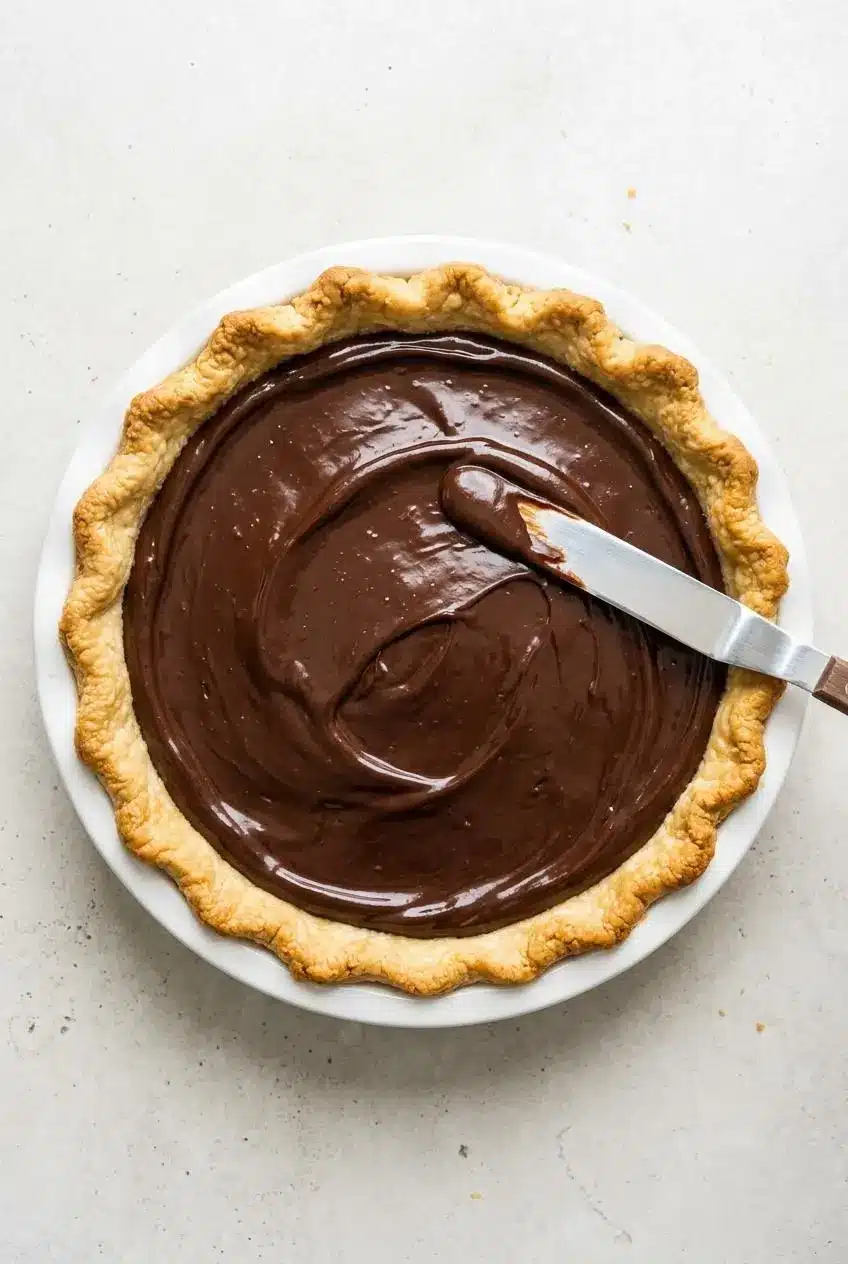
This is the little move that keeps the crust from turning sad and soggy. A thin layer of ganache spread directly on the cooled baked shell creates a moisture barrier between the pastry and the banana-custard filling.
It works because chocolate firms up as it cools. Once set, it slows moisture from soaking into the crust, so the bottom stays crisper for longer. It also adds flavor, which is a nice bonus for something so practical.
Keep the layer thin and even. Too much ganache makes the base hard to cut, but too little leaves gaps where the pudding can seep through.
Fast No-Bake Hack: Instant Pudding Method
If you want the flavor profile without the full pastry project, this shortcut is the easiest way there. Use a store-bought graham cracker crust, instant pudding, banana slices, and real whipped cream.
You still get the banana-and-chocolate combination, but the texture is softer and less structured than the scratch-made version. Homemade whipped cream helps the shortcut taste fresher and less boxed.
A graham cracker base is the easiest no-bake option, while an Oreo crust makes it more chocolate forward. On very busy days, desserts like banana pudding cake scratch the same itch with even less fuss.
The Sogginess Shield: Tips and Troubleshooting
Most problems with this pie come down to moisture, temperature, or undercooked custard. A few targeted fixes make a big difference.
- If the crust turns soft, the shell likely was not fully blind baked or the ganache barrier was added before the crust cooled. Bake until the bottom is lightly browned, then cool completely before the chocolate goes on.
- If the custard seems runny, it usually needs more time on the stove. Cornstarch has to cook through fully, and the pudding should clearly coat the back of a spoon before you remove it from the heat.
- If the pudding looks lumpy, the heat may have been a little too aggressive or the tempering too fast. Whisk constantly and strain the finished custard while it is still warm.
- If the bananas release too much moisture, they were probably too ripe. Choose bananas that are yellow with a few tiny brown specks, not mushy, bruised, or heavily spotted.
- If the bananas brown, they are getting air exposure. Slice them right before assembly and make sure the custard covers them completely with no open gaps near the crust.
- If the whipped cream weeps, it was either overbeaten or added over warm filling. Beat only to medium peaks and top the pie after the lower layers are fully cool.
Storage and Make-Ahead Instructions
This pie needs refrigeration because it contains dairy custard and whipped cream. Keep it covered and chilled, and do not leave it sitting out for long stretches.
You can make the crust and custard ahead as separate components, then assemble once they are cool. If you want the cleanest look, add any fresh banana slices for garnish right before serving so the top stays bright.
Freezing the finished pie is not a great choice for texture. Custard and whipped cream tend to separate and weep after thawing, so the slice loses its smooth structure.
If you want the whipped cream to hold better, beat it only to medium peaks and keep the pie cold until serving. Some cooks also add a small amount of stabilizer to whipped cream for a firmer hold, but that is optional and outside the main recipe.
For egg handling in the kitchen, good chilling and thorough cooking matter throughout the process, and safe egg refrigeration and cooking practices are worth following.
Conclusion
This pie delivers exactly what people want from a classic cream pie: flaky crust, ripe banana, rich chocolate, and a vanilla custard that actually slices cleanly.
If you remember one thing, make it the chocolate shield on the cooled crust. That one small step helps the whole pie stay crisp, neat, and very worth the chill time.
Frequently Asked Questions
Can I Make This Pie a Day in Advance?
Yes, as long as you keep it chilled. Assemble the pie and refrigerate it covered. Add fresh banana slices on top just before serving if you want the prettiest finish. The crust stays at its best when the pie is kept cold and not held out too long.
Why Did My Banana Cream Pie Turn Out Runny?
The most common cause is undercooked custard. Cook until the pudding clearly thickens and coats the back of a spoon. Whole milk gives the filling better body than low-fat milk. Let the pudding cool before assembly so it does not loosen the layers.
How Do I Stop the Bananas From Browning?
Keep air away from them as much as possible. Slice the banana right before assembling the pie. Cover the slices completely with the pudding layer. If using banana slices as a garnish, add them at the last minute.
Can I Freeze Chocolate Banana Cream Pie?
It is better not to. The custard can separate after thawing. The whipped cream may lose its smooth texture. The crust also tends to lose its crispness once the pie defrosts.
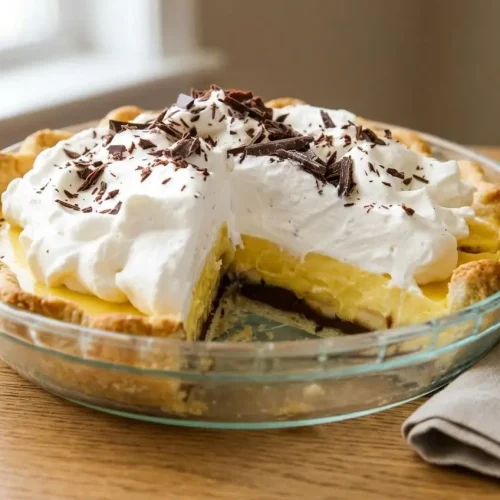
Chocolate Banana Cream Pie

Equipment
- 9-inch Pie Dish
- Pastry blender
- Medium saucepan
- Whisk
- mesh strainer
- Hand mixer
- Rolling Pin
- Pie Weights
Ingredients
For the pie crust
- 1 1/4 cup all-purpose flour
- 1 teaspoon granulated sugar
- ½ teaspoon salt
- 1/2 cup unsalted butter cold and cut into cubes
- 1/4 cup cold water
For the vanilla pudding
- 2 cups whole milk
- 1/2 cup granulated sugar
- 3 large egg yolks
- 3 tablespoons cornstarch
- 1 1/2 teaspoon vanilla extract
- 2 tablespoons unsalted butter
For the chocolate ganache
- 4 oz bittersweet or semi-sweet chocolate chopped or use chips
- 1/2 cup heavy whipping cream
For assembly
- 1 banana sliced
- 1 cup heavy whipping cream
- 2 tablespoons granulated sugar
- 1/2 teaspoon vanilla extract
- Additional chopped chocolate or sliced bananas, for topping (optional)
Instructions
To make the pie crust
- Whisk the flour, sugar, and salt in a bowl, then toss in the cold butter cubes and cut them into the dry mixture with a pastry blender or two knives until the pieces are pea-sized. The mix should still show small butter bits, because those cold pockets help create flaky layers in the oven.
- Stir in the cold water with a spatula, then use your hands just enough to bring the dough into a ball, adding more water a teaspoon at a time only if it will not hold together. Stop as soon as the dough gathers, since overworking it can make the crust tougher instead of tender and crisp.
- Press the dough into a disk, wrap it well, and chill it in the refrigerator for at least 1 hour and up to 5 days. The dough should feel firm and cool, which helps control shrinkage when you roll and bake it later.
Official Rolling and Baking Instructions
- Let the chilled dough sit at room temperature for 5 minutes, then roll it on a lightly floured surface into a rough 13-inch circle about 1/4-inch thick. If the dough softens too fast or sticks, it needs a brief chill so it stays easy to lift and shape.
- Drape the rolled dough into a 9-inch pie dish, then fold and crimp the edges as you like without stretching the pastry. Lowering it in gently helps prevent tears, and avoiding stretch keeps the crust from shrinking back in the oven.
- Freeze the shaped crust for 30 minutes while the oven preheats to 425 °F. The shell should feel firm and cold, which helps the edges hold their shape during blind baking.
- Line the frozen crust with greased foil or parchment and fill it completely with pie weights, dry beans, or rice. The liner should cover the dough snugly and the weights should reach the top so the sides stay supported.
- Bake for 20 to 25 minutes until the edges are golden, then remove the liner and weights and let the crust continue baking for 5 to 10 minutes more until lightly browned all over. The finished shell should look evenly baked and feel crisp, with no pale or damp-looking patch in the center.
To make the vanilla pudding
- Warm the milk and sugar in a medium saucepan over medium heat while whisking the egg yolks and cornstarch together in a separate bowl. When the milk steams and tiny bubbles appear around the edge, it is hot enough to temper the yolks.
- Pour the hot milk mixture slowly into the yolk mixture while whisking, then return everything to the saucepan and cook over medium heat, whisking constantly. The custard will go from loose to noticeably thick, and it should stay smooth as it cooks.
- Take the pan off the heat once thickened, then stir in the vanilla and butter until fully blended. The finished pudding should look glossy and rich and coat the back of a spoon instead of running off quickly.
- Let the pudding cool to room temperature, stirring from time to time as it cools. It should still be creamy and spreadable, not hot, before it goes anywhere near the crust or bananas.
To make the ganache
- Heat the heavy whipping cream in the microwave until steaming, then pour it over the chopped chocolate in a medium bowl and leave it alone for 5 minutes. The chocolate should soften quietly in the hot cream instead of being rushed with immediate stirring.
- Stir the mixture until the ganache turns smooth and uniform. It should look glossy with no unmelted bits or oily streaks.
To assemble the pie
- Beat the heavy whipping cream until it begins to thicken, then add the vanilla and sugar and continue beating to medium peaks. The whipped cream should hold soft, curved peaks that stand up but still look smooth and spreadable.
- Spread the ganache across the bottom of the cooled pie crust, arrange the sliced banana in an even layer, then spoon the cooled vanilla pudding over the fruit and smooth it to the edges before topping with the whipped cream. Each layer should sit neatly in place, and the custard should fully cover the bananas so they are sealed from the air.
- Chill the finished pie for at least 2 hours before serving, then add additional chopped chocolate or sliced bananas, for topping (optional), just before slicing if you like. The filling should feel set and slice cleanly rather than slumping when the knife goes in.