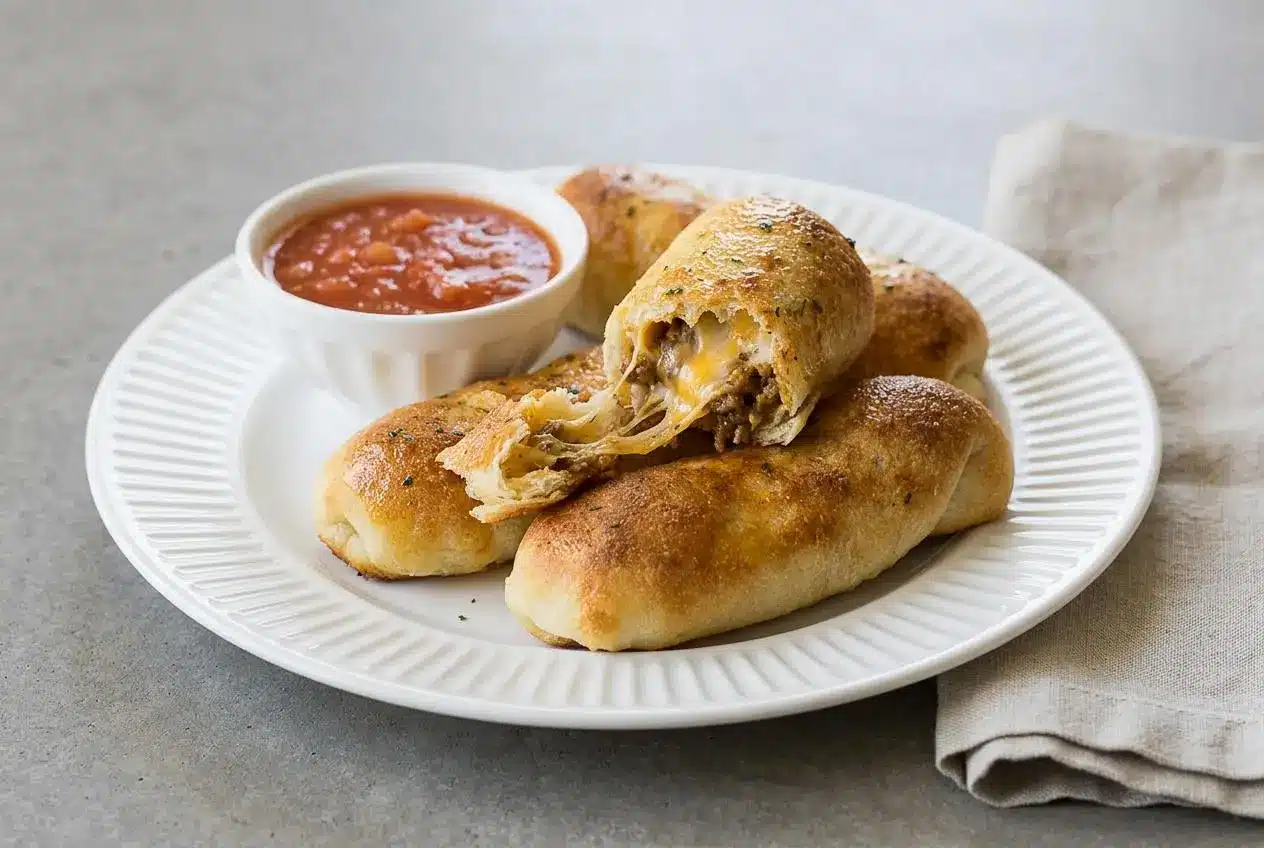
Make cheesy taco sticks by wrapping cooled, seasoned ground beef and halved cheese sticks in refrigerated pizza dough. Brush with garlic parsley butter, then bake at 425°F for 10 to 12 minutes until the crust is golden and the cheese melts inside.
These cheesy taco sticks tuck taco-night flavors into a buttery, handheld breadstick. The pizza dough turns golden around the savory beef, while the garlic butter gives the outside that warm, fragrant finish.
You’ll get 10 sticks for a casual dinner or a shareable snack. The estimated prep and baking time is 22 minutes, but allow extra time for the beef to cool before assembly. The payoff is in the first cheesy bite.
Keep the dough edges free of meat and grease so they stick together when you pinch them closed.
Ingredients and Essential Substitutions
Pizza dough provides the wrapper, beef and taco seasoning build the savory filling, and cheese adds a creamy center. Butter carries the garlic and parsley across the crust, giving it richness, aroma, and a golden finish.
- 1 lb. ground beef
- 1 packet taco seasoning mix (or homemade taco seasoning)
- 1 tube Pillsbury Pizza Dough
- 5 colby jack and cheddar cheese sticks (halved)
- 4 tbsp butter (melted)
- 1 tsp garlic powder
- 1 tsp dried parsley
Refrigerated pizza dough makes a sturdy, chewy wrapper that you can stretch and pinch around the filling. Aim for an even thickness rather than pulling the corners paper-thin. Crescent dough makes a softer, flakier alternative, with handling adjustments explained below.
Colby Jack and cheddar cheese sticks bring a mellow, savory flavor and keep portioning predictable. Halving them gives each rectangle a cheese center without crowding the seams. Mozzarella has a different flavor and stretch, but there’s no need to swap it in or assume it will release more moisture.
Ground beef and dry taco seasoning should form a crumbly filling, not a sauce. Drain the rendered fat, then add the seasoning without water. Even if the packet suggests water for regular tacos, skip it here so liquid doesn’t seep into the dough.
Garlic parsley butter seasons the outside as well as the filling. Stir it before brushing so the garlic powder and parsley don’t collect at the bottom of the bowl.
I’d keep the halved cheese sticks chilled until assembly so they stay firm and easy to position.
How to Make the Cheesy Taco Sticks Step by Step
Work in three stages: cook and cool the filling, wrap and seal the dough, then brush and bake. You’ll need a skillet, a wooden spoon, a large baking sheet, a small bowl, and a pastry brush.
- Set the oven to 425°F and let it preheat while you prepare the filling.
A fully heated oven helps the dough begin baking as soon as the pan goes in. - Apply a light coating of nonstick spray to a large baking sheet.
The surface should have a thin film rather than puddles that could make the bottoms greasy. - Brown the beef in a skillet, using a wooden spoon to break it into small crumbles as it cooks.
The filling should have an even, crumbly texture with no large clumps, and a food thermometer is more dependable than color alone for checking doneness. - Drain the fat, return the skillet to the stovetop, and stir the dry taco seasoning into the beef without adding water.
The seasoning should coat the crumbles evenly, with no watery sauce collecting in the pan. - Take the skillet off the heat and let the seasoned beef cool to room temperature before handling the dough.
No rising steam is a useful cue, but also check that the filling no longer feels warm before assembling. - Flatten the pizza dough evenly, divide it lengthwise into two strips, and make four evenly spaced crosswise cuts through both strips.
This creates a two-row, five-column grid of 10 rectangles with similar thickness and room for filling. - Center about a tablespoon or more of cooled beef and one halved cheese stick on each rectangle, then roll the dough around them and pinch every opening closed.
The finished rolls should have firmly fused seams and closed ends, with no filling trapped between the dough edges. - Mix the melted butter, garlic powder, and parsley in a small bowl, brush the mixture over the rolls, and bake for 10 to 12 minutes.
Look for golden tops, set dough along the sides, and a fragrant garlic crust before removing the pan.
Place the rolls seam-side down on the prepared sheet. That position supports the closure while the dough puffs. Serve them hot, with dipping sauces offered separately.
Secrets for Preventing Cheese Leaks and Blowouts
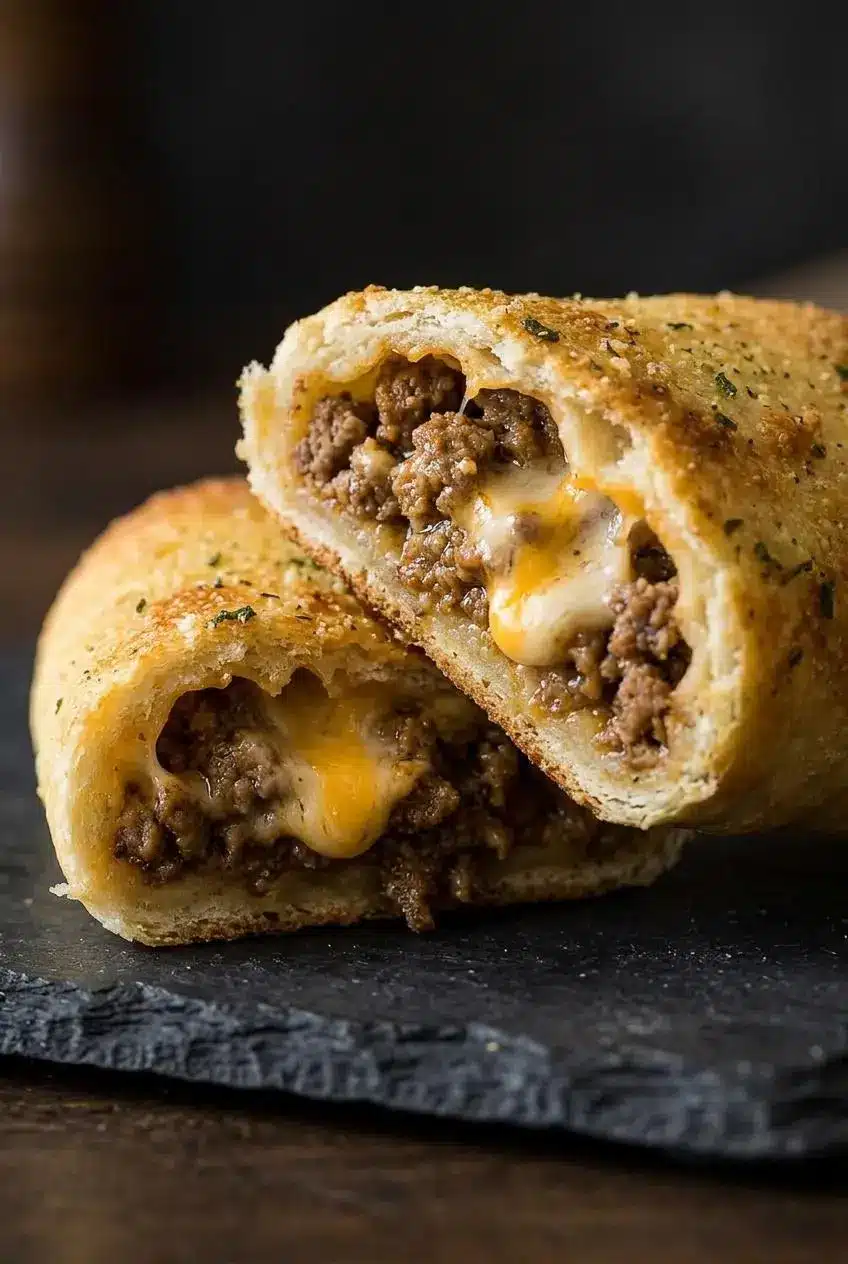
A secure wrapper needs clean edges, enough dough around the filling, and firmly closed ends. Pinching harder won’t help if grease or a beef crumble sits between the surfaces.
For a tuck-and-pinch closure, fold the short ends inward around the filling before rolling the longer edges together. Pinch along the full length of the seam, then check both ends again. The dough should fuse into one surface rather than leave a loose flap.
- Dough turns sticky or tears: warm filling can soften it and make handling difficult. Let the beef cool before assembly, and stretch the dough evenly rather than tugging at one corner.
- Cheese escapes from the ends: the end seams may be open, or the filling may be crowded. Use half a cheese stick per roll and tuck the ends closed before placing it on the pan.
- The long seam separates: grease or filling may have interrupted the seal. Clear the edges, pinch clean dough against clean dough, and set the roll seam-side down.
- The bottoms stay soft: excess fat or liquid can soak the wrapper. Drain the beef well and keep wet salsa outside the unbaked rolls.
Don’t pack in extra filling just because a rectangle looks roomy. You need a border of dough for sealing, and the wrapper expands in the oven. A snug roll is useful; a stretched, overfilled one is more likely to split.
Brush the butter across the tops instead of letting it collect beneath the rolls. If you enjoy that garlic-butter crust, cheesy garlic breadsticks offer another way to enjoy the combination.
Air Fryer Method and Tasty Recipe Variations
These optional changes let you adjust the wrapper, filling, or appliance without changing the oven recipe above. Keep every filling cool and well drained, whichever version you choose.
Air Fryer Taco Sticks
Preheat the air fryer to 375°F. Lightly grease the basket and arrange the assembled, butter-brushed sticks seam-side down in a single layer, leaving space between them.
Cook for 6 to 8 minutes, gently turning them halfway through. Check for a golden exterior and cooked dough along the sides and seam. Air fryers vary, so treat the time as a starting range rather than a guarantee.
Cook in batches if necessary. Crowding blocks airflow, and a deeply browned top doesn’t mean a thick seam underneath has finished cooking.
Crescent Roll Dough Taco Sticks
Use a seamless crescent dough sheet for a softer, flakier wrapper. If the dough has perforations, press them together before cutting matching rectangles so those lines don’t become openings during baking.
Keep the filling modest and seal gently, since crescent dough is more delicate. Begin checking 1 to 2 minutes earlier than the pizza-dough version, and remove the sticks when the wrapper is golden and cooked through rather than relying on the clock alone.
Flavor Swaps and Protein Additions
- Ground turkey: use fully cooked, crumbled turkey for a milder filling, then season it and cool it before wrapping.
- Shredded chicken: choose cooked, seasoned chicken and break up long strands so they don’t interfere with the seams.
- Green chiles: add well-drained diced green chiles for a mellow pepper flavor without bringing their packing liquid into the dough.
- Pickled jalapeños: drain and mince them for tangy heat that distributes more evenly through the filling.
Leftover filling from ground beef tacos can also work if it’s properly stored, chilled, and drained of excess liquid. Avoid adding a second packet of seasoning to meat that’s already seasoned.
Prep, Storage, and Reheating
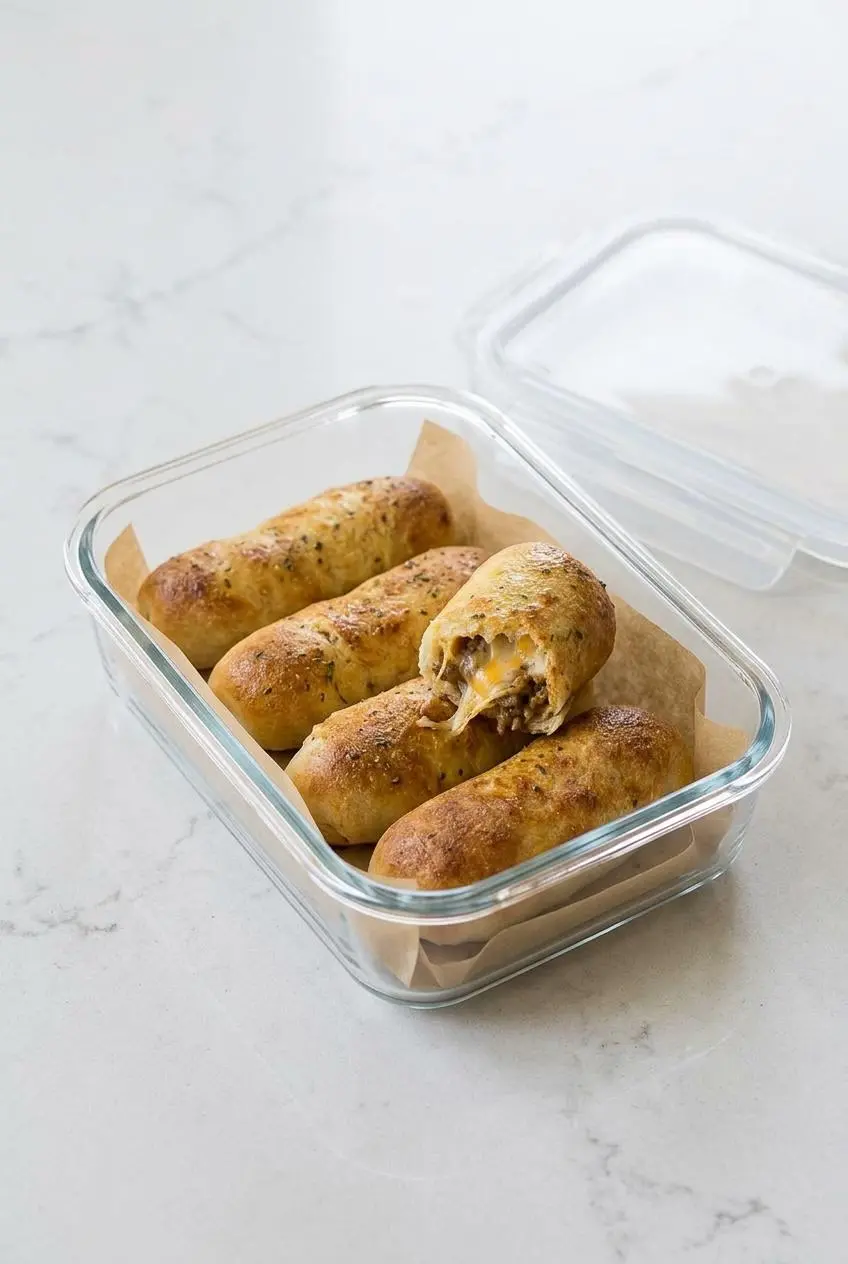
Protect the crust by keeping leftover sticks separate from salsa, sour cream, and other moist toppings. Refrigerate leftovers promptly rather than leaving the platter out while you clean up.
Keeping the Filling Ready for Assembly
Keep cooked filling covered and chilled if you aren’t assembling immediately. Having the meat ready separately lets you cut and fill the dough when you’re ready to bake, without leaving raw dough exposed to moisture.
Store cooked beef or baked leftovers in covered containers and use them within 3 to 4 days of refrigerated storage. Prompt refrigeration and proper handling still matter throughout that period.
Reheating for Maximum Crispness
Use an oven, toaster oven, or air fryer to reheat refrigerated sticks in a single layer. Leave space around them and heat until the filling is hot throughout, checking the crust so it doesn’t overbrown.
Dry circulating heat helps restore the outside texture. A microwave can soften the wrapper, so it’s less useful when crispness is the goal. Reheat the portion you plan to serve and add chilled dips afterward.
Serving Suggestions and Dipping Sauces
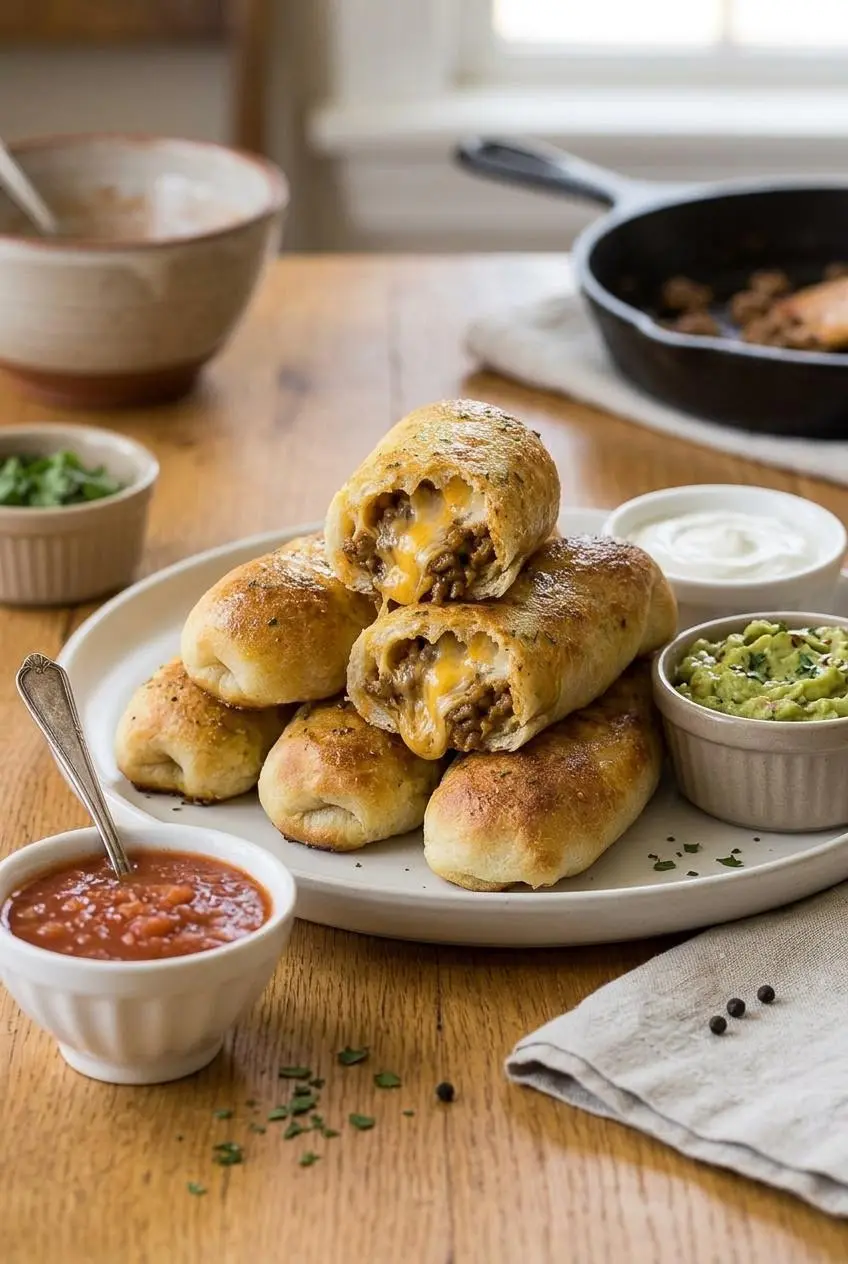
Serve the sticks warm with dips in separate bowls so everyone can choose their own combination without softening the crust.
- For a snack platter: offer chunky salsa, creamy guacamole, and cool sour cream for contrasting textures.
- For game day: add warm queso and sliced pickled jalapeños alongside the sticks.
- For dinner: pair them with cilantro lime rice or Mexican street corn salad.
A bowl of warm taco dip also fits a party spread. Keep the sticks undressed until serving so the garlic crust stays firm enough for dipping.
Conclusion
Golden garlic crust, seasoned beef, and melted cheese make these taco sticks a satisfying handheld dinner or snack. The filling stays tucked inside when you give the dough room to close.
Cool the meat, keep the edges clean, and pinch both the long seam and the ends firmly. Put the dips on the table and enjoy them warm.
Frequently Asked Questions
Can I Make Cheesy Taco Sticks in an Air Fryer?
Yes. Arrange them seam-side down in a lightly greased basket and cook at 375°F for 6 to 8 minutes, turning gently halfway through. Leave space between sticks and check that the dough is cooked through.
Why Is It Important to Let the Taco Meat Cool Before Rolling?
Warm meat can soften the raw dough, making it sticky and harder to seal. Cooling also reduces the steam trapped inside during assembly, helping the wrapper hold its shape.
Can I Use Crescent Roll Dough Instead of Pizza Dough?
Yes. Seamless crescent sheets make a softer, flakier version. Close any perforations before cutting, and check the oven earlier because the wrapper may brown faster.
Can I Prepare the Filling Before Assembly?
Yes. Keep cooked taco meat covered and refrigerated until you’re ready to assemble, following the storage guidance above. Keep it separate from the dough so moisture doesn’t soften the wrapper before baking.
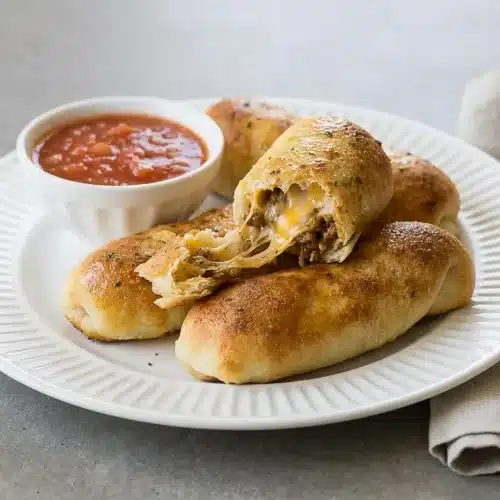
Cheesy Taco Sticks

Equipment
- Non-Stick Cookie Sheets
- Silicone Basting Brushes
- Skillet
Ingredients
- 1 lb. ground beef
- 1 packet taco seasoning mix (or homemade taco seasoning)
- 1 tube Pillsbury Pizza Dough
- 5 colby jack and cheddar cheese sticks (halved)
- 4 tbsp butter (melted)
- 1 tsp garlic powder
- 1 tsp dried parsley
Instructions
- Set the oven to 425°F and let it preheat while you prepare the filling. A fully heated oven helps the dough begin baking as soon as the pan goes in.
- Apply a light coating of nonstick spray to a large baking sheet. The surface should have a thin film rather than puddles that could make the bottoms greasy.
- Brown the beef in a skillet, using a wooden spoon to break it into small crumbles as it cooks. The filling should have an even, crumbly texture with no large clumps, and a food thermometer is more dependable than color alone for checking doneness.
- Drain the fat, return the skillet to the stovetop, and stir the dry taco seasoning into the beef without adding water. The seasoning should coat the crumbles evenly, with no watery sauce collecting in the pan.
- Take the skillet off the heat and let the seasoned beef cool to room temperature before handling the dough. No rising steam is a useful cue, but also check that the filling no longer feels warm before assembling.
- Flatten the pizza dough evenly, divide it lengthwise into two strips, and make four evenly spaced crosswise cuts through both strips. This creates a two-row, five-column grid of 10 rectangles with similar thickness and room for filling.
- Center about a tablespoon or more of cooled beef and one halved cheese stick on each rectangle, then roll the dough around them and pinch every opening closed. The finished rolls should have firmly fused seams and closed ends, with no filling trapped between the dough edges.
- Mix the melted butter, garlic powder, and parsley in a small bowl, brush the mixture over the rolls, and bake for 10 to 12 minutes. Look for golden tops, set dough along the sides, and a fragrant garlic crust before removing the pan.