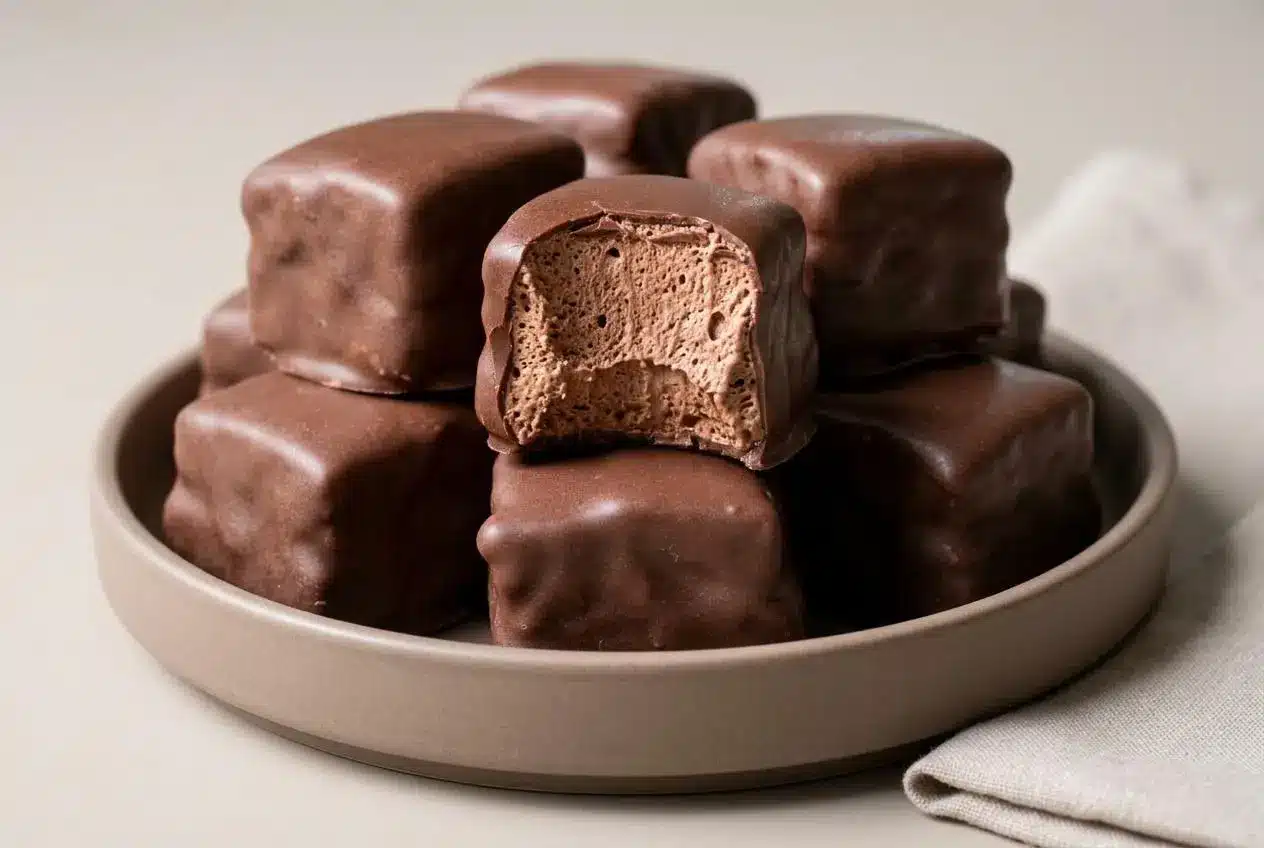
In my kitchen, the fastest way to make people smile is to hand them something bite-sized and unapologetically chocolatey. These brownie truffles hit that sweet spot, part fudgy brownie, part elegant dessert ball you can pop in your mouth without committing to a whole slice.
The little secret is a brown butter and espresso infusion that turns everyday chocolate into something deeper and more grown-up. I will walk you through the steps and the why behind them, so you get that dense center and clean finish every single time.
Why You’ll Love This Recipe
Brown Butter Depth: Letting the butter go to brown butter, beurre noisette in chef-speak, adds a toasted, caramel-nut perfume that makes the chocolate taste like it has been aged in a fancy pastry case.
Espresso Elevation: A small pinch of instant espresso powder is optional, but I swear by it, it nudges the Maillard reaction flavors so the cocoa tastes louder, not coffee-forward.
Texture Contrast: You get a dense, fudgy brownies center with a crisp shell, or that soft cocoa-dusted finish. The first bite is the whole point, snappy outside, melt-in-the-middle.
Versatility: Some days I dip in melting wafers, other days I roll in cocoa or powdered sugar. Both paths give you beautiful brownie truffles without needing pastry-school skills.
Ingredients and Substitutions

These are pantry-friendly staples, but each one has a job. The sugars build chew, the cocoa brings intensity, and the coatings let you choose between glossy dipped truffles or a snowy, cocoa-dusted finish.
Ingredients
FOR THE BROWNIES:
- 3/4 cup Salted Butter
- 1 cup Packed Light Brown Sugar
- 1 cup Granulated Sugar
- 1 cup Dutch Process Cocoa Powder
- 3/4 tsp. Kosher Salt
- 1/2 tsp. Baking Powder
- 2 tsp. Vanilla Extract
- 4 Eggs
- 1 cup Unbleached All-purpose Flour
FOR THE COATINGS:
- Chocolate Melting Wafers
- Natural Cocoa Powder
- Powdered Sugar
Ingredient Notes & Substitutions
Dutch Process Cocoa Powder: This is the backbone of that dark color and smooth, mellow chocolate flavor in the batter. Natural cocoa is sharper and more acidic, so the brownie base will taste different and look lighter.
Salted Butter: I like salted butter here because it keeps the sweetness from getting loud. If you switch to unsalted, the salt amount should be slightly adjusted so the chocolate still tastes bold, not flat, the same logic that makes salted brownie cookies so intense.
Chocolate Melting Wafers: These are my go-to for dipping because they melt fluidly and set neatly, without the fuss of tempering chocolate. Chocolate chips work in a pinch, but the coating often goes thicker and less glossy.
The Twist Add-In: For the brown butter and espresso infusion vibe, add 1 teaspoon of instant espresso powder with the vanilla extract. It deepens the cocoa, even if you do not love coffee desserts.
How to make brownie truffles
Prep, Pan, and a Head Start
- Line a 9 x 13-inch pan with foil, then grease the foil so the slab lifts out cleanly later. Preheat your oven to 325ºF, because this lower heat helps keep the brownies fudgy instead of cakey.
Brown Butter Base and Fudgy Batter
- In a medium saucepan, melt the 3/4 cup Salted Butter over medium-low heat and stay close. First it melts, then it foams, then you will spot golden flecks on the bottom and smell a toasted, nutty aroma, that is your brown butter moment.
- Stir in the 1 cup Packed Light Brown Sugar and 1 cup Granulated Sugar, then keep stirring and heating until the sugar is hot, about 1–2 minutes more. It will look glossy and slightly thicker, like wet sand turning into shiny lava.
- Pull the pan off the heat and whisk in the 1 cup Dutch Process Cocoa Powder, 3/4 tsp. Kosher Salt, and 1/2 tsp. Baking Powder. The mixture will look dark and thick, and it should smell like a chocolate shop.
- Whisk in the 2 tsp. Vanilla Extract, and this is where the optional espresso powder goes too if you are using it. Add the 4 Eggs one at a time, whisking until each disappears into the batter, you want it smooth and emulsified, not streaky.
- Stir in the 1 cup Unbleached All-purpose Flour just until you stop seeing dry patches. The less you work it, the more you protect that fudgy brownies texture.
Bake, Cool, and Form the Truffles
- Pour the batter into the prepared pan and smooth the top so it bakes evenly. Bake for 26–30 minutes, and aim for the fudgy side, the edges should look set, but the center should still feel soft, because overbaking is what makes truffles dry.
- Let the brownies cool completely on a wire rack, patience matters here. Warm brownies crumble and smear instead of rolling into neat dessert balls.
- Lift the slab out using the foil, then cut into 48 pieces. Discard the 4 crunchy corner pieces, they are too dry to roll well, then roll or press the remaining 44 pieces into smooth spheres using warm palms.
Coat, Finish, and Store
- For dipped truffles, melt the Chocolate Melting Wafers according to package directions until smooth and fluid. Set a brownie ball on a fork, dip, then tap the fork handle against the bowl to shake off excess for a thin, professional shell.
- For rolled truffles, add Natural Cocoa Powder to one pie plate and Powdered Sugar to another. Roll the balls, then tap off excess, especially with cocoa, so the finish tastes plush instead of dusty.
- Let the coating set on a waxed paper-lined cookie sheet, then store in airtight containers at room temperature. They should feel firm outside, with that soft, fudgy center when you bite in.
Secrets for Perfection

Temperature matters: Chocolate bloom, those pale streaks, often shows up when chocolate gets overheated or cooled unpredictably. Keep melting wafers warm and fluid, but not scorching, and work in a steady rhythm so the finish stays glossy.
Dutch cocoa science: Dutch process cocoa is alkalized, so it behaves differently than natural cocoa in batters. The note about Dutch process cocoa acidity explains why the flavor reads smoother and darker.
The binder hack: If your brownie pieces feel sandy or dry and will not hold, you can rescue them without starting over. Mix in 1-2 tablespoons of ganache or cream cheese, just enough to make the crumbs clump like soft clay.
Chill before dipping: A quick 15-20 minutes in the freezer helps the rolled balls keep their shape when they hit warm coating. The truffles dip cleaner, and the shell sets faster.
Texture management: Overmixing the flour pushes you toward cakey brownies, which crumble instead of rolling. Stir only until the flour disappears, then stop, even if your arm wants to keep going.
Pro Tips & Troubleshooting
Pro Tips
- Use a toothpick to slide the truffle off the fork onto wax paper for a clean finish.
- If you use chocolate chips instead of melting wafers, add a teaspoon of coconut oil for a snappier coating.
- A boozy truffle variation works beautifully with a splash of Baileys or Bourbon in the brownie mash.
- The dense interior should feel like fudgy brownie cookies, not cake crumbs.
Common Mistakes to Avoid
- Using a cakey brownie base, only a fudgy brownies style will roll smoothly.
- Overbaking, which turns the centers dry and forces you to add a binder.
- Dipping frozen truffles into very hot chocolate, thermal shock causes cracks as temperatures fight.
- Keeping corner pieces, the crispy edges make lumpy, dry brownie truffles.
- Leaving too much cocoa powder on the outside, it can taste bitter and feel dusty.
Serving & Storage

Serving Ideas
Mini muffin liners give brownie truffles that boutique pastry-box look, especially for showers and holiday trays. On a mixed dessert platter, their richness plays nicely beside smaller bites like blintz brownie bites for contrast.
For gifting, I like clear cellophane bags tied with ribbon, it shows off the coating. At the table, a hot espresso or a dark stout makes the brown butter notes feel even toastier.
Storage & Make-Ahead
At room temperature, keep them airtight for 3-4 days, so the centers stay soft and the coating stays pleasant. In warm kitchens, refrigeration helps the shell stay crisp and tidy.
The fridge extends their life to about 2 weeks, and the freezer works for up to 3 months, just let them come back to room temperature before eating so the chocolate aroma opens up again. The storage details align with safe storage guidelines for baked goods.

Fudgy Brown Butter Brownie Truffles

Equipment
- 9 x 13-inch pan
- Medium saucepan
- Whisk
- Wire rack
- Waxed paper
Ingredients
FOR THE BROWNIES
- 3/4 cup Salted Butter
- 1 cup Packed Light Brown Sugar
- 1 cup Granulated Sugar
- 1 cup Dutch Process Cocoa Powder
- 3/4 tsp. Kosher Salt
- 1/2 tsp. Baking Powder
- 2 tsp. Vanilla Extract
- 4 Eggs
- 1 cup Unbleached All-purpose Flour
FOR THE COATINGS
- Chocolate Melting Wafers
- Natural Cocoa Powder
- Powdered Sugar
Instructions
Prep, Pan, and a Head Start
- Line a 9 x 13-inch pan with foil and grease it to ensure the slab lifts out cleanly later. Preheat the oven to 325ºF (163ºC) to help keep the brownies fudgy.
Brown Butter Base and Fudgy Batter
- In a medium saucepan over medium-low heat, melt the salted butter. Continue heating until it foams and golden flecks appear on the bottom with a nutty aroma.
- Stir in the packed light brown sugar and granulated sugar. Keep stirring and heating for 1–2 minutes until the mixture is hot and glossy.
- Remove the pan from the heat. Whisk in the Dutch process cocoa powder, kosher salt, and baking powder until the mixture is dark and thick.
- Whisk in the vanilla extract (and optional espresso powder if using). Add the eggs one at a time, whisking until smooth and emulsified after each addition.
- Stir in the all-purpose flour just until no dry patches remain. Do not overmix to protect the fudgy texture.
Bake, Cool, and Form the Truffles
- Pour the batter into the prepared pan and smooth the top. Bake for 26–30 minutes until edges are set but the center remains soft.
- Allow the brownies to cool completely on a wire rack. Cooling is essential to prevent crumbling during rolling.
- Lift the slab out by the foil and cut into 48 pieces. Discard the 4 crunchy corner pieces, then roll the remaining 44 pieces into smooth spheres using warm palms.
Coat, Finish, and Store
- For dipped truffles, melt the chocolate melting wafers until smooth. Dip a brownie ball using a fork, tapping the handle to remove excess coating.
- For rolled truffles, place natural cocoa powder or powdered sugar in separate dishes. Roll the balls to coat, then tap off excess.
- Let the coating set on a waxed paper-lined sheet before storing in airtight containers at room temperature.
Notes
Nutrition
Conclusion
A great brownie truffle should snap or puff softly on the outside, then melt into a fudgy, dark center. The brown butter twist gives you that bakery-depth flavor without adding complicated steps.
If you play with coatings or add a little boozy warmth, keep the base fudgy and you will be golden. I love serving them when I want maximum chocolate impact with minimum fuss.