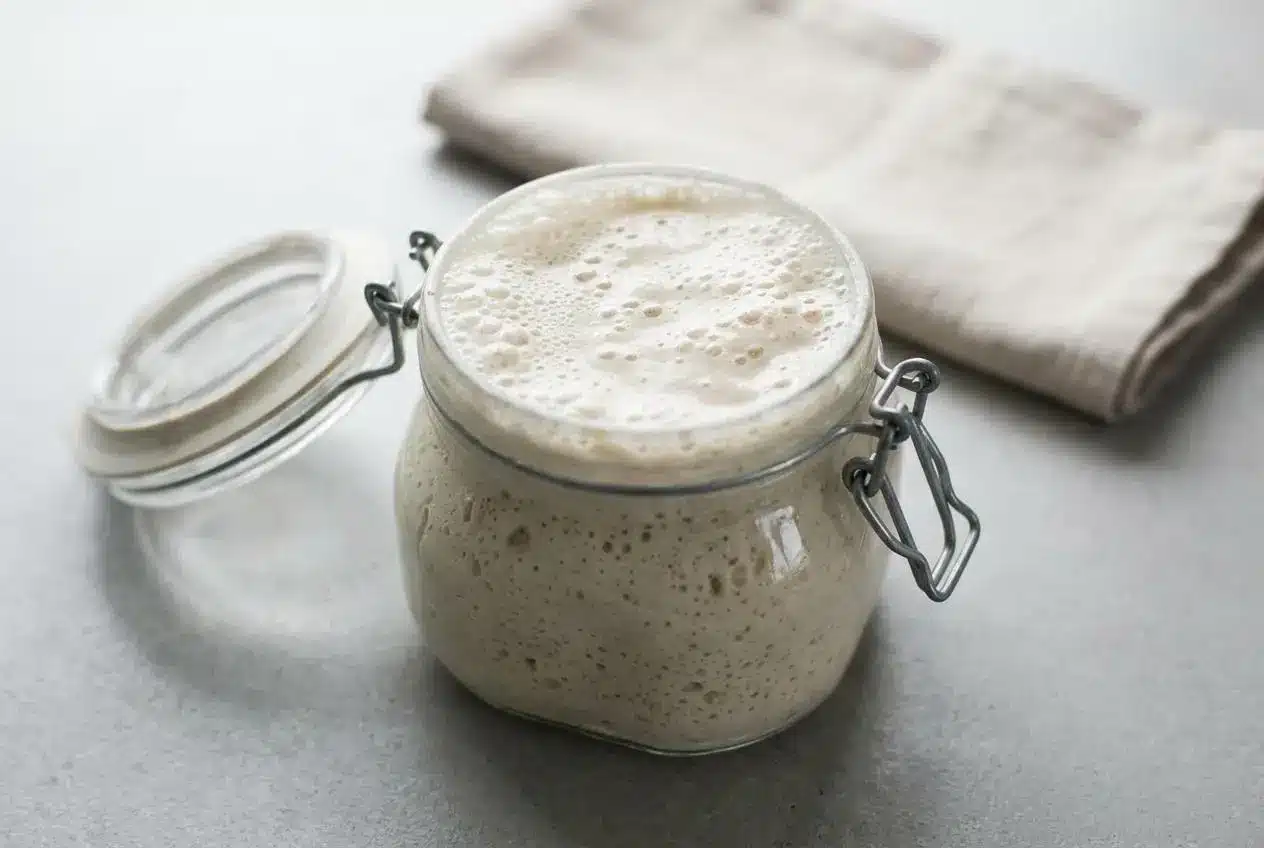
Create a starter by mixing equal weights of flour and warm water, then discarding and feeding it daily until it bubbles, rises reliably, and doubles after feeding.
This sourdough starter recipe begins with whole wheat flour, water, patience, and a warm corner of the kitchen. Flour captures wild yeast and lactic acid bacteria, which gradually build the tangy, bubbly culture needed for naturally leavened bread.
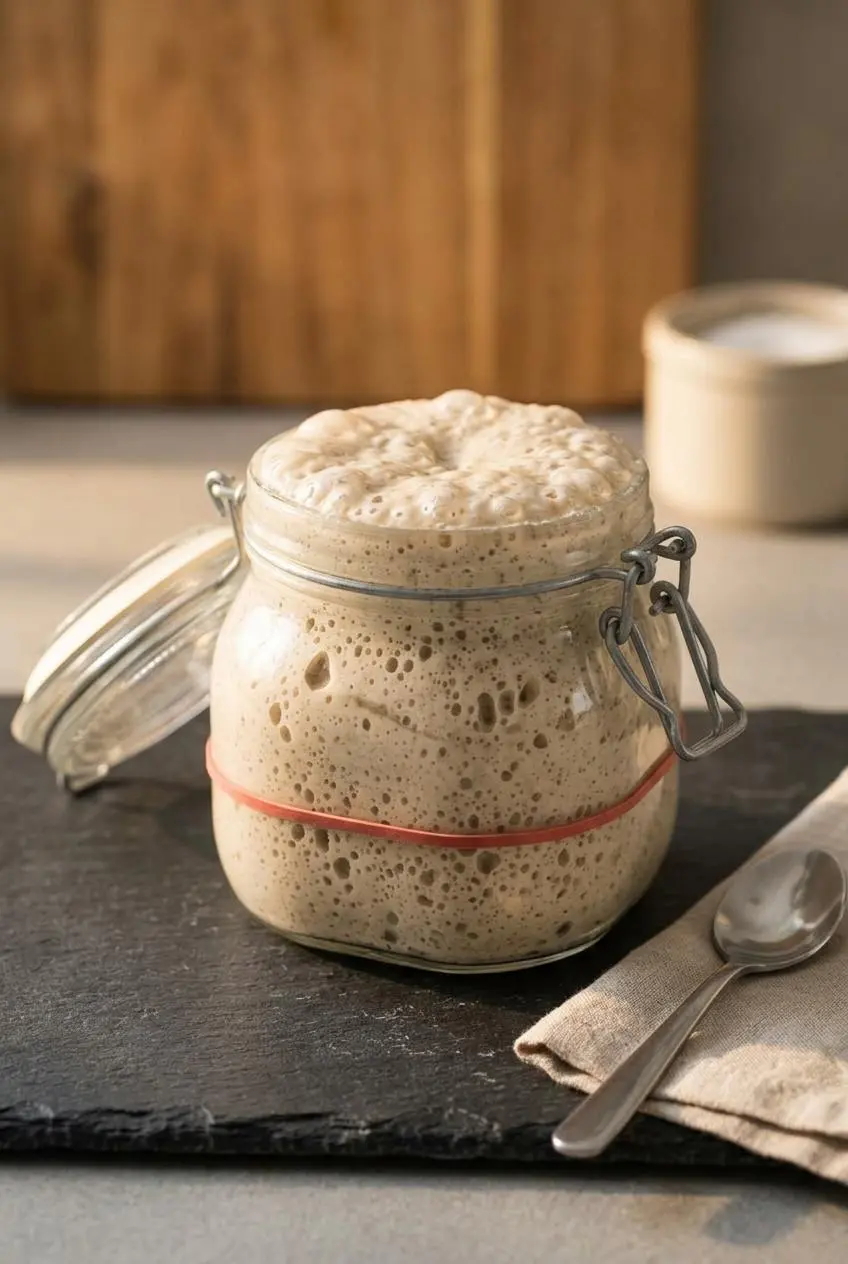
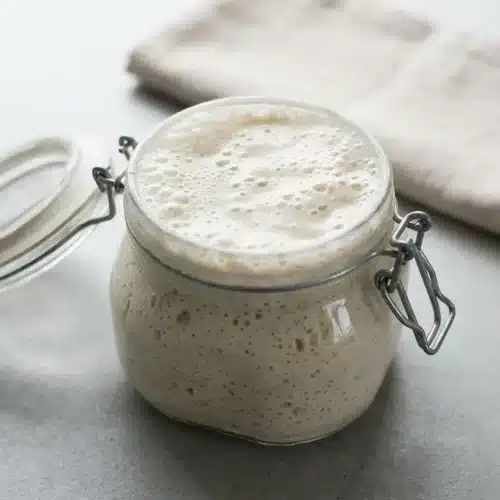
At peak activity, the jar smells gently yeasty and pleasantly tart, with an airy web beneath a domed surface. The rubber band tells the real story.
Mark the starter’s level with a rubber band immediately after each feeding so you can see its rise instead of trying to guess.
Essential Ingredients and Equipment for Sourdough Starter
Each ingredient supports the culture’s structure and activity: whole wheat brings grainy depth, flour provides fresh food, and warm water creates a thick, stirrable batter.
To create the sourdough starter on Day 1
- 1/2 cup (60g) whole wheat flour
- Water, preferably warm around 85 F
To feed the sourdough starter each day (Days 3-7)
- 1x (5lb) bag all purpose flour or bread flour
- Water, preferably warm around 85 F
Whole wheat flour gives the culture a nutrient-rich beginning and often encourages early activity. Unbleached all-purpose or bread flour keeps later feedings consistent, while warm water helps the mixture stay active without making it runny. Equal parts means equal weights in grams, not equal measuring-cup volumes.
I prefer weighing flour and water because a packed cup of flour can make a starter unexpectedly stiff, while a scale keeps the batter’s resistance consistent from one feeding to the next.
Flour Selection: Whole Wheat, Rye, and All-Purpose
Whole wheat is useful on day 1 because the full grain brings more flavor and activity to the jar. For an optional variation, whole-grain rye can replace the whole wheat at the beginning; it often becomes lively quickly and brings a deeper, earthy aroma.
An all-purpose flour only starter also works well when the flour is unbleached. Expect its early activity to be less dramatic than a whole-grain start, and give it time to establish its rhythm. Once mature, either flour path can produce a dependable culture.
Why Water Quality and Temperature Matter
Use water that feels comfortably warm, around 85 F, for mixing and feedings. Very cold water can slow visible fermentation, while hot water can stress the developing culture. If your tap water smells strongly of chlorine, filtered water is a practical choice for a more predictable start.
Recommended Jars and Kitchen Equipment
A wide-mouth 3/4 L glass jar gives the starter room to rise and makes its bubble pattern easy to inspect. Keep a digital scale, a small flexible rubber spatula, and a rubber band or masking tape nearby. The spatula clears flour from the sides, and the marker makes the rise line obvious.
Step-by-Step Daily Guide to Making Sourdough Starter
The first week can look uneven, especially after an energetic beginning. Keep the feeding rhythm steady, watch the texture and aroma, and let the culture develop at its own pace.
Day 1: The Initial Mix
Day 1: Make The Sourdough Starter
- Stir 60 g (1/2 cup) whole wheat flour and 60 g (1/4 cup) warm water together in a large jar with a fork, then cover the jar and leave it at about 70 to 75 F for 24 hours.
The mixture should look like a thick paste with no dry flour pockets.
The warm resting spot gives the first organisms in the flour a comfortable place to begin fermenting. Do not expect a dramatic rise yet; a few pinprick bubbles or a faint grainy aroma are plenty for day 1.
Day 2: Rest and Aeration
Day 2: Rest and Aerate
- Check the surface for small bubbles, stir the starter once or twice if desired, then cover it and leave it for another 24 hours.
A light stir brings air through the paste, but the starter may still look quiet.
Day 2 is mostly observation. Some jars show scattered bubbles around the edges, while others seem unchanged. Both can happen during the early stages, so hold off on adding flour and water until the daily feeding routine begins.
Days 3 to 7: Discarding and Daily Feedings
Days 3 to 7: Daily Feeding Routine
- On day 3, remove and discard 60 g of starter, then mix in 60 g (1/2 cup) all-purpose flour and 60 g (1/4 cup) water with a fork.
Scrape the jar walls clean, cover it, and leave it in a warm spot for 24 hours. - On day 4, remove and discard 90 g of starter before stirring in 60 g (1/2 cup) all-purpose flour and 60 g (1/4 cup) water.
Mix until smooth, clean down the sides, cover, and rest it in warmth for 24 hours. - On day 5, remove and discard 105 g of starter, then blend in 60 g (1/2 cup) all-purpose flour and 60 g (1/4 cup) water.
Cover the smooth mixture and allow it to sit in a warm spot for 24 hours. - On day 6, remove and discard 112 g of starter, then thoroughly stir in 60 g (1/2 cup) all-purpose flour and 60 g (1/4 cup) water.
Wipe down the jar, cover it, and let it rest somewhere warm for 24 hours. - On day 7, remove and discard 116.25 g of starter, then combine the remainder with 60 g (1/2 cup) all-purpose flour and 60 g (1/4 cup) water.
The starter should gradually become lighter, bubblier, and easier to stir after its warm 24-hour rest.
Discarding keeps the acidity from becoming overly concentrated and gives the remaining culture enough fresh flour to ferment. The aroma often changes from raw flour and sweet dough to fruitier, yogurt-like tang. Feed by weight whenever possible, since flour settles differently in every measuring cup.
Day 8 Onward: A Mature Culture
Day 8: Testing and Readiness
- Feed the starter as usual and watch for it to double with abundant bubbles and a springy, marshmallow-like interior, then perform the float test.
Move it to a clean jar if desired once the surface is rounded and the sides show an airy network of bubbles.
A mature culture commonly doubles within 4 to 6 hours after feeding in a warm kitchen. Its texture should feel aerated rather than dense, and a spoonful should pull up in soft, stretchy strands instead of falling like thin paste.
How to Tell When Your Starter Is Ready to Bake
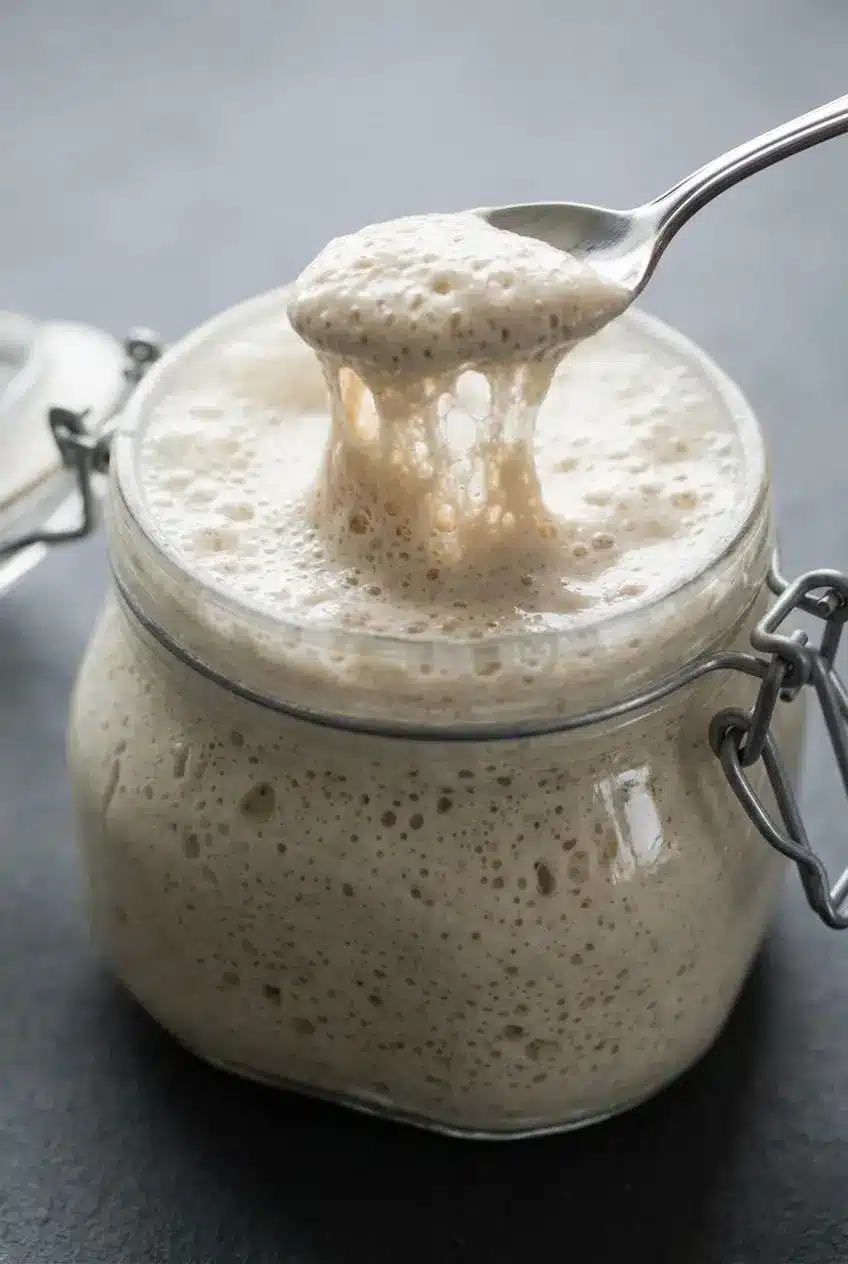
Readiness comes from repeatable behavior, not one lucky burst of bubbles. Look for a starter that rises strongly after feeding, reaches a rounded peak, and smells cleanly tangy and yeasty rather than harsh.
The Float Test and Peak Activity Signs
To try the float test, drop a teaspoon of active starter into a glass of room-temperature water. If it floats, trapped gas is lifting the spoonful. If it sinks, keep feeding and observing rather than treating the test as a failure.
The more useful checkpoint is dependable doubling within 4 to 6 hours after feeding. At that point, the top should be gently domed, the jar walls should show bubbly tunnels, and the starter should feel like an airy sponge when stirred. That strength is well suited to an airy sourdough focaccia as a first bake.
Troubleshooting Common Sourdough Starter Problems
Most starter troubles come down to timing, temperature, or hunger. A quiet jar is frustrating, but it does not automatically mean the culture has failed.
The Day 3 False Start Pause
It is common for a starter to surge with bubbles, then slow down around days 3 and 4. Early bacterial activity fades before the more stable, acid-tolerant wild yeast community becomes noticeable.
- Problem: The starter rose dramatically, then went flat. Likely cause: The early microbial shift is underway. Fix: Continue the scheduled discard and feeding routine rather than starting over.
- Problem: The starter smells sharper than before. Likely cause: Acidity is changing as fermentation develops. Fix: Feed it with fresh flour and water, then watch for a cleaner tang over the following feedings.
Dealing with Hooch Liquid
Dark gray, brown, or clear liquid on top is called hooch. It is an alcohol byproduct that usually signals a hungry starter. Pour it off for a milder flavor, or stir it in for a more pronounced tang, then give the starter its regular feeding.
Sluggish Growth in Cold Kitchens
A starter kept below 70 F may take longer to show its rise. Set the covered jar in an unheated oven with only the light on, or place it near a gently warm appliance. Check that the area feels pleasantly warm, never hot.
- Problem: The mixture stays dense and barely bubbles. Likely cause: The room is cool or the batter is too stiff. Fix: Move it to a warmer place and weigh the flour and water at the next feeding.
- Problem: A dry crust forms on top. Likely cause: The jar is not covered well enough. Fix: Cover the jar loosely so the surface stays moist while the culture can release gas.
Spotting Real Mold vs Safe Starter
A starter can darken slightly around the edges or develop hooch when it needs food. Pink, orange, green, or fuzzy growth is different. Discard a culture with any colored or fuzzy mold, clean the container thoroughly, and begin again with fresh flour and water.
Ongoing Starter Maintenance and Storage Guide
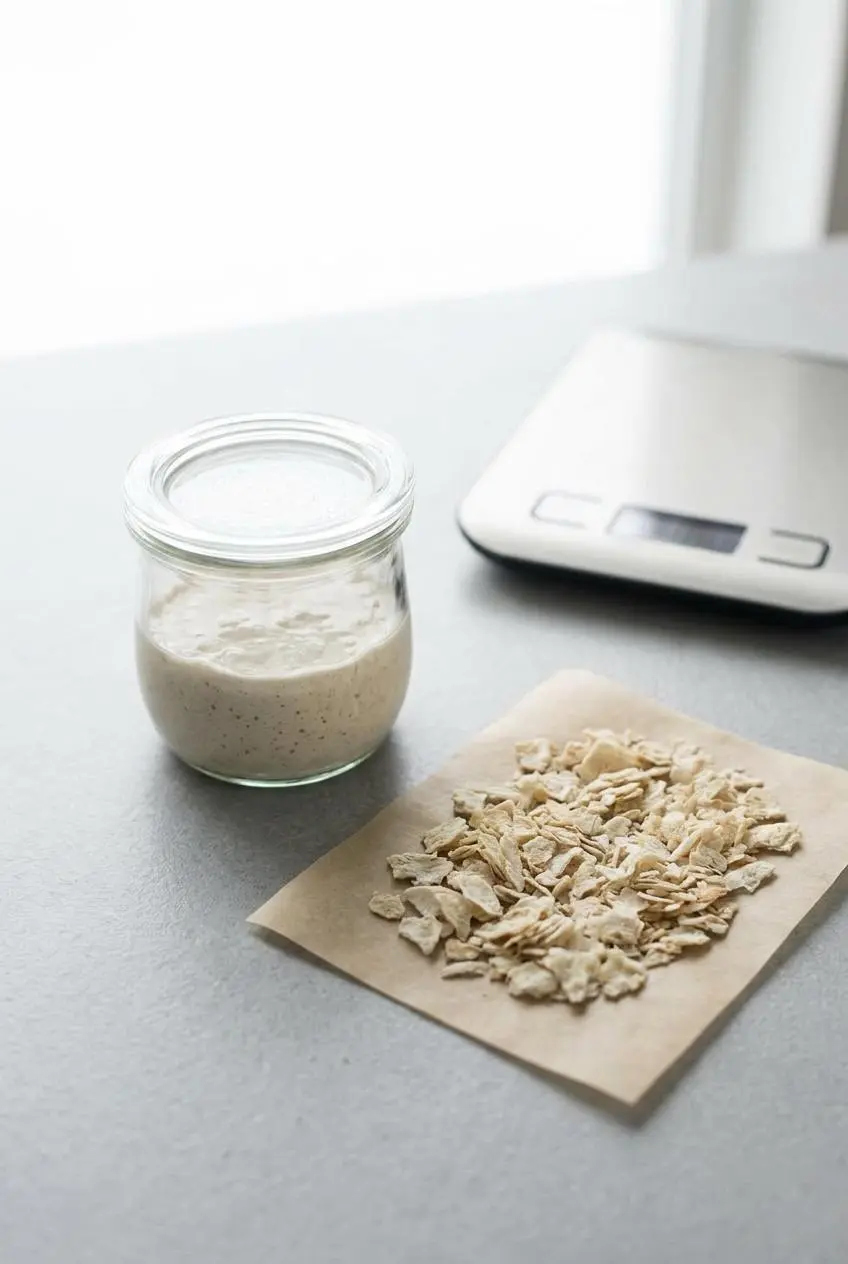
Once the starter is mature, choose a feeding rhythm that matches how often you bake. Consistency matters more than chasing a complicated schedule.
For frequent baking at room temperature, refresh the starter daily. A 1:1:1 feeding means equal weights of starter, flour, and water. For a longer rise before baking, use 1:2:2 or 1:4:4, meaning one part starter to two or four parts flour and the same amount of water.
If you bake less often, feed the starter before placing it in the refrigerator with a loose-fitting lid. When you are ready to bake, bring it out, refresh it, and wait for the familiar rise and bubbly texture before mixing dough.
- Use a micro-starter: Maintain 20 to 30 g of starter rather than a large jar. Feed it at the same weight-based ratio to reduce routine discard.
- Build for baking: Increase the feed when you need enough active culture for dough, rather than keeping a large amount on hand all the time.
- Keep a dried backup: Spread mature starter thinly on parchment, allow it to dry completely, then crumble and store the flakes in an airtight container away from moisture.
Clever Ways to Use Sourdough Discard
Save discard for cooking only after the starter has matured and developed a clean, pleasant aroma. Early-week discard can smell unpredictable, so wait until the culture has reached its regular feeding rhythm.
Use mature discard in quick batters where it adds tang and tenderness without serving as the main bread leavener. Make sourdough discard pancakes for breakfast, stir it into waffle batter for crisp edges, or bake thin sourdough discard crackers for a savory snack.
Keep collected mature discard covered in the refrigerator until you are ready to use it. Add it to recipes that include their own leavening when you want flavor without waiting for a dough to rise.
Conclusion
A lively starter comes from steady feeding, warm conditions, and attention to its rise rather than perfection on any one day. Measure by weight, mark the jar, and let the aroma and bubble pattern guide you.
With patient daily care, that modest jar becomes a lasting baking companion for tangy loaves, focaccia, and plenty of discard cooking. Keep feeding the bubbles.
Frequently Asked Questions
How Long Does It Take for a Sourdough Starter to Be Ready to Bake With?
Most starters need 7 to 10 days to establish a reliable routine. Look for dependable doubling within 4 to 6 hours after feeding. A warm kitchen often helps the culture show activity sooner. Use the float test as an extra check, not the only sign of readiness.
Why Did My Sourdough Starter Stop Rising on Day 3 or 4?
This pause is common during the transition from early bacterial activity to a more stable wild yeast culture. Keep discarding and feeding on schedule. Do not restart simply because the jar goes quiet for a day or two. Maintain a warm resting spot and watch for smaller bubbles returning.
What Is the Dark Liquid on Top of My Sourdough Starter?
The liquid is hooch, which usually means the starter needs fresh flour and water. Pour it off for a milder result, or stir it in for more tang. Feed the starter right afterward using its usual ratio. Frequent hooch can mean the starter needs a more regular feeding rhythm.
Can I Make a Sourdough Starter Using Only All-Purpose Flour?
Yes. Unbleached all-purpose flour can build a strong starter. Whole wheat or rye may show early activity faster, but they are optional. Use equal flour and water weights for each feeding. Give an all-purpose starter extra patience if its first bubbles appear slowly.
Sourdough Starter Recipe

Equipment
- 3/4 L glass jar
- Digital scale
- Small rubber spatula
- Rubber band or masking tape
Ingredients
To create the sourdough starter on Day 1
- 1/2 cup whole wheat flour (60g)
- Water preferably warm around 85 F
To feed the sourdough starter each day (Days 3-7)
- 1 bag all purpose flour or bread flour (5lb)
- Water preferably warm around 85 F
Instructions
Day 1: Make The Sourdough Starter
- Stir 60 g (1/2 cup) whole wheat flour and 60 g (1/4 cup) warm water together in a large jar with a fork, then cover the jar and leave it at about 70 to 75 F for 24 hours. The mixture should look like a thick paste with no dry flour pockets.
Day 2: Rest and Aerate
- Check the surface for small bubbles, stir the starter once or twice if desired, then cover it and leave it for another 24 hours. A light stir brings air through the paste, but the starter may still look quiet.
Days 3 to 7: Daily Feeding Routine
- On day 3, remove and discard 60 g of starter, then mix in 60 g (1/2 cup) all-purpose flour and 60 g (1/4 cup) water with a fork. Scrape the jar walls clean, cover it, and leave it in a warm spot for 24 hours.
- On day 4, remove and discard 90 g of starter before stirring in 60 g (1/2 cup) all-purpose flour and 60 g (1/4 cup) water. Mix until smooth, clean down the sides, cover, and rest it in warmth for 24 hours.
- On day 5, remove and discard 105 g of starter, then blend in 60 g (1/2 cup) all-purpose flour and 60 g (1/4 cup) water. Cover the smooth mixture and allow it to sit in a warm spot for 24 hours.
- On day 6, remove and discard 112 g of starter, then thoroughly stir in 60 g (1/2 cup) all-purpose flour and 60 g (1/4 cup) water. Wipe down the jar, cover it, and let it rest somewhere warm for 24 hours.
- On day 7, remove and discard 116.25 g of starter, then combine the remainder with 60 g (1/2 cup) all-purpose flour and 60 g (1/4 cup) water. The starter should gradually become lighter, bubblier, and easier to stir after its warm 24-hour rest.
Day 8: Testing and Readiness
- Feed the starter as usual and watch for it to double with abundant bubbles and a springy, marshmallow-like interior, then perform the float test. Move it to a clean jar if desired once the surface is rounded and the sides show an airy network of bubbles.