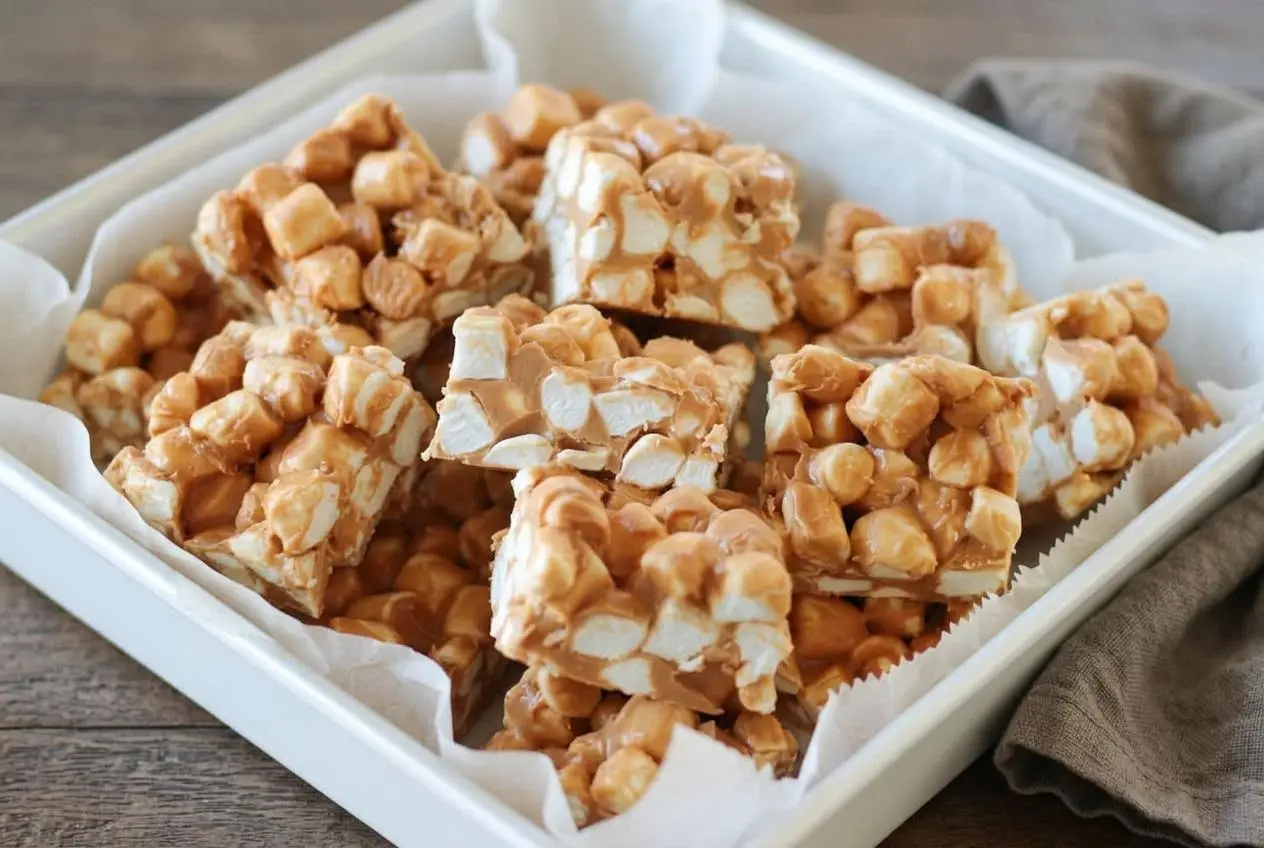
Peanut butter marshmallow squares are a four-ingredient, no-bake dessert with a creamy butterscotch and peanut butter coating wrapped around chewy mini marshmallows. Melt the coating gently, fold it around cold marshmallows, spread in a lined pan, and refrigerate until firm enough to slice.
These sweet-salty bars have a soft, fudge-like coating and distinct marshmallow pieces in every bite. White minis keep the flavor focused on peanut butter and butterscotch; fruity pastel minis turn them into colorful confetti squares.
There’s no oven involved, but temperature still matters. Gentle heat keeps the coating smooth, while cold marshmallows help preserve that fluffy chew. The trick starts before the saucepan does.
Clear space in the refrigerator for your pan before you begin melting the coating.
Ingredients and Smart Substitutions
Butter adds richness, peanut butter gives the coating roasted flavor and body, and butterscotch chips help it set. Mini marshmallows supply the chewy contrast that keeps each square from feeling like a solid piece of fudge.
- 1/2 cup butter (1 stick)
- 1 11 oz. bag of butterscotch chips
- 1 cup peanut butter (creamy or crunchy)
- 1 16 oz. bag of mini marshmallows (regular or fruity)
Butter also softens the chilled coating, making it easier to bite through. The baking chips provide sweetness and structure as they cool. Creamy peanut butter makes a smoother coating, while crunchy peanut butter leaves little peanut pieces throughout.
I prefer conventional peanut butter here because its consistent texture makes the coating easier to manage.
Why Conventional Peanut Butter Gives a Firmer Set
Conventional creamy or crunchy peanut butter generally has a more uniform texture than runny, oil-separated natural peanut butter. Excess free oil can leave the squares softer or give their surface an oily finish.
That doesn’t mean every natural brand will fail. It does mean the result is less predictable, especially with a loose, pourable product. For the most consistent set, choose peanut butter that holds its shape on a spoon.
White Mini Marshmallows or Fruity Pastel Marshmallows?
White mini marshmallows let the roasted peanut and butterscotch flavors take center stage. Fruit-flavored pastel minis add a bright contrast and the familiar confetti appearance associated with Canadian confetti squares.
Check the package before choosing. Color alone doesn’t establish flavor, and different products can taste quite different. Either regular or fruity minis work in this recipe.
Check Bag Weights Before Opening Them
Use the listed weights, not just “one bag.” This batch calls for an 11 oz. bag of chips and a 16 oz. bag of marshmallows. Package sizes vary, so a bag from another brand or market may contain a different amount.
If your package uses different units, check its printed weight information against the required amounts. Don’t assume the whole package is equivalent or compensate by changing the butter or peanut butter.
How to Make Peanut Butter Marshmallow Squares
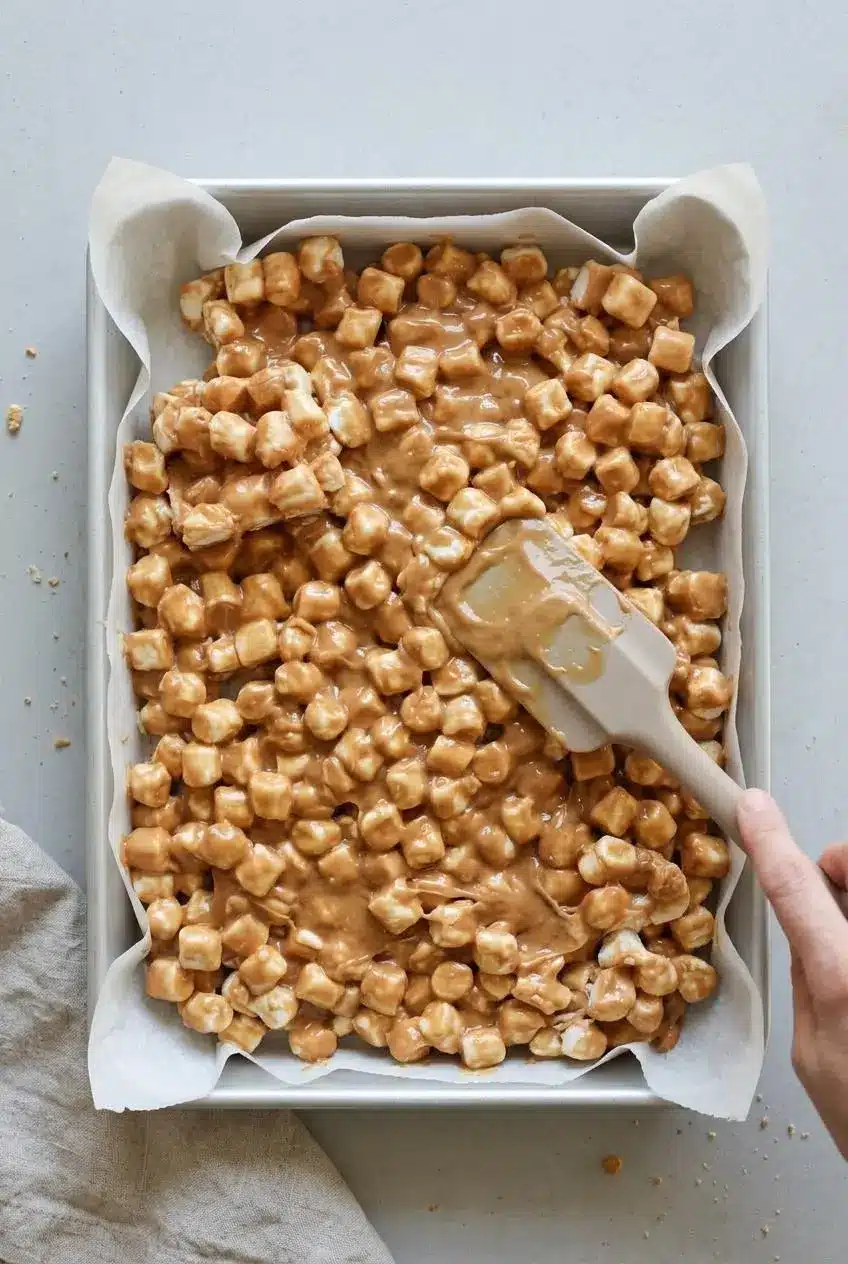
Have your saucepan, large bowl, rubber spatula, parchment paper, and 9×13 baking pan ready. Once the cold marshmallows meet the melted coating, the mixture can thicken quickly.
Allow 20 minutes for prep, about 2 minutes for melting, and 1–2 hours for chilling. The total of 1 hour 22 minutes uses the shorter chilling time; a softer center needs more time to firm up.
- Put the unopened bag of mini marshmallows in the freezer for 15–20 minutes as you organize the remaining ingredients and equipment.
The chilled pieces will better retain their individual shapes when they meet the warm coating. - Fit parchment paper into a 9×13 baking pan.
Covering the bottom and sides keeps the sticky mixture from clinging directly to the pan. - Stir the butter, butterscotch chips, and peanut butter together in a saucepan over medium-low heat, without allowing the mixture to boil.
Stop heating once the butter has fully melted and the coating looks glossy, creamy, and free of lumps. - Empty the cold marshmallows into a large bowl, then cover them with the melted peanut butter and butterscotch coating.
The coating should still flow easily around the marshmallow pieces. - Fold the mixture thoroughly to cover every marshmallow.
Look for an even coating with no dry pockets hiding at the bottom of the bowl. - Transfer the coated marshmallows to the lined pan and use a rubber spatula to pat them into an even layer.
A level surface and filled corners help the slab chill to a consistent thickness. - Refrigerate the filled pan for 1–2 hours.
The coating should feel firm enough for the slab to hold its shape during slicing. - Divide the firm slab into 24 squares.
The cut edges should stay upright rather than slump or smear.
Tips and Troubleshooting for the Best Texture
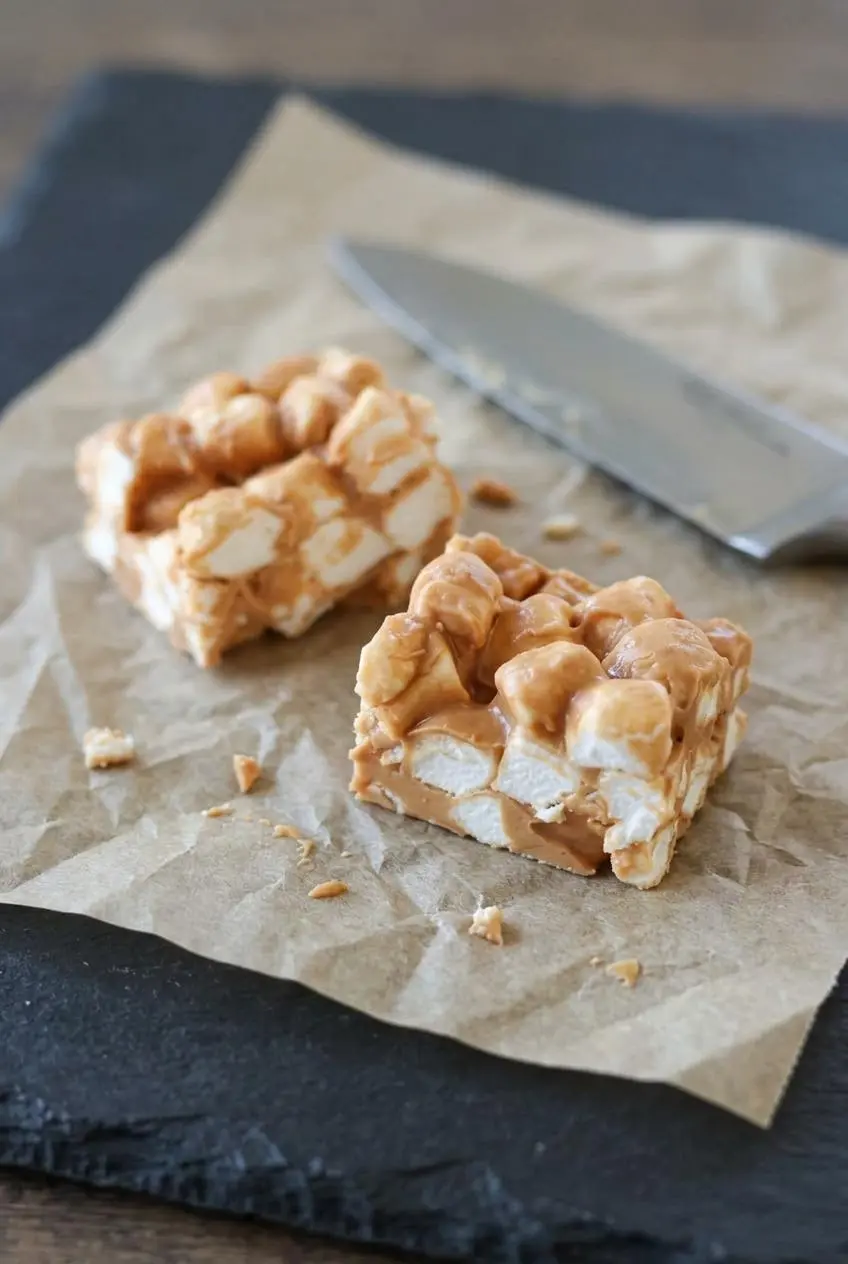
Distinct marshmallow pieces and a cohesive coating depend mostly on heat control and patience during chilling. These adjustments help prevent the most common texture problems.
How to Keep Marshmallows From Melting
The brief freezer rest gives the marshmallows a head start against the warm coating. It helps preserve their shape, but it isn’t a reason to overheat the saucepan mixture.
As an optional second safeguard, let an unusually hot coating cool slightly before pouring it over the marshmallows. Aim for warm rather than piping hot, while keeping it fluid enough to stir. Don’t touch the saucepan bottom to check its temperature.
Fold efficiently once everything meets in the bowl. Cold marshmallows can make the coating thicken quickly, so work around the sides and across the bottom rather than stirring only through the center.
Why the Coating Looks Oily, Grainy, or Too Soft
- Oily or separated coating: Excessive heat or separated peanut butter may be responsible. Use a consistent peanut butter and keep the burner at medium-low rather than increasing the heat to hurry melting.
- Grainy or scorched coating: Boiling or overheating can damage the chips. Stir gently and stop heating as soon as the mixture becomes smooth; more heat won’t necessarily fix graininess.
- Soft squares or ragged edges: The center may not have finished chilling. Let the slab firm through before cutting instead of relying on a set-looking surface.
- Crumbly coating: Check ingredient weights and consider whether the mixture overheated. There isn’t one guaranteed cause or a dependable extra-ingredient fix.
Choosing the Right Pan Size and Scaling
A smaller pan changes thickness, not the amount of mixture. These comparisons use the same unchanged batch:
- 9×13 pan: The standard choice for this recipe, yielding 24 squares.
- 9×9 pan: Makes thicker pieces with a deeper center that may take longer to firm.
- 8×8 pan: Makes still thicker pieces, so check pan capacity and center firmness carefully.
No alternate chilling times or yields are established for the smaller pans. Don’t treat a smaller pan as a smaller-batch formula.
How to Cut Neat Squares Without Dragging Marshmallows
Leave parchment overhang when lining the pan if you want to lift out the chilled slab. Move it onto a cutting board only once the coating holds its shape.
A clean, warm knife can help with slicing. Wipe the blade dry before cutting, then clean away sticky coating between cuts. Firm edges are a better readiness cue than a cold surface alone.
Easy Variations Without Butterscotch, With Three Ingredients, or With Chocolate
Keep these optional adaptations separate from the four-ingredient version above. Different baking chips and added textures can change how the coating tastes and sets.
Peanut Butter Marshmallow Squares Without Butterscotch Chips
You can replace the butterscotch chips using the original 11 oz. chip weight rather than assuming every bag is equivalent.
- Peanut butter chips: Emphasize peanut flavor and remove the butterscotch note.
- Semi-sweet chocolate chips: Create a darker coating with a less sweet-tasting chocolate contrast.
- Milk chocolate chips: Give the squares a sweeter, milder chocolate flavor.
- Salted caramel baking chips: Shift the flavor toward caramel with a salty edge.
Different formulations may melt and firm differently, so don’t expect every replacement to behave exactly like butterscotch chips.
The Three-Ingredient Method Explained
A three-ingredient adaptation uses peanut butter, baking chips, and mini marshmallows, omitting the butter. Without butter’s softening effect, that approach generally produces a denser, firmer chew.
It’s a separate adaptation, not the four-ingredient recipe above. The listed quantities and chilling guidance belong to the butter-containing version; they don’t establish a verified alternate formula.
Pastel Confetti Squares, Chocolate Dips, and Crunchy Additions
- Pastel confetti squares: Choose fruity minis for colorful pieces and a fruit-flavored contrast, or white minis for a more focused peanut butter and butterscotch flavor.
- Chocolate-chip squares: Use a chocolate replacement for a darker appearance and chocolate-peanut butter flavor.
- Chocolate finish: Dip the bottoms of firm squares in melted chocolate or add a drizzle for a contrasting layer.
- Crunchy additions: Chopped salted peanuts, crispy rice cereal, or chow mein noodles add texture against the chewy marshmallows.
For a cereal-centered alternative, try peanut butter cereal treats rather than improvising a large cereal addition here.
Another optional flavor enhancement is pure vanilla extract and flaky sea salt stirred into the warm coating after it comes off the heat. Vanilla adds aroma, while the salt offers contrast to the sweetness.
How to Store and Serve Chilled Confetti Squares
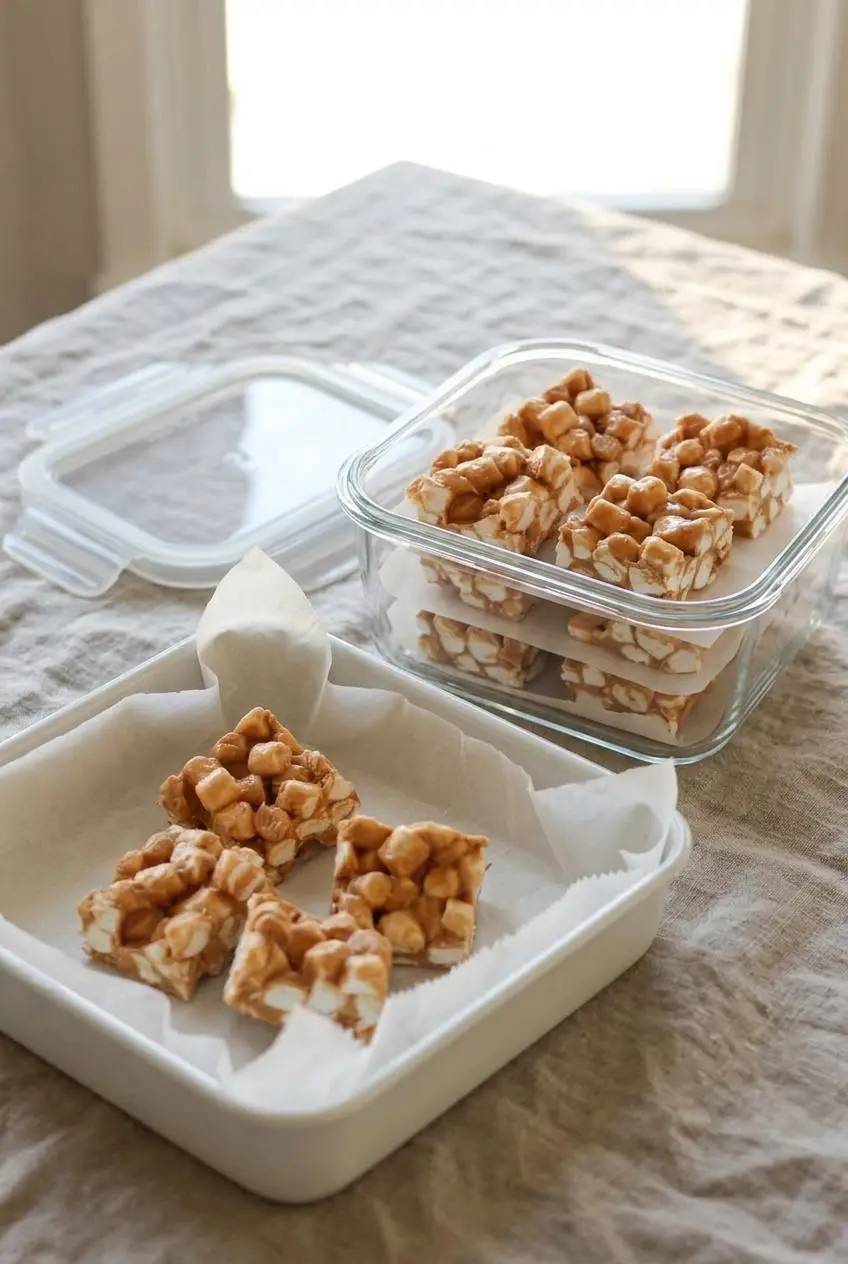
Keep the squares chilled for cleaner handling. Their coating softens as it warms, especially when held in warm fingers.
Place cut squares in an airtight container with parchment between layers to prevent sticking. Refrigerate them, and bring out small portions for serving so the remaining pieces stay cold. These are texture-protection suggestions, not a claim about a specific storage life.
For holiday dessert trays or bake sales, arrange manageable portions rather than leaving the entire batch out. A mixed platter can also include bite-sized peanut butter balls.
For packed treats, start with chilled squares and use chilled packing. Check peanut restrictions before sending them to school or a shared workplace.
Conclusion
These four-ingredient squares pair a creamy peanut butter and butterscotch coating with chewy marshmallow pieces, all without turning on the oven.
Start with cold marshmallows, melt gently, and allow the full chilling period before slicing. A little patience keeps those fluffy pieces distinct and the squares neat.
Frequently Asked Questions
What Are the Ingredients for 3 Ingredient Peanut Butter Marshmallow Squares?
The three components are peanut butter, baking chips, and mini marshmallows. That separate adaptation omits butter and generally has a firmer chew than the four-ingredient version.
Can You Make Peanut Butter Marshmallow Squares Without Butterscotch Chips?
Yes, optional replacements include peanut butter, semi-sweet chocolate, milk chocolate, or salted caramel baking chips. Match the original chip weight and expect flavor, color, and setting differences between products.
What Are Peanut Butter Marshmallow Squares Called?
Common names include Confetti Squares, Butterscotch Confetti Bars, and Peanut Butter Confetti Squares, particularly in Canadian usage. Church window cookies and stained glass bars can describe different confections, so those names aren’t always interchangeable.
Are Colored Mini Marshmallows Fruit-Flavored or Plain?
Many pastel mini marshmallows are fruit-flavored, but check the package because color doesn’t guarantee flavor. This recipe allows regular or fruity minis: white ones keep the coating’s flavor central, while fruity ones add contrast.
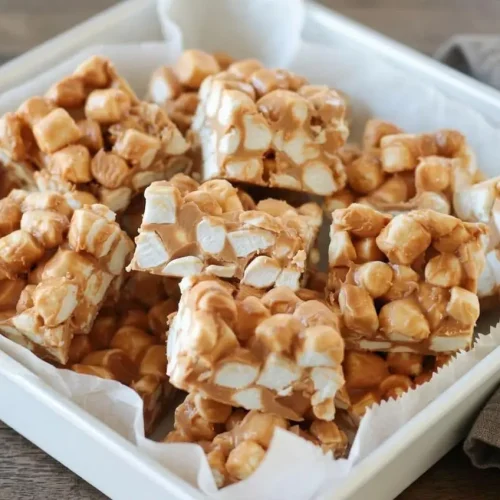
Peanut Butter Marshmallow Squares

Equipment
- 9X13 baking pan
- Parchment Paper
- Saucepan
- large bowl
- Rubber spatula
Ingredients
- 1/2 cup butter (1 stick)
- 1 11 oz. bag of butterscotch chips
- 1 cup peanut butter (creamy or crunchy)
- 1 16 oz. bag of mini marshmallows (regular or fruity)
Instructions
- Put the unopened bag of mini marshmallows in the freezer for 15–20 minutes as you organize the remaining ingredients and equipment. The chilled pieces will better retain their individual shapes when they meet the warm coating.
- Fit parchment paper into a 9×13 baking pan. Covering the bottom and sides keeps the sticky mixture from clinging directly to the pan.
- Stir the butter, butterscotch chips, and peanut butter together in a saucepan over medium-low heat, without allowing the mixture to boil. Stop heating once the butter has fully melted and the coating looks glossy, creamy, and free of lumps.
- Empty the cold marshmallows into a large bowl, then cover them with the melted peanut butter and butterscotch coating. The coating should still flow easily around the marshmallow pieces.
- Fold the mixture thoroughly to cover every marshmallow. Look for an even coating with no dry pockets hiding at the bottom of the bowl.
- Transfer the coated marshmallows to the lined pan and use a rubber spatula to pat them into an even layer. A level surface and filled corners help the slab chill to a consistent thickness.
- Refrigerate the filled pan for 1–2 hours. The coating should feel firm enough for the slab to hold its shape during slicing.
- Divide the firm slab into 24 squares. The cut edges should stay upright rather than slump or smear.