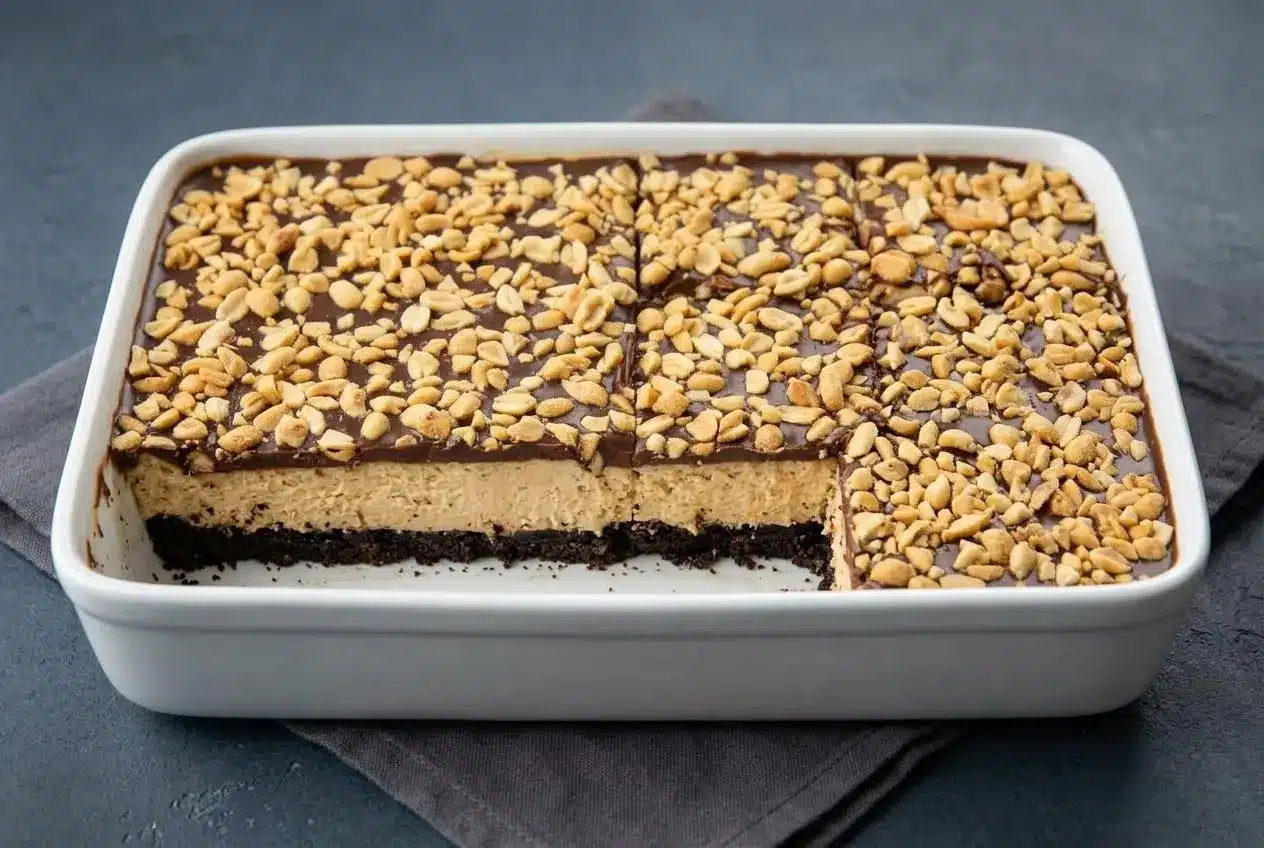
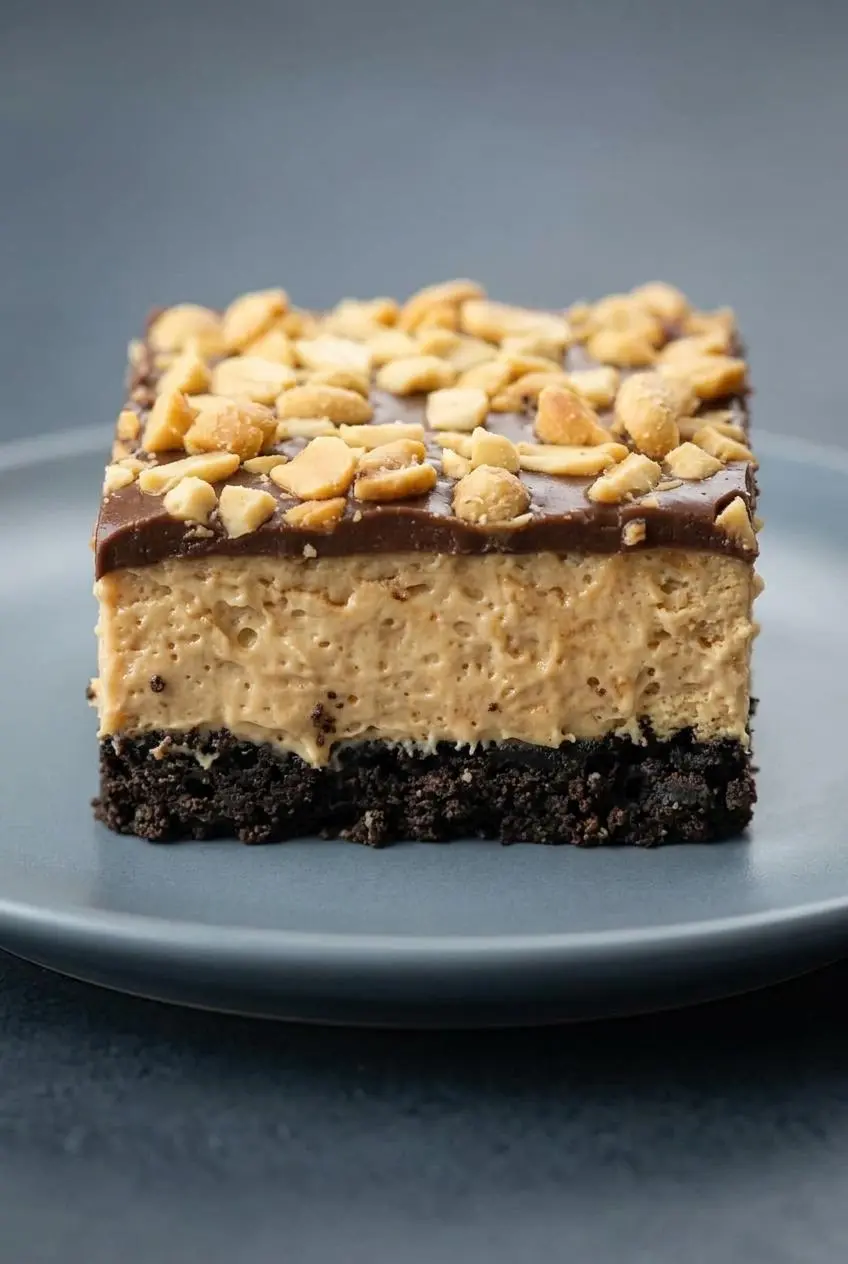
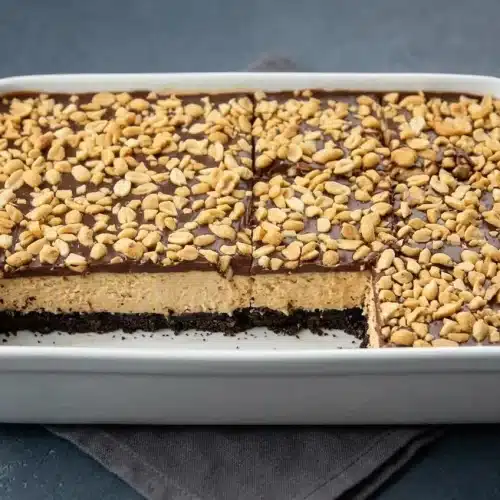
No Bake Buckeye Cheesecake Bars are an easy oven-free dessert with three layers: a chocolate cookie crust, a creamy peanut butter cheesecake filling, and a smooth chocolate ganache topping.
These bars taste like the classic chocolate and peanut butter candy combo, but in a chilled, sliceable dessert. The filling stays rich and mousse-like instead of dense, and the Oreo base adds the right amount of crunch.
They’re also a smart party dessert since a 9×13-inch pan feeds a crowd without the fuss of a springform pan or water bath. The clean-slice trick is what makes them extra satisfying.
Line the pan with parchment paper and leave some overhang on the sides so you can lift the whole slab out before slicing.
Why You Will Love This No-Bake Method
This recipe keeps all the Buckeye flavor while skipping the usual cheesecake stress. There’s no oven to heat up, no cracked top to worry about, and no water bath standing between you and dessert.
The 9×13-inch pan is a big advantage here. Instead of wrestling a tall round cheesecake out of a springform pan, you get straight-edged bars that are easy to portion for holidays, potlucks, or any table where people want chocolate and peanut butter in grab-and-go form.
The texture is different from baked cheesecake in the best way. Baked cheesecake is denser and more custardy, while this filling chills into a softer, silkier layer that feels almost like peanut butter mousse once fully set.
If you like the easy slice-and-serve style of peanut butter bars, this version brings that same convenience with a richer cheesecake center.
Essential Ingredients Explained
Each ingredient has a real job here, from building a crust that holds together to creating a filling that chills firm and slices neatly.
Crust
- 2 cups (216 g) crushed Oreo Cookies, about 20 cookies, crushed
- 1/4 cup (1/2 stick / 57 g) unsalted butter, melted
Cheesecake
- 3 packages (8 ounces each) cream cheese, room temperature
- 1/2 cup (100 g) granulated sugar
- 1 1/4 cups (322.5 g) creamy peanut butter
- 1 teaspoon vanilla extract
- 1/4 cup (57.5 g) sour cream
- 1 1/4 cups (297.5 g) heavy whipping cream, cold
- 3/4 cup (94 g) confectioners’ sugar
Ganache
- 1/2 cup (119 g) heavy whipping cream
- 1 cup (182 g) milk chocolate chips
Topping
- 2 cups (292 g) salted roasted peanuts, coarsely chopped
Cream Cheese: Use Full-Fat Blocks
Full-fat block cream cheese gives this no-bake filling its structure. When chilled, the fat firms up and helps the bars hold clean edges without gelatin, while the tang keeps the peanut butter from tasting flat or overly sweet.
Room temperature cream cheese matters just as much. Softened blocks blend into a smooth base without lumps, but don’t leave dairy sitting out longer than needed. Once it feels pliable, mix it and get the pan back in the refrigerator promptly.
The sour cream adds a little looseness during mixing, but it also rounds out the flavor and keeps the filling from feeling heavy.
The Peanut Butter Rule: Avoid Natural Styles
Use standard creamy peanut butter here, not natural peanut butter. Regular commercial peanut butter is more stable and evenly emulsified, which helps the filling stay smooth and firm after chilling.
Natural styles tend to separate into oil and solids. In a no-bake filling, that can turn the mixture greasy, loose, or stubbornly soft, even if everything else is measured correctly.
I always reach for a classic creamy brand for this kind of dessert because it blends faster and sets with a much cleaner, silkier finish.
Oreo vs Graham Cracker Crust
Oreo crumbs bring the most classic Buckeye flavor. Their deeper cocoa taste works beautifully with peanut butter, and the crust presses into a firm base that stays sturdy once chilled.
Graham crackers are a fine optional swap if you want a lighter, buttery flavor, but the result will taste less chocolatey and a bit more traditional cheesecake bar than candy-inspired dessert bar.
When you press the Oreo mixture into the pan, look for a compact, even surface that resembles packed damp sand with no loose dry patches. That tight compression is what keeps the crust from crumbling later.
If chocolate cookie crusts are your thing, no-bake Oreo cheesecake uses the same kind of sturdy base in another chilled dessert.
Step-by-Step No-Bake Method
This method works best when each layer stays cool and each mixing stage gets its full moment. The crust needs firm pressure, the whipped cream needs real volume, and the ganache needs a little patience before it goes on top.
Crust
- Stir the crushed Oreo Cookies with the melted butter in a small bowl until the crumbs are evenly moistened, then press the mixture firmly across the bottom of a 9×13-inch baking dish.
The crust should look level, dark, and tightly packed with no loose crumb pockets.
Cheesecake
- Beat the cream cheese and granulated sugar in the bowl of a stand mixer fitted with the whisk attachment until completely smooth, or use a handheld mixer if needed.
The mixture should lose all lumps and look thick, pale, and creamy. - Mix in the creamy peanut butter, vanilla extract, and sour cream, scraping the bowl as needed, until the filling base is fully blended.
The texture should be dense but silky, with an even peanut butter color throughout. - Pour the cold heavy whipping cream into a separate bowl and begin whipping with a handheld mixer on low speed, then slowly increase to medium speed.
It will move from loose bubbles to a thicker, softly billowy texture as air builds. - Pause once the cream begins to thicken, add the confectioners’ sugar slowly, then resume mixing from low to medium and finally high speed until stiff peaks form.
The whipped cream is ready when it holds firm peaks that stand up instead of folding back into the bowl. - Fold the whipped cream gently into the peanut butter mixture until no white streaks remain.
The finished filling should stay airy and mousse-like rather than flat or runny. - Spread the filling evenly over the prepared crust and refrigerate the pan for at least 5 hours.
The surface should look smooth and hold its shape when the filling is fully chilled.
Ganache
- Heat the heavy whipping cream in a microwave-safe bowl for 45 seconds to 1 minute, just until hot.
The cream should be steaming but not scorched or boiling over the edges. - Add the milk chocolate chips to the hot cream, let them sit for 5 minutes, then whisk until the ganache is glossy and smooth, about 1 minute.
The finished ganache should look shiny and pourable with no unmelted bits. - Pour the ganache over the chilled cheesecake layer, scatter the chopped peanuts on top, and let the topping set for 15 to 20 minutes before cutting and serving.
The ganache should look settled and slightly firm so it doesn’t drag across the filling when sliced.
Mixing and Folding for a Fluffy Texture
The whipped cream is what gives these bars lift. Since there’s no gelatin here, the filling relies on the fat in the cream cheese plus the air trapped in whipped cream to stay light and sliceable once chilled.
Watch the cream as it changes. It starts foamy and loose, then thickens into soft ripples, and finally turns into stiff clouds that hold their shape. If you stop too early, the filling can slump. If you fold too aggressively, you knock out the air you just built.
Use a broad spatula and fold with slow scoops from the bottom of the bowl up over the top. Rotate the bowl as you go. It takes an extra minute, but the filling spreads with that beautiful firm, mousse-like texture instead of turning heavy.
Preparing the Ganache and Toppings Safely
Ganache is easy, but it’s easy to rush too. Heat the cream only until hot. If you over-microwave it, the cream can scorch and the finished chocolate may taste dull instead of smooth and milky.
After whisking, let the ganache lose its harsh heat before pouring it over the cold cheesecake layer. Very hot ganache can soften the top of the filling and blur the layers, which makes clean slicing much harder later.
The salted roasted peanuts matter too. They bring crunch and a little salt, which helps balance the sweetness in the filling and chocolate topping.
Troubleshooting Your No-Bake Cheesecake Filling
- The filling looks lumpy. The cream cheese was likely still too cold. Let it soften properly before mixing, then beat it with the sugar until fully smooth before adding anything else.
- The filling seems too soft. The whipped cream may have been under-whipped. You want stiff peaks, not soft folds, before combining it with the peanut butter mixture.
- The filling turned dense. Over-mixing after adding the whipped cream can deflate it. Fold gently and stop as soon as the mixture looks evenly blended.
- The bars won’t hold shape when cut. They likely need more chill time. These bars really do need at least 5 hours to set well, and a longer chill gives the neatest slices.
- The crust crumbles apart. It probably was not pressed firmly enough. Use the flat bottom of a measuring cup or glass to compact the crumbs into a tight, even layer.
- The ganache sank into the filling. The cheesecake layer may not have been cold enough, or the ganache was still too hot. Chill the bars thoroughly first and let the ganache cool slightly before pouring.
How to Slice Cheesecake Bars Cleanly
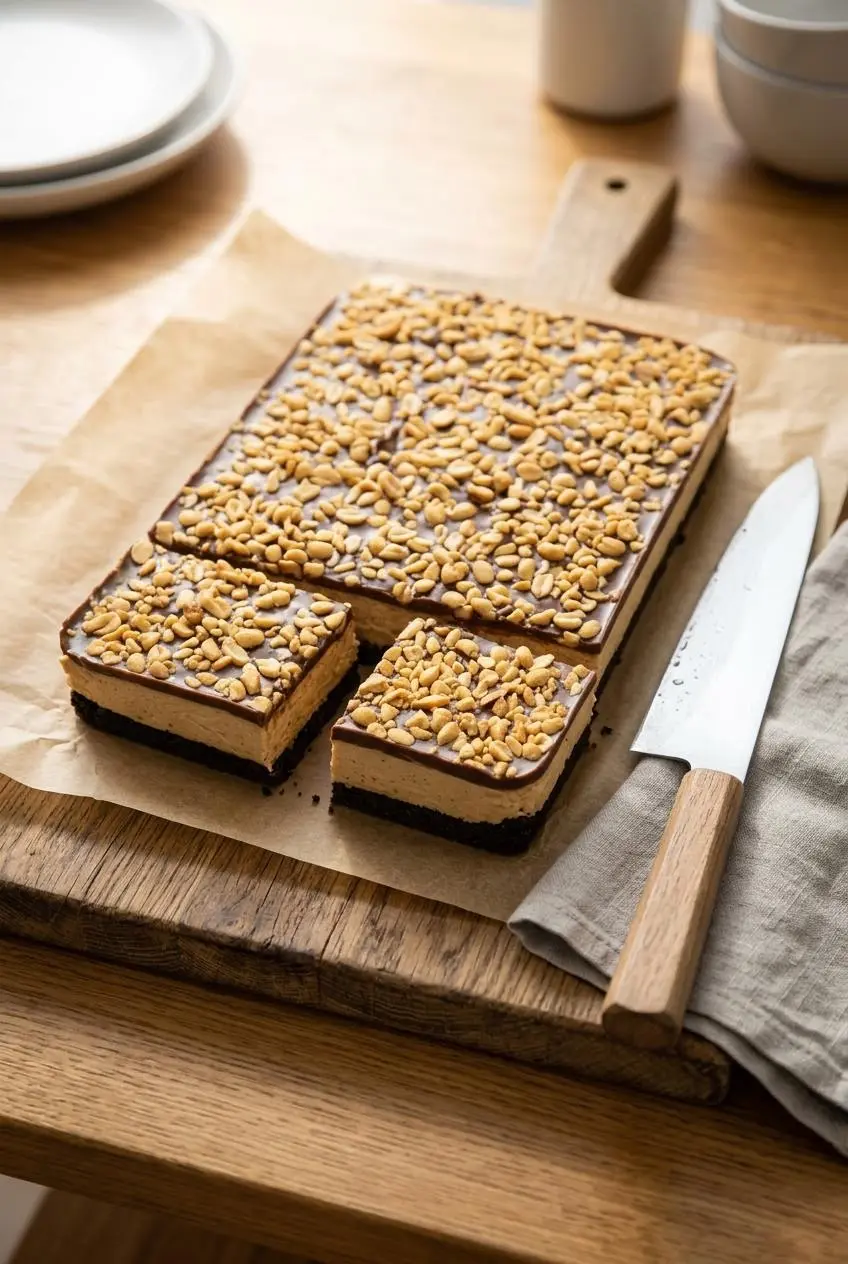
If you want sharp layers instead of smeared chocolate streaks, wait until the ganache is fully set and the bars are well chilled. This is one of those desserts where patience shows up in every slice.
Use a long sharp knife and a tall container of hot water. Dip the blade, wipe it completely dry, make one straight downward cut, then repeat the whole process before every single slice. Yes, every slice. It’s a little fussy, but the results are worth it.
Don’t saw back and forth. Press down cleanly and lift the knife out. Wiping between cuts keeps peanut butter filling and ganache from building up on the blade and dragging across the next square.
The parchment sling helps here too. Lifting the chilled slab onto a cutting board gives you more control than slicing deep inside the pan.
For another dessert where neat edges matter, creamy cheesecake bars follow the same chill-first, wipe-the-knife method.
Flavor Twists and Variations
These changes stay fully optional, so the main recipe keeps its original structure while giving you a couple of easy ways to adjust the flavor.
Gluten-Free Cookie Crust
Swap in gluten-free chocolate sandwich cookies in the same amount as the Oreo crumbs and keep the melted butter ratio the same. You’ll get the same dark cookie flavor and a very similar no-bake structure.
Dark Chocolate Ganache
- Use dark chocolate chips instead of milk chocolate chips if you want a less sweet finish and a deeper chocolate edge.
- Add a light sprinkle of flaky sea salt on top after pouring the ganache to sharpen the chocolate-peanut butter contrast.
- Stir a pinch of espresso powder into the Oreo crumbs if you want the chocolate base to taste a little fuller and darker without making the bars taste like coffee.
- If you prefer a nut-free serving option, skip the chopped peanuts on top and leave the ganache plain.
How to Store and Freeze No-Bake Cheesecake
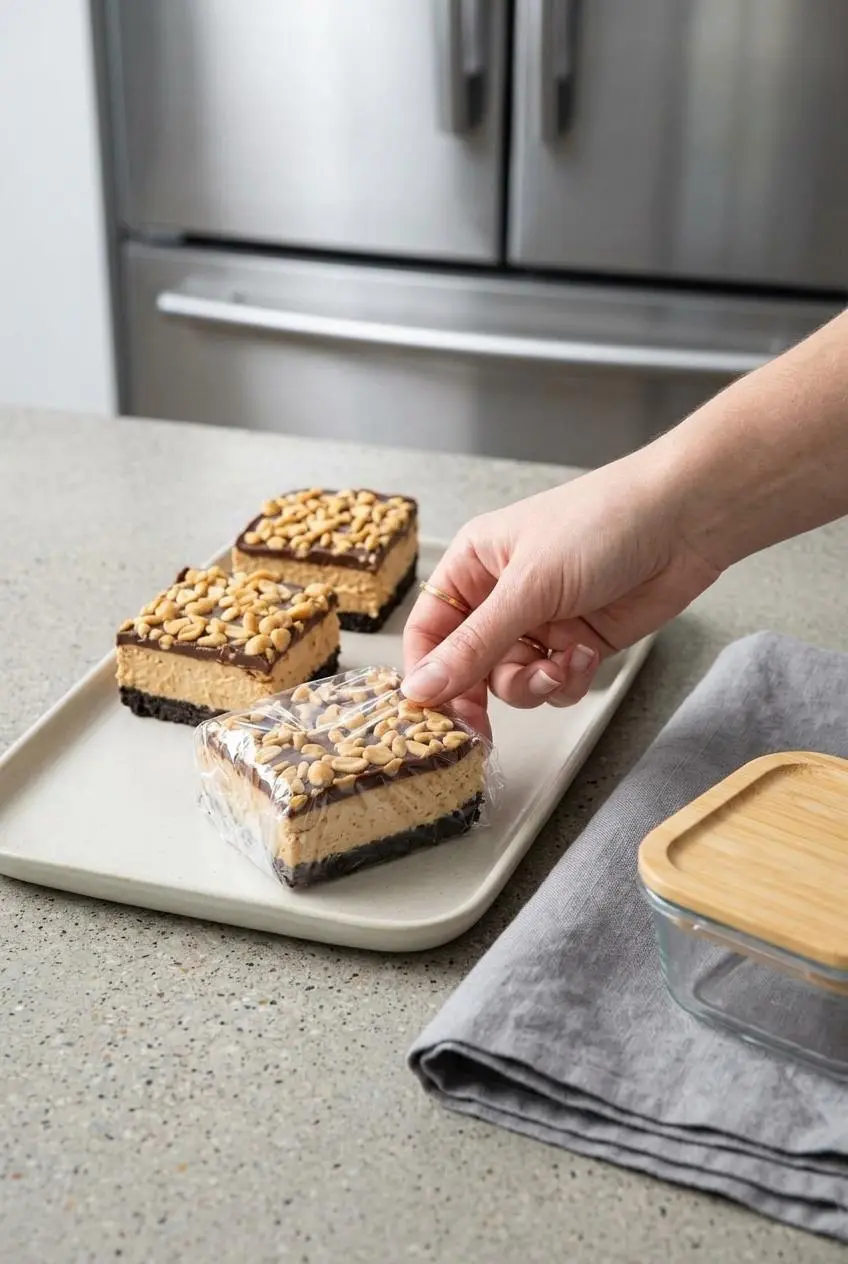
Because this dessert is dairy-rich and chilled, good storage is mostly about keeping the texture smooth and the flavors clean. Cover it well so the filling stays fresh-tasting and the ganache doesn’t pick up refrigerator odors.
Refrigeration Guidelines
Wrap the baking dish tightly with plastic wrap or transfer sliced bars to a well-sealed container. The official recipe stores these bars in the refrigerator for up to 5 days, and keeping dairy cold helps preserve quality and safety, with fresh cream and milk products best kept at refrigerator temperatures of 40 °F or below under safe cold storage for milk and dairy products.
Serve the bars chilled straight from the refrigerator for the cleanest shape. They soften as they sit, so colder bars usually look tidier on a dessert tray.
The Secret to Freezing for Later
You can freeze these bars if you want to make dessert planning easier. Slice them first, place the pieces on a baking sheet until firm, then wrap them tightly and store them in an airtight container or freezer bag for up to 3 months.
Thaw the bars in the refrigerator so the ganache stays smoother and condensation stays more controlled. Keeping the slices wrapped well is the key detail here, since exposed cheesecake can dry out fast in the freezer.
Conclusion
These bars hit that classic Buckeye combination from every angle: crisp chocolate cookie crust, silky peanut butter cheesecake, smooth ganache, and a salty peanut finish. Best of all, you get it without turning on the oven.
Give the layers enough time to chill, keep the ganache from going on too hot, and slice with a wiped warm knife. That little bit of patience is what turns a good pan of bars into a really polished dessert.
Frequently Asked Questions About No Bake Buckeye Cheesecake Bars
Can I use natural peanut butter for these bars?
No. Natural peanut butter can separate and make the filling oily or too soft. Stick with regular creamy peanut butter for the most stable texture. It blends more smoothly and helps the bars set neatly.
Why is my no-bake cheesecake filling runny?
The most common causes are under-whipped cream, cream cheese that got too warm, or over-mixing after folding. Any of those can weaken the structure. Make sure the whipped cream reaches stiff peaks, fold gently, and chill the bars fully before slicing.
How long do these cheesecake bars take to set?
They need at least 5 hours in the refrigerator. That minimum chill time helps the filling firm up enough to cut. If you want especially clean squares, a longer chill works even better. Don’t rush this part.
Can I freeze buckeye cheesecake bars?
Yes. Slice them first, freeze the pieces until firm, then wrap them tightly before storing. Thaw in the refrigerator so the layers stay neater and the ganache keeps a smoother finish.
No Bake Buckeye Cheesecake Bars

Equipment
- Stand mixer with whisk attachment
- Handheld mixer
- 9×13-inch baking dish
- Microwave-safe Bowl
Ingredients
Crust
- 2 cups crushed Oreo Cookies, about 20 cookies, crushed (216 g)
- 1/4 cup unsalted butter, melted 1/2 stick / 57 g
Cheesecake
- 3 packages cream cheese, room temperature 8 ounces each
- 1/2 cup granulated sugar (100 g)
- 1 1/4 cups creamy peanut butter (322.5 g)
- 1 teaspoon vanilla extract
- 1/4 cup sour cream (57.5 g)
- 1 1/4 cups heavy whipping cream, cold (297.5 g)
- 3/4 cup confectioners’ sugar (94 g)
Ganache
- 1/2 cup heavy whipping cream (119 g)
- 1 cup milk chocolate chips (182 g)
Topping
- 2 cups salted roasted peanuts, coarsely chopped (292 g)
Instructions
Crust
- Stir the crushed Oreo Cookies with the melted butter in a small bowl until the crumbs are evenly moistened, then press the mixture firmly across the bottom of a 9×13-inch baking dish. The crust should look level, dark, and tightly packed with no loose crumb pockets.
Cheesecake
- Beat the cream cheese and granulated sugar in the bowl of a stand mixer fitted with the whisk attachment until completely smooth, or use a handheld mixer if needed. The mixture should lose all lumps and look thick, pale, and creamy.
- Mix in the creamy peanut butter, vanilla extract, and sour cream, scraping the bowl as needed, until the filling base is fully blended. The texture should be dense but silky, with an even peanut butter color throughout.
- Pour the cold heavy whipping cream into a separate bowl and begin whipping with a handheld mixer on low speed, then slowly increase to medium speed. It will move from loose bubbles to a thicker, softly billowy texture as air builds.
- Fold the whipped cream gently into the peanut butter mixture until no white streaks remain. The finished filling should stay airy and mousse-like rather than flat or runny.
- Spread the filling evenly over the prepared crust and refrigerate the pan for at least 5 hours. The surface should look smooth and hold its shape when the filling is fully chilled.
Ganache
- Heat the heavy whipping cream in a microwave-safe bowl for 45 seconds to 1 minute, just until hot. The cream should be steaming but not scorched or boiling over the edges.
- Add the milk chocolate chips to the hot cream, let them sit for 5 minutes, then whisk until the ganache is glossy and smooth, about 1 minute. The finished ganache should look shiny and pourable with no unmelted bits.
- Pour the ganache over the chilled cheesecake layer, scatter the chopped peanuts on top, and let the topping set for 15 to 20 minutes before cutting and serving. The ganache should look settled and slightly firm so it doesn’t drag across the filling when sliced.