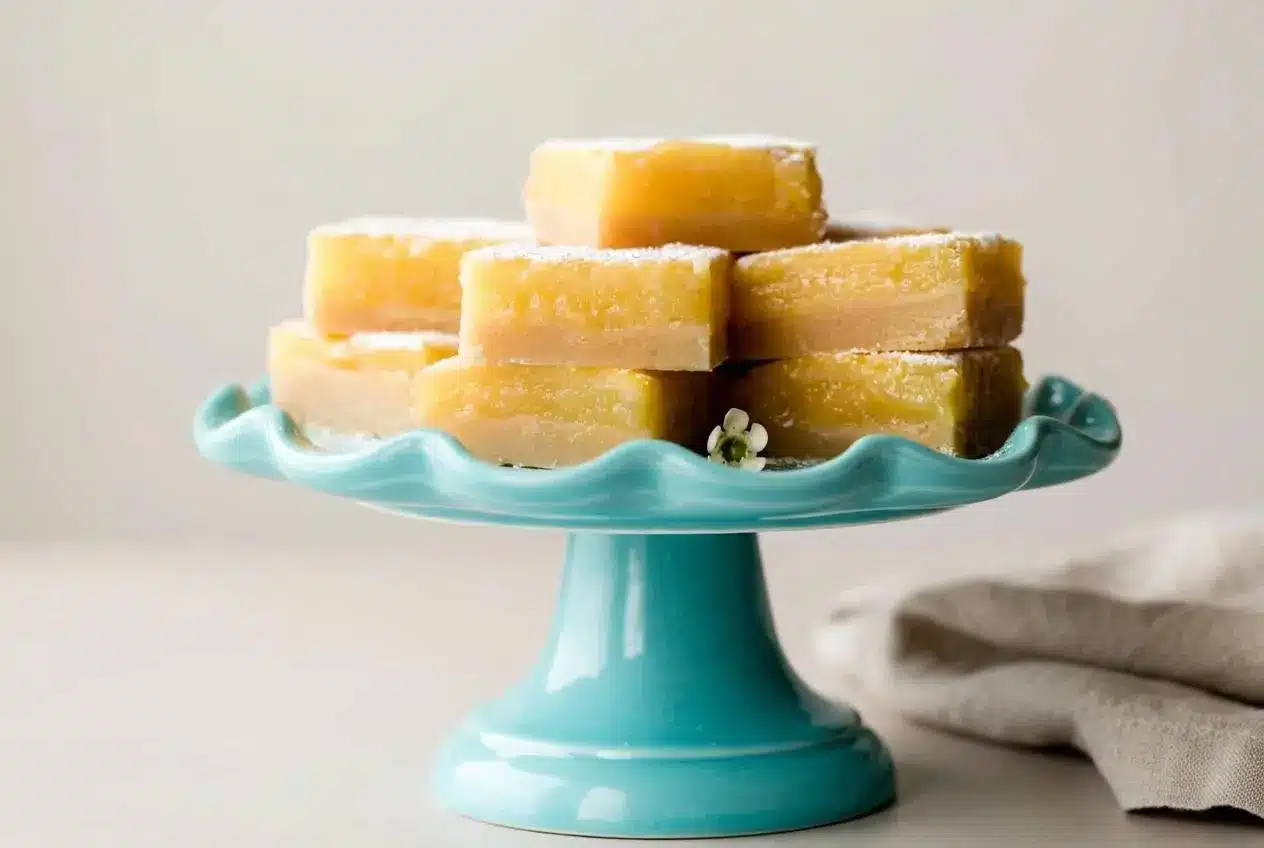
Lemon bars with shortbread crust pair a crisp, buttery parbaked base with tangy baked lemon custard for neat, chilled squares with bright citrus flavor.
These lemon bars with shortbread crust balance rich butter against sharp lemon juice, with a sturdy crust that supports every silky bite.
Fresh zest makes the filling smell especially lively, while a patient chill turns it sliceable. That first clean-cut square is the payoff.
Use a glass 9×13-inch baking dish and leave enough parchment hanging over the sides to lift the slab out without wrestling it from the pan.
Key Ingredients for Lemon Bars With Shortbread Crust
Each ingredient supports the contrast that makes these bars memorable: butter creates structure, flour gives the layers body, and lemon, eggs, and sugar build a smooth, tart filling.
Shortbread Crust
- 1 cup (16 Tbsp; 226g) unsalted butter, melted
- 1/2 cup (100g) granulated sugar
- 2 teaspoons pure vanilla extract
- 1/2 teaspoon salt
- 2 cups + 2 Tablespoons (265g) all-purpose flour (spooned & leveled)
Lemon Filling
- 2 cups (400g) granulated sugar
- 6 Tablespoons (46g) all-purpose flour
- 6 large eggs
- 1 cup (240ml) fresh lemon juice (about 4 lemons)
- 2 teaspoons fresh lemon zest, optional
- optional: confectioners’ sugar for dusting
Melted butter coats the flour thoroughly, creating a compact, tender shortbread layer that stands up well to the wet filling. Vanilla rounds out the butter, while salt keeps the crust from tasting flat.
Use freshly squeezed lemon juice rather than bottled juice. Fresh lemons bring clean acidity plus fragrant oils from the peel, especially when you add the optional zest. Bottled juice can taste harsher and lacks that fresh citrus perfume.
In the filling, sugar softens the lemon’s sharp edge and flour adds gentle thickening power. Eggs set the custard as it bakes, giving it structure without gelatin. Room-temperature eggs mix more smoothly and help the filling bake evenly.
I zest lemons directly over the bowl before juicing so the aromatic oils land in the filling instead of on the cutting board.
Step-by-Step Method for Foolproof Lemon Bars
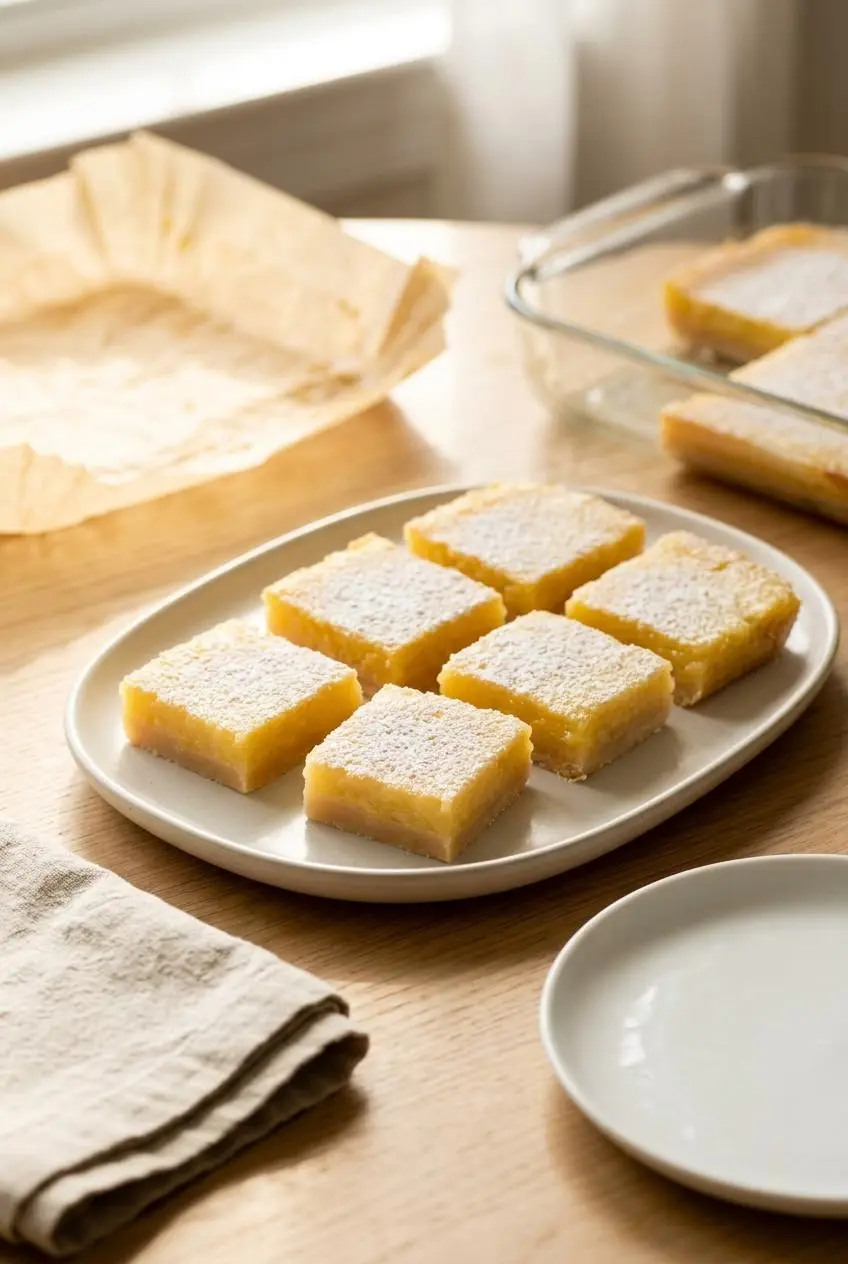
The key sequence is simple: bake the crust first, dock it while warm, then add the lemon filling before the crust cools. That warm-on-warm contact helps the two layers hold together.
- Heat the oven to 325°F (163°C), then line the bottom and sides of a 9×13-inch glass baking pan with parchment, leaving overhang on two sides.
The parchment sling should sit flat against the corners and extend high enough to grip after chilling. - Stir the melted butter, sugar, vanilla extract, and salt in a medium bowl, add the flour, and mix until a thick dough forms; press it firmly and evenly into the prepared pan.
Bake for 20-22 minutes, until the edges turn lightly golden and the kitchen smells warmly buttery. - Prick the warm crust all over with a fork without piercing through to the pan.
These shallow holes give the lemon layer places to grip, helping prevent the crust from sliding away from the filling. - Sift the sugar and flour into a large bowl, whisk in the eggs, then stir in the fresh lemon juice and optional lemon zest until smooth.
The mixture should look fluid and evenly blended, without floury pockets or large frothy bubbles. - Pour the filling over the warm docked crust and bake for 22-26 minutes.
The center should look mostly set and move with a small, even wobble when the pan is gently tapped with an oven mitt. - Cool the pan completely at room temperature for about 2 hours, then refrigerate for 1-2 hours until thoroughly chilled before lifting out, dusting, and cutting.
Wipe the knife clean between cuts for sharp squares, then cover leftovers and refrigerate for up to 1 week. - For freezing, cut fully cooled bars without confectioners’ sugar, arrange them on a baking sheet, and freeze for 1 hour before wrapping each square in aluminum foil or plastic wrap and placing them in a freezer container.
Keep them frozen for up to 3-4 months, thaw in the refrigerator, and add confectioners’ sugar just before serving.
Resist cutting while the bars are warm. The custard needs both its room-temperature cooling period and refrigerator chill to firm into tidy layers instead of spreading under the knife.
Critical Success Tips and Pan Selection
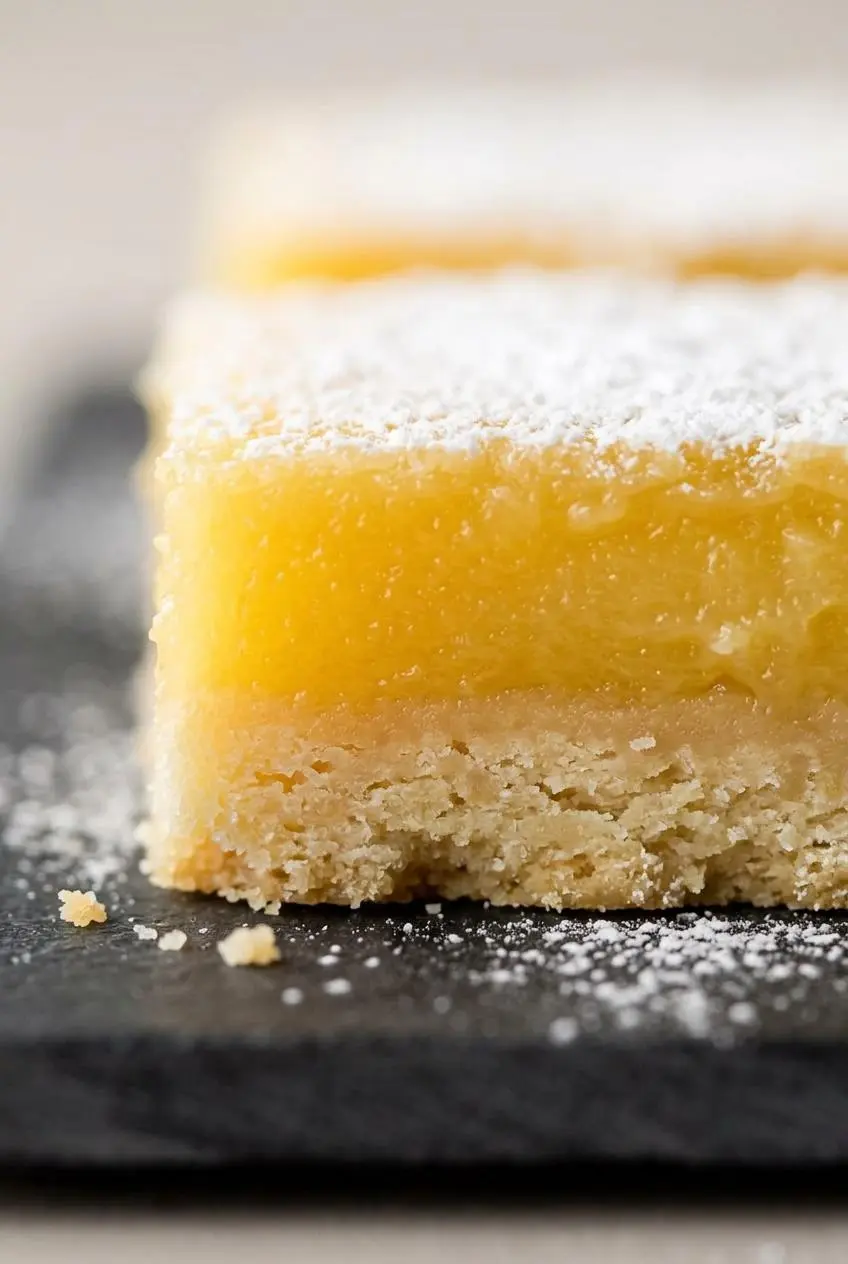
A few details make the difference between bright, clean-tasting lemon bars and ones with dark edges, a loose middle, or a crust that softens too quickly.
Why Glass Baking Dishes Outperform Metal Pans
Choose glass or ceramic for this high-acid filling. Lemon juice can react with uncoated aluminum, which may leave a faint metallic taste and darken the edges. Glass keeps the citrus flavor pure and gives the custard gentler, steadier heat.
Keep the oven at 325°F (163°C). The moderate heat lets the shortbread finish crisping while the egg-rich filling sets gradually. Higher heat can make the custard puff, dry at the edges, or release moisture as it cools.
Mastering the Sieve and Whisk for Silky Curd
Do not skip the fine-mesh sieve. Sifting the filling’s sugar and flour together breaks up clumps before any liquid goes in, so there are no stubborn flour pockets to chase around the bowl later.
Whisk steadily rather than aggressively once the eggs are added. Vigorous whisking traps extra air in the mixture, and that air can rise during baking to form a pale, bubbly top. A few small bubbles are normal.
Melted Butter vs Creamed Butter for Crust Stability
Melted butter makes a dense, cohesive crust because it blends directly through the flour rather than trapping air. Once baked, that compact layer acts as a barrier beneath the lemon filling and gives the bars a firm foundation.
Creamed butter creates a lighter, more aerated dough. That can be lovely for cookies, but here it can leave a more fragile crust that crumbles or absorbs moisture more readily beneath custard.
If you enjoy citrus desserts with a more delicate pastry shell, a classic lemon tart offers a different route to the same bright lemon finish.
Troubleshooting Common Lemon Bar Dilemmas
Most lemon bar problems come down to crust preparation, custard doneness, or cooling. Each has a practical fix for the next batch.
Fixing Runny Centers and Underbaked Custard
- Problem: The middle runs when cut. Likely cause: The filling was removed before the center was mostly set, or the bars were sliced warm. Fix: Bake until the center has only a restrained wobble, cool fully, and chill for at least 2 hours before slicing.
- Problem: The edges are firm but the middle looks wet. Likely cause: The pan came out before the filling finished setting. Fix: Use the gentle pan-tap test while baking and wait for a uniform, softly set center.
- Problem: Chilled bars still seem soft. Likely cause: The filling did not bake long enough. Fix: Do not try to rebake fully chilled bars; serve the squares chilled and use the doneness cue more closely next time.
Managing White Surface Foam and Air Bubbles
A thin white layer or small bubbles on top come from air beaten into the eggs. As the bars bake, the bubbles rise and the egg proteins set at the surface. The flavor is still fine.
For a smoother top next time, sift first and whisk more gently. For the current batch, dust the fully chilled bars lightly with confectioners’ sugar immediately before serving. Sugar applied too soon can dissolve into a sticky coating.
Preventing an Eggy Aftertaste in Lemon Custard
An eggy or sulfur-like aroma usually points to overcooked custard. Eggs need enough heat to set, but excessive heat tightens their proteins too quickly and dulls the clean lemon flavor.
Keep the oven moderate, remove the pan when the center is just set, and use fresh lemon juice. Optional fresh zest also helps because its aromatic oils reinforce the citrus character before any egg flavor takes over.
Storage, Make-Ahead, and Freezing Guidelines
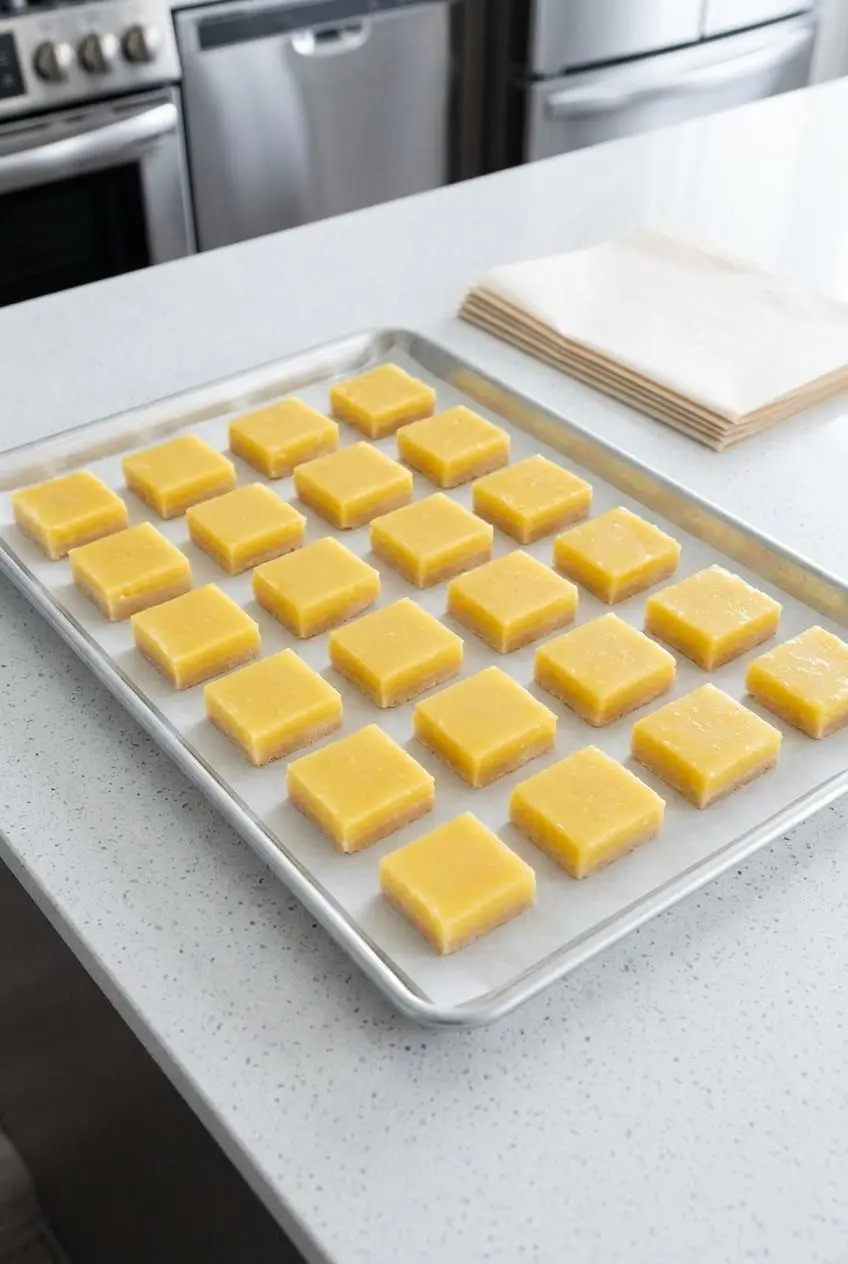
These bars are especially convenient for a dessert tray because the chilled custard cuts cleanly and holds its shape. Keep confectioners’ sugar off until serving so the finish stays powdery instead of damp.
Chilling and Refrigerator Storage
After the bars cool, refrigerate them for at least 2 hours before slicing. Lift the chilled slab out with the parchment sling, dip a knife in hot water, wipe it dry, and clean the blade between cuts for crisp edges.
Store cut bars covered in an airtight container in the refrigerator for up to 1 week. Keep them chilled except while serving, and dust with confectioners’ sugar at the last moment.
Freezing and Thawing Without Texture Loss
Freeze the bars only after they have cooled completely, been cut, and been left without confectioners’ sugar. Arrange the squares in a single layer on a baking sheet for 1 hour, then wrap them individually in aluminum foil or plastic wrap before transferring them to a freezer container.
The wrapped bars keep well frozen for up to 3-4 months. Thaw them in the refrigerator, unwrap once chilled, and finish with confectioners’ sugar shortly before serving.
Flavor Variations and Dietary Adjustments
Keep the core method intact, then choose one optional direction if you want a different citrus profile or need an ingredient swap. Avoid changing the egg-to-lemon balance in the filling, since it controls the custard’s set.
Meyer Lemon Bars With Reduced Sugar
Meyer lemons are sweeter and more floral than standard lemons, so they make a softer, gentler-tasting bar. Reduce the filling’s granulated sugar by 2 to 4 Tablespoons to preserve a lively sweet-tart balance without losing the lemon’s delicate character.
The filling may look slightly more golden with Meyer lemon juice. Watch the same doneness cue: a mostly set center with a subtle, even wobble.
Gluten-Free and Dairy-Free Modifications
For a gluten-free crust, use a quality 1-to-1 gluten-free baking blend that contains xanthan gum in place of the all-purpose flour in the crust. Press it firmly into the pan and parbake until the edges show the same light golden color.
For a dairy-free version, replace the butter with solid plant butter sticks rather than a soft spread. Solid sticks give the shortbread a more stable crumb and are less likely to leave the base greasy or fragile.
Brown Butter and Citrus Infusions
- Brown butter crust: Brown the butter before using it in the crust for toasted, nutty depth beneath the tart filling. Let it cool briefly so it is melted but not scorching hot before mixing.
- Lemon-scented sugar: Rub fresh lemon zest into the filling sugar before sifting it with flour to release more citrus aroma.
- Richer citrus bars: For a creamy alternative with a cheesecake-style layer, try lemon cream cheese bars.
Conclusion
These bars bring together a crisp buttery shortbread crust and a bright, silky lemon filling in every chilled square. Fresh citrus, a glass pan, and a properly parbaked crust keep the flavor clean and the layers distinct.
Give the custard time to cool and chill before cutting. That small bit of patience delivers the neat, bakery-style squares everyone reaches for first.
Frequently Asked Questions
Is It Better to Bake Lemon Bars in a Glass or Metal Pan?
Glass or ceramic is the better choice for lemon bars. Lemon juice is acidic and can react with aluminum, creating a tinny aftertaste. Glass and ceramic help avoid overly dark edges and preserve a clean citrus flavor. Use a 9×13-inch glass baking pan for the method here.
Why Do My Lemon Bars Have a White Layer or Bubbles on Top?
The white layer comes from air incorporated into the egg mixture. Whisked air rises as the filling bakes and forms a thin pale surface. It does not ruin the flavor or texture underneath. Whisk gently next time, then cover the chilled top with a light dusting of confectioners’ sugar.
Why Are My Lemon Bars Runny and How Do I Fix Them?
Runny bars usually need more baking time, more chilling time, or both. Bake until the center is mostly set with only a small, uniform wobble. Cool the pan completely, then refrigerate for at least 2 hours before cutting. Do not slice warm bars, because the custard will collapse and spread.
Can I Freeze Homemade Lemon Bars for Later?
Yes, baked bars freeze well when left without confectioners’ sugar. Freeze cut squares on a baking sheet for 1 hour before wrapping them individually. Wrap tightly in aluminum foil or plastic wrap and store in a freezer container for up to 3-4 months. Thaw in the refrigerator and dust with confectioners’ sugar before serving.
How Do You Keep the Shortbread Crust From Getting Soggy?
Parbaking and docking create the strongest crust-to-filling bond. Bake the crust until the edges are lightly golden and fragrant. Prick the warm crust with a fork without pushing through to the pan. Pour the lemon filling onto the warm crust so the layers set together instead of separating.
Lemon Bars With Shortbread Crust

Equipment
- 9×13-inch Glass Pan
- Glass Mixing Bowls
- Silicone spatula
- Silicone Whisk
- Juicer
- Fine-Mesh Sieve
Ingredients
Shortbread Crust
- 1 cup unsalted butter, melted 16 Tbsp; 226g
- 1/2 cup granulated sugar 100g
- 2 teaspoons pure vanilla extract
- 1/2 teaspoon salt
- 2 cups + 2 Tablespoons all-purpose flour 265g, spooned & leveled
Lemon Filling
- 2 cups granulated sugar 400g
- 6 Tablespoons all-purpose flour 46g
- 6 large eggs
- 1 cup fresh lemon juice 240ml; about 4 lemons
- 2 teaspoons fresh lemon zest optional
- confectioners’ sugar for dusting optional
Instructions
- Heat the oven to 325°F (163°C), then line the bottom and sides of a 9×13-inch glass baking pan with parchment, leaving overhang on two sides. The parchment sling should sit flat against the corners and extend high enough to grip after chilling.
- Stir the melted butter, sugar, vanilla extract, and salt in a medium bowl, add the flour, and mix until a thick dough forms; press it firmly and evenly into the prepared pan. Bake for 20-22 minutes, until the edges turn lightly golden and the kitchen smells warmly buttery.
- Prick the warm crust all over with a fork without piercing through to the pan. These shallow holes give the lemon layer places to grip, helping prevent the crust from sliding away from the filling.
- Sift the sugar and flour into a large bowl, whisk in the eggs, then stir in the fresh lemon juice and optional lemon zest until smooth. The mixture should look fluid and evenly blended, without floury pockets or large frothy bubbles.
- Pour the filling over the warm docked crust and bake for 22-26 minutes. The center should look mostly set and move with a small, even wobble when the pan is gently tapped with an oven mitt.
- Cool the pan completely at room temperature for about 2 hours, then refrigerate for 1-2 hours until thoroughly chilled before lifting out, dusting, and cutting. Wipe the knife clean between cuts for sharp squares, then cover leftovers and refrigerate for up to 1 week.
- For freezing, cut fully cooled bars without confectioners’ sugar, arrange them on a baking sheet, and freeze for 1 hour before wrapping each square in aluminum foil or plastic wrap and placing them in a freezer container. Keep them frozen for up to 3-4 months, thaw in the refrigerator, and add confectioners’ sugar just before serving.