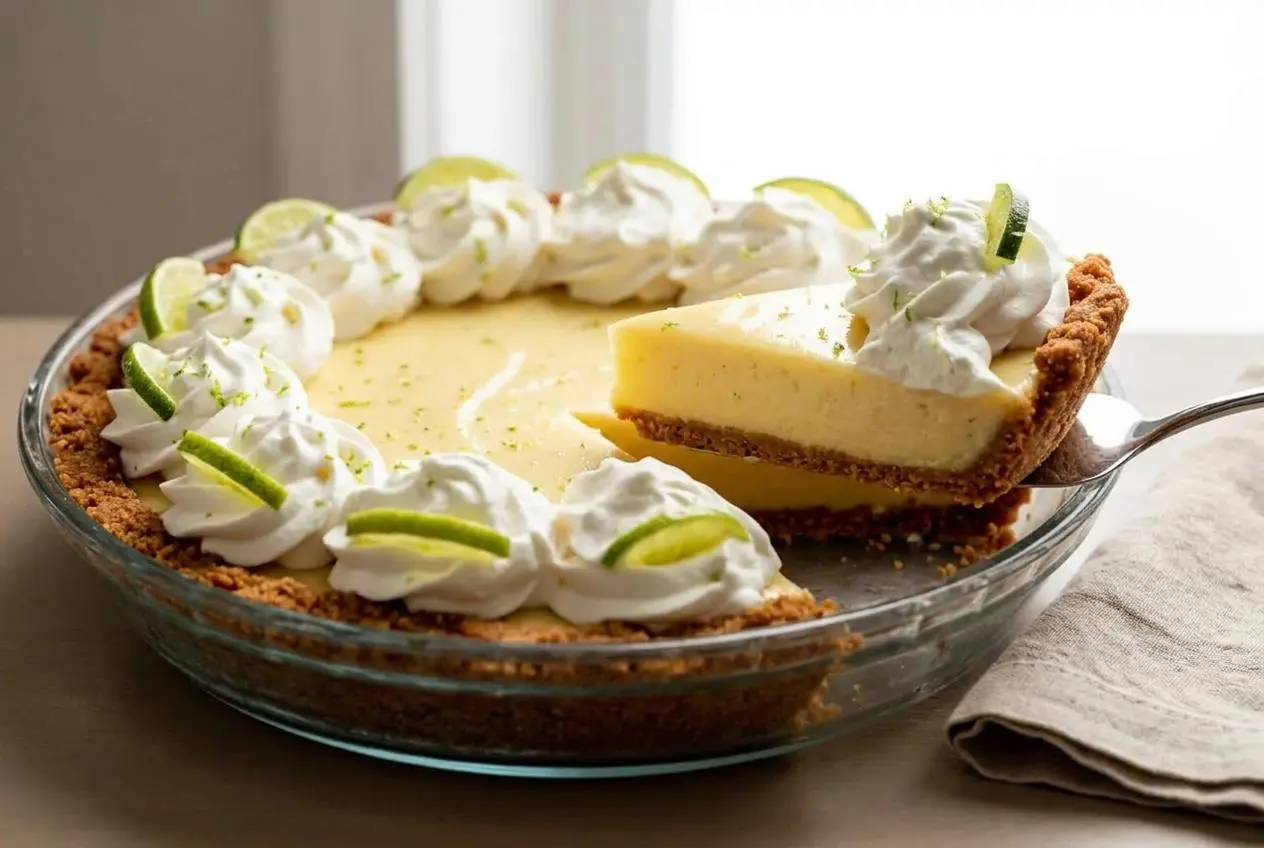
Classic key lime pie pairs key lime juice, sweetened condensed milk, and egg yolks in a crisp pre-baked graham cracker crust. Bake it just until the center gently wobbles, then chill it thoroughly for neat, creamy slices.
This key lime pie recipe balances sharp citrus with rich, silky custard and a buttery macadamia crunch. The filling is glossy and pale yellow before baking, then firms into a cool, clean-cut wedge.
Fresh zest perfumes the filling, while the crust sends a warm citrus-and-nut aroma through the kitchen as it pre-bakes. The gentle center wobble is the whole trick.
Zest fresh limes before juicing them, since the firm peel is much easier to grate than a squeezed, slippery lime.
Ingredients for Key Lime Pie
Each ingredient earns its place: crumbs and butter create structure, macadamias add richness, condensed milk gives body, and lime brings the tart aroma that keeps every bite balanced.
Graham Cracker Macadamia Crust
- 11 (about 160g) full-sheet graham crackers
- 1/2 cup (62g) salted macadamia nuts (I use roasted)
- 2 Tablespoons (25g) granulated sugar
- 5 Tablespoons (71g) unsalted butter, melted
Filling + Topping
- 28 ounces (two 14-ounce cans/793g) full-fat sweetened condensed milk
- 1 cup (240ml) key lime juice
- 4 large egg yolks
- 1 teaspoon key lime zest
- garnish: lime zest, quartered lime slices, macadamia nuts, whipped cream, or meringue topping
Full-fat sweetened condensed milk gives the filling its lush body. Lime juice thickens the mixture as its acidity works with the milk proteins, while the yolks provide extra structure so the pie cuts cleanly without starch. Do not swap in evaporated milk, which will not give the filling the same set.
The crust needs both butter and sugar. Melted butter coats and binds the graham crumbs and nuts, while sugar helps the crust hold together and develop a lightly caramelized flavor in the oven. Salted macadamias add a savory edge that keeps the sweetness from feeling heavy.
I always zest the limes before juicing because the zest carries the fragrant citrus oils that make the filling taste brighter without making it more watery.
How to Make Key Lime Pie Step-by-Step
Build the crust firmly, whisk the filling gently, and trust the wobble rather than waiting for browning. This custard pie should stay pale yellow from edge to center.
- Heat the oven to 350°F (177°C).
Set the 9-inch pie dish nearby so the crust mixture can go straight in once it is combined. - Pulse the graham crackers and macadamias in a food processor until they form coarse crumbs, then stir them with the sugar and melted butter in a medium bowl.
The mixture should look sandy and damp, with no large hard chunks of cracker or nut remaining. - Press the crumb mixture across the bottom and up the sides of an ungreased 9-inch pie dish using moderate, even pressure.
Use a flat-bottomed measuring cup to level the base, then round the bottom corner with a spoon so slices release without the crust crumbling. - Bake the crust for 8 minutes, then leave the oven on.
It should smell buttery and citrusy from the nuts while remaining light in color. - Whisk the sweetened condensed milk, key lime juice, and egg yolks until smooth, then whisk in the lime zest and pour the filling into the warm crust.
Mix only until unified to limit air bubbles; the filling should look glossy, pale yellow, and slightly thickened. - Bake for 18–20 minutes.
The outer ring should look firm while the center gives a small, delicate wobble when the pie dish is nudged. - Cool the pie completely on a wire rack, cover it, and chill for at least 1 hour before serving.
Chilling finishes the set, so the filling should slice smoothly instead of spreading across the plate. - Finish with the garnish of your choice before serving.
A little zest, lime, macadamia, whipped cream, or meringue gives the pale filling welcome contrast.
Key Limes vs. Persian Limes and Bottled Juice
Key limes are small, round, highly aromatic limes with a sharper, more floral acidity than the larger Persian limes commonly sold in U.S. supermarkets. Persian lime juice still makes a tasty pie, but its flavor is milder and less perfumed.
Fresh key limes offer the classic flavor, but juicing enough of the tiny fruits can take patience. A quality bottled option such as Nellie and Joes key lime juice is a practical choice when you want dependable tartness without a long juicing session. Add fresh zest whenever possible, because it supplies the fragrant oils bottled juice cannot bring.
If you use Persian limes, choose fruit that feels heavy for its size and zest it first. The pie will still set properly because the filling depends on the measured juice and its acidity, but expect a rounder citrus profile.
Egg Custard vs. Sour Cream Filling Methods
This pie uses egg yolks for a baked custard that feels smooth, rich, and sturdy enough for a tidy wedge. The yolks also soften the intensity of the lime juice without muting it.
A sour cream version is a different style, usually softer and more pudding-like, with a tangy dairy flavor. For an egg-free chilled alternative, try this no-bake key lime pie; it is a separate preparation rather than a substitution for the baked custard here.
Key Lime Pie Success Tips and Troubleshooting
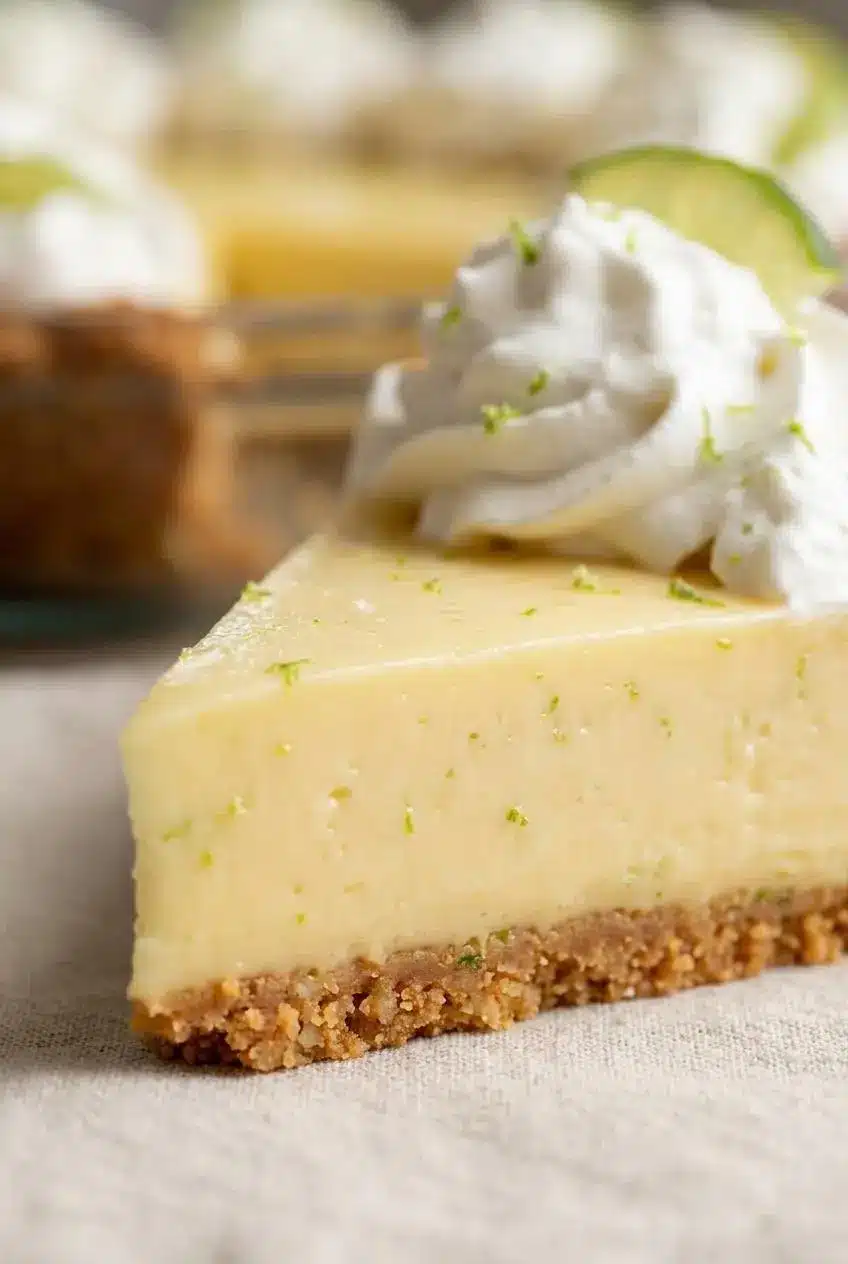
The best key lime pie stays creamy and tart, with a crust that holds its shape. These small checks prevent the most frustrating custard-pie problems.
- The center looks liquid: A finished pie has set edges and a small wobble only in the middle. If the entire filling sloshes when moved, it needs more baking time.
- The filling seems runny after baking: Let it cool completely, then chill it before judging the texture. Warm custard is naturally softer and will not produce clean slices.
- The top browned or cracked: The pie baked too long. Remove it while the surface is pale yellow and the center still trembles gently, because overbaked yolks can curdle and turn the custard rubbery.
- The crust falls apart: Press the damp crumbs firmly into the dish, especially where the bottom meets the sides. A rounded corner supports the filling and makes the first slice much easier to lift.
- The crust is soggy: Do not skip the 8-minute pre-bake. It dries and sets the crumb layer before the filling goes in.
- The flavor is flat: Use fresh zest even when bottled juice is doing the heavy lifting. The zest gives the pie the floral lift people expect from key lime flavor.
Make-Ahead and Storage Instructions

This pie works well for a gathering because the chilling stage happens after baking. Cool it fully, cover it, and refrigerate it for at least 1 hour before serving. For the cleanest texture, keep any whipped cream or meringue topping separate until close to serving.
Leftovers can stay covered in the refrigerator for up to 1 week. Keep the pie in its dish or move individual slices to a covered container so the custard does not absorb refrigerator odors or dry around the cut edges.
For the best appearance, garnish only the slices you plan to serve. Lime slices can release juice over time, and whipped cream softens more quickly than the chilled custard beneath it.
Key Lime Pie Variations and Toppings

The baked pie stands well on its own, but optional changes can shift the crust, topping, or format without changing the core filling method.
Nutty Macadamia or Pecan Crust
The macadamia graham crust in this pie adds buttery richness and a subtle salty crunch. For a different nut profile, roasted pecans bring a deeper, toastier flavor. Digestive biscuits can replace the graham crackers when that is what you have available, though the flavor will be less honeyed.
A light pinch of ground cardamom in the crust is another optional move. It adds a soft herbal warmth that plays nicely with lime, but use a restrained hand so it does not overpower the citrus.
No-Bake Sour Cream Key Lime Pie
A no-bake sour cream filling is a useful alternative when you want an egg-free pie with a softer texture. It has a cool, tangy, pudding-like character rather than the firm, silky slice of a baked yolk custard.
Because the texture and setting method are different, treat it as its own dessert rather than changing this filling midstream. The baked version here is the better choice when you want defined wedges and a classic custard finish.
Topping Choices: Whipped Cream vs. Torched Meringue
- Whipped cream: Lightly sweetened whipped cream cools the tart lime and keeps the presentation relaxed and fresh.
- Torched Swiss meringue: Use leftover egg whites for glossy meringue, then lightly torch the surface for a marshmallow-like finish and dramatic contrast.
- Lime and macadamias: Quartered lime slices, extra zest, and chopped macadamias add color and crunch without covering the custard.
For a portable dessert-table option with the same bright flavor direction, these key lime pie bars are easier to portion and carry.
Conclusion
This pie gets its character from contrast: a crisp, buttery macadamia crust beneath a silky filling that is sweet enough to welcome the lime’s sharp edge. Pre-baking the crust and stopping at the gentle wobble make the texture reliable.
Give the pie time to chill, then serve it cold with the garnish you enjoy most. That first clean, creamy slice is worth the wait.
Frequently Asked Questions
Can I Use Bottled Key Lime Juice Instead of Fresh Limes?
Yes. High-quality bottled key lime juice, including Nellie and Joes, gives this pie a bright, reliably tart flavor and saves a great deal of juicing. Pair bottled juice with fresh key lime zest when possible. The zest restores the floral citrus aroma that bottled juice alone cannot provide.
What Is the Difference Between Key Limes and Regular Limes?
Key limes are smaller, rounder, more aromatic, and generally more acidic than standard Persian limes. Their flavor has a distinctly floral edge. Persian limes are larger and easier to juice, with a milder flavor. They work in this pie, especially when you include fresh zest.
How Do I Know When Key Lime Pie Is Finished Baking?
Look for firm edges and a pale yellow surface. The center should still wobble gently when you nudge the pie dish. If the center moves like loose liquid, keep baking. Do not wait for the top to brown, since browning is a sign the custard may be overbaking.
Can You Freeze Key Lime Pie for Later?
Freezing directions are not included for this version, so refrigerating the cooled pie is the most dependable storage approach. Keep toppings separate so the custard and crust retain their best texture. For planned serving, bake, cool, cover, and chill the pie before adding whipped cream, meringue, lime slices, or extra zest.

Key Lime Pie Recipe

Equipment
- Food Processor or Chopper
- Glass Mixing Bowl
- 9-inch Pie Dish
- Citrus Zester
- Citrus Juicer
- Whisk
Ingredients
Graham Cracker Macadamia Crust
- 11 full-sheet graham crackers about 160g
- 1/2 cup salted macadamia nuts 62g, roasted recommended
- 2 Tablespoons granulated sugar 25g
- 5 Tablespoons unsalted butter 71g, melted
Filling + Topping
- 28 ounces full-fat sweetened condensed milk two 14-ounce cans/793g
- 1 cup key lime juice 240ml
- 4 large egg yolks
- 1 teaspoon key lime zest
- garnish: lime zest, quartered lime slices, macadamia nuts, whipped cream, or meringue topping optional
Instructions
- Heat the oven to 350°F (177°C). Set the 9-inch pie dish nearby so the crust mixture can go straight in once it is combined.
- Pulse the graham crackers and macadamias in a food processor until they form coarse crumbs, then stir them with the sugar and melted butter in a medium bowl. The mixture should look sandy and damp, with no large hard chunks of cracker or nut remaining.
- Press the crumb mixture across the bottom and up the sides of an ungreased 9-inch pie dish using moderate, even pressure. Use a flat-bottomed measuring cup to level the base, then round the bottom corner with a spoon so slices release without the crust crumbling.
- Bake the crust for 8 minutes, then leave the oven on. It should smell buttery and citrusy from the nuts while remaining light in color.
- Whisk the sweetened condensed milk, key lime juice, and egg yolks until smooth, then whisk in the lime zest and pour the filling into the warm crust. Mix only until unified to limit air bubbles; the filling should look glossy, pale yellow, and slightly thickened.
- Bake for 18–20 minutes. The outer ring should look firm while the center gives a small, delicate wobble when the pie dish is nudged.
- Cool the pie completely on a wire rack, cover it, and chill for at least 1 hour before serving. Chilling finishes the set, so the filling should slice smoothly instead of spreading across the plate.
- Finish with the garnish of your choice before serving. A little zest, lime, macadamia, whipped cream, or meringue gives the pale filling welcome contrast.