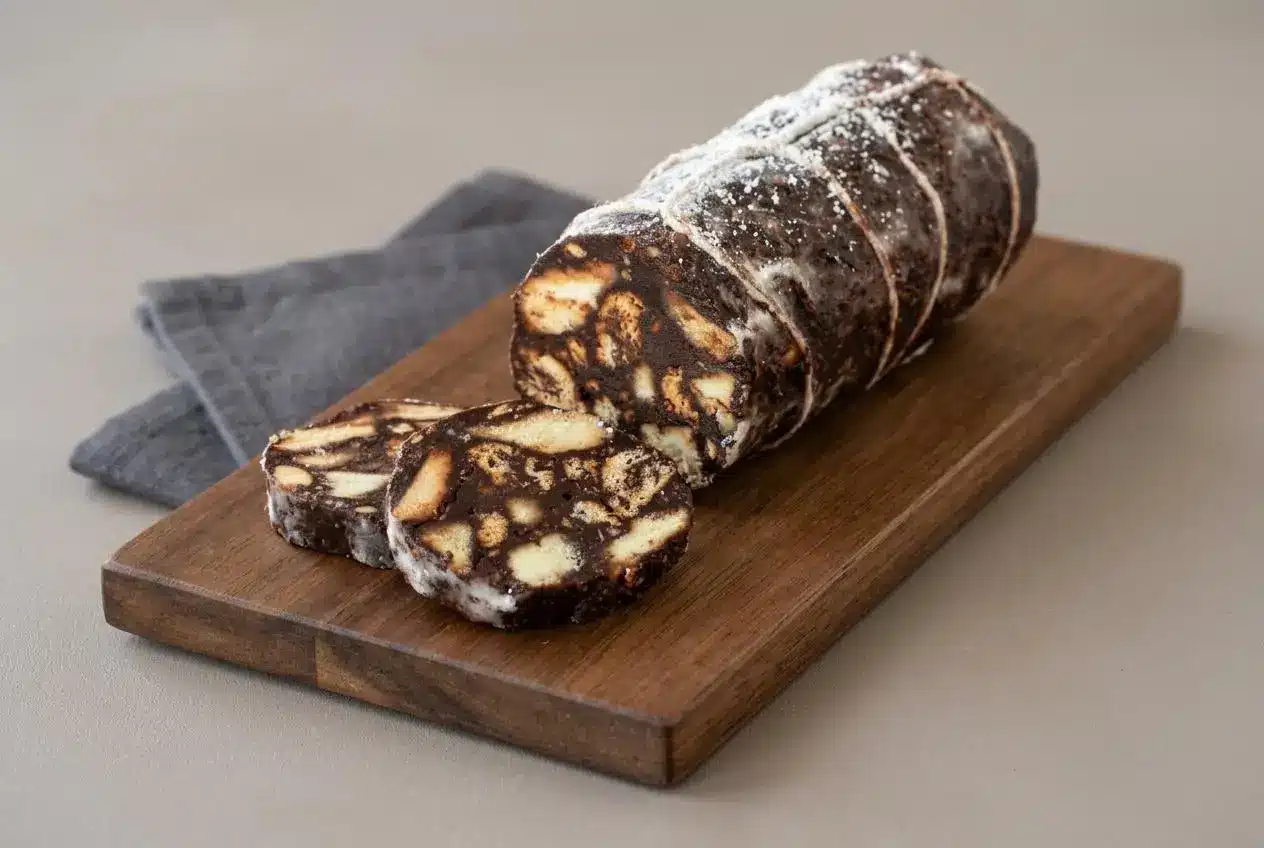
Chocolate salami is a European no-bake dessert made with chocolate, butter, sugar, broken cookies, and nuts, then shaped into a log and chilled. It contains no meat. This eggless version has a fudgy chocolate texture with crisp cookie pieces and toasted almond crunch.
Known in Italy as salame di cioccolato, chocolate salami gets its name from its speckled slices. Pale biscuit pieces resemble the marbling in cured salami, while a light powdered sugar coating finishes the resemblance.
You can make two logs without a mixer or oven, using a bowl, saucepan, and wooden spoon. The hands-on prep takes about 15 minutes, followed by chilling. The payoff is that first marbled slice.
Set out the butter before starting so it softens enough to beat smoothly without becoming oily.
Essential Ingredients for Authentic Chocolate Salami
Chocolate and cocoa build depth and structure, butter softens the bite, and sugar balances bitterness. Cookies provide pale marbling, almonds add toasted crunch, and Marsala or milk supplies moisture to bring the mixture together.
- 8 ounces (226 grams) dark chocolate
- 10 ounces (283 grams) sweet cookies
- 4 ounces (1 stick or 113 grams) unsalted butter (softened)
- 1 cup (110 grams) powdered (icing) sugar (sieved)
- ½ cup (35 grams) cocoa powder
- ⅓ cup (80ml) sweet marsala wine (or milk )
- ⅓ cup (30 grams) chopped toasted almonds
Dark chocolate firms up in the refrigerator, while butter keeps the finished dessert from eating like a solid chocolate bar. Sieved powdered sugar blends into the butter more readily than coarse sugar, giving the chocolate binder a smoother texture.
Sweet Marsala adds a warm aroma. For an alcohol-free version, use the milk alternative in the ingredient list at the same listed quantity. Keep the liquid from being refrigerator-cold when you incorporate it so it blends more readily.
I prefer cookies with a pale interior and a clean snap because their pieces stay distinct against the dark chocolate.
Selecting the Right Chocolate and Cocoa
Choose a bittersweet or semisweet dark chocolate bar that you enjoy eating. Chocolate containing cocoa butter provides the melting and setting qualities needed here; candy coatings behave differently and aren’t the best choice for this texture.
You don’t need to chase a particular cocoa percentage. A darker bar gives a more assertive chocolate flavor, while semisweet chocolate produces a sweeter result. The cocoa powder adds another layer of chocolate intensity.
Unsweetened Dutch-process cocoa works well for a rounded flavor and dark color. Sift out any compacted lumps before mixing. Otherwise, dry cocoa pockets can remain hidden among the cookie pieces.
Best Cookies to Mimic Salami Fat Marbling
Use crisp, dry cookies rather than soft or cream-filled ones. The pieces should absorb some moisture from the binder without disappearing into it.
- Maria cookies or tea biscuits: Pale interiors and a restrained sweetness make them a good choice for distinct speckles.
- Digestive biscuits: Their grainier texture creates a more rustic slice with a slightly wheaty flavor.
- Petit beurre: These buttery biscuits complement the chocolate and break into attractive irregular pieces.
- Biscotti: Their harder crunch gives a firmer bite; break especially tough pieces smaller to make slicing easier.
Cookie texture matters more than perfectly uniform pieces. Keep a mixture of small chunks and crumbs, with enough larger pale pieces to make the cross-section recognizable.
Toasted Nuts for Aroma and Contrast
Toasted almonds add a roasty aroma and a crisp bite that contrasts with the soft chocolate binder. Their pale centers also contribute to the marbling.
If you toast the almonds yourself, use gentle dry heat and stir frequently, stopping when they smell nutty rather than waiting for a very dark color. Let them cool before chopping and mixing. Warm nuts can soften the butter mixture unnecessarily.
Chop them into pieces that distribute through the log without creating large obstacles for the knife. The nuts should add crunch to each slice, not dominate it.
How to Make Chocolate Salami
This recipe makes two logs and serves about 20 people. Allow about 15 minutes for preparation and 3 hours for chilling, for a total of about 3 hours and 15 minutes.
- Set a heatproof bowl containing the chopped chocolate above barely simmering water, keeping its base clear of the water, and stir occasionally before taking the melted chocolate off the saucepan.
The chocolate should look fluid and smooth, without unmelted pieces. - Use your hands to break the cookies into irregular chunks and collect them in a separate bowl.
A mixture of small pieces and larger pale fragments will give the slices their marbled appearance. - Work the softened butter and sieved powdered sugar together in a large bowl with a wooden spoon.
The mixture should become creamy, with no visible butter lumps. - Beat the cocoa powder and Marsala, or the listed milk alternative, gradually into the butter mixture.
The color should become evenly dark as the cocoa blends in. - Fold in the melted chocolate once it has cooled slightly, stirring until the binder has a consistent texture.
It should look thick and glossy rather than hot and runny. - Distribute the broken cookies and chopped toasted almonds through the chocolate mixture with thorough folding.
Every piece should have a chocolate coating, with no loose dry pockets at the bottom. - Lay out two separate lengths of plastic wrap, doubling each to strengthen it.
Each sheet should have enough room around the mixture to enclose a log and seal its ends. - Portion the mixture equally onto the sheets, arrange each portion lengthwise, and use the wrap to compress it into a cylinder before twisting the ends closed.
The logs should feel compact, with no obvious gaps beneath the wrapping. - Transfer both wrapped logs to a baking tray and begin refrigerating them.
The tray supports the soft cylinders while the chocolate starts to firm. - Inspect the logs after 30 minutes, gently rounding any flattened areas and tightening the wrapped ends again.
The mixture should still yield to light pressure, allowing you to smooth its shape. - Complete the 3-hour refrigeration period, or leave the wrapped logs chilled overnight.
A fully set log should feel firm enough to cut without collapsing. - For longer keeping, place the wrapped logs in the freezer instead of continuing refrigerator storage.
Keep the wrapping snug against the chocolate to protect its surface. - Unwrap the set logs when ready to serve and, if desired, sift a light coating of powdered sugar over them.
The chilled surface should be firm and dry enough to hold the white coating. - Cut the logs into rounds and keep the remaining chocolate salami chilled.
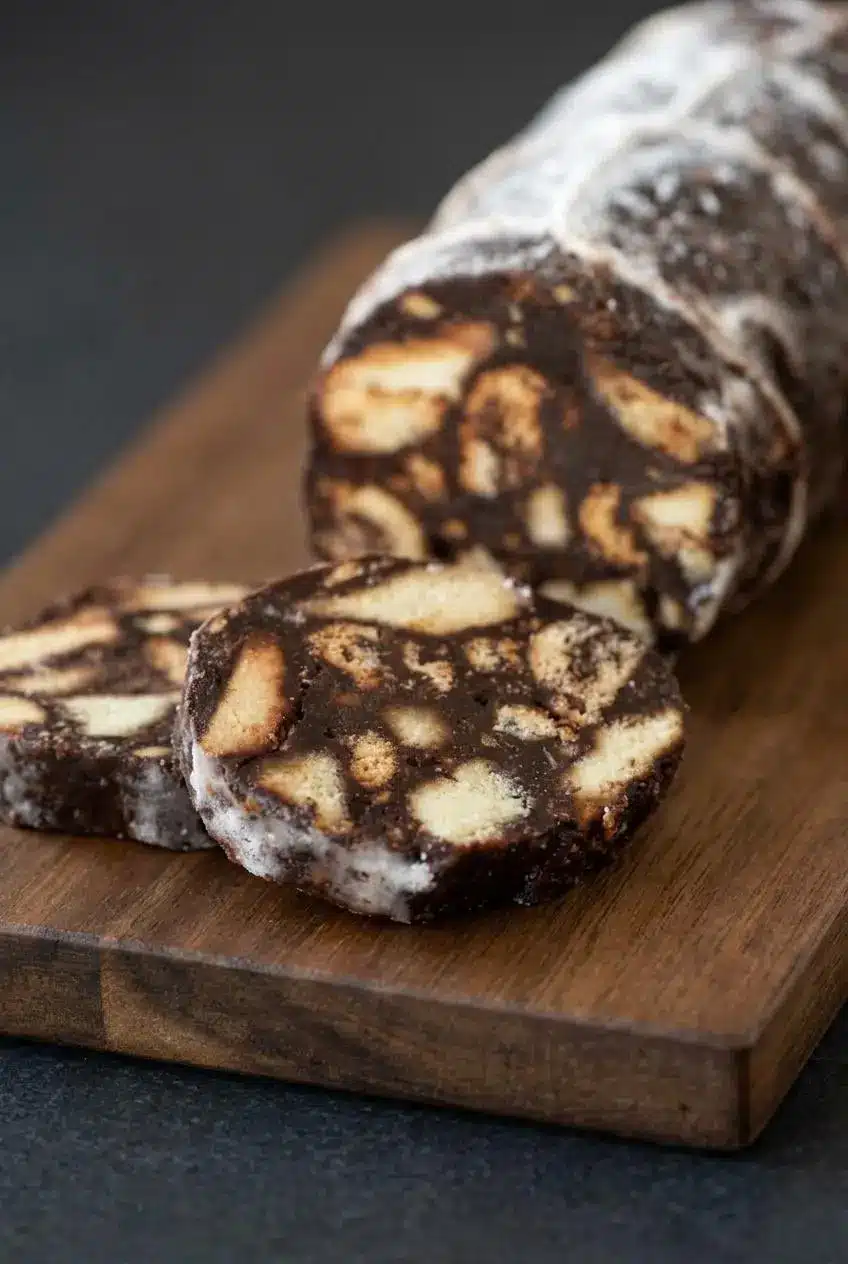
The slices should hold their shape, revealing pale cookie pieces and almonds.
Hand Crushing Biscuits to the Perfect Size
Aim for roughly pea-sized pieces alongside some slightly larger fragments. Break the cookies over a bowl so you catch the crumbs, but don’t deliberately grind everything into powder.
A blender or food processor can erase the pale pockets that make this dessert distinctive. Too much cookie dust also thickens the binder quickly, making it harder to distribute evenly. If you find a large piece while folding, break it with the spoon rather than crushing the entire batch more finely.
Emulsifying Butter and Melted Chocolate
The chocolate should remain pourable after cooling slightly, but it shouldn’t be hot enough to liquefy the softened butter. Stir it into the butter mixture until the color and sheen look uniform.
Before the cookies go in, the binder should look glossy and substantial. After folding, it becomes a thick, fudge-like mixture that holds together when pressed. That’s the useful transition: soft enough to shape, thick enough to stay inside the wrap.
Tight Wrapping and Midway Reshaping
Use the plastic wrap to press the mixture inward as you roll. Concentrate on closing gaps rather than squeezing hard enough to force chocolate out through the ends. Twisting those ends helps maintain gentle pressure along the cylinder.
The midway check matters because the underside can flatten against the tray. While the chocolate remains pliable, gently roll and press the wrapped log back into a rounded shape. Parchment can provide an outer protective layer, but the doubled plastic wrap does the close-fitting shaping work.
Troubleshooting Common Chocolate Salami Problems
Most problems come from excessive heat, uneven mixing, or cutting at the wrong texture. Identify which stage went wrong before adding anything to the mixture.
Fixing Separated or Greasy Melted Chocolate
- Greasy chocolate while melting: Excessive heat can disrupt its texture; remove the bowl from the heat and stir gently as it cools slightly.
- Oily butter-and-chocolate mixture: The chocolate may have been too hot; pause to let the mixture cool slightly, then stir again before adding the cookies.
- Stiff, grainy melted chocolate: Water may have entered the bowl; don’t keep heating it in an attempt to make it smooth, and restart with a dry bowl if it won’t blend.
Prevention is more dependable than trying to rescue badly damaged chocolate. This guide to how to melt chocolate explains gentle heating and bowl handling.
Preventing Crumbly Slices During Cutting
- The log squashes as you cut: It is too warm or insufficiently set; return it to the refrigerator until it holds its shape.
- The chocolate fractures around hard cookie pieces: The log may be excessively cold; let it soften just enough for the blade to pass through without forcing it.
- The knife catches and tears: Use a sharp serrated knife with gentle strokes, warming and thoroughly drying the blade if needed, then wiping it between cuts.
Aim for firm but cuttable, not soft and sticky. Extremely thin slices are more vulnerable to breaking around large biscuit pieces, so make the first cut a little thicker while you assess the texture.
Keeping Powdered Sugar Coating Crisp and White
- The sugar disappears into sticky patches: Moisture or a warm surface is dissolving it; dust only after the log has chilled and set.
- The coating looks damp after storage: Leave the decorative sugar until serving rather than coating the log before wrapping it.
- The surface has wet spots: Gently blot visible moisture before applying a light, even dusting.
Presentation: Twine Tying and Charcuterie Board Styling
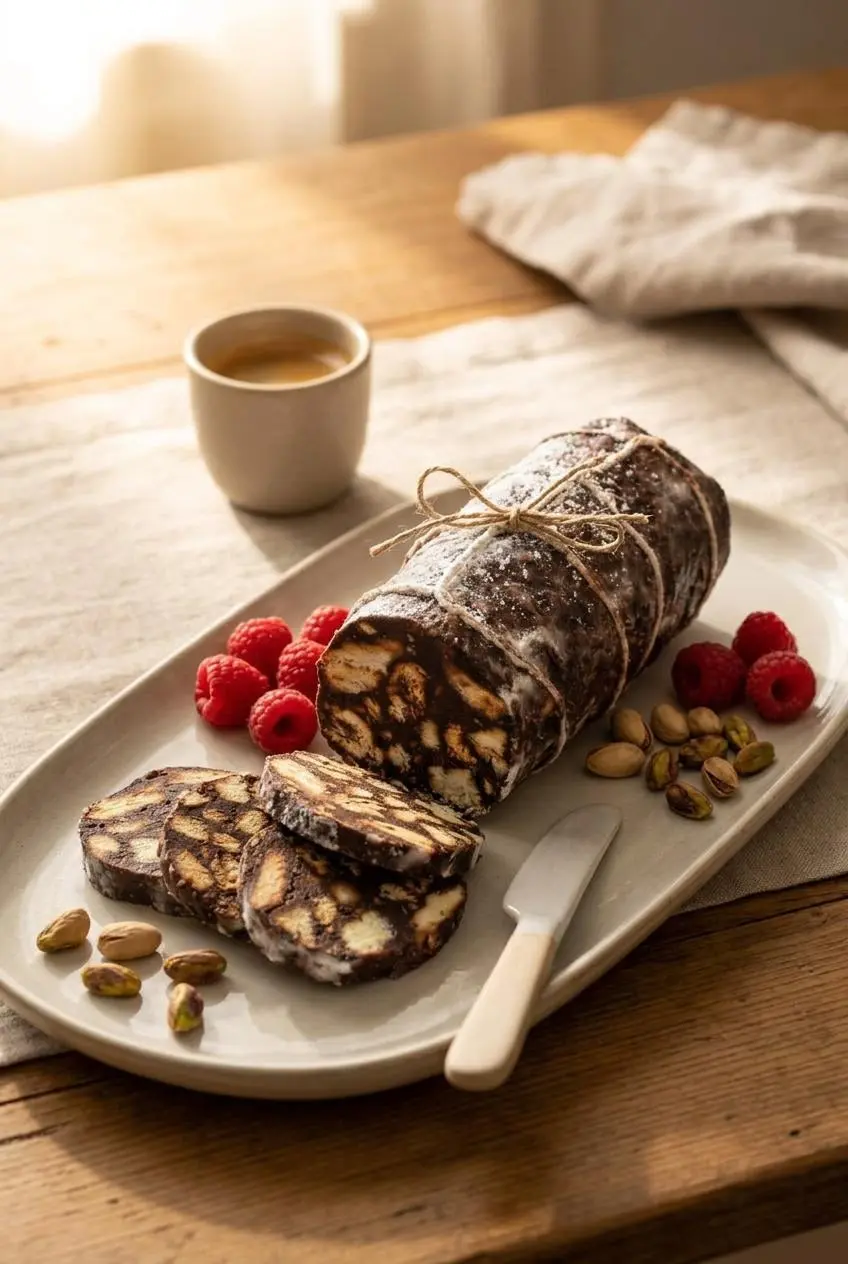
The sugar coating and decorative string turn a chocolate log into a playful dessert centerpiece. Finish the surface only after chilling so you don’t mark or distort it.
Tying the Log with Baker String
Use food-safe kitchen twine. Tie a loose loop near one end of the dusted log, leaving a tail for the final knot. Run the working length along the log, make another loop around it, and pass the string beneath the lengthwise strand to hold that loop in place.
Repeat at roughly one-inch intervals, keeping the tension gentle. Bring the string along the underside and tie it to the starting tail. The loops should rest against the surface without cutting into it.
Twine is decorative, not edible. Remove it before slicing and eating. For gifts, wrap the chilled log in parchment and tie the outer package instead.
Assembling a Dessert Charcuterie Platter
Arrange overlapping rounds beside fresh raspberries or orange slices. Fruit adds a bright contrast to the dense chocolate, while espresso makes a natural pairing.
For a larger confectionery platter, add homemade chocolate truffles in a separate cluster. Leave space between the fruit and powdered sugar coating so fruit moisture doesn’t dampen the slices.
Optional toasted hazelnuts add another crunchy element. A little fresh orange zest over the platter brings a citrus aroma without changing the chocolate mixture. Put out portions for serving and keep the remainder chilled to preserve its shape.
Make-Ahead, Refrigerator, and Freezer Storage
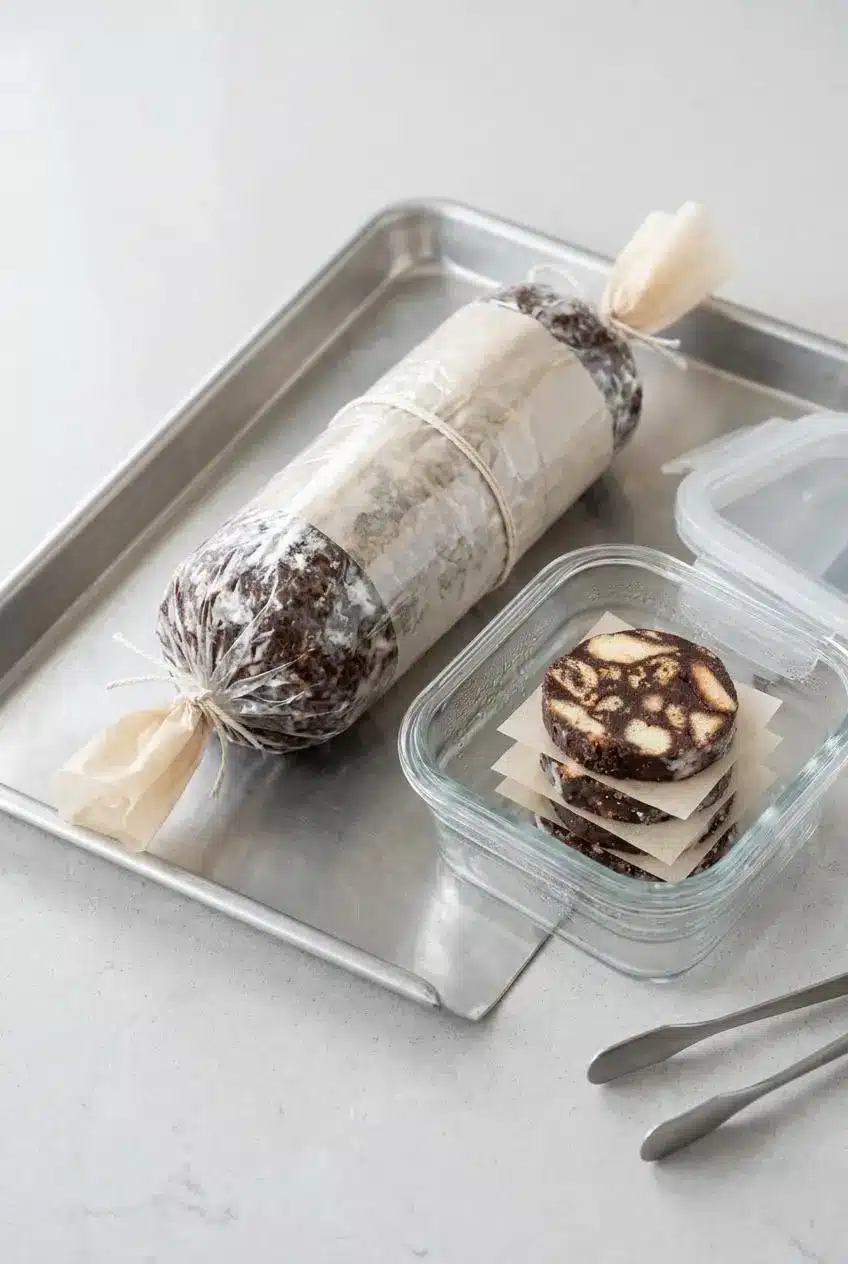
Store the logs wrapped and undecorated, then dust and slice when you’re ready to serve. That protects both the chocolate flavor and the finished appearance.
Refrigerator Storage for Daily Entertaining
Keep each log tightly enclosed in its shaping wrap, then place it in a covered container to limit exposure to refrigerator odors. Store cut rounds in a covered container with parchment between layers to reduce sticking.
The overnight chilling option lets you finish the shaping before serving day. Leave the powdered sugar and decorative twine until presentation time.
There isn’t a verified refrigerator shelf-life limit for this particular mixture, especially with the milk option. Avoid treating it as a confection that can sit indefinitely, and keep it chilled between servings.
Freezer Storage for Holiday Gifting
You can freeze the wrapped logs. Add a protective outer layer of foil or place them in a tightly closed freezer container to help protect the surface and keep the package intact.
Label the package with its preparation date and ingredients, including almonds, dairy, and the chosen cookies. Use milk instead of Marsala when you want an alcohol-free gift.
No verified freezer duration is available for this recipe, so don’t rely on a promised multi-month shelf life. Before slicing, let the log return to a firm, cuttable texture, and add the sugar coating only when ready to present it.
Global Variations and Dietary Adaptations
These optional ideas change the flavor or accommodate ingredient preferences. Keep them separate from the quantities and method above, especially when a different binder is involved.
Portuguese Salame de Chocolate with Maria Cookies
Portuguese salame de chocolate often features Maria biscuits and a cocoa-forward chocolate mixture. Some versions use sweetened condensed milk, producing a sweeter, chewier result.
Maria cookies work as the cookie choice here. Condensed milk, however, isn’t a direct substitute for the listed liquid because it changes sweetness and consistency; use a formulation designed for it rather than adding it to this mixture.
Spiced Biscoff and Cranberries
For a warm-spiced variation, choose speculoos or Biscoff cookies in place of the sweet cookies. Their caramelized flavor shifts the dessert away from pale tea-biscuit marbling toward a darker, cinnamon-scented slice.
Optional dried tart cranberries add chewy contrast. Keep additions restrained so the chocolate can still bind everything together, and avoid wet fruit inside the log. Fresh fruit works better alongside the finished slices.
Nut-Free and Plant-Based Options
- Without almonds: Consider toasted pumpkin seeds for crunch or puffed rice for a lighter texture; check all ingredient labels and preparation surfaces when allergies are involved.
- Gluten-free cookies: Choose crisp gluten-free biscuits with enough strength to remain in pieces, checking the other packaged ingredients as well.
- Plant-based butter: A firm baking block is a more suitable candidate than a soft spread, though the final setting texture may differ.
- Dairy-free adaptation: Check the chocolate and cookies for dairy, then use suitable plant-based butter and milk alternatives; changing these ingredients can affect firmness.
Eggless doesn’t automatically mean vegan or allergy-friendly. Read labels for the chocolate, cookies, butter substitute, and liquid you choose rather than relying on the dessert’s name.
Conclusion
Chocolate salami combines rich cocoa flavor, buttery cookie crunch, and toasted almonds in a no-bake dessert that doubles as a festive gift. Careful melting and firm wrapping make the preparation manageable.
Keep the cookies in visible pieces, then give the logs time to set. Hand-crushed biscuits are the detail that turns a chocolate slice into that unmistakable marbled round.
Frequently Asked Questions
Does Authentic Chocolate Salami Have Raw Eggs?
Some traditional versions include raw eggs, but recipes vary. This version contains no eggs; butter and melted chocolate bind the cookies and almonds. You don’t need to add eggs to achieve a rich, sliceable texture.
What Are the Best Cookies for Chocolate Salami?
Choose crisp, dry cookies such as Maria biscuits, tea biscuits, or petit beurre. Digestive biscuits also work, giving a more rustic texture. Break them by hand so pale chunks remain visible instead of grinding them into dust.
Why Is My Chocolate Salami Crumbling When Sliced?
An excessively cold log can fracture, while a warm one can squash and lose pieces. Large, hard biscuit fragments or gaps from loose shaping can also weaken slices. Use a sharp serrated knife on a firm, cuttable log, wiping the blade between cuts.
How Long Does Chocolate Salami Stay Fresh?
A verified refrigerator or freezer shelf life isn’t available for this particular recipe. Keep it tightly wrapped and chilled, protecting it from moisture and refrigerator odors. You can freeze the wrapped logs, but don’t assume a specific storage duration; follow the packaging guidance above.
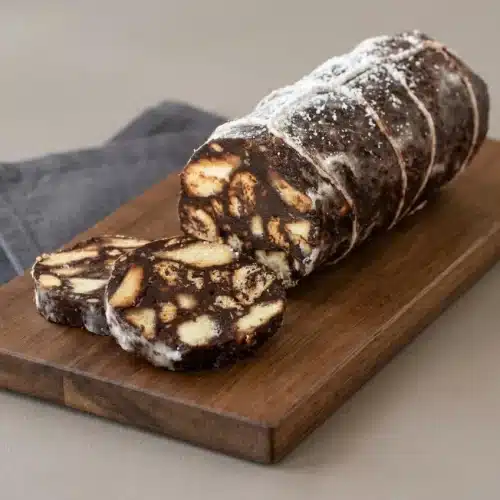
Chocolate Salami

Equipment
- Heat-proof bowl
- Saucepan
- Wooden Spoon
- Mixing Bowl
- Plastic wrap
- Baking tray
Ingredients
- 8 ounces dark chocolate (226 grams)
- 10 ounces sweet cookies (283 grams)
- 4 ounces unsalted butter (1 stick or 113 grams, softened)
- 1 cup powdered (icing) sugar (110 grams, sieved)
- ½ cup cocoa powder (35 grams)
- ⅓ cup sweet marsala wine (80ml, or milk)
- ⅓ cup chopped toasted almonds (30 grams)
Instructions
- Set a heatproof bowl containing the chopped chocolate above barely simmering water, keeping its base clear of the water, and stir occasionally before taking the melted chocolate off the saucepan. The chocolate should look fluid and smooth, without unmelted pieces.
- Use your hands to break the cookies into irregular chunks and collect them in a separate bowl. A mixture of small pieces and larger pale fragments will give the slices their marbled appearance.
- Work the softened butter and sieved powdered sugar together in a large bowl with a wooden spoon. The mixture should become creamy, with no visible butter lumps.
- Beat the cocoa powder and Marsala, or the listed milk alternative, gradually into the butter mixture. The color should become evenly dark as the cocoa blends in.
- Fold in the melted chocolate once it has cooled slightly, stirring until the binder has a consistent texture. It should look thick and glossy rather than hot and runny.
- Distribute the broken cookies and chopped toasted almonds through the chocolate mixture with thorough folding. Every piece should have a chocolate coating, with no loose dry pockets at the bottom.
- Lay out two separate lengths of plastic wrap, doubling each to strengthen it. Each sheet should have enough room around the mixture to enclose a log and seal its ends.
- Portion the mixture equally onto the sheets, arrange each portion lengthwise, and use the wrap to compress it into a cylinder before twisting the ends closed. The logs should feel compact, with no obvious gaps beneath the wrapping.
- Transfer both wrapped logs to a baking tray and begin refrigerating them. The tray supports the soft cylinders while the chocolate starts to firm.
- Inspect the logs after 30 minutes, gently rounding any flattened areas and tightening the wrapped ends again. The mixture should still yield to light pressure, allowing you to smooth its shape.
- Complete the 3-hour refrigeration period, or leave the wrapped logs chilled overnight. A fully set log should feel firm enough to cut without collapsing.
- For longer keeping, place the wrapped logs in the freezer instead of continuing refrigerator storage. Keep the wrapping snug against the chocolate to protect its surface.
- Unwrap the set logs when ready to serve and, if desired, sift a light coating of powdered sugar over them. The chilled surface should be firm and dry enough to hold the white coating.
- Cut the logs into rounds and keep the remaining chocolate salami chilled. The slices should hold their shape, revealing pale cookie pieces and almonds.