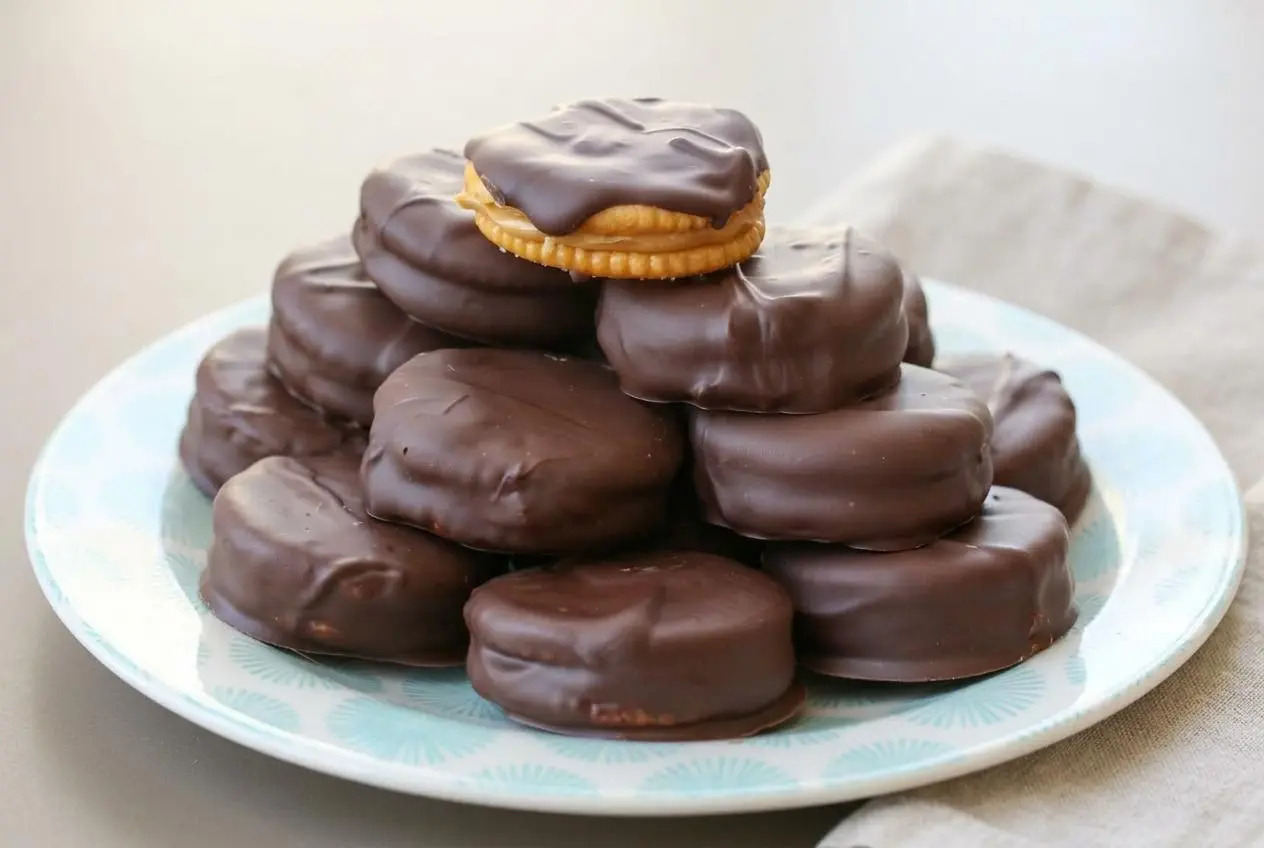
These chocolate peanut butter ritz cracker cookies are no-bake sandwich treats with creamy peanut butter between salty, buttery crackers and a coating of melted chocolate. Refrigerate them until the shell firms up for a crisp, sweet-and-salty bite.
The appeal is all about contrast: a delicate cracker crunch, a rich peanut butter center, and chocolate that brings everything together. You don’t need an oven, and two forks handle the dipping without specialized equipment.
They fit right into holiday cookie tins, party dessert trays, or an afternoon treat with cold milk. The hands-on prep takes about 15 minutes, followed by chilling. The neat edges start with the filling.
Set the lined baking sheet beside your chocolate bowl so each dipped sandwich has a short trip to its resting spot.
Key Ingredients and Smart Swaps
Ritz crackers provide buttery crunch and salt, creamy peanut butter binds the sandwiches with a rich filling, and semisweet chocolate adds sweetness and a firm outer shell. Each ingredient contributes to the balance of crisp, creamy, sweet, and salty.
- 48 Ritz crackers
- 3/4 cup creamy peanut butter
- 16 ounces semi-sweet chocolate chips
The crackers supply structure without baking. Peanut butter cushions their crisp texture, while semisweet chocolate keeps the coating from tasting quite as sweet as milk or white chocolate.
I’d choose peanut butter that holds a soft mound on a spoon rather than one that pours; it makes the sandwiches easier to handle.
Cracker and Peanut Butter Pairing
Salted, buttery crackers keep these cookies from becoming one-note sweet. Their thin texture also makes the finished sandwich easy to bite through, even with chocolate coating both sides.
Standard commercial creamy peanut butter usually holds its shape better than a loose, oil-separated natural variety. That consistency matters when you press on the second cracker and later lift the sandwich through warm chocolate.
If you use natural peanut butter, stir it thoroughly before assembling. Choose a spreadable consistency rather than a runny one, and chill any sandwiches that slide when lifted. Crunchy peanut butter is an optional texture change, but spread it gently so the peanut pieces don’t crack the crackers.
Choosing the Best Chocolate Coating
Semisweet chips give this recipe its chocolate flavor, but they may melt into a thicker coating than products made specifically for dipping. Pick the option that suits your priorities:
- Semisweet chocolate chips: Use these for the listed recipe and a rich chocolate taste; stir thoroughly and drain each cookie well.
- Chocolate-flavored almond bark: This confectionery coating is designed for melting and dipping, though its flavor differs from semisweet chocolate.
- Melting wafers: Choose wafers labeled for coating, and follow their package directions for melting and setting.
An optional blend of chips and chocolate-flavored almond bark can balance flavor with easier dipping. A little coconut oil or neutral oil can also loosen smoothly melted chips, but extra oil may soften the finished shell. Neither addition is required.
Simply melting chocolate isn’t the same as tempering it. These cookies rely on refrigeration to firm the coating, so don’t expect an untempered chip coating to stay glossy and crisp in a warm room.
Cracker Math and Batch Sizing
Each cookie needs two crackers. For the 24-cookie batch, count out 48 intact crackers before opening the peanut butter. Sleeve counts vary by package, so count crackers rather than relying on the number of sleeves.
For 48 cookies, double the listed ingredients to 96 crackers, 1 1/2 cups creamy peanut butter, and 32 ounces chocolate chips. Assemble the sandwiches first, then melt and dip in manageable batches so you aren’t rushing as the coating thickens.
Set aside broken crackers for another use. An intact top and bottom make a stronger sandwich and help keep crumbs out of the chocolate bowl.
How to Make Chocolate Peanut Butter Ritz Cookies

Allow about 15 minutes for preparation, plus about 1 hour of chilling. Have a baking sheet, parchment or wax paper, a microwave-safe glass bowl, two forks, and an airtight container ready.
- Cover a baking sheet with parchment or wax paper, arrange 24 crackers on it, and sandwich about 1/2 tablespoon of peanut butter between each cracker and a second cracker.
Keep the filling just inside the edges so the sandwiches stay tidy when lifted. - Heat the chocolate chips in a microwave-safe glass bowl for 90 seconds, then stir thoroughly to distribute the heat.
Some chips may still look intact but soften and blend as you stir. - Use additional 30-second microwave intervals only as needed, stirring after each interval until the chocolate melts fully.
Stop heating when stirring produces a smooth mixture without solid pieces. - Coat each sandwich in the melted chocolate, using two forks to lift it, drain the excess, and return it to the lined baking sheet.
A well-drained cookie has an even coating without a large puddle forming around its base. - Refrigerate the tray until the coating feels firm, then move the cookies into an airtight container and keep them refrigerated.
The set shell should resist a light touch rather than smear.
Assembling the Sandwich Cookies
Place the peanut butter near the center of each bottom cracker, then spread it outward without reaching the scalloped rim. Lower the top cracker straight onto the filling and press lightly.
The goal is contact, not compression. A hard squeeze pushes peanut butter out and can split the cracker. If filling bulges over an edge, remove the excess before dipping rather than trying to hide it under chocolate.
Keep the tops aligned with the bottoms. A level sandwich rests more securely on fork tines and needs less handling in the coating.
Melting Chocolate Without Scorching
Use a dry bowl and dry forks. Small amounts of water can make melted chocolate clump, so check for droplets after washing your equipment.
After the initial 90-second heating period, stir thoroughly before deciding whether the chocolate needs more heat. The warm bowl and melted portions can soften remaining chips as you stir.
Microwave strength varies. Watch for a smooth texture rather than assuming every batch needs the same number of additional intervals. Stop if the chocolate develops a burnt smell or dry, grainy patches; more heating won’t repair scorched chocolate.
Step-by-Step Dipping Technique
Lower one sandwich into the chocolate and turn it gently to cover the exposed cracker surfaces. Use one fork underneath as a platform and the second fork to steady the sandwich without squeezing it.
Lift the cookie above the bowl and let chocolate run through the tines. Tap the supporting fork gently against the rim, then lightly draw its underside across the rim to remove the hanging drip. Keep the cookie itself away from the bowl edge.
Position the fork close to the lined sheet and use the second fork to slide the cookie off. A low transfer helps prevent cracked crackers and splashes.
As the coating chills, it may lose some wet shine and look more matte. Appearance alone doesn’t confirm that it has set, though. Check for a firm surface that doesn’t smear before stacking.
Troubleshooting Common Dipping Mistakes
Most dipping problems come from chocolate texture, loose filling, or too much coating left on the fork. Check the cause before adding anything to the bowl.
Fixing Thick or Seized Chocolate
- Smooth but thick chocolate: Baking chips can melt thicker than dipping coatings, and chocolate also thickens as it cools; stir first, then gently rewarm if needed.
- Chocolate that still won’t flow: Try a small addition of coconut oil or neutral oil, stirring thoroughly before adding more; too much can leave a softer shell.
- Suddenly clumpy chocolate: Moisture may have caused it to seize; don’t add water or milk when you need a firm dipping shell, and start a fresh coating batch if it won’t become smooth.
- Burnt-smelling or scorched chocolate: Overheating is the likely cause; replace it rather than trying to mask the flavor with oil.
- Wide chocolate puddles: Excess coating is collecting beneath the cookies; let more chocolate drain through the fork before transferring.
Preventing Peanut Butter Leakage
- Filling squeezes out during assembly: The portion is too large or the top cracker is pressed too firmly; remove excess filling and use a lighter touch.
- Crackers slide apart: The peanut butter is too loose; chill the assembled sandwiches in the refrigerator until the filling holds them together when lifted.
- Filling loosens during dipping: The coating may be unnecessarily hot; stir it and let it stop steaming, while keeping it fluid enough to coat the cookies.
- Peanut butter smears into the bowl: Prolonged handling can disturb the filling; coat, lift, drain, and transfer without repeatedly turning the sandwich.
Pre-chilling is optional. Use the feel of the sandwich as your guide: the crackers should stay aligned when lifted, and the filling should no longer shift under gentle pressure.
Easy Variations and Festive Toppings
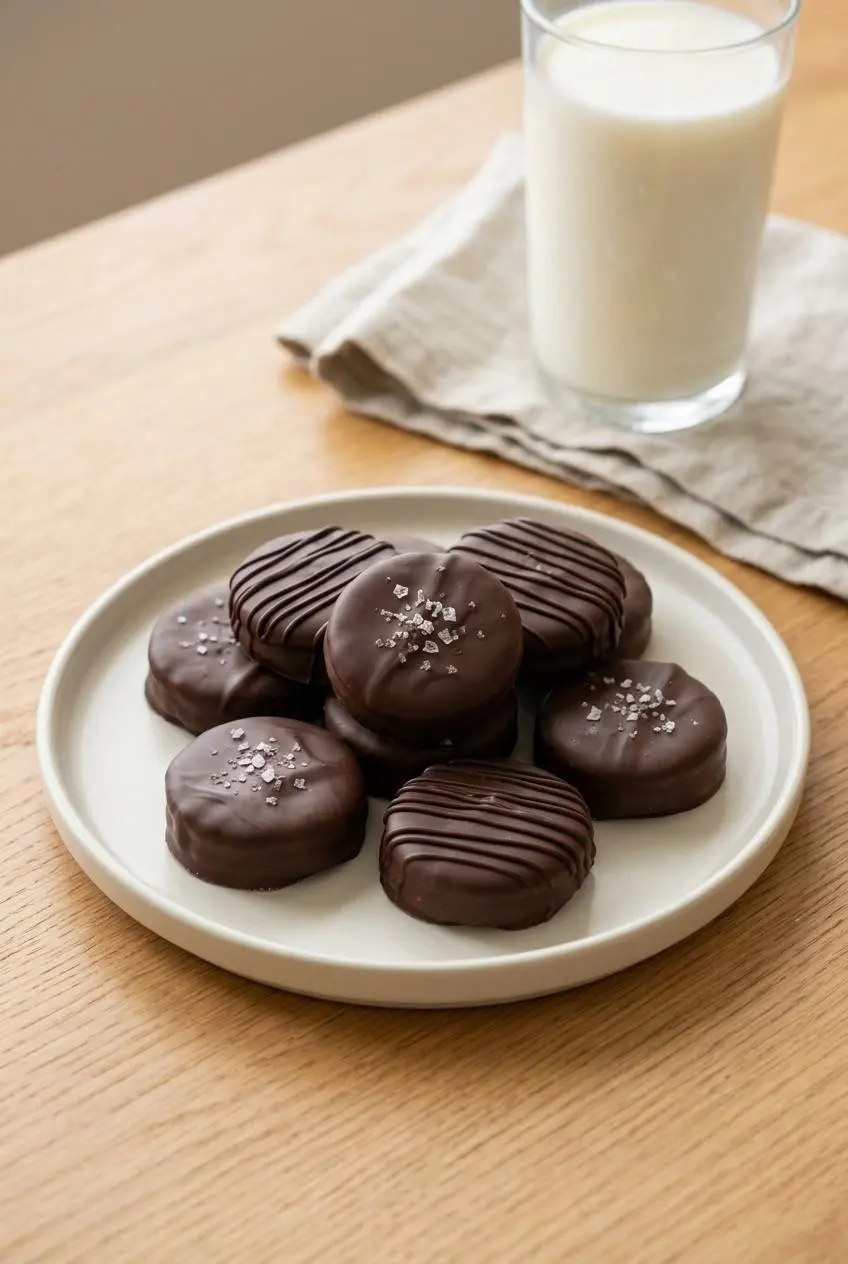
Keep the cracker-and-filling structure, then change the coating or garnish to suit the occasion. All of these ideas are optional and separate from the listed recipe.
White Chocolate Dipped Ritz Cookies
White chocolate creates a sweeter coating with a creamy flavor. Vanilla almond bark offers a similar pale appearance with different melting properties; follow its package directions rather than assuming it behaves exactly like chocolate chips.
For winter celebrations, add crushed candy canes or holiday sprinkles while the coating is still tacky. Press decorations lightly if needed, without pushing through the shell.
Festive Sprinkles and Flaky Salt
Add toppings after excess chocolate has drained. For flaky salt, wait until the coating stops flowing freely but remains tacky enough to grip the flakes. Too early and they may sink into the coating; too late and they can fall off.
- Dark chocolate and flaky sea salt: Use a darker coating for a less sweet bite, then finish lightly with coarse flakes, such as Maldon.
- Dark chocolate drizzle: Add contrasting lines over a firm white chocolate coating for a decorative finish.
- Crushed roasted peanuts: Sprinkle them over tacky chocolate for extra crunch and a stronger peanut flavor.
- Cinnamon peanut butter: Stir a small pinch of ground cinnamon into the filling for a warm spice accent.
- Sunflower seed butter: Choose a thick, spreadable variety for a peanut-free filling alternative, and check all ingredient labels and school requirements before sharing.
- Almond butter: Use a thick variety for a different nut flavor; it is not a substitute for someone avoiding tree nuts.
Serve the cookies chilled with cold milk, espresso, or coffee. For a holiday tray with another chocolate-and-peanut-butter texture, pair them with peanut butter blossom cookies.
Storage and Make-Ahead Instructions
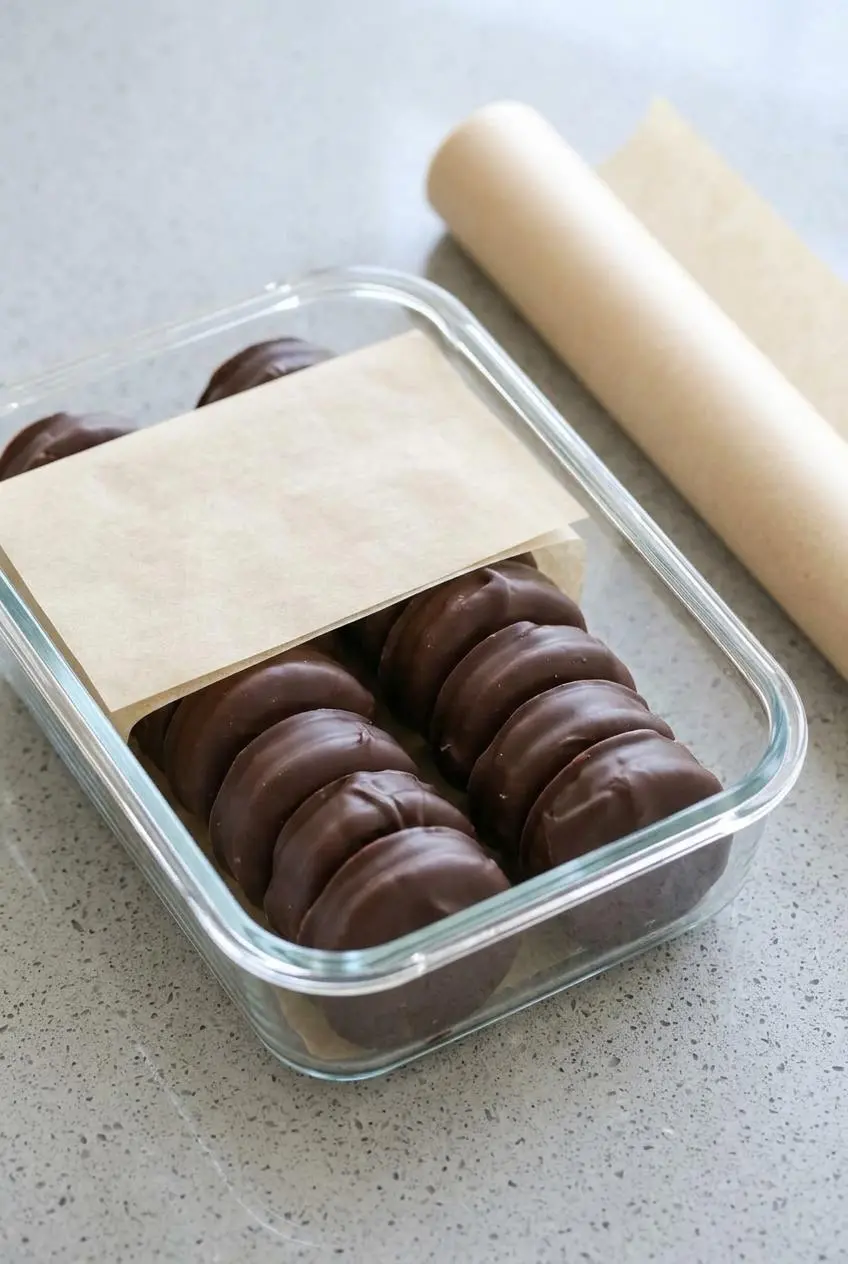
Keep the finished cookies refrigerated in an airtight container. Let the coating become fully firm before packing so the cookies don’t stick together or pick up finger marks.
- Protect the layers: Place parchment or wax paper between layers to reduce rubbing and sticking.
- Choose a rigid container: A firm-sided box protects the crackers better than a loosely packed bag.
- Keep away from heat: Bring out a serving portion rather than leaving the entire batch near a sunny window or warm appliance.
- Pack gift tins carefully: Arrange firm cookies snugly without wedging them in, and keep the tin chilled before gifting.
For make-ahead preparation, complete the dipping and setting before arranging the serving tray. Store the cookies covered and chilled, then transfer them when you’re ready to serve. A fixed shelf life isn’t established here, so don’t use a long storage window as your planning assumption.
Conclusion
Buttery crackers, creamy peanut butter, and a firm chocolate shell make these cookies a satisfying mix of salty, sweet, and crisp. Careful filling portions and gentle fork draining help keep the finish neat.
Add them to your holiday treat list when you want a no-bake option with plenty of crunch. Leave room for chilling, then enjoy that first crisp bite.
Frequently Asked Questions
What Chocolate Melts Best for Dipping Ritz Cracker Cookies?
Chocolate-flavored almond bark and coating wafers are designed for easy dipping. Semisweet chips provide a rich chocolate flavor and work for this recipe, though they may melt thicker. An optional blend with almond bark can make dipping easier.
How Should You Store Chocolate Peanut Butter Ritz Cookies?
Refrigerate them in an airtight container after the coating firms completely. Separate layers with parchment or wax paper, and use a rigid container to protect the crackers from breaking.
Why Is My Melted Chocolate Too Thick for Dipping?
Chocolate chips may melt thicker than coating chocolate, or the mixture may have cooled. Stir and gently rewarm smooth chocolate if needed. An optional small addition of coconut oil or neutral oil can loosen it, but clumpy or scorched chocolate needs a different fix.
How Long Do Chocolate Covered Ritz Cookies Last?
A specific storage duration isn’t established for this recipe. Keep the cookies covered and refrigerated, avoid prolonged exposure to warmth, and plan a batch size suited to your serving needs rather than extended storage.

Chocolate Peanut Butter Ritz Cracker Cookies

Equipment
- Baking Sheet
- Parchment Paper
- Glass bowl
- Microwave
- Two forks
- Airtight container
Ingredients
- 48 Ritz crackers
- 3/4 cup creamy peanut butter
- 16 ounces semi-sweet chocolate chips
Instructions
- Cover a baking sheet with parchment or wax paper, arrange 24 crackers on it, and sandwich about 1/2 tablespoon of peanut butter between each cracker and a second cracker. Keep the filling just inside the edges so the sandwiches stay tidy when lifted.
- Heat the chocolate chips in a microwave-safe glass bowl for 90 seconds, then stir thoroughly to distribute the heat. Some chips may still look intact but soften and blend as you stir.
- Use additional 30-second microwave intervals only as needed, stirring after each interval until the chocolate melts fully. Stop heating when stirring produces a smooth mixture without solid pieces.
- Coat each sandwich in the melted chocolate, using two forks to lift it, drain the excess, and return it to the lined baking sheet. A well-drained cookie has an even coating without a large puddle forming around its base.
- Refrigerate the tray until the coating feels firm, then move the cookies into an airtight container and keep them refrigerated. The set shell should resist a light touch rather than smear.