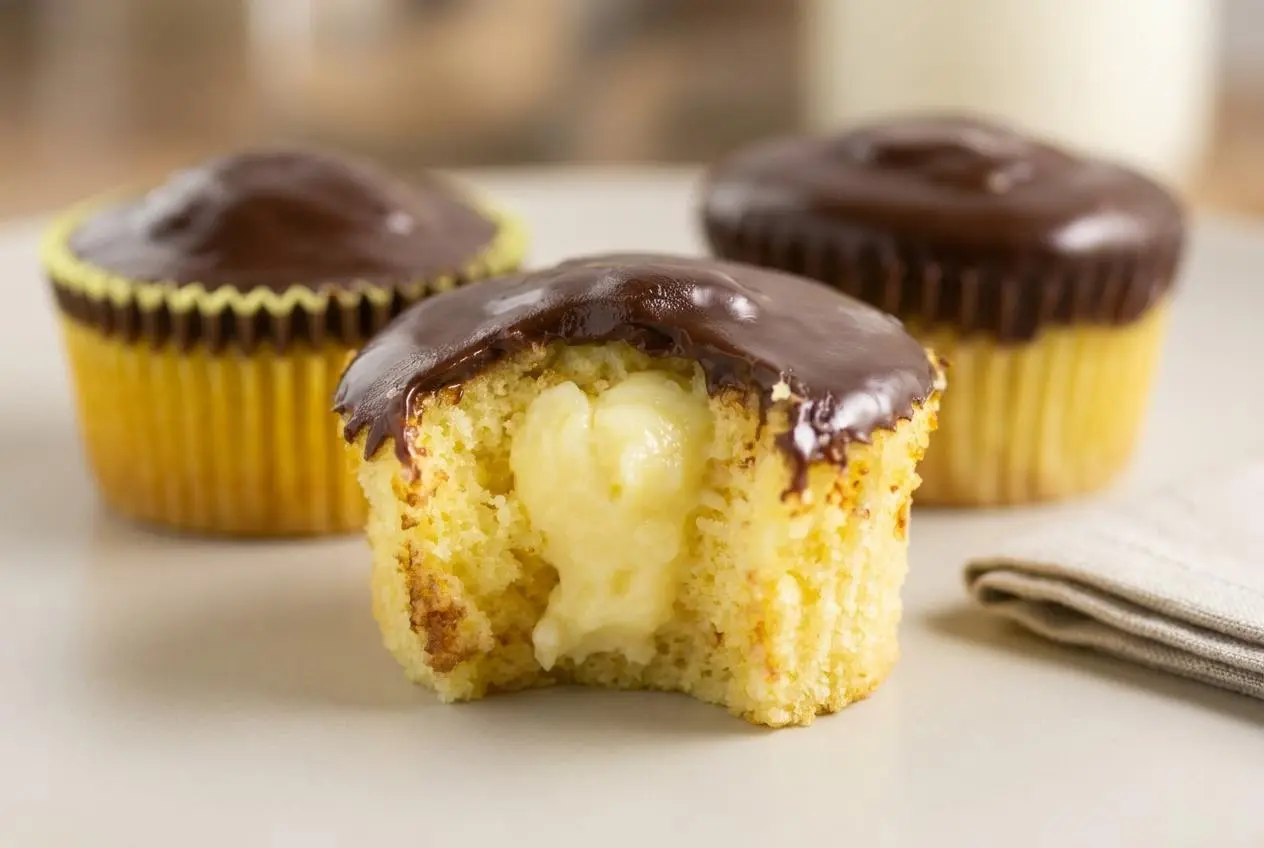
Boston cream pie cupcakes combine tender vanilla cake, cooked vanilla pastry cream, and a smooth chocolate ganache topping. Bake the cupcakes, chill the custard, then fill and dip once the cake has cooled completely.
These boston cream pie cupcakes tuck the familiar cake, custard, and chocolate combination into individual servings. Buttermilk keeps the crumb tender, while the thick vanilla filling gives each bite that classic creamy center.
The recipe makes 12 cupcakes and rewards a little patience between stages. You don’t need elaborate decorating skills, just cool cake and ganache that flows without running everywhere. The custard center is worth the wait.
Clear refrigerator space before starting so the pastry cream can chill while the cupcakes cool.
Essential Ingredients for Authentic Boston Cream Flavor
Each ingredient helps build the three contrasting layers: butter and buttermilk enrich the cake, yolks and cornstarch give the filling body, and chocolate with heavy cream creates a smooth topping. Sugar, salt, and vanilla balance the flavors throughout.
For the Cake
- 12 tablespoons unsalted butter, softened
- 1 cup sugar
- 2 teaspoons vanilla
- 3 eggs
- 1 1/2 cups flour
- 2 teaspoons baking powder
- 1/2 teaspoon salt
- 2/3 cup buttermilk
For the Filling
- 3 egg yolks
- 3 cups milk
- 1/2 cup sugar
- 1/3 cup cornstarch
- 1/4 teaspoon salt
- 1 teaspoon vanilla
For the Ganache
- 8 ounces semi-sweet baking chocolate, finely chopped
- 1 cup heavy cream
Butter adds flavor, but its softness also matters for mixing. Yolks enrich the milk filling, while cornstarch supplies the thickness needed to keep it inside the cupcake. Heavy cream softens the chocolate into a glaze rather than a brittle shell.
I look for butter that takes a gentle fingertip dent but still holds its shape; shiny, partly melted butter won’t cream as well.
Fluffy Vanilla Cupcake Base
Beating softened butter with sugar incorporates air that helps the cupcakes rise. Eggs provide structure, and buttermilk contributes moisture and a slight tang that balances the sweet filling.
Room-temperature eggs and buttermilk blend more readily into the butter mixture. Once the flour goes in, stop mixing as soon as the batter comes together. You want a tender crumb that still holds its shape when filled, not an overworked cake.
Rich Stovetop Pastry Cream
Egg yolks give pastry cream richness and a silky texture. Cornstarch thickens the milk mixture into a filling that holds a spooned mound after chilling instead of soaking straight into the cake.
This method combines the yolks with milk before heating everything gradually. It doesn’t require pouring hot milk into the eggs to temper them separately. Gentle heat and constant stirring are the important protections against curdled egg bits.
Glossy Semi-Sweet Chocolate Ganache
The ganache combines 8 ounces of semi-sweet baking chocolate with 1 cup of heavy cream. That balance produces a soft chocolate finish that complements the custard without becoming a hard chocolate cap.
Finely chopped chocolate melts more evenly than large chunks. Heat the cream until it steams, then work it gradually into the chocolate. Compared with canned frosting, ganache brings a more pronounced chocolate flavor and a smoother, less fluffy finish.
How to Make the Boston Cream Pie Cupcakes Step by Step
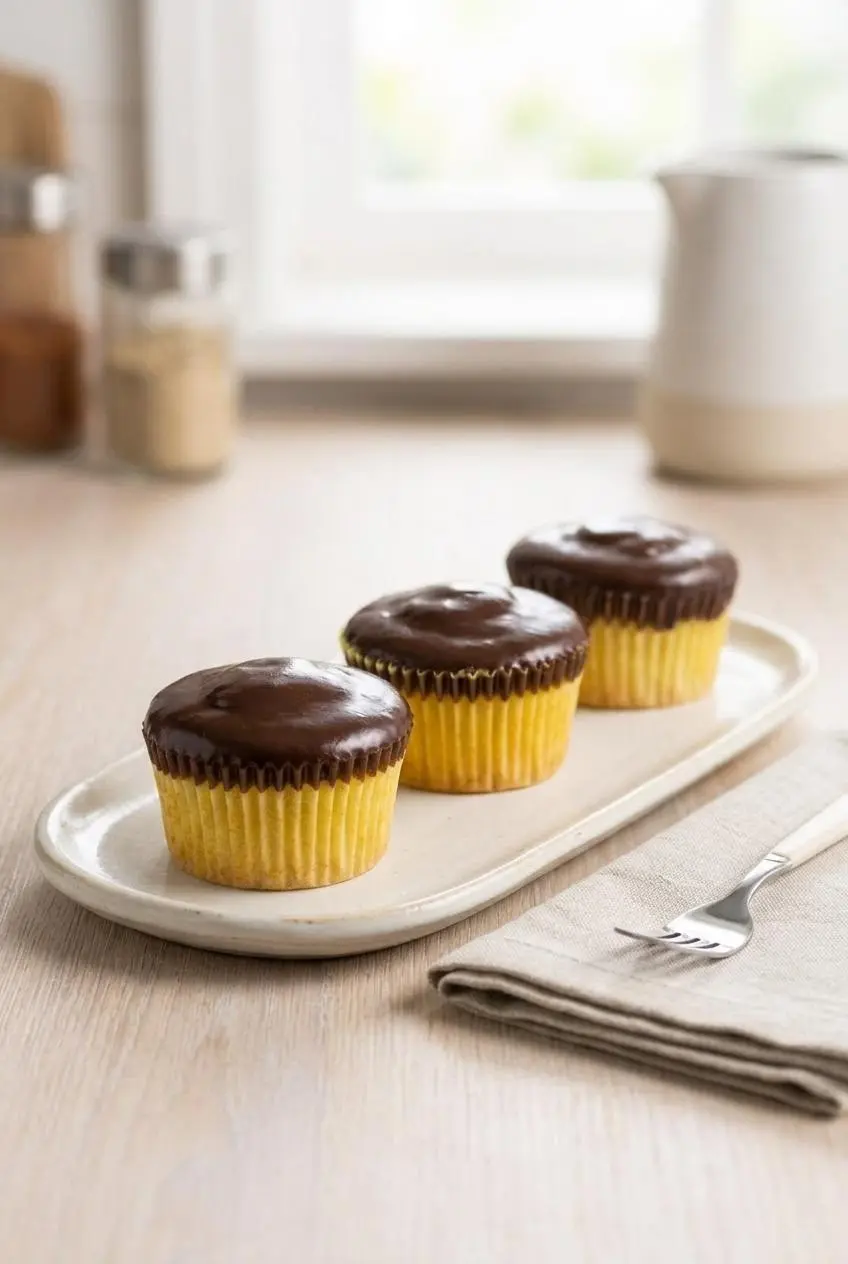
Keep the stages separate: bake the cake, cook and chill the filling, then prepare the ganache and assemble. Have a muffin pan, liners, mixing bowls, a heavy saucepan, a food processor, and a piping bag with a filling tip ready.
For the cake
- Beat the softened butter and sugar in a large mixing bowl until the mixture looks lighter and fluffy.
This creates the airy foundation for the cupcake batter. - Blend the vanilla into the butter mixture.
The flavoring should disperse evenly without leaving wet streaks. - Beat in the eggs individually, fully incorporating each before adding the next.
The batter should look blended after each addition rather than streaked with egg. - Whisk the flour, baking powder, and salt together in another bowl.
Evenly distributed leavening helps the cupcakes rise consistently. - Incorporate the dry mixture in three additions, alternating with buttermilk and keeping dry ingredients first and last.
Mix briefly after each addition, stopping when no dry patches remain. - Lightly grease the muffin pan, add cupcake liners, and portion the batter until each liner is 3/4 full.
Leave the remaining space open so the batter has room to rise. - Bake at 350°F for 18–25 minutes, checking for a clean toothpick before removing the cupcakes and letting them cool completely.
Look for lightly golden edges and a center without wet batter.
For the Filling
- Whisk the egg yolks thoroughly in a medium bowl.
They should become uniform, with no separate streaks of yolk. - Whisk the milk into the yolks gradually.
The mixture should look evenly blended before it reaches the saucepan. - Combine the sugar, cornstarch, and salt in a large, heavy saucepan over medium-low heat.
Break up visible starch clumps so they don’t remain dry when liquid is added. - Stir the milk-and-yolk mixture into the saucepan in a gradual stream.
Keep the mixture moving so the cornstarch disperses without forming lumps. - Stir constantly over medium-low heat for about 20 minutes, removing the pan from the burner when the filling thickens and reaches a gentle boil.
Large, slow bubbles should break through the thickened surface, and the filling will firm further as it cools. - Set the saucepan in a large bowl of ice water, continue stirring, and blend in the vanilla.
The filling should cool evenly instead of staying hot around the edges of the pan. - Press plastic wrap against the filling’s surface and refrigerate until needed for assembly.
Direct contact keeps a tough skin from forming as the pastry cream chills.
Prepare the Ganache
- Pulse the chocolate in a food processor until finely chopped, then place it in a mixing bowl.
Small, evenly sized pieces melt more readily when the cream reaches them. - Warm the cream in a small saucepan, stirring frequently, and remove it from the heat when steam appears.
The cream should be hot enough to melt chocolate without reaching a vigorous boil. - Whisk the hot cream gradually into the chocolate, then let the smooth ganache cool until comfortable to handle but still fluid.
It should flow in a thick ribbon rather than splash like hot cream or hold a stiff mound.
To assemble the cupcakes
- Load the chilled pastry cream into a piping bag fitted with a filling tip once the cupcakes have cooled completely.
The filling should hold its body, and the cake should feel cool throughout. - Insert the tip into each cupcake and gently pipe in pastry cream, stopping before the cake splits.
A little resistance or slight swelling signals that the center is filling. - Dip the cupcake tops into the fluid ganache and leave the coating to set for 30 minutes to an hour.
The finished topping should settle into a smooth layer without streaming down the sides.
Baking and Cooling the Cupcakes
Use the toothpick test rather than judging by color alone. A golden edge can appear before the middle finishes baking, especially if your oven heats unevenly.
Stick with the specified liner fill level rather than topping off the cups. Excess batter can create broad, fragile tops that are harder to dip. Cool the cupcakes all the way through before adding custard so the crumb stays intact during filling.
Cooking and Chilling the Pastry Cream
Stir across the bottom and into the corners of the saucepan, where thickening custard can collect and scorch. As it cooks, the mixture changes from milky liquid to a heavier cream that leaves a brief trail behind the spoon.
Watch for slow, rounded bubbles pushing through the surface. Don’t stop just because the mixture feels warm or begins to coat the spoon. After the ice bath, refrigerate it with the wrap touching the surface until it is cold and thick enough to fill the cupcakes.
Filling and Glazing the Cupcakes
Use gentle pressure on the piping bag. If the cupcake starts bulging noticeably, stop rather than trying to squeeze in more custard.
For dipping, hold the cupcake by its lower half, lower the top into the ganache, then lift and turn it upright. The chocolate should cover the top and slowly level itself. If it runs off immediately, let it cool a little more; if it drags the crumb, it has become too thick.
Cupcake Filling Techniques: Coring vs. Piping
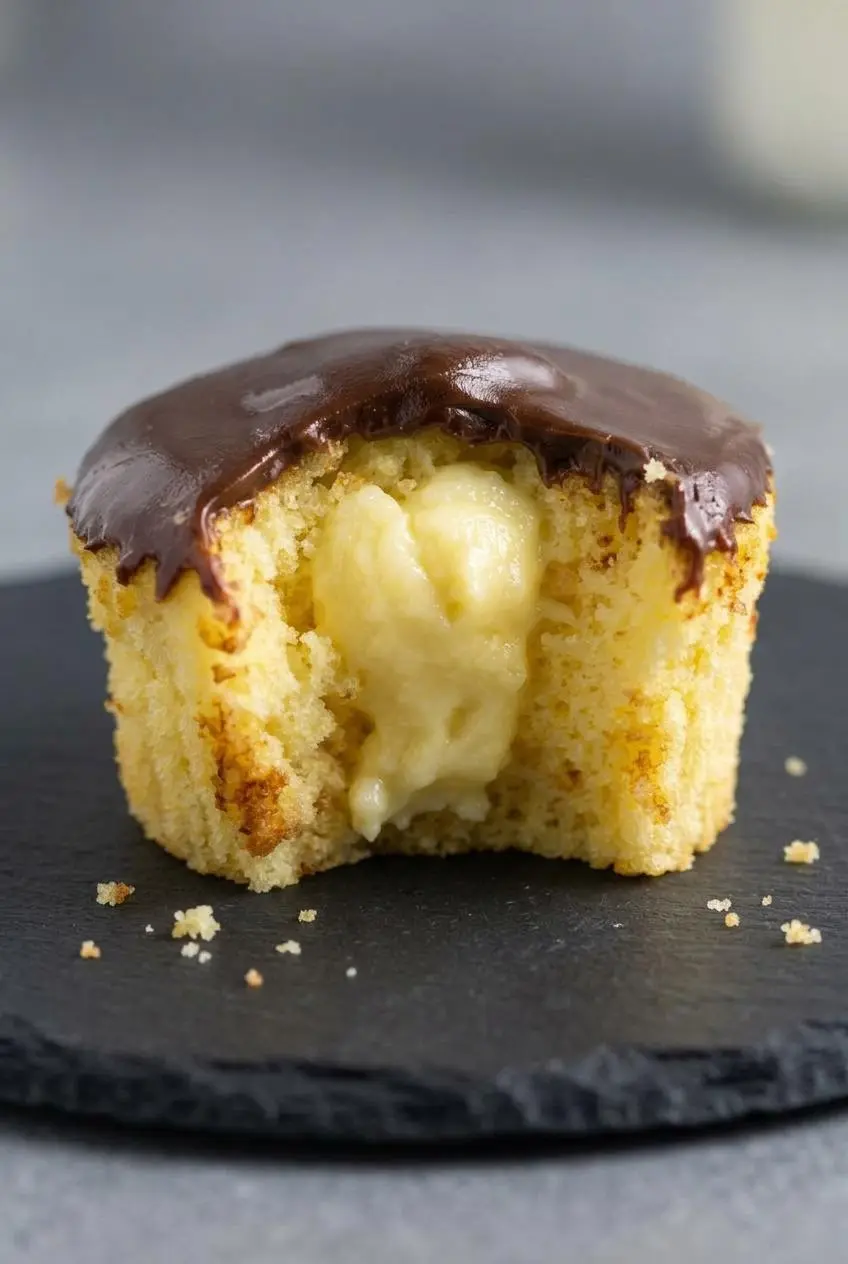
A filling tip is convenient, but a paring knife works well when you want more control over the custard pocket. Both methods keep the cupcake in one piece, which makes handling and dipping easier than slicing it horizontally.
- Coring with a paring knife: Cut a small cone from the center, leaving cake around the sides and at the bottom. Spoon custard into the hollow, trim the point from the removed cone, and replace the top as a cap.
- Coring with an apple corer: Twist gently into the center without going through the bottom. Remove the cake plug, fill the opening, and use a trimmed piece of the plug to close the top.
- Injecting with a Bismarck tip: Insert the long filling tip into the center and squeeze slowly. Stop at slight resistance or gentle swelling, before the sides crack.
Coring creates a defined cavity and usually accommodates more custard. Fill it just below the opening so the cap sits level instead of floating on a mound. Direct injection is faster and leaves less of a seam on top, but the amount each cupcake accepts can vary.
Keep the bottom intact whichever method you choose. A hole through the base gives the filling an escape route. You don’t need to force all the pastry cream into the cupcakes; their structure sets the limit.
Once you’re comfortable making a neat center pocket, stuffed churro cupcakes offer another filled-cupcake project.
Tips for Success and Troubleshooting Common Issues
Most problems come from rushing a temperature change or pushing more filling into the cake than it can hold. Check texture before moving to the next stage.
- Thin pastry cream: Warm filling naturally feels softer, but insufficient cooking can also leave it loose. Reach the thickened, gently bubbling stage before cooling, then check its consistency after chilling rather than adding extra cornstarch at assembly.
- Lumpy custard: Uneven heat or poor stirring can leave starch lumps or small curdled egg bits. Pass the cooked filling through a fine-mesh sieve before chilling; straining won’t repair a scorched flavor.
- Oily or split ganache: Excess heat or uneven mixing can disrupt the smooth blend. Gently whisk in a small splash of warm cream as an optional repair, stopping when the mixture comes together.
- Runny chocolate topping: Ganache that is still too warm slips off the cake. Let it cool until a ribbon sits briefly on the surface before disappearing.
- Thick or dull topping: Overcooled ganache can leave ridges instead of a smooth coat. Warm it gently and stir until it flows again, avoiding vigorous beating that adds bubbles.
- Leaking or soggy centers: Warm cake, loose custard, or a damaged bottom can cause trouble. Use completely cooled cupcakes and chilled filling, keep the base intact, and stop filling before the cake cracks.
Make-Ahead and Storage Guidelines
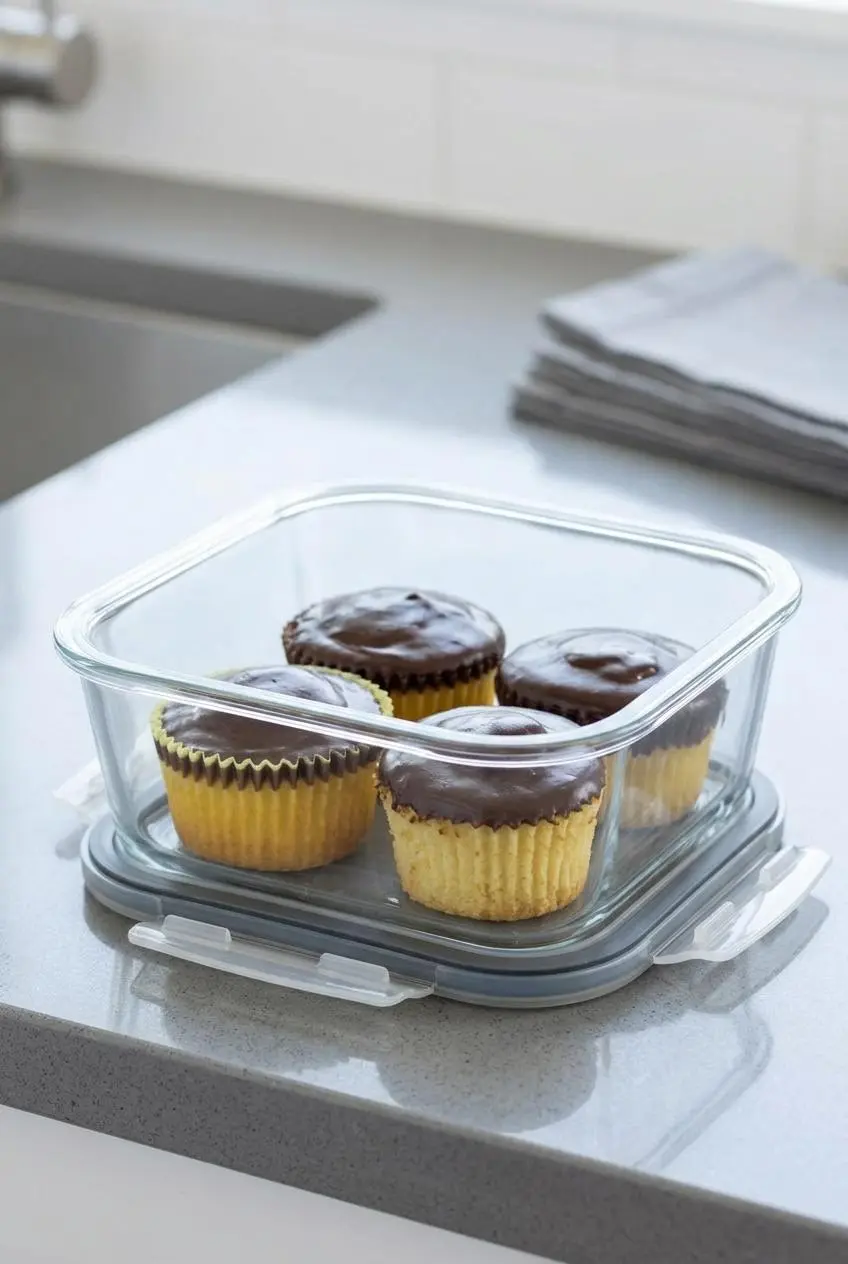
Keep the components separate until the cupcakes are cool and the pastry cream has chilled. This makes assembly easier and prevents the filling from softening warm cake.
Cover the pastry cream with wrap against its surface, as directed in the method. Store assembled cupcakes upright in a covered container with enough headroom that the lid won’t touch the ganache.
Because they contain an egg-and-milk filling, refrigerate the custard-filled desserts promptly and keep them chilled between serving.
Serve chilled or slightly cool for a well-defined custard center. For a party platter, bring out portions as needed rather than leaving the entire batch on display.
Delicious Variations and Box Mix Shortcuts
Keep the scratch version for its buttery cake and rich cooked filling, or choose a shortcut when you want fewer mixing and stovetop stages. These options stay separate from the recipe above.
The Easy Cake Mix and Instant Pudding Method
Bake a boxed yellow cake mix as cupcakes using the package’s ingredients and directions. Prepare instant vanilla pudding with cold milk according to its package, then refrigerate until set before filling completely cooled cupcakes.
Don’t change the cake mix’s liquid amounts just to make it firmer. Instead, use the package’s fill guidance and doneness test, then core carefully while keeping a substantial cake wall around the filling.
Scratch pastry cream offers yolk richness and a cooked vanilla flavor; instant pudding skips the saucepan and gives you a convenient cold-set filling. Either approach can use the chocolate ganache described above.
For a slice-and-serve alternative to individual cupcakes, try Boston cream poke cake.
Mini Party-Sized Boston Cream Cupcakes
Mini cupcakes need less baking time than standard cupcakes, so check them earlier and use a clean toothpick as the finishing cue. Keep the same sequence of complete cooling, chilled filling, and fluid ganache.
Make a narrow filling pocket and preserve the bottom. With such a small cake, a restrained custard center is easier to handle than a deep hollow that leaves thin walls.
For optional flavor changes, choose one of these directions:
- Dark chocolate espresso ganache: Use dark baking chocolate and dissolve espresso powder in the warm cream for a more bittersweet finish.
- Orange-scented ganache: Infuse fresh orange zest into the steaming cream, then strain before combining it with chocolate for a subtle citrus aroma.
- Double chocolate cupcakes: Use a chocolate cupcake recipe you already trust, keeping the vanilla filling and chocolate topping for contrast.
Conclusion
Tender vanilla cake, thick pastry cream, and a soft chocolate finish make these cupcakes satisfying without elaborate decoration. Complete cooling and thorough custard chilling are the steps that make assembly manageable.
Keep the classic vanilla-and-chocolate combination or add a subtle orange aroma to the ganache. Take your time with the filling, and let the cake tell you when it’s full.
Frequently Asked Questions
Do Boston Cream Pie Cupcakes Need to Be Kept in the Fridge?
Yes. Keep the egg-and-milk custard filling and assembled cupcakes refrigerated. Use a covered container that protects the chocolate topping, and return unserved cupcakes to the refrigerator promptly.
How Do I Protect the Custard Texture During Storage?
Keep plastic wrap directly against unassembled pastry cream to prevent a surface skin. Store filled cupcakes upright and covered in the refrigerator so the filling stays chilled and the topping doesn’t rub against the lid.
What Is the Easiest Way to Fill Cupcakes Without a Piping Tip?
Use a paring knife to remove a small cone from the center without cutting through the bottom. Spoon chilled custard into the opening, trim the point off the cake plug, and replace the cap so it sits level.
Can I Use Cake Mix and Instant Pudding Instead of Making It From Scratch?
Yes. Prepare yellow cake mix cupcakes and instant vanilla pudding according to their package directions. Cool the cupcakes completely, chill the pudding until set, then fill and finish with ganache.
Boston Cream Pie Cupcakes

Equipment
- Large Mixing Bowl
- Muffin pan
- Cupcake liners
- Heavy saucepan
- Food processor
- piping bag with filling tip
Ingredients
For the Cake
- 12 tablespoons unsalted butter softened
- 1 cup sugar
- 2 teaspoons vanilla
- 3 eggs
- 1 1/2 cups flour
- 2 teaspoons baking powder
- 1/2 teaspoon salt
- 2/3 cup buttermilk
For the Filling
- 3 egg yolks
- 3 cups milk
- 1/2 cup sugar
- 1/3 cup cornstarch
- 1/4 teaspoon salt
- 1 teaspoon vanilla
For the Ganache
- 8 ounces semi-sweet baking chocolate finely chopped
- 1 cup heavy cream
Instructions
For the cake
- Beat the softened butter and sugar in a large mixing bowl until the mixture looks lighter and fluffy. This creates the airy foundation for the cupcake batter.
- Blend the vanilla into the butter mixture. The flavoring should disperse evenly without leaving wet streaks.
- Beat in the eggs individually, fully incorporating each before adding the next. The batter should look blended after each addition rather than streaked with egg.
- Whisk the flour, baking powder, and salt together in another bowl. Evenly distributed leavening helps the cupcakes rise consistently.
- Incorporate the dry mixture in three additions, alternating with buttermilk and keeping dry ingredients first and last. Mix briefly after each addition, stopping when no dry patches remain.
- Lightly grease the muffin pan, add cupcake liners, and portion the batter until each liner is 3/4 full. Leave the remaining space open so the batter has room to rise.
- Bake at 350°F for 18–25 minutes, checking for a clean toothpick before removing the cupcakes and letting them cool completely. Look for lightly golden edges and a center without wet batter.
For the Filling
- Whisk the egg yolks thoroughly in a medium bowl. They should become uniform, with no separate streaks of yolk.
- Whisk the milk into the yolks gradually. The mixture should look evenly blended before it reaches the saucepan.
- Combine the sugar, cornstarch, and salt in a large, heavy saucepan over medium-low heat. Break up visible starch clumps so they don’t remain dry when liquid is added.
- Stir the milk-and-yolk mixture into the saucepan in a gradual stream. Keep the mixture moving so the cornstarch disperses without forming lumps.
- Stir constantly over medium-low heat for about 20 minutes, removing the pan from the burner when the filling thickens and reaches a gentle boil. Large, slow bubbles should break through the thickened surface, and the filling will firm further as it cools.
- Set the saucepan in a large bowl of ice water, continue stirring, and blend in the vanilla. The filling should cool evenly instead of staying hot around the edges of the pan.
- Press plastic wrap against the filling’s surface and refrigerate until needed for assembly. Direct contact keeps a tough skin from forming as the pastry cream chills.
Prepare the Ganache
- Pulse the chocolate in a food processor until finely chopped, then place it in a mixing bowl. Small, evenly sized pieces melt more readily when the cream reaches them.
- Warm the cream in a small saucepan, stirring frequently, and remove it from the heat when steam appears. The cream should be hot enough to melt chocolate without reaching a vigorous boil.
- Whisk the hot cream gradually into the chocolate, then let the smooth ganache cool until comfortable to handle but still fluid. It should flow in a thick ribbon rather than splash like hot cream or hold a stiff mound.
To assemble the cupcakes
- Load the chilled pastry cream into a piping bag fitted with a filling tip once the cupcakes have cooled completely. The filling should hold its body, and the cake should feel cool throughout.
- Insert the tip into each cupcake and gently pipe in pastry cream, stopping before the cake splits. A little resistance or slight swelling signals that the center is filling.
- Dip the cupcake tops into the fluid ganache and leave the coating to set for 30 minutes to an hour. The finished topping should settle into a smooth layer without streaming down the sides.