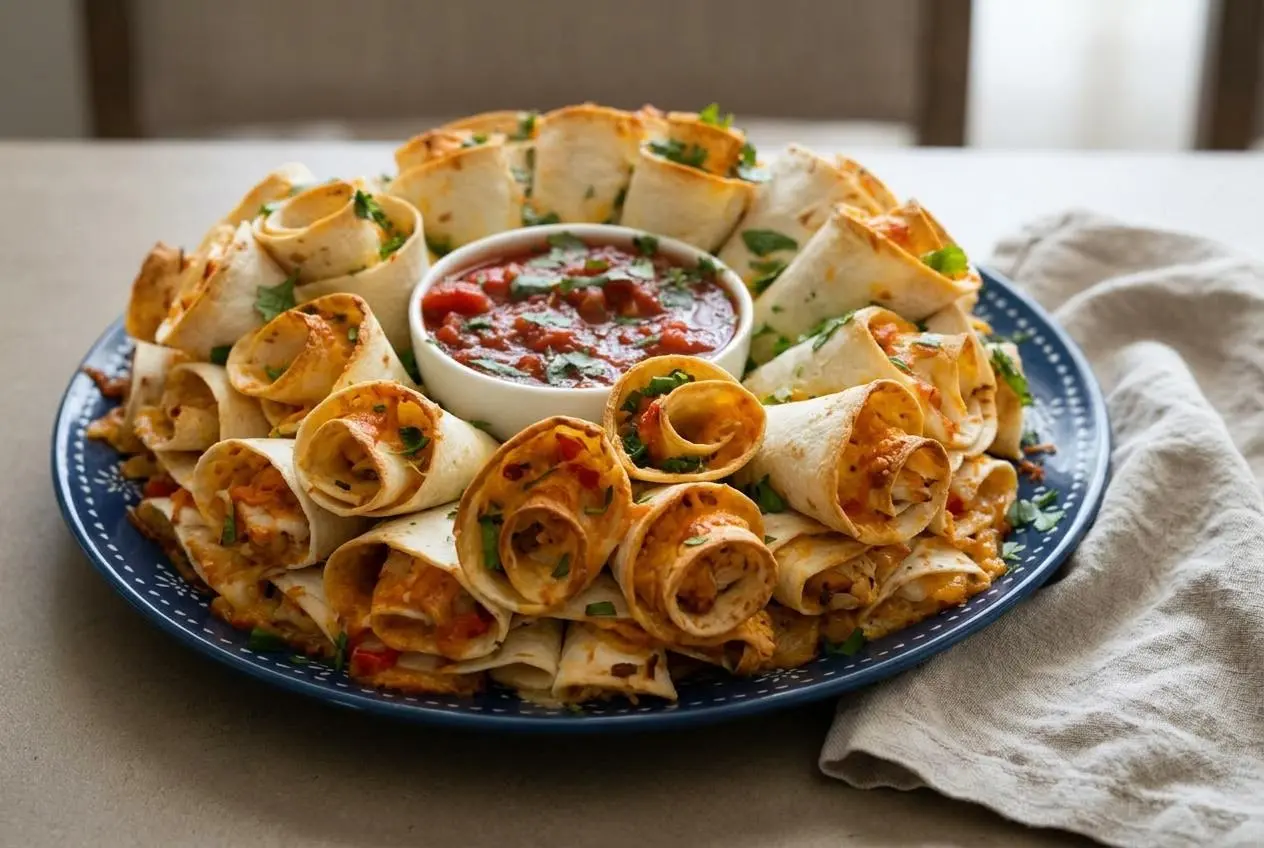
A blooming quesadilla ring is a pull-apart appetizer made from 40 filled flour tortilla halves rolled into cones and stacked in three cheesy layers around a jar. Remove the jar, then bake at 375°F for 15 to 20 minutes until the cheese melts and the edges crisp.
For game day, a blooming quesadilla ring puts chicken, peppers, taco sauce, and melted cheese into portions guests can pull apart and dip. The open center holds a dipping bowl, while the tortilla cones create plenty of crisp edges.
You get golden tortilla tips and a melty, cheesy center without standing over a skillet making individual quesadillas. The assembly takes some patience, but pacing the filling makes it manageable. Save enough for the top layer.
Clear space beside your baking sheet for the tortilla halves, filling bowl, and cheeses before you start rolling.
Key Ingredients and Their Roles
Chicken gives the filling substance, taco sauce adds moisture and seasoning, and chopped vegetables bring sweetness, heat, and crunch. The tortillas form the cones, while cheddar and Monterey Jack add richness and help hold the stacked layers together.
- 3 cups cooked and shredded chicken
- 1 onion, chopped
- 1 red bell pepper, chopped
- 1 jalapeño, chopped
- 1 cup taco sauce
- 20 taco-size tortillas
- 3 cups shredded cheddar cheese
- 3 cups shredded monterey jack cheese
Tortillas: Choose soft, taco-size flour tortillas, typically about 6 inches across. Their size makes manageable cones, and flour tortillas bend more readily than corn tortillas. Check that they feel flexible rather than dry around the edges. Larger tortillas change the ring’s footprint and make filling distribution harder to judge.
Chicken: Rotisserie chicken or cooked leftover chicken works well. Shred it into pieces that fit comfortably inside a cone rather than leaving long strands that pull the filling out as you roll. If starting with raw chicken, cook it first, then measure the required 3 cups of cooked, shredded meat.
Cheeses: Sharp cheddar is a good choice for a more pronounced flavor; Monterey Jack brings a milder taste and stretchy melt. Together, they connect neighboring cones as the ring bakes. Keep some of both cheeses available for the spaces between layers and the top.
Sauce and vegetables: Taco sauce coats the chicken so the filling doesn’t taste dry. Chop the onion and peppers evenly so one large piece doesn’t prop open a seam. The jalapeño supplies heat, while the bell pepper adds sweetness and color.
I’d warm a small stack of tortillas in a damp paper towel for about 15 seconds, then check that they bend easily before cutting.
How to Make a Blooming Quesadilla Ring Step-by-Step
Build the ring on the sheet you’ll bake it on. Moving loose cones before the cheese melts makes the arrangement much harder to keep intact.
Prep: 30 minutes. Cook: 20 minutes. Total: 50 minutes. Yield: 20 servings.
- Set the oven to 375°F (190°C) and cover a baking sheet with parchment.
The parchment should lie flat beneath the entire ring. - Stir the chicken, onion, red bell pepper, jalapeño, and taco sauce together in a large bowl, then set the bowl aside.
The sauce should coat the chicken evenly, with vegetables distributed throughout. - Halve all 20 tortillas and distribute cheddar, Monterey Jack, and chicken filling across the cut pieces, aiming for about 2 tablespoons of each per half while checking the available amounts.
Keep the portions even and leave cheese available for layering rather than packing the first cones heavily. - Shape each filled half into a cone by bringing the tortilla around itself from the straight, cut edge.
The overlapping flap should sit snugly without squeezing filling through the wide opening. - Position a wide-mouth jar or glass in the middle of the lined sheet.
This temporary guide marks the opening that will remain in the finished ring. - Arrange about 13 cones around the jar with their tips pointing inward and touching it, scatter both cheeses over them, and repeat to form two more layers before topping with the remaining cheese and removing the jar.
The cones should form a supported stack with an empty center before the sheet enters the oven. - Bake the assembled ring for 15 to 20 minutes.
Look for fully melted cheese and crisp tortilla edges with golden color. - Move the baked ring carefully onto a serving platter, add your chosen dip to the center, finish with any desired garnishes, and serve promptly.
The cones should stay connected while the outer edges remain crisp.
Prep the Savory Chicken Filling
Use a bowl large enough to turn the mixture without spilling. Stir from the bottom so the taco sauce reaches the chicken underneath, not just the pieces on top. An evenly coated filling gives each cone the same balance of chicken, vegetables, and sauce.
The vegetables go into this version raw. Expect some onion and pepper crunch after the brief bake; use the optional sautéing approach below if you prefer a softer filling.
Cut and Roll the Tortilla Cones
Cutting 20 tortillas in half gives you 40 half-circles. Keep the filling near the middle of each piece, leaving room for the tortilla to overlap. Roll snugly enough to hold its shape, but don’t compress the chicken into a hard mound.
Treat the tablespoon measurements as approximate scoop cues, not an instruction to exhaust either cheese bowl. Portioning by eye without checking what remains can leave the final cones bare. The distribution method below helps reconcile the scoops with the available filling and cheese.
Stack the Ring Around a Center Jar and Bake
Place the bottom cones seam-side down so their own weight holds the flaps closed. Point their narrow ends toward the jar and keep the broad openings facing outward. Divide the cones roughly into layers of 13, 13, and 14.
The jar determines the center opening; choose one that leaves room for your intended dipping bowl. Remove it before baking. It’s an assembly guide, not baking equipment.
For easier transfer, let the finished ring rest on the sheet for 5 minutes. This optional pause allows the cheese to firm slightly. Bring a wide, flat platter level with the sheet, then slide the parchment and ring across together instead of lifting the ring unsupported.
Pro Tips and Troubleshooting for Perfect Cones
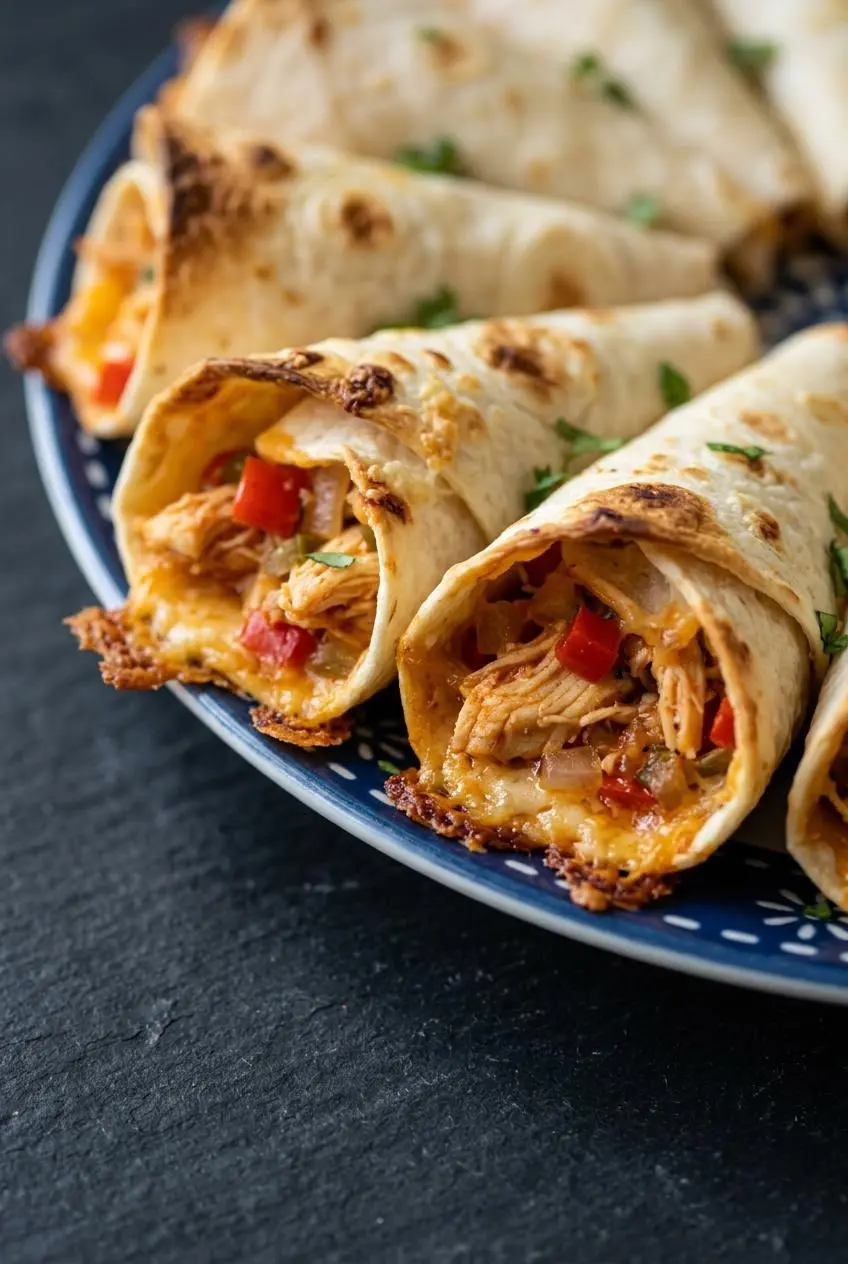
The most common assembly problems come from uneven scoops, stiff tortillas, and moving the ring before the cheese has settled.
- Running short on filling: Divide the mixed chicken filling into four roughly equal portions, then use each portion for ten tortilla halves. This distributes the actual bowlful across all 40 cones without relying on a heaping spoon. Make the same allocation for cheese only after setting some aside for layering.
- Cones opening on the sheet: Cold tortillas resist bending and can push their seams apart. Warm them briefly, roll with a firm overlap, and put the seam underneath. If needed, an optional tiny smear of softened cream cheese or refried beans on the flap can help it stick.
- Filling squeezing out: A tightly packed mound leaves no room for overlap. Spread the filling more evenly and roll without pressing down on the wide opening. Redistribute excess filling to an underfilled cone rather than forcing the seam closed.
- Onions tasting too raw: The quick bake melts cheese faster than it softens enclosed vegetables. For a tender texture, optionally sauté the chopped onion, bell pepper, and jalapeño for about 4 minutes before mixing them with the chicken. A pinch of ground cumin is an optional seasoning addition.
- Wanting richer outer edges: An optional light brush of melted garlic butter adds flavor to the exposed tortilla tips. Avoid soaking them, which works against the crisp texture.
- The ring separating during transfer: Give the cheese the brief settling time described above, and support the base. Slide the parchment onto a flat platter or use two wide spatulas together so one side doesn’t hang unsupported.
Delicious Variations to Try
Keep the cone shape and layered assembly, but choose a different filling when you want a change from the classic taco-sauce version. These swaps are optional and don’t belong in the ingredient list above.
Buffalo Chicken and Cream Cheese Ring
Replace the taco sauce and chopped vegetables with softened cream cheese, Buffalo wing sauce, and sliced scallions mixed into the shredded chicken. Soften the cream cheese enough to blend smoothly rather than leaving dense lumps.
The filling should hold together on a spoon without dripping. Serve ranch or blue cheese dip in the center to balance the tangy heat.
Creamy Rotel Chicken or Taco Beef Ring
Fold drained Rotel diced tomatoes and green chilies into softened cream cheese and shredded chicken. Draining matters: excess tomato liquid can wet the tortillas and make the cones harder to handle.
For a beef version, use cooked taco-seasoned ground beef and drain excess grease before filling. The seasoning approach used for ground beef quesadillas offers a useful starting point for that swap.
Vegetarian Black Bean and Corn Fiesta Ring
Replace the chicken with rinsed, well-drained black beans, corn kernels, diced bell pepper, and southwest seasoning. Fold in shredded cheese, and lightly mash some beans if the filling feels too loose to stay inside the cones.
For a quick flavor comparison:
- Buffalo: Wing sauce brings tangy heat, while cream cheese binds the chicken.
- Rotel: Tomatoes and green chilies add bright flavor to a creamy filling.
- Vegetarian: Beans give substance, corn adds sweetness, and cheese helps connect the filling.
Best Dips and Serving Suggestions
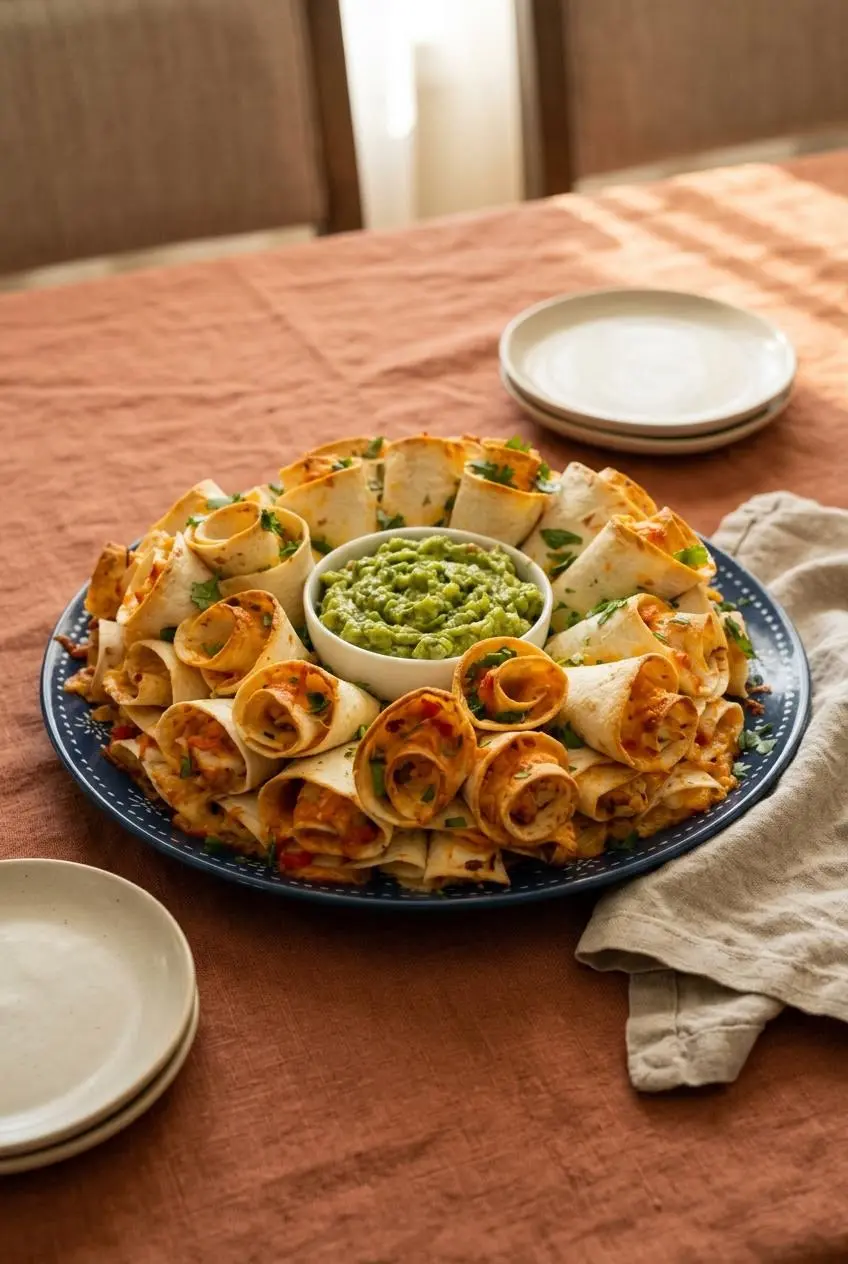
Use a bowl that fits comfortably inside the opening without pressing against the cones. Set it in place after transferring the ring, not while baking.
- Warm queso blanco: A rich option for guests who want extra cheese.
- Chunky guacamole: Adds creamy contrast to the crisp tortillas.
- Restaurant-style salsa or sour cream: Offers a brighter or cooler counterpoint to the seasoned chicken.
For a fruity contrast, serve fresh mango salsa alongside the ring. Keep extra dip nearby so guests don’t need to reach across the entire platter.
Add chopped cilantro, sliced green onions, diced tomatoes, or pickled jalapeños just before serving. A light scattering adds freshness without hiding the crisp edges.
Make-Ahead, Storage, and Reheating Guide
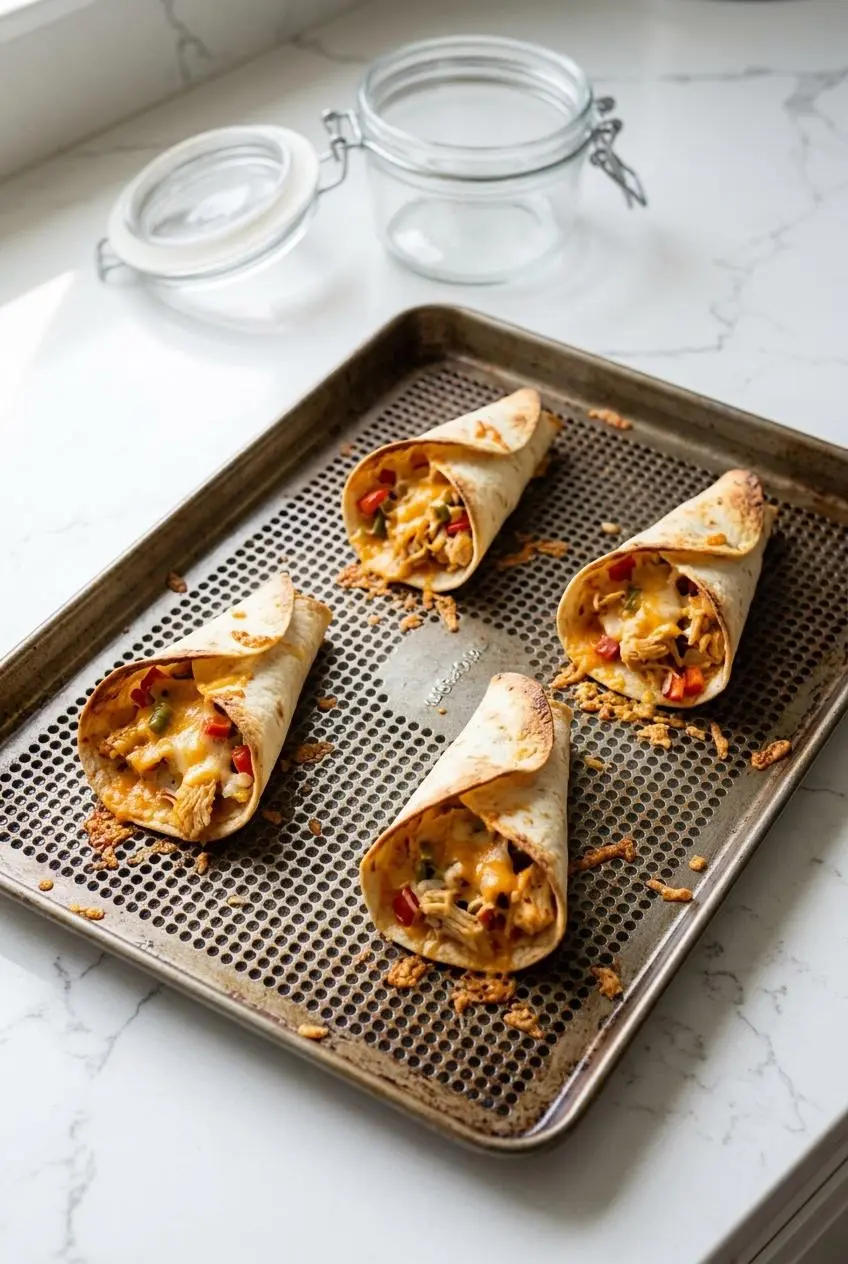
For easier party preparation, organize the filling, cheeses, and tortillas separately, and leave the final assembly and baking close to serving. This keeps moist filling from sitting against the tortillas unnecessarily.
Keep cooked chicken and mixed filling covered and refrigerated while you organize the remaining ingredients. There isn’t a confirmed advance-assembly window here, so don’t rely on a specific holding time for a fully stacked ring. If you refrigerate an assembled ring during preparation, remove any covering and the center jar before baking, and check the filling as well as the tortilla edges.
Refrigerate leftovers promptly in a covered container. Store the dipping sauce and fresh garnishes separately so they don’t soften the tortilla shells. Individual cones are easier to store and reheat than an intact stack.
For reheating, arrange cones with space between them in an oven or air fryer so heat can reach the exposed edges. Check that the filling reaches 165°F when reheating leftovers, using a food thermometer. A microwave can warm the filling, but it won’t restore the same crisp shell.
Conclusion
This pull-apart ring brings crisp tortilla edges, seasoned chicken, and melted cheese to one shareable platter. Flexible tortillas and evenly paced filling make the assembly much less frustrating.
Choose the raw-vegetable crunch or the optional sautéed filling, and add garlic butter to the tips if you want extra richness. Have the platter and dip ready when the ring comes out of the oven.
Frequently Asked Questions
How Do I Keep the Tortilla Cones From Unrolling While Assembling the Ring?
Warm stiff tortillas briefly so they bend instead of springing open. Roll from the cut edge with a snug overlap, then place the seam underneath. Optionally dab softened cream cheese or refried beans onto the flap to help seal it.
Can I Make a Blooming Quesadilla Ring Ahead of Time?
Prepare and refrigerate the filling separately to reduce assembly work. For the best texture, roll, stack, and bake close to serving rather than relying on an unconfirmed advance-assembly window. Remove any covering and the center jar before baking.
Why Did I Run Out of Chicken Filling Before Finishing All Three Layers?
Heaping scoops on the first cones use up filling meant for all 40 tortilla halves. Divide the chicken mixture into four portions and use each portion for ten halves. Reserve cheese for the stacked layers before filling the cones.
How Do I Transfer the Baked Quesadilla Ring to a Serving Platter Without Breaking It?
Let it rest on the sheet for 5 minutes so the melted cheese firms slightly. Slide the parchment and ring together onto a wide, flat platter. If lifting instead, support the base with two wide spatulas rather than one.

Blooming Quesadilla Ring

Equipment
- Baking Sheet
- Parchment Paper
- wide mouth jar or glass
- Serving platter
Ingredients
- 3 cups cooked and shredded chicken
- 1 onion chopped
- 1 red bell pepper chopped
- 1 jalapeño chopped
- 1 cup taco sauce
- 20 taco-size tortillas
- 3 cups shredded cheddar cheese
- 3 cups shredded monterey jack cheese
Instructions
- Set the oven to 375°F (190°C) and cover a baking sheet with parchment. The parchment should lie flat beneath the entire ring.
- Stir the chicken, onion, red bell pepper, jalapeño, and taco sauce together in a large bowl, then set the bowl aside. The sauce should coat the chicken evenly, with vegetables distributed throughout.
- Halve all 20 tortillas and distribute cheddar, Monterey Jack, and chicken filling across the cut pieces, aiming for about 2 tablespoons of each per half while checking the available amounts. Keep the portions even and leave cheese available for layering rather than packing the first cones heavily.
- Shape each filled half into a cone by bringing the tortilla around itself from the straight, cut edge. The overlapping flap should sit snugly without squeezing filling through the wide opening.
- Position a wide-mouth jar or glass in the middle of the lined sheet. This temporary guide marks the opening that will remain in the finished ring.
- Arrange about 13 cones around the jar with their tips pointing inward and touching it, scatter both cheeses over them, and repeat to form two more layers before topping with the remaining cheese and removing the jar. The cones should form a supported stack with an empty center before the sheet enters the oven.
- Bake the assembled ring for 15 to 20 minutes. Look for fully melted cheese and crisp tortilla edges with golden color.
- Move the baked ring carefully onto a serving platter, add your chosen dip to the center, finish with any desired garnishes, and serve promptly. The cones should stay connected while the outer edges remain crisp.