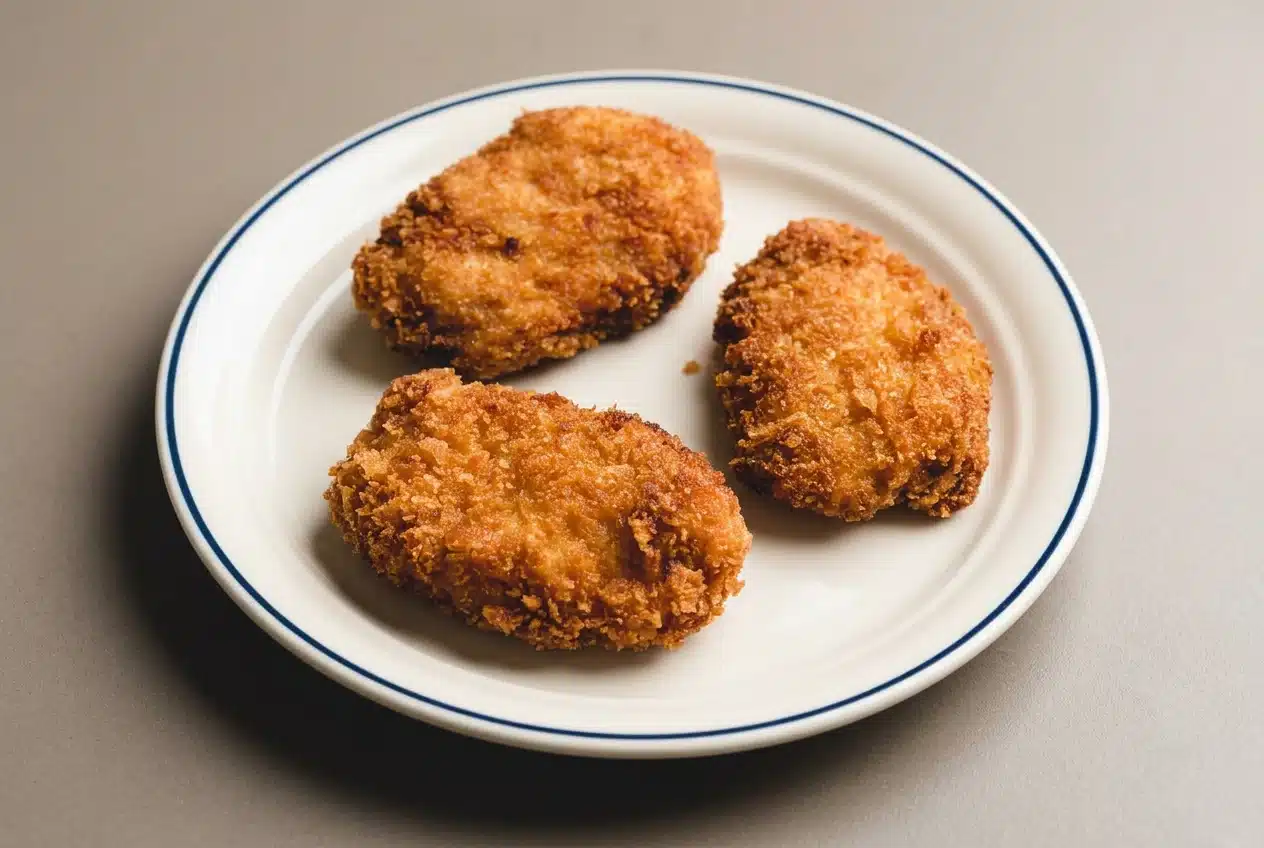
Crispy tofu katsu is a Japanese-style breaded tofu cutlet with a golden, shatteringly crisp panko crust. Press the tofu, coat it in starch, yogurt, and panko, then deep-fry, air-fry, or bake using pre-toasted crumbs.
These cutlets pair a tender tofu center with an airy breadcrumb shell. They’re a meatless take on Japanese katsu, ready for rice, finely shredded cabbage, and a tangy sauce.
You can choose your cooking method without changing the essential breading sequence. The useful trick is getting that coating onto the narrow edges, too. That’s where the crunch often goes missing.
Set out the breading bowls before handling the tofu so you can move from dry coating to binder to crumbs without leaving wet fingerprints everywhere.
Key Ingredients and Smart Substitutions
Tofu provides the tender center, starch anchors the coating, yogurt holds the panko, and oil develops the golden crust. Salt and pepper season the tofu itself, so the flavor doesn’t stop at the breadcrumbs.
- 14 oz package of medium firm, firm or extra firm tofu
- salt
- pepper
- 1/4 cup potato starch or all purpose flour
- 3 tbsp yogurt*
- 1/2 cup (70 g) panko
- oil for frying
*Choose plant-based yogurt if you want to keep the cutlets vegan.
Choosing and Prepping the Tofu
Firm and extra-firm tofu are the easiest choices for handling sturdy slabs. Medium-firm tofu gives a softer center and needs a gentler touch. Silken tofu is too fragile for this cutlet method.
Fresh-pressed tofu keeps a smoother, more tender interior. Frozen-and-thawed tofu develops a more porous, chewy texture, with layers that contrast nicely with the panko. Neither choice needs to imitate meat to make a satisfying cutlet.
Pressing removes excess water inside the block; patting dry addresses moisture on the outside. Both matter because a damp surface makes an uneven foundation for breading.
Dry Starch, Wet Binder, and Authentic Japanese Panko
Potato starch or all-purpose flour gives the wet binder something to grip. Aim for a thin coating rather than a chalky buildup, which can collect in gummy pockets beneath the crumbs.
Yogurt has enough body to hold jagged panko flakes against the tofu. Aquafaba is another plant-based binder option mentioned in the method. Thickened plant milk or a starch slurry can serve as optional alternatives, while plain, thin plant milk tends to run off rather than cling.
Japanese panko has larger, lighter flakes than regular fine breadcrumbs. That irregular structure creates the airy crunch associated with katsu; fine crumbs produce a tighter, denser shell.
I look for distinct, flaky pieces of panko rather than powdery crumbs when choosing breading for katsu.
How to Make Crispy Tofu Katsu Step by Step
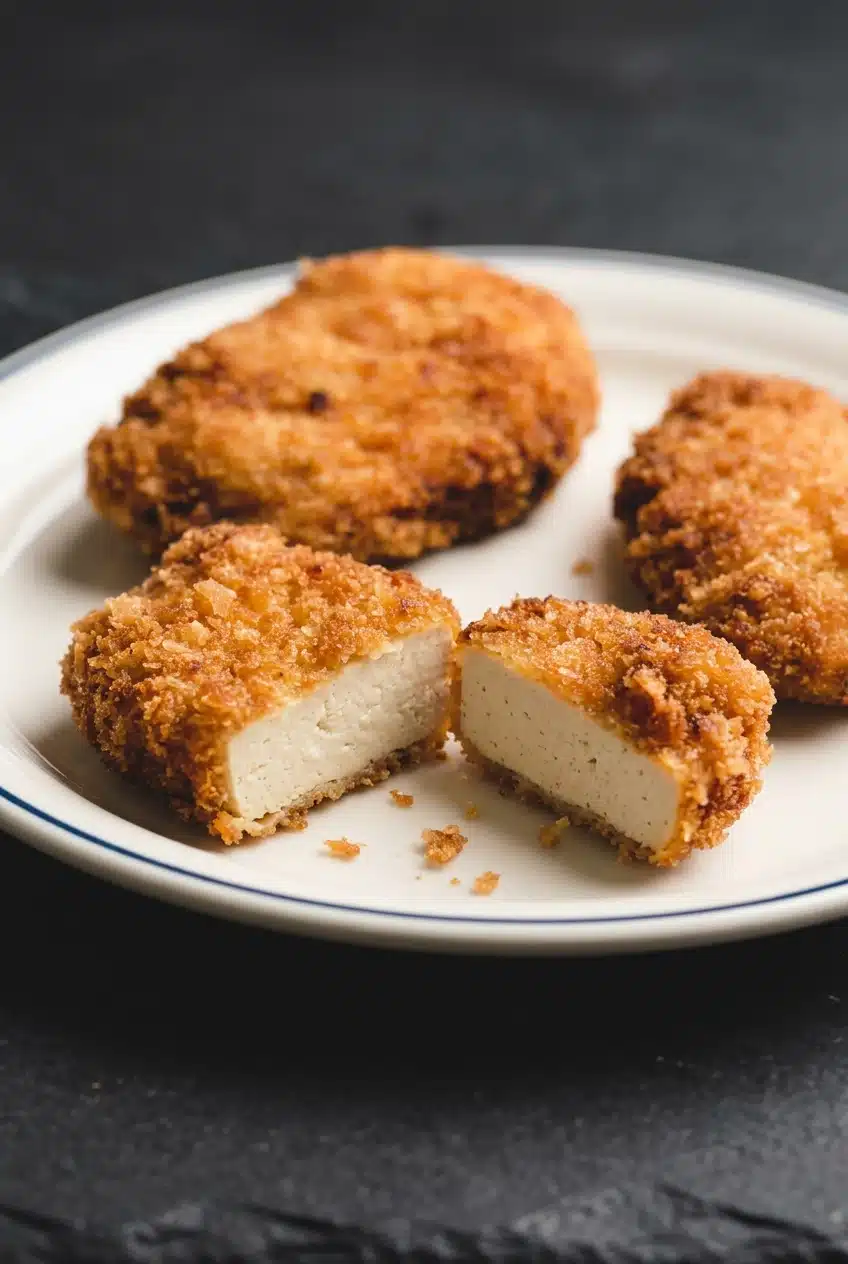
Prepare the tofu and breading station first, then choose one cooking pathway. For baking, leave the tofu unbreaded until you’ve toasted the panko.
Prep: 30 minutes · Cook: 30 minutes · Total: 1 hour · Servings: 4
The listed total does not include the optional freeze-and-thaw preparation.
Pressing, Shaping, and Breading the Cutlets
Make the Tofu Cutlet
- Choose either fresh-pressed tofu or freeze-thaw preparation, then remove excess water with a tofu press or a weighted cutting board.
For the fresh route, press firm or extra-firm tofu for at least 20 minutes; for the frozen route, freeze it overnight, thaw in the refrigerator, and press, with medium-firm tofu optionally undergoing two freeze-thaw-and-press cycles. - Cut regular cutlets into 1/2-inch-thick slabs and trim the corners if you prefer a rounded shape.
A block may give about three regular slabs, or you can divide it into four smaller pieces and leave them rectangular or shape them into irregular nuggets. - Arrange three shallow dishes with starch or flour first, yogurt second, and panko third, stirring oil into the yogurt or aquafaba only if using that optional addition.
The binder should coat the tofu rather than sit in thick lumps, so loosen very thick yogurt with a little water. - Dry every tofu surface with a lint-free towel or paper towel, season both faces with salt and pepper, then use a fork to guide each piece through the dry coating, yogurt, and panko.
Press crumbs against both broad faces and every narrow edge, then gently shake away loose flakes before breading the next piece.
Deep-Frying, Air-Frying, and Oven-Baking Pathways
Deep Fry
- Fill a heavy-bottomed pot with oil to a depth of 1 1/2 to 2 inches and heat over medium-high heat to 180 °C / 350 °F.
A test flake of panko should rise to the surface and sizzle, rather than settle at the bottom. - Lower one or two cutlets into the oil and leave them undisturbed until the first side is golden, about 1 1/2 minutes, then turn carefully and fry for another 2 to 3 minutes.
Look for a golden-brown crust on both faces before lifting the cutlets out. - Lift each cutlet with tongs or chopsticks and transfer it to a paper-lined wire rack or plate.
Let excess oil drain while you finish cooking the remaining pieces in batches.
Air Fry
- Prepare and bread the cutlets as above, preheat the air fryer to 375 °F, and optionally spray both the basket and cutlets with oil before arranging them inside.
The oil spray encourages a more fried-looking, crisp finish but remains optional. - Air-fry for 6 to 8 minutes, turn the cutlets, and continue for another 5 minutes.
Check for light golden crumbs before turning and a golden-brown finish afterward.
Baked
- Complete the tofu preparation and breading-station setup, leaving the tofu unbreaded, then heat the oven to 400 °F and set an oven-safe rack over a baking sheet, or use parchment paper.
The panko should still be separate at this stage because it needs to brown before coating the tofu. - Toast the panko in a skillet over medium heat with a spray of oil, then take it off the heat and transfer it to the crumb dish before seasoning and breading the dried tofu.
Watch for golden crumbs before coating both faces and all the edges. - Arrange the breaded tofu on the prepared rack or lined baking sheet and bake for 10 to 12 minutes per side.
The finished coating should look golden brown all over.
To Serve
Pair the cutlets with rice and cabbage, or use them for katsu curry, a tofu katsu sando, or a vegan katsudon-style bowl.
Pro Tips for Maximum Crunch and Troubleshooting
Most coating problems begin before the tofu reaches the heat. Check the surface and edges first.
- Patchy coating: Wet spots interrupt the dry layer, while heavy starch deposits make it uneven; pat thoroughly and keep the dusting thin.
- Crumbs slipping off the edges: Narrow sides often miss the binder or panko; coat them deliberately and press the flakes into place before shaking off excess.
- Coating disturbed during frying: Moving a cutlet too early can dislodge crumbs; let the first face become golden before turning it.
- Uneven browning or oily crumbs: Crowding drops the oil temperature and limits air circulation in an air fryer; leave space and cook in batches.
- Dark crumbs before the cutlet cooks evenly: Oil that’s too hot browns panko quickly; check with a thermometer rather than relying on color alone.
- A damp underside after frying: Flat resting surfaces trap steam; an elevated wire rack gives the crust airflow.
As an optional handling tip, let breaded cutlets rest briefly on a rack before cooking to give the coating a chance to settle. After frying, you can also tilt each cutlet briefly over the pot so surface oil runs off before transferring it to the rack.
Cooking Method and Flavor Variations
Deep-frying gives the most enveloping golden crust. The other pathways offer different conveniences while keeping the same tofu-and-panko combination.
Air Fryer Crispy Tofu Katsu
The air fryer is convenient when you’d rather skip a pot of hot oil. Expect golden panko with a lighter finish, especially where the optional oil mist reaches the flakes; follow the air-fryer pathway above.
For a different Japanese-style tofu coating, air fryer agedashi tofu uses starch rather than a panko shell.
Oven-Baked Tofu Katsu with Pre-Toasted Panko
Pre-toasted panko gives baked cutlets their color before they enter the oven. That matters because untreated crumbs can remain pale while the tofu heats through. The oven pathway works well when you want to use a baking sheet rather than cook small batches in a basket.
Egg-Based Vegetarian Tofu Katsu
Beaten egg can replace the yogurt binder for an optional vegetarian version. It fills the same middle position between the dry coating and panko, but it changes the cutlets from plant-based to egg-based.
Gluten-Free and Savory Seasoned Panko Adaptations
- Gluten-free direction: Choose the potato starch option with gluten-free panko, checking the remaining products against your dietary requirements.
- Garlic-sesame panko: An optional direction for a more aromatic, nutty crust.
- Mild curry crumbs: A warm-spiced variation that fits especially well with curry rice.
- Teriyaki and togarashi: An optional sweet-savory and spicy finish; keep sauce light if you want the panko texture to remain prominent.
Traditional Accompaniments and Serving Ideas
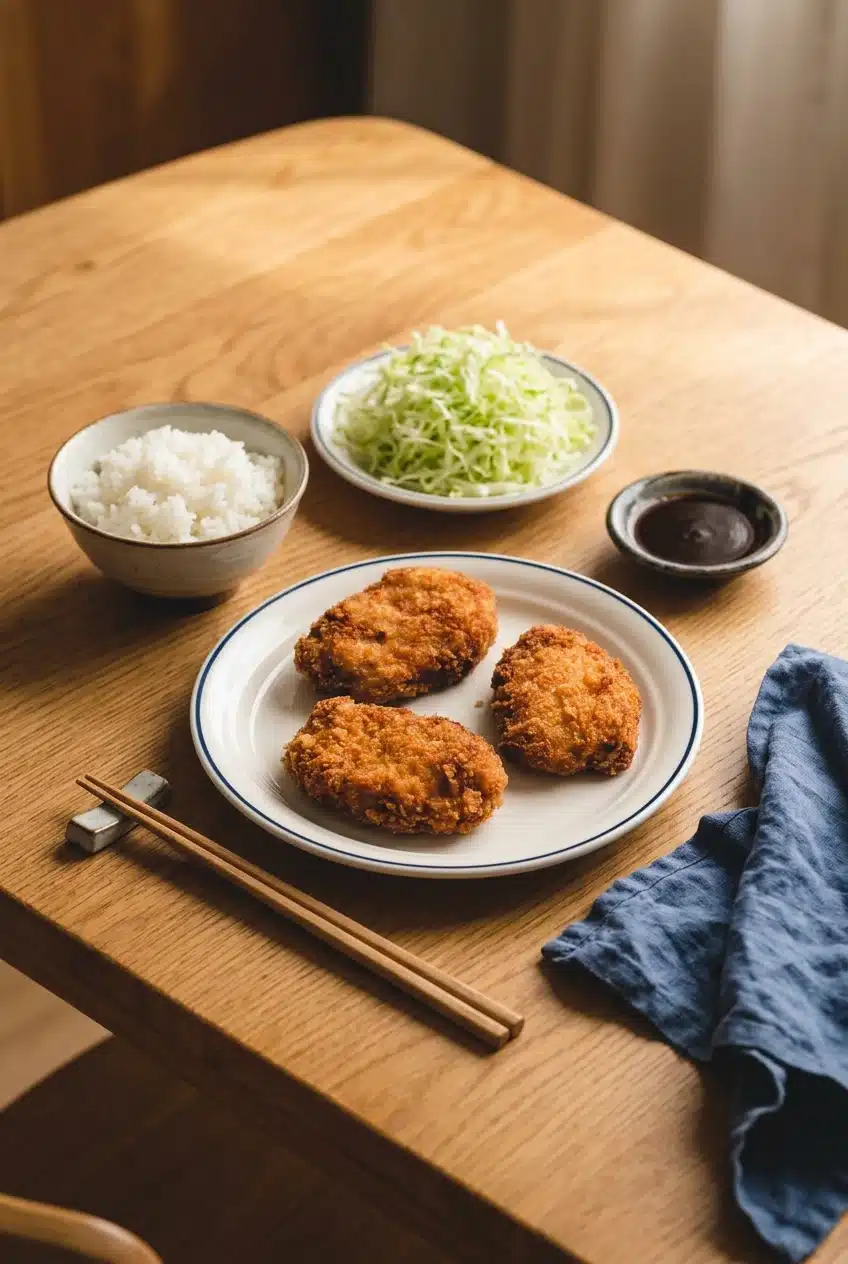
Keep something fresh and something tangy alongside the cutlets to contrast with the fried coating.
- Classic plate: Serve with steamed short-grain Japanese rice, finely shredded green cabbage, and tangy tonkatsu sauce, the same familiar accompaniments used with classic chicken katsu.
- Katsu curry: Add sliced tofu katsu to a rice bowl with warm Japanese curry, keeping some crust above the sauce.
- Katsu sando: Tuck a cutlet into soft bread with slaw and sauce for a crunchy sandwich.
- Katsudon-style bowl: Arrange the tofu over rice with your preferred plant-based accompaniments for a vegan interpretation.
If you’re cooking strictly vegan, check the ingredients of bottled tonkatsu or Worcestershire sauces, curry products, and sandwich bread before choosing them.
Make-Ahead Preparation and Component Organization
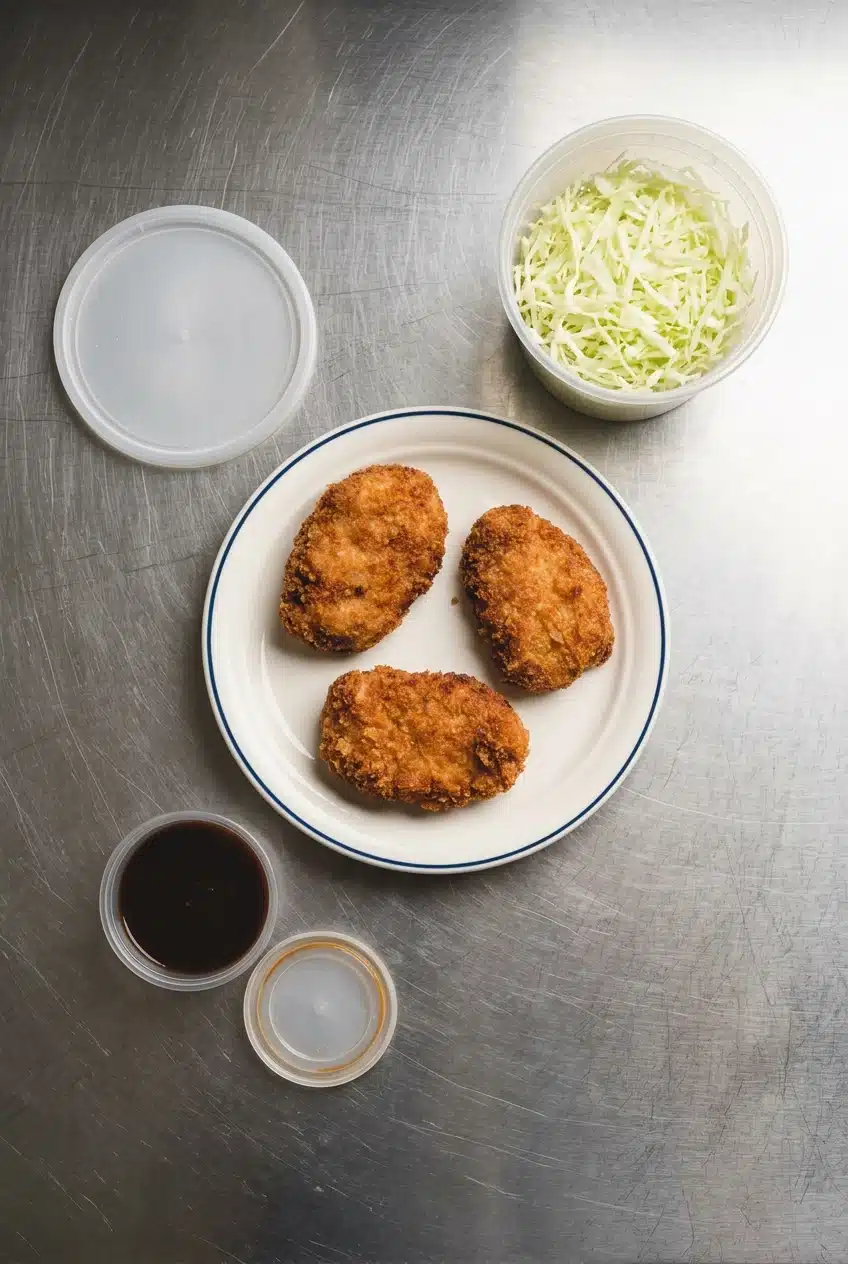
Organize the meal around separate components rather than assembling sauced cutlets in advance. Keep sauce and dressed slaw in separate containers, and bring them together with the tofu at serving time.
The optional freeze-thaw preparation applies to unbreaded tofu. It changes the interior texture before pressing and coating; it isn’t a method for storing finished breaded cutlets.
For the clearest route to the intended crunch, coordinate the rice, cabbage, and sauce so they’re ready when the cutlets finish cooking.
Final Thoughts on Homemade Tofu Katsu
Dry tofu, an even binder layer, and flaky panko give these cutlets their crisp golden shell. Pay particular attention to the edges before cooking.
Choose the frying, air-frying, or baking pathway that suits your kitchen. Have the rice bowl or sandwich ready to welcome that crunch.
Frequently Asked Questions
How Do You Make Crispy Katsu Tofu So the Breading Stays On?
Press the tofu and pat every surface dry before adding a thin starch or flour coating. Cover both faces and all edges with binder, then press on the panko firmly. During frying, let the first side turn golden before moving or flipping it.
What Is the Secret to Extra Crispy Tofu Katsu?
Use flaky Japanese panko rather than fine breadcrumbs. Avoid crowded cooking batches and drain fried cutlets with airflow underneath.
What Is Japanese Tofu Katsu?
It’s a meatless adaptation of Japanese breaded cutlets, using tofu inside a crisp panko shell. Rice, shredded cabbage, and savory-sweet cutlet sauce are familiar accompaniments.
Can I Make Crispy Tofu Katsu with Egg Instead of Vegan Substitutes?
Yes, beaten egg is an optional vegetarian alternative to the yogurt binder. Keep plant-based yogurt if you want the cutlets themselves to remain vegan.
Can You Air Fry or Bake Tofu Katsu Instead of Deep Frying?
Yes, both pathways appear in the method above. The air-fryer option includes optional oil spray; the baked option uses pre-toasted panko for golden color.
Is Crispy Tofu Still Healthy?
A crisp coating alone doesn’t establish whether a meal suits your nutritional needs. Consider your portion, sauce, sides, and chosen cooking method rather than treating one preparation as automatically healthier.
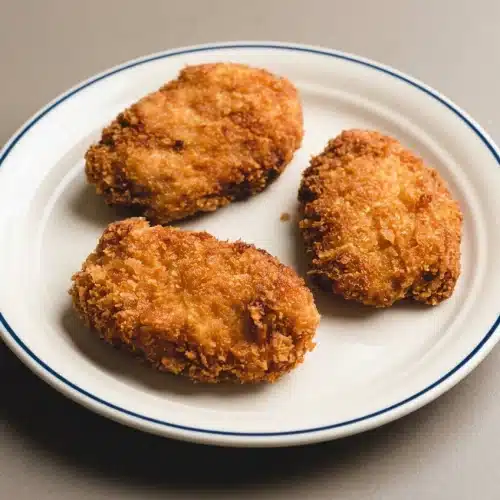
Crispy Tofu Katsu

Equipment
- Tofu press
- Shallow dishes
- Heavy-bottomed pot
- Wire rack
- Tongs
Ingredients
- 14 oz package of medium firm, firm or extra firm tofu
- salt
- pepper
- 1/4 cup potato starch or all purpose flour
- 3 tbsp yogurt* Choose plant-based yogurt if you want to keep the cutlets vegan.
- 1/2 cup panko (70 g)
- oil for frying
Instructions
Make the Tofu Cutlet
- Choose either fresh-pressed tofu or freeze-thaw preparation, then remove excess water with a tofu press or a weighted cutting board. For the fresh route, press firm or extra-firm tofu for at least 20 minutes; for the frozen route, freeze it overnight, thaw in the refrigerator, and press, with medium-firm tofu optionally undergoing two freeze-thaw-and-press cycles.
- Cut regular cutlets into 1/2-inch-thick slabs and trim the corners if you prefer a rounded shape. A block may give about three regular slabs, or you can divide it into four smaller pieces and leave them rectangular or shape them into irregular nuggets.
- Arrange three shallow dishes with starch or flour first, yogurt second, and panko third, stirring oil into the yogurt or aquafaba only if using that optional addition. The binder should coat the tofu rather than sit in thick lumps, so loosen very thick yogurt with a little water.
- Dry every tofu surface with a lint-free towel or paper towel, season both faces with salt and pepper, then use a fork to guide each piece through the dry coating, yogurt, and panko. Press crumbs against both broad faces and every narrow edge, then gently shake away loose flakes before breading the next piece.
Deep Fry
- Fill a heavy-bottomed pot with oil to a depth of 1 1/2 to 2 inches and heat over medium-high heat to 180 °C / 350 °F. A test flake of panko should rise to the surface and sizzle, rather than settle at the bottom.
- Lower one or two cutlets into the oil and leave them undisturbed until the first side is golden, about 1 1/2 minutes, then turn carefully and fry for another 2 to 3 minutes. Look for a golden-brown crust on both faces before lifting the cutlets out.
- Lift each cutlet with tongs or chopsticks and transfer it to a paper-lined wire rack or plate. Let excess oil drain while you finish cooking the remaining pieces in batches.
Air Fry
- Prepare and bread the cutlets as above, preheat the air fryer to 375 °F, and optionally spray both the basket and cutlets with oil before arranging them inside. The oil spray encourages a more fried-looking, crisp finish but remains optional.
- Air-fry for 6 to 8 minutes, turn the cutlets, and continue for another 5 minutes. Check for light golden crumbs before turning and a golden-brown finish afterward.
Baked
- Complete the tofu preparation and breading-station setup, leaving the tofu unbreaded, then heat the oven to 400 °F and set an oven-safe rack over a baking sheet, or use parchment paper. The panko should still be separate at this stage because it needs to brown before coating the tofu.
- Toast the panko in a skillet over medium heat with a spray of oil, then take it off the heat and transfer it to the crumb dish before seasoning and breading the dried tofu. Watch for golden crumbs before coating both faces and all the edges.
- Arrange the breaded tofu on the prepared rack or lined baking sheet and bake for 10 to 12 minutes per side. The finished coating should look golden brown all over.
To Serve
- Pair the cutlets with rice and cabbage, or use them for katsu curry, a tofu katsu sando, or a vegan katsudon-style bowl.