These strawberry pop tart cookies are soft, buttery sugar cookies filled with cooked, cornstarch-thickened strawberry jam and finished with milk icing and rainbow sanding sugar. They bring toaster-pastry nostalgia to a tender cookie, with a glossy filling that’s easier to contain during baking.
The appeal is that familiar combination of sweet icing, bright strawberry flavor, and colorful sugar on top. Instead of a crisp pastry shell, you get a thick cookie with a soft crumb and a jammy pocket tucked inside.
Sour cream and an extra egg yolk give the dough richness, while two chilling stages make it easier to shape and seal. The filling needs a brief stovetop simmer before it goes anywhere near the dough. Watch for the gloss.
Plan for at least 1 hour 15 minutes of chilling in addition to mixing, baking, cooling, and icing.
Ingredients
Strawberry jam supplies fruit flavor, butter and egg yolk add richness, and sour cream keeps the crumb tender. Cornstarch gives the filling body and softens the dough’s texture, while the milk icing and rainbow sugar provide sweetness and a colorful finish.
- 3/4 cup seedless strawberry jam
- 1-1/2 tablespoons cornstarch
- 1-1/2 tablespoons water
DOUGH
- 1/2 cup unsalted butter, room temperature
- 1 cup sugar
- 1 large egg, room temperature
- 1 large egg yolk, room temperature
- 1/4 cup sour cream
- 2 teaspoons vanilla extract
- 2-1/2 cups all-purpose flour
- 2 tablespoons cornstarch
- 1 teaspoon baking powder
- 1/2 teaspoon baking soda
- 1 teaspoon salt
TOPPING
- 1-1/4 cups confectioners’ sugar
- 2 tablespoons whole milk
- Rainbow sanding sugar, for garnish
Why Ingredient Roles Matter in Strawberry Pop-Tart Cookies
The filling and dough use cornstarch for different jobs. Keep their measurements separate as you work: one portion thickens the strawberry center, while the other contributes to a tender cookie.
- Seedless jam, cornstarch, and water: Seedless jam gives the center a smooth texture. Mixing cornstarch with water first disperses it before it meets the hot jam, reducing clumps. Heat turns that slurry into a thickener; cooling then gives the filling enough body to pipe into the dough.
- Sour cream, egg yolk, and dough cornstarch: Sour cream adds moisture and a gentle tang. The extra yolk brings richness without adding another whole egg’s worth of white. Cornstarch softens the flour mixture’s texture, helping the baked cookie feel more tender than chewy.
- Baking powder and baking soda: These provide lift, with the baking soda also working alongside acidic sour cream. Together with chilled butter and flour, they help the cookie rise while keeping enough structure around the filling.
Butter and sugar create the creamy foundation of the dough. Vanilla adds aroma, and salt balances the sweetness of both the jam and icing. Confectioners’ sugar dissolves into the milk topping without the graininess of granulated sugar.
I look for butter that yields to a finger but still holds its shape; melted or oily butter makes this dough harder to handle.
How to Make the Strawberry Pop Tart Cookies
Prepare the filling first so it can cool while you mix the dough. A stand mixer with a paddle attachment and a piping bag with a small round tip keep the mixing and filling stages manageable.
- Bring the strawberry jam to a gentle simmer in a small saucepan, stir in the cornstarch whisked with water in a separate bowl, and cook for 3 to 4 minutes with occasional stirring before transferring the filling to a bowl.
The slurry initially makes the jam cloudy, but the cooked mixture should become glossy and translucent as it thickens. - Beat the butter and sugar with the stand mixer’s paddle for 3 to 5 minutes, incorporate the whole egg and extra yolk thoroughly, then blend in the sour cream and vanilla.
The creamed butter should look lighter and fluffy before the eggs go in, and the finished wet mixture should look evenly combined. - Whisk the flour, dough cornstarch, baking powder, baking soda, and salt in a large separate bowl, then feed this mixture gradually into the mixer on low speed.
Stop as soon as the flour disappears so the dough stays tender rather than becoming overworked. - Cover the dough and refrigerate it for at least 1 hour or overnight, then put the cooled filling into a piping bag fitted with a small round tip and keep it chilled until shaping.
The dough should feel firm enough to flatten and lift, while the filling should hold a mound rather than run across the dough. - Portion the dough into 2 tablespoonfuls, press each portion into a 3-inch disc with a shallow center, pipe in 1 to 2 teaspoons of filling, lift and pinch the edges closed, then place each pouch seam down on two parchment-lined 15x10x1-inch baking sheets at least 2 inches apart and refrigerate for at least 15 minutes.
Each sealed cookie should completely surround the jam without an open seam or a visibly thin patch. - Heat the oven to 350°F, bake the chilled cookies for 10 to 12 minutes, and remove the sheets promptly when the cookies are done, leaving them on the sheets for 10 minutes to cool.
Look for lightly golden edges and pale centers that appear set, rather than waiting for the entire cookie to brown. - Whisk the confectioners’ sugar with the milk until smooth, spread 2 teaspoons of icing over each cookie with a spoon back or offset spatula, immediately add a generous pinch of rainbow sanding sugar, and leave the topping to set for 10 minutes.
The icing should form an even layer, with the sanding sugar clinging to its still-wet surface.
Step-by-Step Method for Perfect Stuffed Cookies
Shape each dough disc into a shallow bowl rather than stretching it into a thin sheet. The thicker bottom supports the jam while you gather the sides upward like a pouch. Pinch gently, keeping the filling below the seam so it doesn’t interfere with the seal.
The first chill firms the dough for handling. The second cools the shaped cookies after your hands have warmed them. Skipping either stage makes spreading and seam trouble more likely.
At the oven, judge the edges and centers together. A little gold around the perimeter is enough; the centers should remain pale but look set. They’ll be delicate when hot, which is why the baking-sheet cooling time matters.
Expert Tips and Troubleshooting for Leak-Proof Cookies
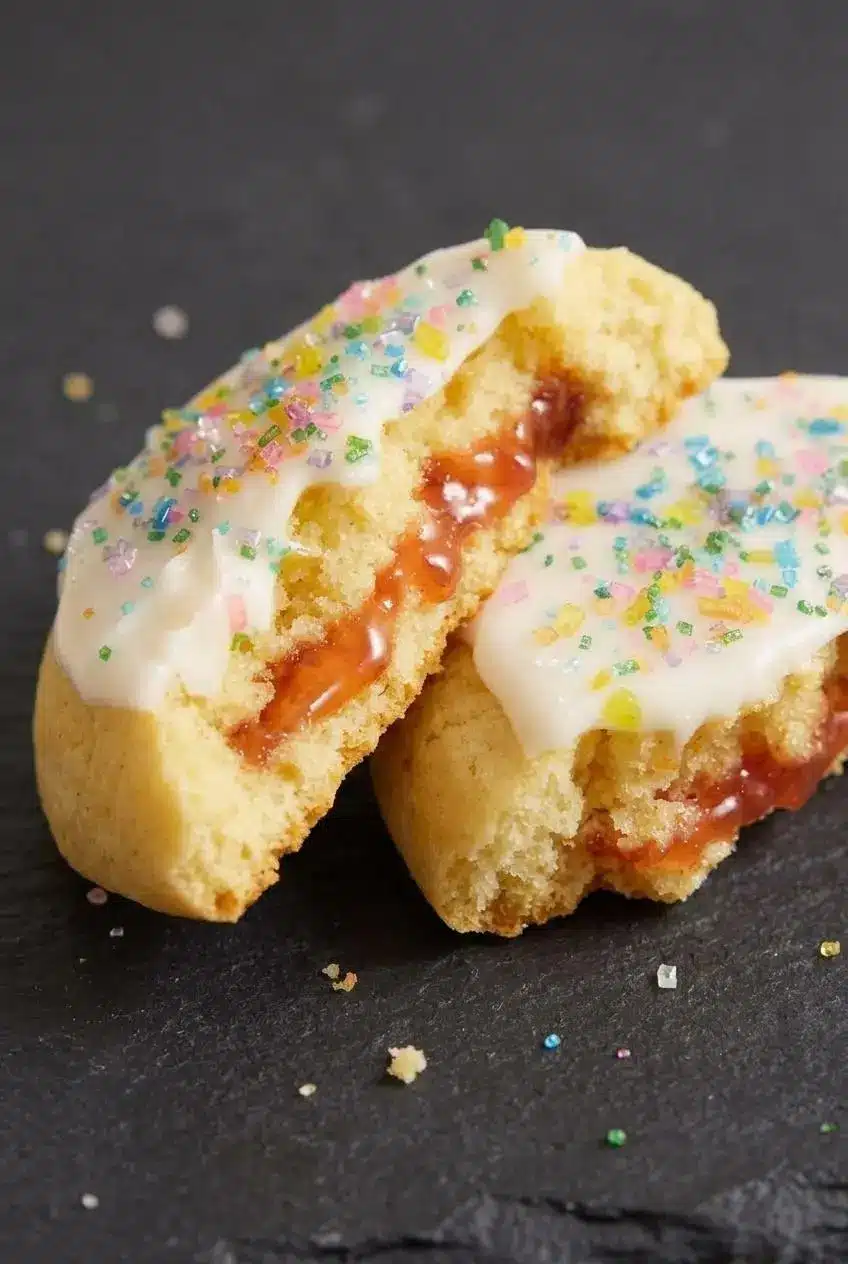
Thick filling and intact dough work together to reduce leaks. Extra jam won’t improve a cookie if it leaves too little dough to close the pocket.
- Jam escapes during baking: The filling may be too loose, the pocket overfilled, or the seam incomplete. Check the cooked filling’s thickness, stay within the filling amount, and inspect every closure before placing it seam down.
- Dough sticks or slumps: Warm butter makes shaping difficult. Return the covered dough to the refrigerator until it feels firm enough to lift without stretching.
- Seams crack: A thin edge can tear when pulled too hard. Gather the dough gently and press the edges together instead of tugging them across the jam.
- Cookies turn dry: Waiting for brown centers can overbake them. Use the lightly golden edges and set-center cue instead.
Why Cooking the Jam Helps the Filling Set
Raw cornstarch stirred into jam doesn’t create the thick filling you need. Stovetop heat allows the starch to absorb liquid and thicken the mixture. The change from cloudy to glossy is your practical cue that the slurry has cooked.
Chilling helps the cooked filling become easier to handle, but cold alone doesn’t replace that cooking stage. If you prefer homemade strawberry jam, use a smooth, seedless version and still follow the slurry method rather than assuming its initial thickness is enough.
How to Get Flat Tops and Perfectly Round Edges
For optional finishing, gently press a puffed top with the flat bottom of a drinking glass while the cookie is warm. Use light pressure so you don’t squeeze out the filling or compress the crumb.
To tidy uneven edges, surround a hot cookie with a round cutter or glass wider than the cookie and make small circular motions. This cookie scoot technique nudges the perimeter inward without cutting it. Work gently while the cookie is still pliable.
Flavor Variations and Flour Substitutions
Keep flavor changes separate from the dough and filling instructions above. These cookies hide jam inside a sealed pocket; a Crumbl-style presentation often emphasizes a frosted cookie topped with miniature toaster-pastry pieces instead.
For an optional strawberry-almond finish, add a little almond extract to the icing and sprinkle crushed freeze-dried strawberries alongside the rainbow sugar. Almond extract is assertive, so keep its flavor in the background.
Brown Sugar Cinnamon and Berry Filling Swaps
A brown sugar cinnamon center uses brown sugar, ground cinnamon, and flour instead of fruit jam. Follow the dedicated brown sugar pop-tart cookies method for that filling rather than applying the strawberry slurry quantities to it.
- Blueberry jam: Adds a deeper berry flavor; use a smooth jam for easier piping.
- Raspberry jam: Gives a brighter, tart contrast to the icing; choose seedless if you want a smooth center.
- Mixed berry jam: Combines fruit flavors while keeping the same stuffed-cookie approach.
- Cherry jam: Adds a richer fruit flavor; avoid large pieces that make sealing awkward.
- Royal icing: Offers a firmer alternative topping for gift packing, provided you let it dry fully before stacking.
Can You Use Gluten-Free Flour or Almond Flour?
A measure-for-measure gluten-free baking blend containing xanthan gum is the more promising substitute, though results can vary by brand. Follow the blend’s substitution directions and keep both chilling stages.
Almond flour isn’t a direct replacement. It lacks wheat flour’s gluten structure and can produce a softer, more fragile pouch that tears around the jam. Use a recipe developed for almond flour rather than replacing all the flour here.
Make-Ahead and Storage Guide
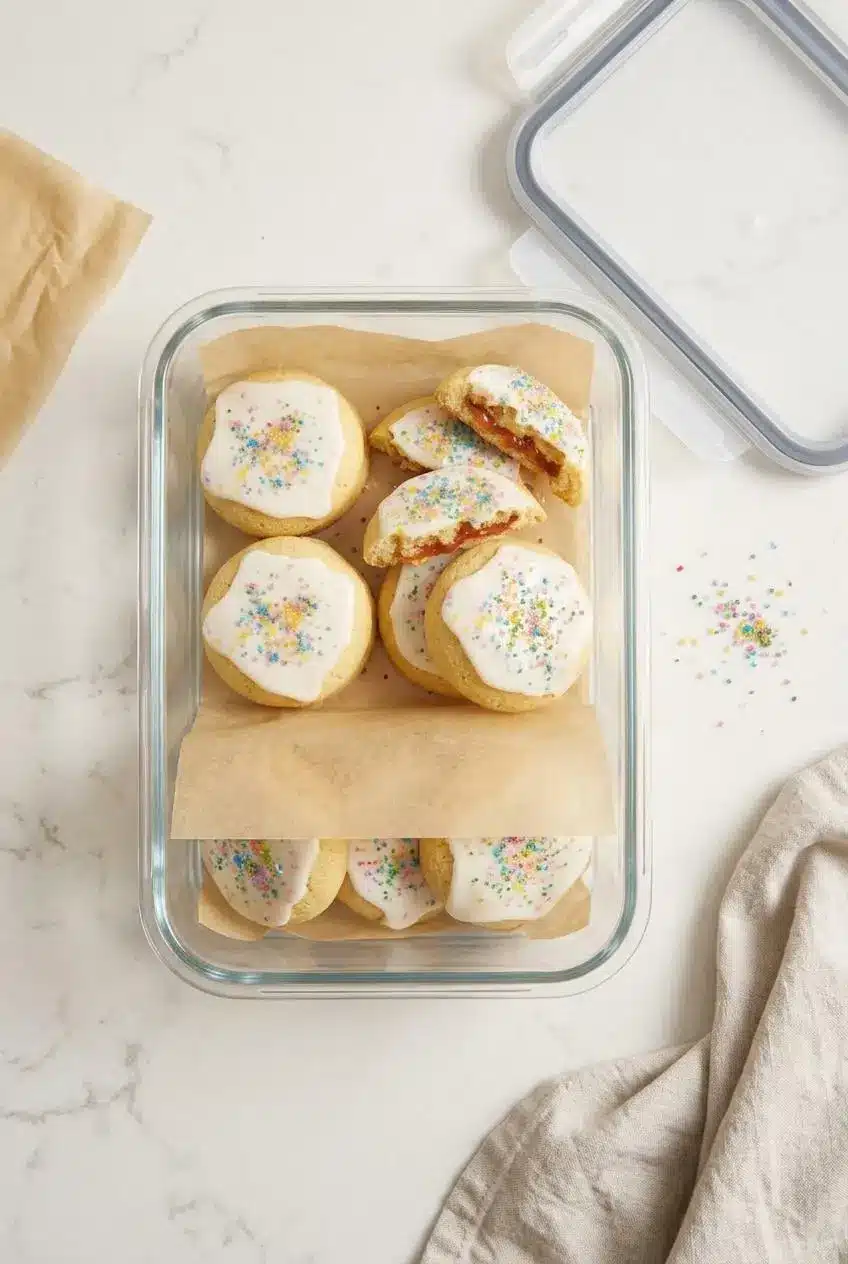
The dough’s covered overnight chilling option lets you split preparation across sessions. Keep the cooked filling chilled separately in its piping bag, then shape and bake when you’re ready.
For finished cookies, protect the topping before packing: let the cookies cool and the icing set completely. Place them in a tightly covered container with parchment between layers, and don’t press the layers together. Trapped warmth creates condensation that can soften the icing and dissolve the sanding sugar.
Keep the container away from heat and humidity. In a warm kitchen, refrigeration can help preserve the topping’s texture, but keep the container closed to limit moisture exposure. For serving, the buttery crumb is most pleasant at room temperature.
Keep unbaked dough chilled and avoid tasting mixtures containing raw eggs. The filling may smell tempting, but once it’s enclosed in raw dough, save that first bite for the baked cookie.
Best Ways to Serve Strawberry Pop-Tart Cookies

Serve these at room temperature with cold milk or hot coffee for an afternoon treat. The soft crumb and jam center contrast nicely with the thin icing layer and little crunch of sanding sugar.
For birthday parties, bake sales, or weekend gatherings, place fully set cookies in parchment-lined gift boxes. Keep them in a single layer when presentation matters, since pressure can mark the icing even after it sets.
A strawberry-themed dessert tray also works well: pair them with strawberry shortcake cookies for a second texture and a different take on the same fruit flavor.
Conclusion
These cookies combine buttery dough, a soft crumb, and a bright strawberry center with the nostalgic finish of icing and rainbow sugar. Cooking the jam until glossy and closing each pouch carefully make the biggest difference.
Keep the classic topping or try the optional almond-scented icing and crushed freeze-dried strawberries. Give the dough its chilling time, and let those pale, set centers guide you at the oven.
Frequently Asked Questions
How Do You Keep Jam From Leaking Out of Strawberry Pop Tart Cookies?
Cook the jam with the cornstarch slurry until glossy, then cool it completely. Use 1 to 2 teaspoons of filling and leave enough dough around it to close the pocket. Pinch every seam shut and chill the shaped cookies before baking.
Can You Make Strawberry Pop Tart Cookies With Gluten-Free Flour or Almond Flour?
A measure-for-measure gluten-free baking blend with xanthan gum may work, but texture varies by blend. Keep both chilling stages to make the dough easier to handle. Don’t replace all-purpose flour directly with almond flour; the filled pouch needs more structure.
Can You Prepare the Unbaked Dough Ahead?
Yes, cover the dough and use the overnight refrigerator option before shaping. Keep the cooled, cooked filling chilled separately until you’re ready to fill the cookies. After shaping, complete the second chill before baking.
Why Didn’t the Jam Filling Set Before Stuffing the Cookies?
Raw cornstarch needs heat to thicken; stirring it into cold jam isn’t enough. Cook the slurry with the jam until the cloudy appearance becomes glossy and translucent. Let the cooked filling cool before chilling and piping it into the dough.

Strawberry Pop Tart Cookies

Equipment
- Small saucepan
- stand mixer fitted with a paddle attachment
- piping bag fitted with a small, round tip
- two 15x10x1-in. parchment-lined baking sheets
- Offset spatula
Ingredients
- 3/4 cup seedless strawberry jam
- 1-1/2 tablespoons cornstarch
- 1-1/2 tablespoons water
DOUGH
- 1/2 cup unsalted butter room temperature
- 1 cup sugar
- 1 large egg room temperature
- 1 large egg yolk room temperature
- 1/4 cup sour cream
- 2 teaspoons vanilla extract
- 2-1/2 cups all-purpose flour
- 2 tablespoons cornstarch
- 1 teaspoon baking powder
- 1/2 teaspoon baking soda
- 1 teaspoon salt
TOPPING
- 1-1/4 cups confectioners’ sugar
- 2 tablespoons whole milk
- Rainbow sanding sugar for garnish
Instructions
- Bring the strawberry jam to a gentle simmer in a small saucepan, stir in the cornstarch whisked with water in a separate bowl, and cook for 3 to 4 minutes with occasional stirring before transferring the filling to a bowl. The slurry initially makes the jam cloudy, but the cooked mixture should become glossy and translucent as it thickens.
- Beat the butter and sugar with the stand mixer’s paddle for 3 to 5 minutes, incorporate the whole egg and extra yolk thoroughly, then blend in the sour cream and vanilla. The creamed butter should look lighter and fluffy before the eggs go in, and the finished wet mixture should look evenly combined.
- Whisk the flour, dough cornstarch, baking powder, baking soda, and salt in a large separate bowl, then feed this mixture gradually into the mixer on low speed. Stop as soon as the flour disappears so the dough stays tender rather than becoming overworked.
- Cover the dough and refrigerate it for at least 1 hour or overnight, then put the cooled filling into a piping bag fitted with a small round tip and keep it chilled until shaping. The dough should feel firm enough to flatten and lift, while the filling should hold a mound rather than run across the dough.
- Portion the dough into 2 tablespoonfuls, press each portion into a 3-inch disc with a shallow center, pipe in 1 to 2 teaspoons of filling, lift and pinch the edges closed, then place each pouch seam down on two parchment-lined 15x10x1-inch baking sheets at least 2 inches apart and refrigerate for at least 15 minutes. Each sealed cookie should completely surround the jam without an open seam or a visibly thin patch.
- Heat the oven to 350°F, bake the chilled cookies for 10 to 12 minutes, and remove the sheets promptly when the cookies are done, leaving them on the sheets for 10 minutes to cool. Look for lightly golden edges and pale centers that appear set, rather than waiting for the entire cookie to brown.
- Whisk the confectioners’ sugar with the milk until smooth, spread 2 teaspoons of icing over each cookie with a spoon back or offset spatula, immediately add a generous pinch of rainbow sanding sugar, and leave the topping to set for 10 minutes. The icing should form an even layer, with the sanding sugar clinging to its still-wet surface.