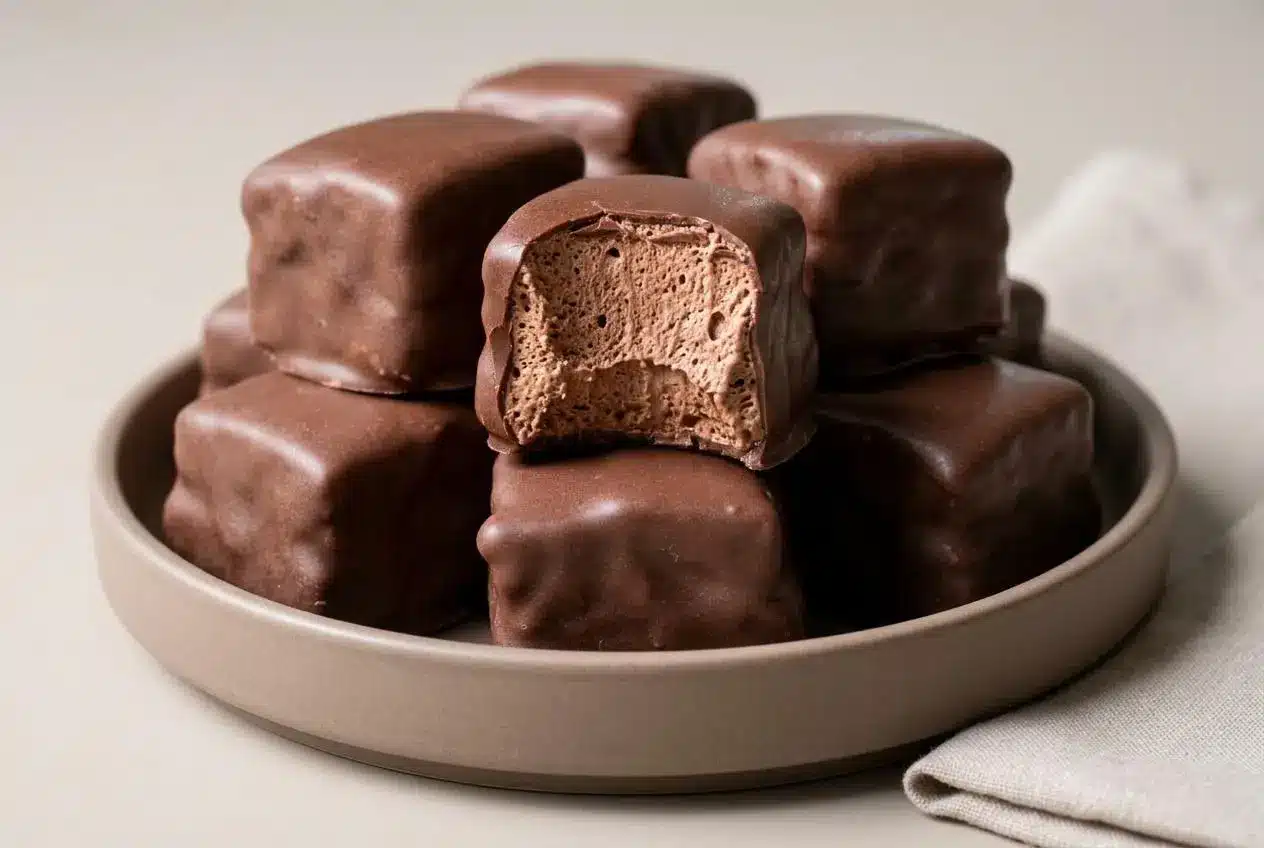
Cool Whip candy is a three-ingredient chocolate treat with a fluffy center and a crisp shell. Fold cooled, melted milk chocolate into thawed Cool Whip, freeze the filling, cut it into squares, then coat each piece in dark chocolate melting wafers.
This cool whip candy has the airy, nougat-like bite that makes a 3 Musketeers bar so appealing. The filling feels lighter than fudge, while the dark chocolate coating gives each square a satisfying snap.
You won’t need an oven, a candy thermometer, or a bubbling pot of sugar. The hands-on work is melting, folding, and dipping, with freezer breaks between stages. The trick is keeping the fluff inside.
Clear space for a baking sheet in your freezer before you start melting the chocolate.
Why This Cool Whip Candy Recipe Works
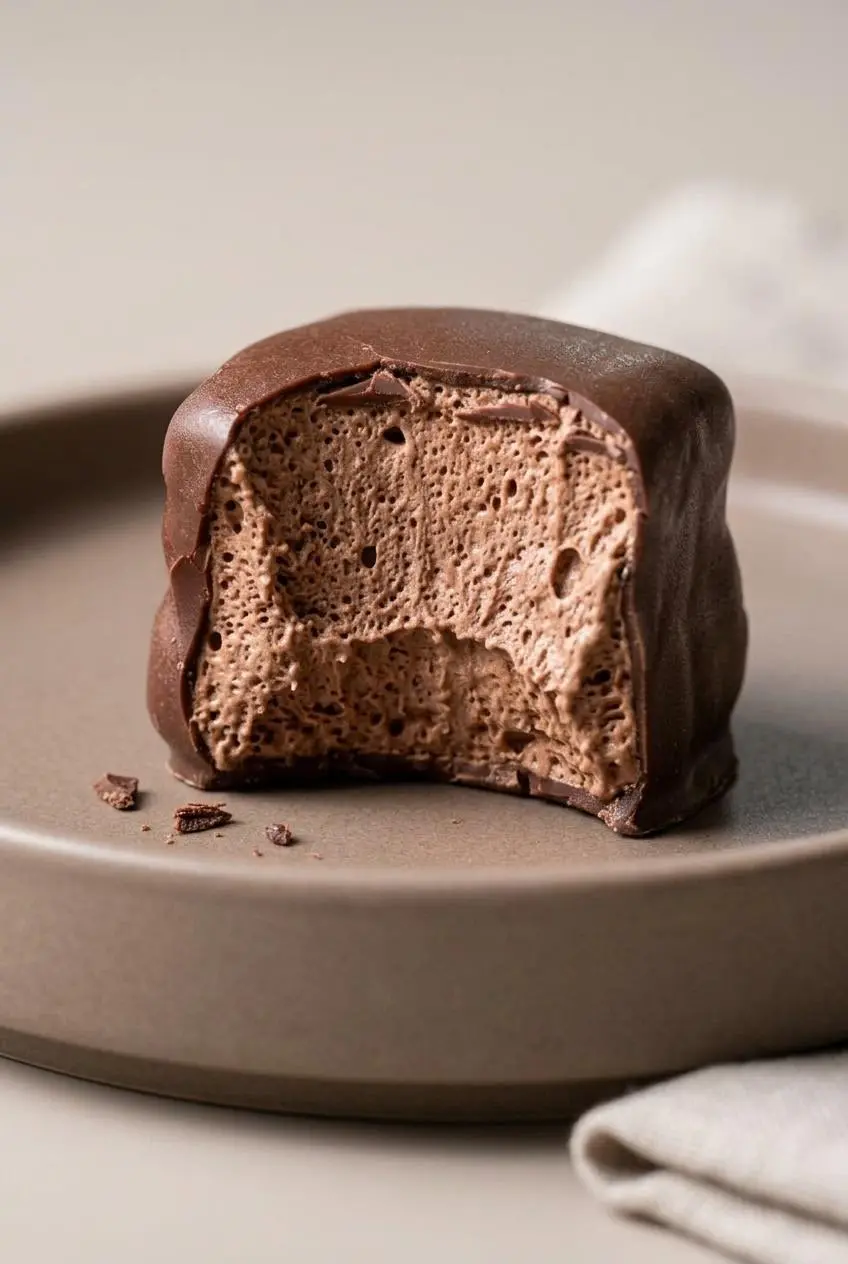
The whipped topping supplies the air; the melted chocolate gives that airy mixture body. Gentle folding brings them together without beating out the volume you want in the finished center.
Cool Whip contains vegetable oils and stabilizers, while chocolate contributes fat and solids that help the chilled filling hold its shape. You don’t need to manage those ingredients separately. Your job is to combine them gently and let the freezer firm up the mixture.
Milk chocolate makes the center sweet and creamy. The darker coating adds contrast, so each bite tastes chocolatey rather than uniformly sweet. A thin, even shell also gives you a cleaner balance between the crisp exterior and the soft middle.
Temperature matters more than speed here. Hot chocolate can melt the topping and reduce its volume. Let the chocolate reach room temperature before folding, but don’t leave it until it becomes stiff again. It should still flow from the spatula.
Unlike fresh whipped cream, packaged whipped topping gives this recipe a consistent starting texture. A homemade cream substitution would need separate testing rather than a direct swap.
Ingredients and Equipment You Need
Milk chocolate supplies sweetness and structure, thawed Cool Whip brings airy volume, and dark chocolate melting wafers form the contrasting outer shell. Each ingredient contributes to the candy’s soft-center, crisp-coating texture.
- 2 (11 oz each) packages milk chocolate chips
- 1 (8 oz) tub Cool Whip, thawed
- 24 oz dark chocolate melting wafers
Milk chocolate chips: These form the filling, not the coating. Stir thoroughly between microwave intervals because chips can retain their shape even after they have softened. Stop heating once stirring produces a smooth mixture.
Thawed Cool Whip: The topping should be scoopable throughout, without a frozen core. Ice crystals or hard patches make it harder to distribute the chocolate evenly without overworking the mixture.
I check the thawed topping with a gentle press of a clean fingertip; it should feel soft, without an icy patch beneath the surface.
Dark chocolate melting wafers: Choose wafers intended for coating candy, and follow their package directions. They’re designed to melt fluidly and set into a shell. Standard chocolate chips may melt more thickly, making dipping and draining less convenient.
Gather an 8×8-inch baking dish, parchment paper, a microwave-safe bowl, a mixing bowl, a rubber or silicone spatula, a sharp knife, a baking sheet, and a fork. A dipping fork is helpful, but an ordinary dinner fork works.
Leave parchment extending above the sides of the baking dish so you can lift out the chilled filling. The pan size matters: spreading the mixture into a larger dish would make thinner centers than intended.
How to Make Cool Whip Candy Step by Step
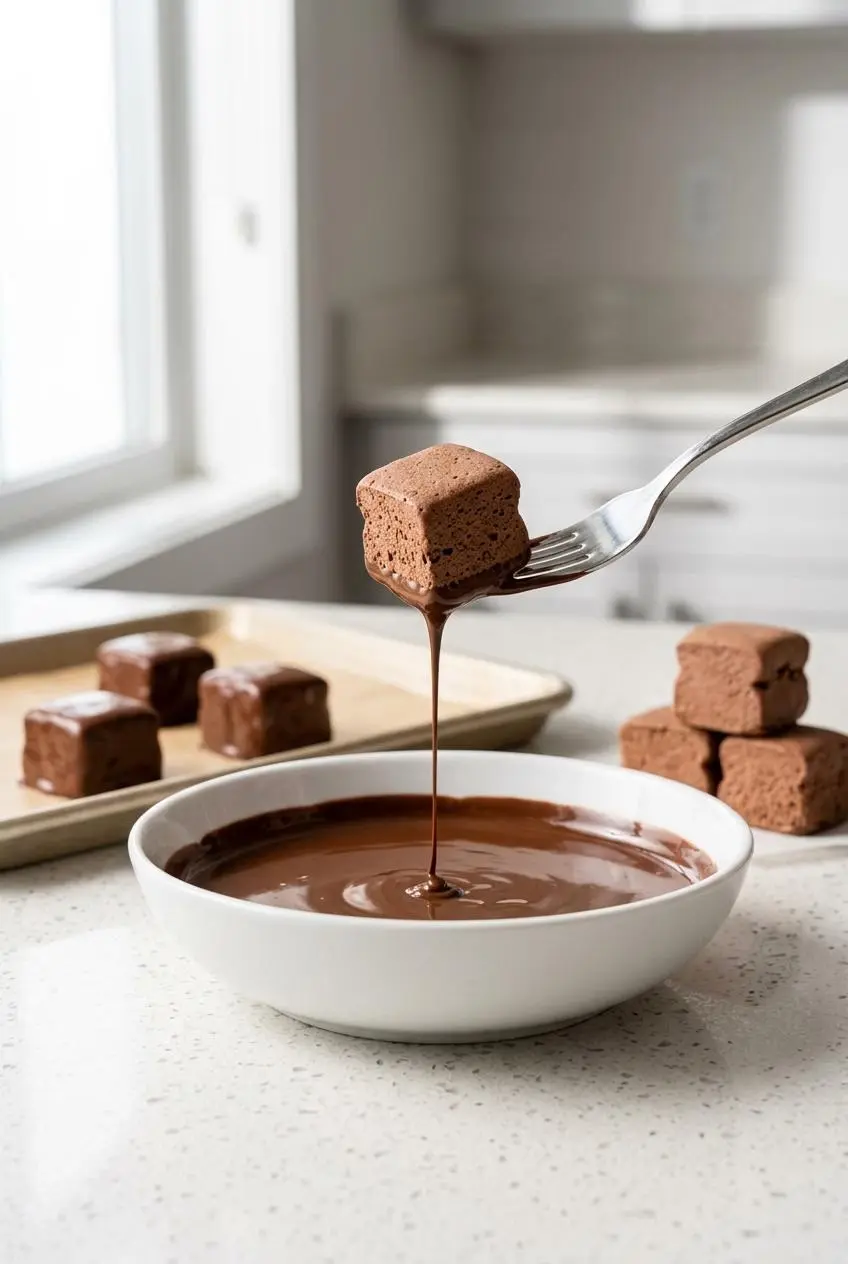
This recipe yields 36 candies. Keep the cooling pause and both freezing stages separate: the first makes the filling sliceable, and the second firms the individual pieces for dipping.
- Heat the milk chocolate chips in a microwave-safe bowl for 1 minute, then stir thoroughly and continue heating in 30-second intervals, stirring after each interval.
The chocolate is ready when stirring removes the remaining chip shapes and leaves a smooth mixture. - Set the melted chocolate aside to reach room temperature, allowing about 15 minutes.
It should remain fluid but no longer feel warm. - Fit parchment paper into an 8×8-inch baking dish, leaving enough overhang to lift the filling later.
The paper should cover the bottom and sides without large folds crowding the corners. - Fold the cooled chocolate into the thawed Cool Whip in a mixing bowl, then transfer the filling to the lined dish and level it with a spatula.
Look for an evenly chocolate-colored mixture with no broad white streaks. - Freeze the filled dish for 30 minutes, lift out the slab, and cut it into 36 squares.
The filling should hold its edges as the knife passes through it. - Arrange the cut centers on a parchment-lined baking sheet and freeze them for another 30 minutes.
Each piece should feel firm enough to lift without bending or smearing. - Prepare the dark chocolate wafers using their package directions, then use a fork to lower the frozen squares into the melted coating and lift them out.
A fully coated center should have chocolate covering its top, sides, and underside. - Let excess chocolate drain from the fork, then slide each candy onto the parchment-lined baking sheet and allow the shell to harden.
The coating should lose its wet appearance and feel set before you handle the pieces. - Keep the finished candies in the freezer until serving.
The centers should stay firm beneath their hardened chocolate shells.
Melting and Folding the Filling
Microwave chocolate cautiously. The stirring breaks help distribute heat and reveal whether the chips have already melted, so don’t judge readiness by their shape alone. More heat isn’t helpful once the chocolate is smooth.
Use temperature, not appearance or aroma, to judge the cooling stage. Chocolate can look glossy and smell rich while still being too warm for the topping. The cooling time is a guide; the goal is room-temperature chocolate that still pours.
For folding, run the spatula down the side of the bowl, sweep underneath the mixture, and bring it up over the top. Rotate the bowl and repeat. Scrape the bottom occasionally so you don’t leave a dense pocket of chocolate underneath the fluffy filling.
The Two-Stage Freezing Method
After the first freeze, the slab should resemble firm, chilled fudge: sliceable, but not necessarily hard like a finished frozen center. If it still drags and smears badly, let it firm further before cutting.
Cut six rows in each direction to make 36 squares. Wipe the knife between cuts when filling builds up on the blade. Clean cuts give the coating fewer ragged edges to catch on.
Don’t skip the second freeze. Cutting exposes more surface area and handling warms the filling. Freezing the separated pieces restores their firmness before they meet the melted coating.
Coating the Candies Like a Pro
Keep most of the centers in the freezer and bring out a small batch at a time. Even leaving half frozen while you coat the other half helps avoid a tray of increasingly soft squares.
Rest a center across the fork tines, lower it into the chocolate, and lift it out once covered. Tap the fork gently against the bowl rim to release excess coating. Avoid hard taps that could knock the center off.
Slide the candy onto parchment with a gentle nudge rather than scraping it forcefully off the fork. A heavy puddle underneath means more coating could have drained away. Aim for an even shell, not a thick chocolate platform.
Troubleshooting Common Candy Mistakes
Most problems come from chocolate temperature or centers that have softened. Check those before changing the ingredients.
- The filling has small chocolate flecks: Chocolate can firm quickly when it meets cooler topping. Fold gently to distribute it; small flecks don’t automatically mean the candy has failed.
- The mixture is stiff or badly lumpy: Uneven temperatures or overheated chocolate may be involved. Don’t microwave the combined filling or beat it aggressively, which can sacrifice more of its airy texture.
- The center collapses during dipping: It may be insufficiently frozen, or the coating may be overly hot. Return the undipped centers to the freezer and let the coating cool slightly while keeping it fluid.
- The coating thickens in the bowl: Frozen centers gradually cool the chocolate. Rewarm the wafers gently using the package directions, then stir until fluid again rather than adding water.
- The shell has bare patches: Thick coating or rough handling can leave gaps. Use fluid coating, cover the whole center, and lift it carefully with the fork.
- The cut edges crumble or look ragged: A dirty blade can pull at the filling. Wipe it clean and press straight down rather than sawing repeatedly.
Delicious Recipe Variations
Keep these optional changes separate from the chocolate-coated recipe above. Added flavors and substitute toppings can change how firmly the centers freeze and how easily they dip.
For a two-ingredient version, the milk chocolate and thawed whipped topping make an uncoated frozen confection. Without the wafers, it won’t have the crisp shell or the same handling qualities, so serve it as a frozen chocolate bite rather than a coated candy.
Peanut Butter Swirl Candy
For an optional peanut butter variation, loosen creamy peanut butter just enough to swirl, then let it cool so it isn’t hot. Dot it over the filling in the pan and draw a spatula through it before the first freeze.
Leave visible ribbons rather than mixing until uniform. The swirl adds nutty richness, but peanut butter can also make the center softer, so check firmness carefully before dipping.
Dairy-Free Coconut Whip Version
A dairy-free adaptation requires frozen coconut whipped topping, dairy-free chocolate chips, and a dairy-free coating. Check every package label; dark chocolate and coconut-based products aren’t automatically dairy-free.
Choose a coconut topping intended as a whipped-topping substitute and follow its package handling directions. Expect a coconut flavor and potentially different firmness. Keep the two-stage freezing approach, but judge readiness by whether the centers hold their shape rather than assuming the swap behaves identically.
Crunchy Pretzel and Sea Salt Toppings
Add optional surface toppings immediately after dipping, while the coating is still wet. Once the shell sets, garnishes won’t cling well.
- Crushed pretzels: Add salty crunch against the sweet filling; keep the pieces small enough to stay attached.
- Flaky sea salt: Use a light sprinkle to sharpen the chocolate contrast without overwhelming it.
- Crushed cookies: Add a crumbly topping, choosing crumbs rather than large chunks for easier eating.
- Vanilla bean paste and espresso powder: Fold these optional flavor boosters into the filling for a vanilla accent and deeper chocolate flavor.
For another whipped-topping dessert on a party spread, Cool Whip cookies offer a different texture alongside these frozen bites.
Storage, Freezing, and Serving Guidelines
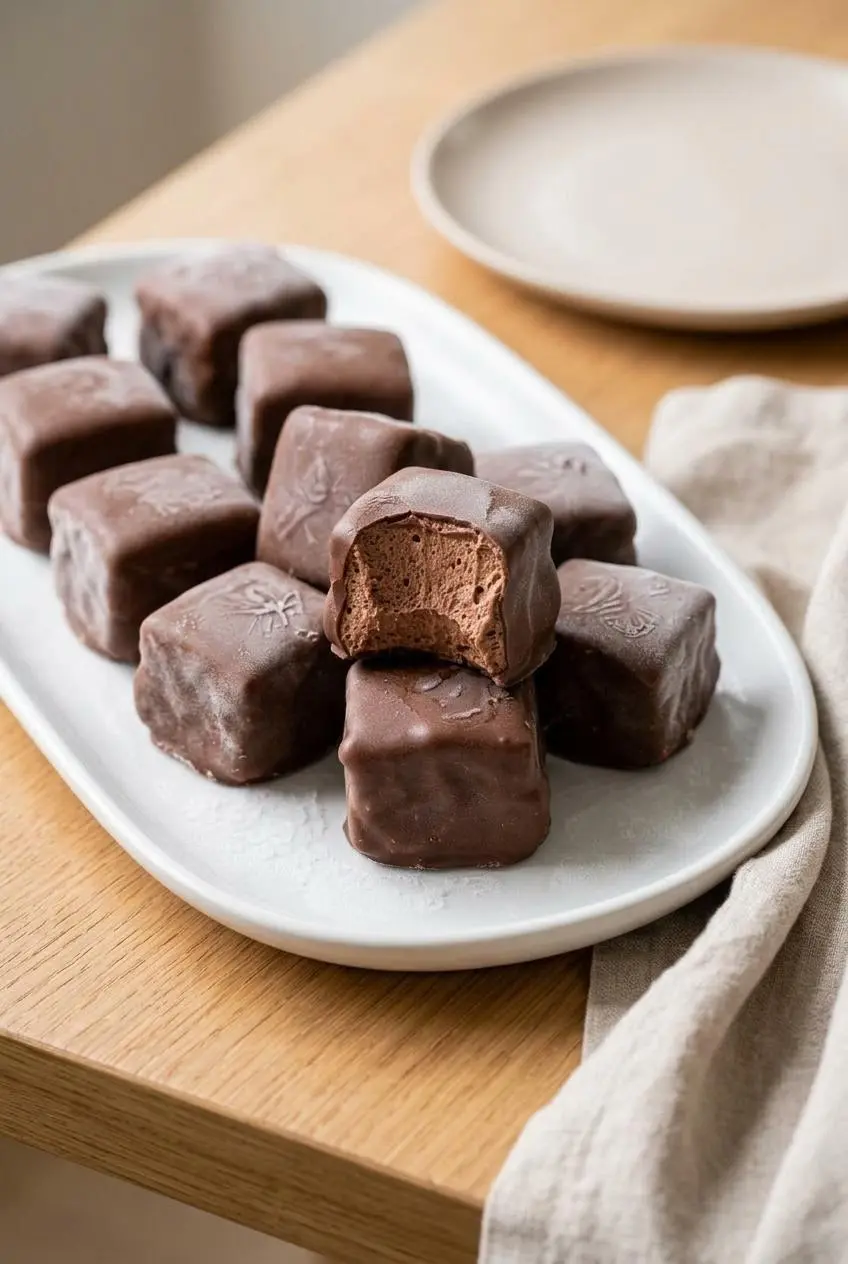
Store the finished candy in the freezer, not on the counter. Freezer storage is part of this recipe’s texture, helping the airy centers stay firm beneath the chocolate shell.
Once the coating has hardened, pack the candies in a tightly closed freezer container. Separate layers with parchment paper so the pieces don’t stick together or scrape each other’s coating. Label the container with the preparation date.
Use the refrigerator for neither long-term shape retention nor display. These centers can soften as they warm, even when the shell still looks intact. Keep the main batch frozen and take out only what you plan to serve.
For a party, arrange the candies on a chilled platter just before serving and replenish it from the freezer. Serve straight from frozen for the firmest bite, or let individual pieces soften slightly as you eat them.
If you’re giving them as a gift, explain that they need freezer storage. Individual wax-paper wraps can help separate the pieces, but a decorative box doesn’t replace chilled handling.
Conclusion
Cool Whip candy brings together an airy milk chocolate center and a crisp dark chocolate shell without oven time or sugar cooking. The freezer does much of the work.
Let the melted chocolate cool before folding, give the cut centers their second freeze, and dip in small batches. Keep the finished bites frozen until serving, and enjoy that first little snap.
Frequently Asked Questions
Why Did My Chocolate Seize When Mixed With Cool Whip?
Chocolate can become grainy or firm abruptly when it meets cooler whipped topping, while overly hot chocolate can melt the topping. Cool the melted chocolate to room temperature while keeping it fluid, then fold gently. Small chocolate flecks don’t necessarily ruin the filling.
Can I Store Cool Whip Candy in the Refrigerator?
Keep this recipe in the freezer to preserve its firm centers. Refrigerator storage can leave the filling too soft for neat handling, even if the outer coating remains set.
Can I Use Real Whipping Cream Instead of Cool Whip?
Real whipped cream isn’t a dependable direct substitute here. Its stability and behavior differ from packaged whipped topping, so the filling may lose volume or release moisture. Use Cool Whip for the intended texture.
How Far in Advance Can I Make Cool Whip Candy?
You can finish the candies before serving and keep them frozen in a tightly closed container with parchment between layers. There isn’t a verified storage duration for this recipe, so avoid assigning it a fixed freezer life. Leave the candies frozen until you’re ready to serve them.
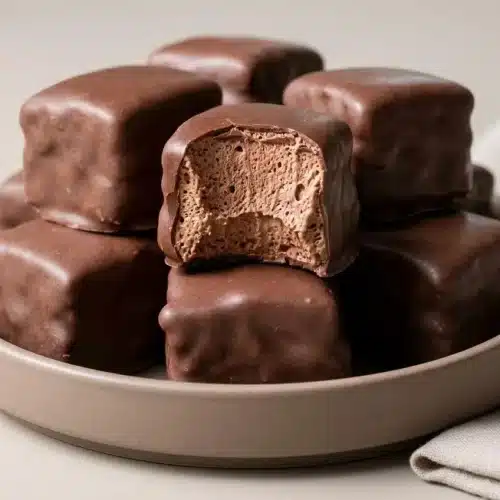
Cool Whip Candy

Equipment
- Microwave-safe Bowl
- 8×8-inch Baking Dish
- Parchment Paper
- Rubber spatula
- Baking Sheet
- Fork
Ingredients
- 2 packages milk chocolate chips 11 oz each
- 1 tub Cool Whip 8 oz, thawed
- 24 oz dark chocolate melting wafers
Instructions
- Heat the milk chocolate chips in a microwave-safe bowl for 1 minute, then stir thoroughly and continue heating in 30-second intervals, stirring after each interval. The chocolate is ready when stirring removes the remaining chip shapes and leaves a smooth mixture.
- Set the melted chocolate aside to reach room temperature, allowing about 15 minutes. It should remain fluid but no longer feel warm.
- Fit parchment paper into an 8×8-inch baking dish, leaving enough overhang to lift the filling later. The paper should cover the bottom and sides without large folds crowding the corners.
- Fold the cooled chocolate into the thawed Cool Whip in a mixing bowl, then transfer the filling to the lined dish and level it with a spatula. Look for an evenly chocolate-colored mixture with no broad white streaks.
- Freeze the filled dish for 30 minutes, lift out the slab, and cut it into 36 squares. The filling should hold its edges as the knife passes through it.
- Arrange the cut centers on a parchment-lined baking sheet and freeze them for another 30 minutes. Each piece should feel firm enough to lift without bending or smearing.
- Prepare the dark chocolate wafers using their package directions, then use a fork to lower the frozen squares into the melted coating and lift them out. A fully coated center should have chocolate covering its top, sides, and underside.
- Let excess chocolate drain from the fork, then slide each candy onto the parchment-lined baking sheet and allow the shell to harden. The coating should lose its wet appearance and feel set before you handle the pieces.
- Keep the finished candies in the freezer until serving. The centers should stay firm beneath their hardened chocolate shells.