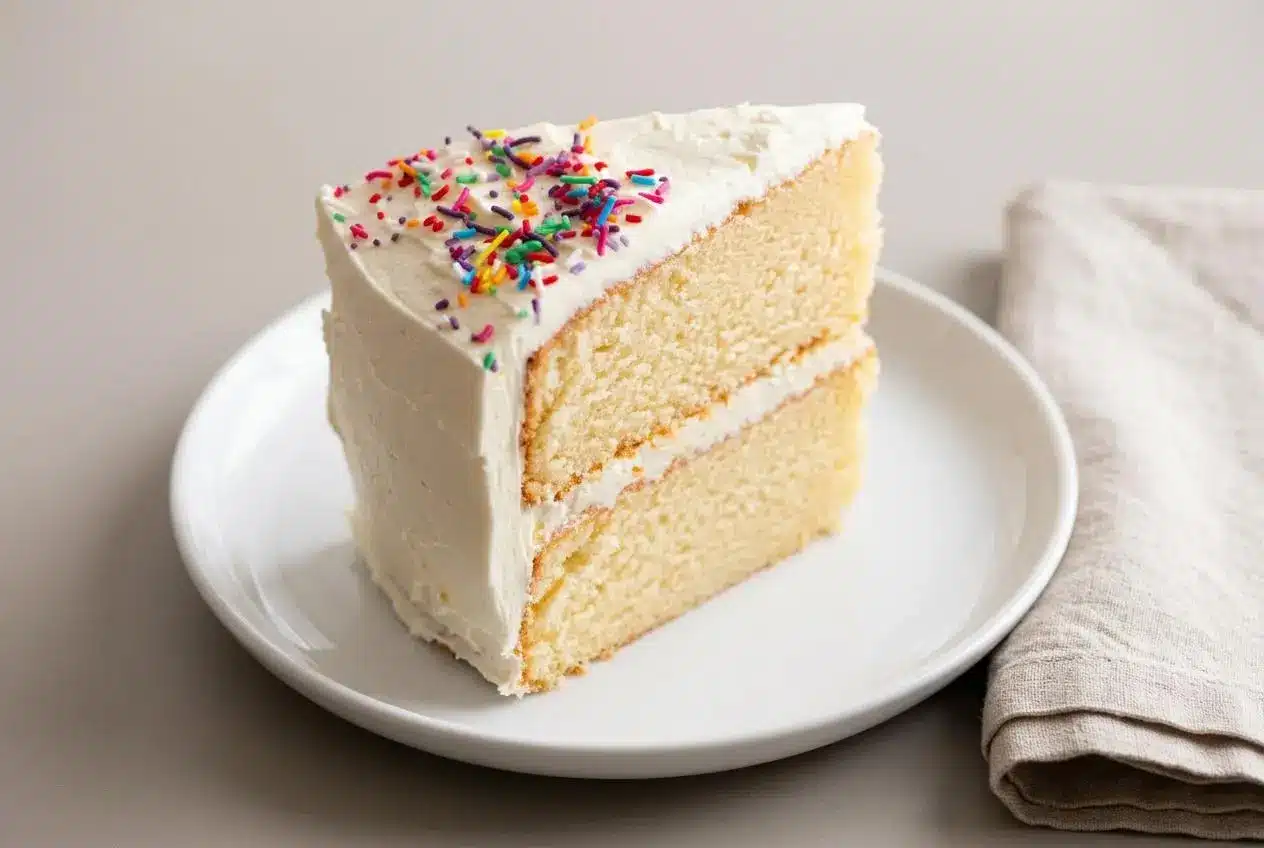
This vanilla cake uses room-temperature eggs whipped with sugar, then a hot milk and melted butter mixture, to create soft, springy layers baked at 350°F (177°C) for 30 minutes.
This vanilla cake recipe brings a buttery vanilla aroma and a plush crumb without relying on a traditional creamed-butter batter. The egg foam does much of the lifting, while warm milk keeps the batter fluid and tender.
Expect pale golden layers that slice neatly once cooled and soften beautifully at room temperature. The hot milk step is the small detail that changes everything.
Set out the eggs, milk, and butter before heating the oven so the batter stays smooth and the whipped eggs hold their volume.
Key Ingredients for the Vanilla Cake
Each ingredient supports the cake’s flavor, lift, moisture, and structure, while the buttercream brings a smooth vanilla finish that holds its shape for layering.
- 2 cups plain / all purpose flour
- 2 1/2 teaspoons baking powder
- 1/4 tsp cooking salt
- 4 large eggs
- 1 1/2 cups caster sugar / superfine sugar
- 115 g / 1/2 cup unsalted butter
- 1 cup milk
- 3 tsp vanilla extract
- 3 tsp vegetable or canola oil
Vanilla Buttercream
- 225 g / 2 sticks unsalted butter
- 500 g / 1 lb soft icing sugar / powdered sugar
- 3 tsp vanilla extract
- 2 – 4 tbsp milk
Superfine sugar dissolves readily while the eggs whip, helping create a stable, airy foam. All-purpose flour gives the layers enough structure to stack, while baking powder offers extra lift. Vanilla extract carries the cake’s fragrance, and salt keeps the sweetness from tasting flat.
Butter provides the rich dairy flavor expected from a celebration cake. The small amount of neutral oil stays fluid after baking, so the crumb remains softer than an all-butter cake as it sits covered. Room-temperature eggs and dairy also blend more smoothly into the batter than cold ingredients.
I use room-temperature eggs because they whip into a fuller, more stable foam and make the pale ribbon stage much easier to recognize.
The Science of Whole Egg Aeration
Whipping whole eggs with fine sugar for the full 7 minutes creates a thick foam packed with tiny air bubbles. Those bubbles expand in the oven, giving the cake a plush, bouncy crumb instead of a tight, heavy one.
The baking powder supports that lift, but it does not have to do all the work. Properly whipped eggs should look much paler than when they started, nearly ivory, and should reach about triple their original volume. This airy foundation is why the batter can bake into tall, tender layers without a dense center.
Balancing Butter Flavor with Oil Moisture
Butter and oil handle different jobs. Butter firms slightly as it cools, helping the cake hold a clean slice and giving it a fuller flavor. Vegetable or canola oil stays liquid at room temperature, which helps the crumb feel soft rather than dry.
This balance suits a vanilla layer cake especially well. A fully butter-based cake can taste rich but become firm when cool, while an oil-only cake can lack that familiar buttery character. Here, both fats work together.
How to Make Vanilla Cake Step-by-Step
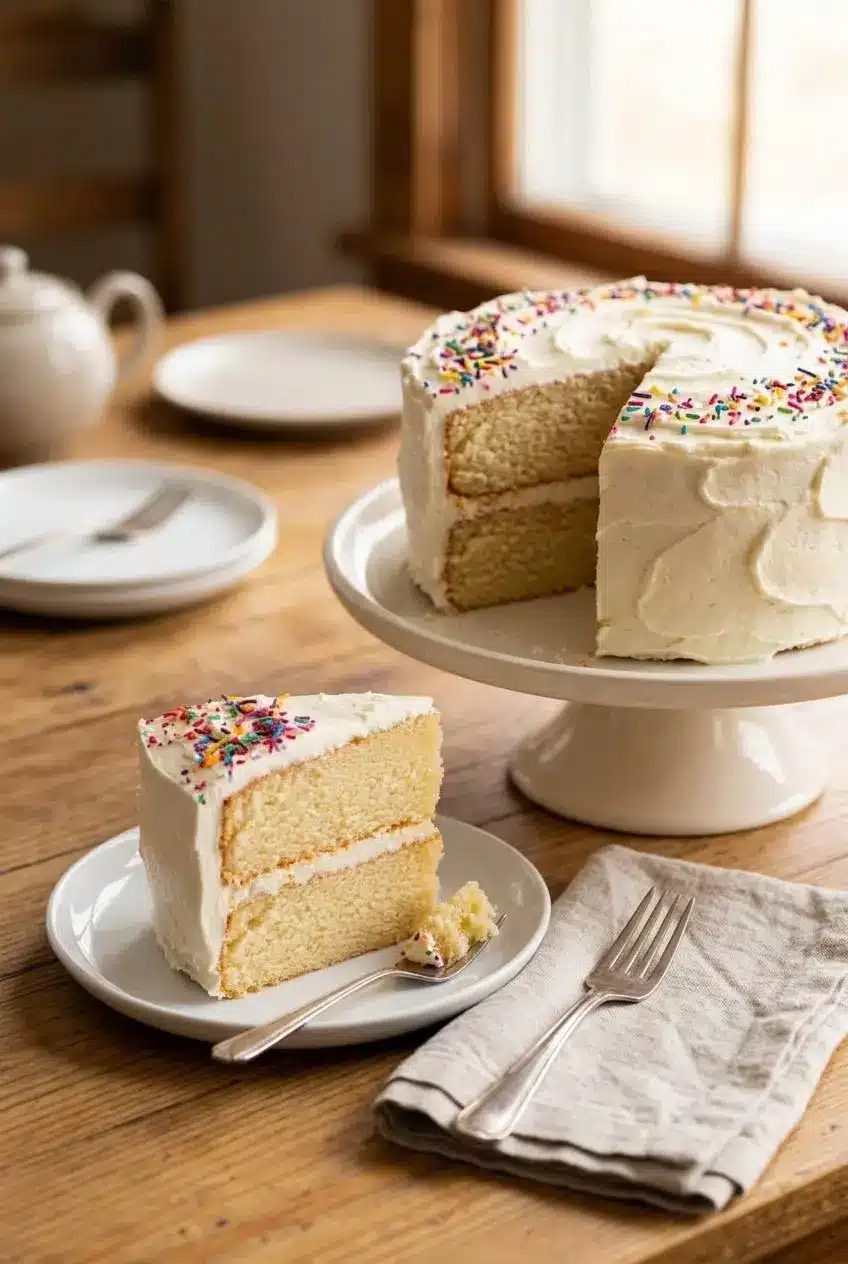
Work steadily once the flour goes into the egg foam. The finished batter should be smooth, pourable, and lightly foamy, so have the pans prepared before you begin mixing.
Full Recipe
- Heat the oven to 180 °C/350°F, or 160 °C fan, for 20 minutes before making the batter and position a rack in the center.
A fully heated oven helps the layers rise evenly from the start. - Butter two 20 cm / 8-inch cake pans and line them with parchment / baking paper, choosing pans without loose bases when possible.
The parchment should sit flat against the bottom so the baked layers release cleanly. - Whisk the flour, baking powder, and salt together in a large bowl, then set the bowl aside.
Evenly dispersed baking powder prevents uneven pockets of lift.
Beat Eggs Until Aerated
- Whisk the eggs on speed 6 with a stand mixer whisk attachment, or a hand beater, for 30 seconds.
The eggs should loosen and become lightly bubbly before the sugar goes in. - Keep the mixer running and add the sugar gradually over 45 seconds.
A steady stream helps the sugar dissolve into the eggs without collapsing the foam. - Increase to speed 8 and whip for 7 minutes.
The mixture should become white, thick, and roughly triple in volume.
Finish Cake Batter
- While the eggs whip, heat the butter and milk together in a heatproof jug for 2 minutes on high in the microwave, or warm them on the stove until the butter melts.
The liquid should be hot and fluid, with no solid butter pieces remaining. - Add the flour mixture to the whipped eggs in 3 additions, mixing on speed 1 for 5 seconds after each addition.
After the last addition, mix only 5 to 10 seconds more, stopping as soon as no dry flour remains. - Pour the hot milk mixture, vanilla, and oil into the now-empty flour bowl.
Using the flour bowl keeps the hot liquid ready for tempering without adding another dish. - Whisk about 1 1/2 cups, or about 2 ladles, of cake batter into the hot milk mixture until smooth.
This smaller portion can be mixed firmly and should look foamy. - Run the mixer on speed 1 and pour the tempered milk mixture into the main batter over 15 seconds, then stop the mixer.
Adding it gradually protects the airy egg structure. - Scrape the bowl’s sides and bottom, then mix on speed 1 for 10 seconds.
The final batter should look uniform, glossy, and easy to pour.
Bake
- Divide the batter between the prepared pans, using 560 g / 20 oz batter per pan.
Similar amounts help both layers bake to the same height. - Tap each filled pan firmly on the counter 3 times.
This releases larger trapped bubbles that could leave irregular holes in the crumb. - Bake for 30 minutes until the tops are golden and a toothpick inserted in the center comes out clean.
The center should also feel softly springy when pressed lightly.
Cool & Frost
- Let the cakes rest in their pans for 15 minutes, then turn them onto wire racks.
Handle the layers gently while warm so their edges stay intact. - For flatter layer cakes, cool the rounds upside down on the racks until completely cool.
The slight dome settles under gentle counter pressure, reducing the need for trimming. - Frost only fully cooled layers with frosting of choice, or use cream and fresh berries or jam.
Warm cake will soften the buttercream and make the stack slide.
Vanilla Buttercream
- Beat the butter with a paddle attachment on high speed for 3 minutes.
It should change from yellow to a much paler, fluffy cream. - Add the icing sugar / powdered sugar in 3 additions, mixing slowly at first, then beating on high for 3 minutes once mostly incorporated.
The buttercream should become light and spreadable rather than grainy. - Mix in the vanilla and milk for 30 seconds, using milk only as needed for a soft buttercream that still holds its form.
Use it right away while it is smooth enough to spread or pipe.
Whipping to Triple Volume
The 7-minute whip is the heart of this method. Stop the mixer briefly and lift the whisk: the egg mixture should fall in a thick pale ribbon that leaves a trail on the surface for a moment before melting back in.
If the mixture still looks yellow, thin, or quickly disappearing when drizzled, keep whipping until it reaches that fuller stage. Under-whipped eggs lead to a tighter crumb and shorter layers.
Tempering the Hot Milk and Butter
Do not pour the hot milk straight into the whipped eggs. That sudden weight and heat can knock out much of the air you just built. Mixing a portion of batter into the hot liquid first brings the mixtures closer in texture, so they combine more gently.
The tempered mixture may look airy and loose. That is normal. Pour it back slowly on low speed, then stop mixing as soon as the batter turns smooth.
Inverted Cooling for Perfectly Flat Tops
After the 15-minute rest, carefully turn each layer upside down onto a wire rack. The lingering steam and the rack’s gentle pressure encourage a slight dome to settle while the cake cools.
Flat layers are easier to fill and frost, especially when stacking several components. For a bright contrast to sweet buttercream, spread tart berry jam between the cooled layers before assembling the cake.
Mastering the Aerated Hot Milk Technique
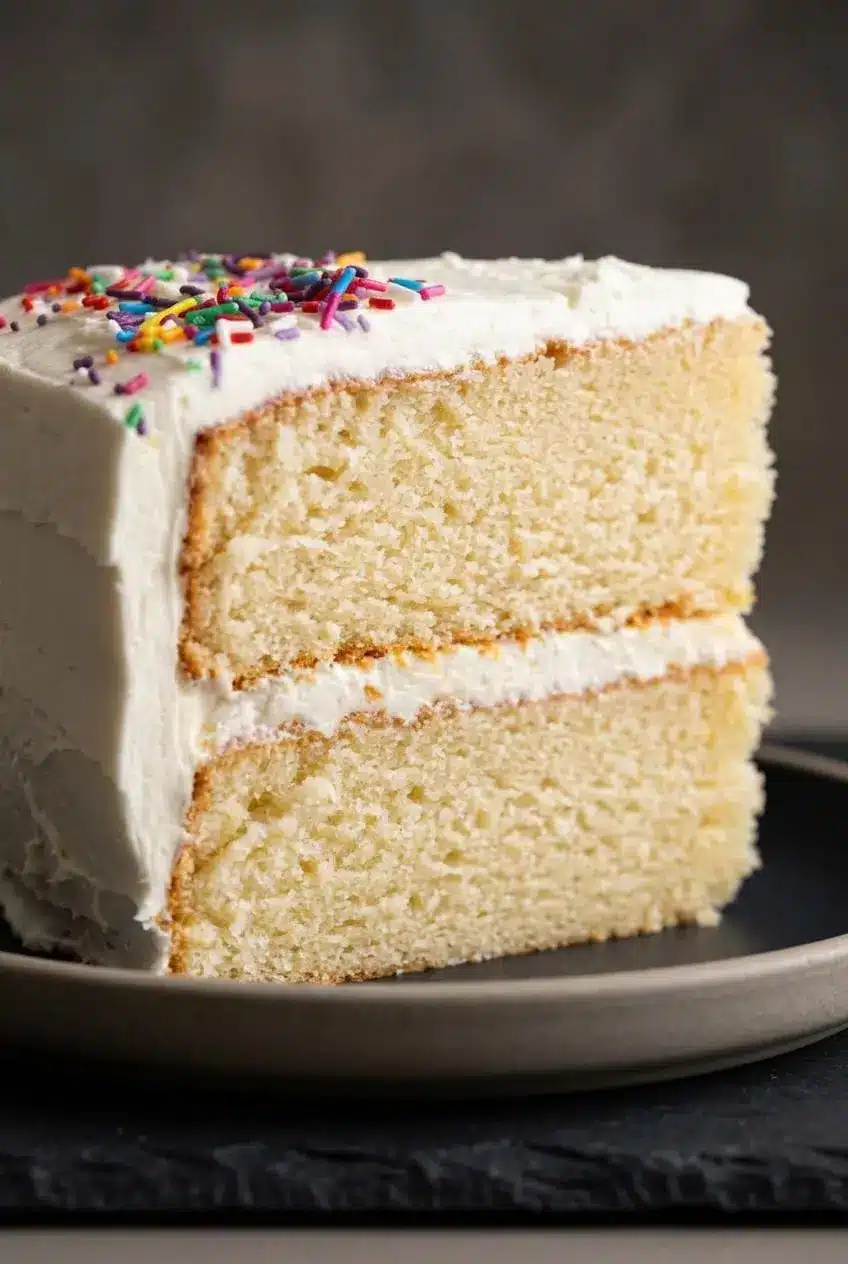
This method sits between a sponge cake and a traditional butter cake. Instead of creaming butter and sugar, it relies on whipped whole eggs for lift, then uses hot milk and melted butter to enrich the foam.
Compared with a traditional yellow cake, this batter feels lighter and more pourable because it starts with an egg foam rather than a dense butter base. The hot milk helps hydrate the flour quickly, while the butter and oil coat the crumb with richness and tenderness.
Reverse creaming, where fat is rubbed into flour before liquid is added, can produce very even layers with a fine crumb. It is useful for sharply stacked cakes, but the aerated hot milk approach is especially forgiving when you want a soft, buoyant texture without sacrificing vanilla flavor.
Cake Pan Conversions and Baking Times
Changing pans changes how quickly heat reaches the center, so start checking early rather than relying on color alone. Keep pans on the center rack whenever possible, and place multiple pans with space around them for air circulation.
Adapting for 9-Inch Rounds and Sheet Cakes
- For 9-inch rounds, divide the batter evenly and begin checking at 22 minutes. They generally finish in about 22 to 25 minutes because the layers are shallower.
- For a 9 x 13-inch sheet cake, spread the batter evenly and begin checking at 28 minutes. It generally needs about 28 to 32 minutes.
- For 6-inch rounds, divide the batter among pans without overfilling them. Bake time will vary with the number and depth of pans, so use a clean toothpick and springy center as the deciding cues.
- If baking more than one rack of cakes, rotate the pans only after the layers have risen and begun to set. Opening the oven too early can contribute to sinking centers.
Baking Perfect Vanilla Cupcakes
For approximately 24 cupcakes, line a muffin pan and fill each liner about two-thirds full. Bake at 350°F (177°C) for 15 to 18 minutes, checking the first cupcake at 15 minutes for a springy top and clean toothpick.
For a dedicated handheld version with decorating ideas, try these fluffy vanilla cupcakes. Cupcakes cool faster than layers, but they still need to be completely cool before adding buttercream.
Vanilla Birthday Funfetti Cake
For an optional birthday version, fold 1/2 cup of rainbow jimmies into the finished batter just before dividing it between the pans. Use jimmies rather than nonpareil sprinkles, which can bleed color into the pale golden batter. Fold gently with a spatula so the egg foam stays light.
Troubleshooting Common Vanilla Cake Mistakes
Most vanilla cake problems begin with lost air, too much flour, or an oven opened before the center has set. These fixes target the cause rather than covering it with extra frosting.
- Dense, heavy layers: Cold eggs may not whip fully, or flour may have been overmixed. Bring eggs to room temperature, whip until pale and tripled in volume, and stop mixing immediately after the flour disappears.
- Chewy or rubbery crumb: Too much mixing after adding flour develops gluten. Use low speed and keep the final mixing brief.
- Dry cake: Scooping flour directly from the bag can pack too much into the cup, and extra baking time dries the crumb. Spoon flour lightly into the measuring cup, level it, and start checking at the earliest bake time.
- Sunken centers: The oven may have been opened before the cake structure set, or the batter may have lost too much air. Keep the oven closed during the early rise and make sure the eggs reach the full ribbon stage.
- Large holes inside: Air pockets were trapped while dividing the batter. Tap the filled pans on the counter before baking.
- Torn or cracked layers: Let the cake rest in the pan before turning it out. If a layer still breaks, crumble it with leftover buttercream for homemade cake pops.
Auditory and Tactile Doneness Cues
A toothpick is useful, but it is not the only clue. Press the center lightly with a fingertip. A baked layer springs back promptly instead of leaving a dent.
Listen near the end of baking as well. A cake that still hisses or sizzles loudly usually has more moisture moving through the center and benefits from another 2 to 3 minutes before checking again. When the sound quiets, the top is golden, and the center springs back, test with a toothpick.
Keeping Cake Fresh Before Serving
Cool unfrosted layers completely before wrapping them tightly in plastic wrap. Keep them protected from air and humidity so the crumb stays soft, and avoid refrigerating uncovered cake layers, which can dry their surface.
For a frosted cake, use a cake dome or an inverted bowl to protect the buttercream and cake from drying out. If the kitchen is warm, chill the cake until the buttercream firms, then let it stand at room temperature before slicing for the softest texture.
If you need to hold layers for later assembly, keep each cooled round tightly wrapped and avoid exposing it to repeated temperature changes. Frost only when the cake is fully cool, then decorate with swirls, smooth sides, or a simple rustic finish.
Conclusion
These vanilla layers stay soft because the eggs are whipped properly, the hot milk is tempered into the foam, and the flour is mixed only until smooth. Room-temperature ingredients make every stage more reliable.
Once the layers are cool, frost with confidence and make the finish your own, from clean buttercream edges to a generous swirl of vanilla frosting.
Frequently Asked Questions
Why Did My Vanilla Cake Turn Out Dense?
A dense cake usually means the egg foam did not reach full volume or the flour was mixed too long. Use room-temperature eggs, whip them with sugar until pale and thick, and keep the final flour mixing brief. Overmeasured flour can also create a heavy crumb. Spoon flour into the cup and level it rather than packing it directly from the bag.
Can I Substitute Buttermilk for Regular Milk in This Recipe?
Yes. Buttermilk can replace the regular milk, but its acidity changes how the leavening behaves. Replace 1/2 teaspoon of the baking powder with 1/4 teaspoon of baking soda to keep the rise balanced. Expect a slightly tangier flavor and a somewhat tighter crumb than the regular milk version. Keep the buttermilk at room temperature before warming it with the butter.
How Should I Store Frosted Vanilla Cake Overnight?
Keep the frosted cake covered under a cake dome or inverted bowl so the buttercream protects the exposed crumb. In a warm kitchen, chill it until the frosting is firm, then bring slices to room temperature before serving. Avoid leaving the cake uncovered, since the cut edges dry out first. For the nicest texture, keep the dome in place until it is time to slice.
What Is the Difference Between Vanilla Cake and White Cake?
Vanilla cake commonly uses whole eggs, which give the crumb a richer flavor and warm golden color. This cake gets much of its lift from whipped whole eggs. Traditional white cake usually uses egg whites and clear flavoring to keep the crumb very pale. It can be light and delicate, but it lacks some of the richness that whole egg yolks provide.
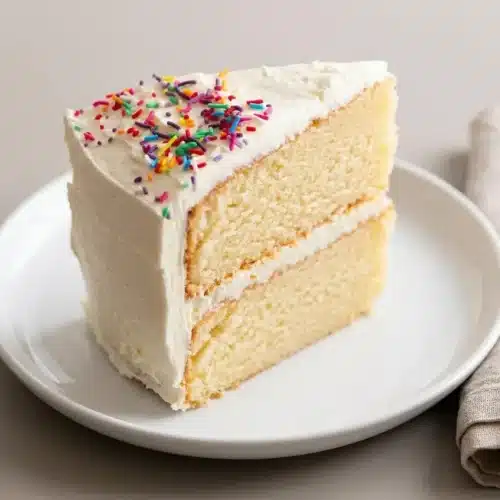
Vanilla Cake Recipe

Equipment
- Stand mixer with whisk and paddle attachments
- 2 x 20cm / 8 inch cake pans
- Baking parchment paper
- Heatproof jug
- Wire Cooling Racks
Ingredients
- 2 cups plain / all purpose flour
- 2 1/2 teaspoons baking powder
- 1/4 tsp cooking salt
- 4 large eggs
- 1 1/2 cups caster sugar / superfine sugar
- 115 g unsalted butter / 1/2 cup
- 1 cup milk
- 3 tsp vanilla extract
- 3 tsp vegetable or canola oil
Vanilla Buttercream
- 225 g unsalted butter / 2 sticks
- 500 g soft icing sugar / powdered sugar / 1 lb
- 3 tsp vanilla extract
- 2 – 4 tbsp milk
Instructions
Full Recipe
- Heat the oven to 180 °C/350°F, or 160 °C fan, for 20 minutes before making the batter and position a rack in the center. A fully heated oven helps the layers rise evenly from the start.
- Butter two 20 cm / 8-inch cake pans and line them with parchment / baking paper, choosing pans without loose bases when possible. The parchment should sit flat against the bottom so the baked layers release cleanly.
- Whisk the flour, baking powder, and salt together in a large bowl, then set the bowl aside. Evenly dispersed baking powder prevents uneven pockets of lift.
Beat Eggs Until Aerated
- Whisk the eggs on speed 6 with a stand mixer whisk attachment, or a hand beater, for 30 seconds. The eggs should loosen and become lightly bubbly before the sugar goes in.
- Keep the mixer running and add the sugar gradually over 45 seconds. A steady stream helps the sugar dissolve into the eggs without collapsing the foam.
- Increase to speed 8 and whip for 7 minutes. The mixture should become white, thick, and roughly triple in volume.
Finish Cake Batter
- While the eggs whip, heat the butter and milk together in a heatproof jug for 2 minutes on high in the microwave, or warm them on the stove until the butter melts. The liquid should be hot and fluid, with no solid butter pieces remaining.
- Add the flour mixture to the whipped eggs in 3 additions, mixing on speed 1 for 5 seconds after each addition. After the last addition, mix only 5 to 10 seconds more, stopping as soon as no dry flour remains.
- Pour the hot milk mixture, vanilla, and oil into the now-empty flour bowl. Using the flour bowl keeps the hot liquid ready for tempering without adding another dish.
- Whisk about 1 1/2 cups, or about 2 ladles, of cake batter into the hot milk mixture until smooth. This smaller portion can be mixed firmly and should look foamy.
- Run the mixer on speed 1 and pour the tempered milk mixture into the main batter over 15 seconds, then stop the mixer. Adding it gradually protects the airy egg structure.
- Scrape the bowl’s sides and bottom, then mix on speed 1 for 10 seconds. The final batter should look uniform, glossy, and easy to pour.
Bake
- Divide the batter between the prepared pans, using 560 g / 20 oz batter per pan. Similar amounts help both layers bake to the same height.
- Tap each filled pan firmly on the counter 3 times. This releases larger trapped bubbles that could leave irregular holes in the crumb.
- Bake for 30 minutes until the tops are golden and a toothpick inserted in the center comes out clean. The center should also feel softly springy when pressed lightly.
Cool & Frost
- Let the cakes rest in their pans for 15 minutes, then turn them onto wire racks. Handle the layers gently while warm so their edges stay intact.
- For flatter layer cakes, cool the rounds upside down on the racks until completely cool. The slight dome settles under gentle counter pressure, reducing the need for trimming.
- Frost only fully cooled layers with frosting of choice, or use cream and fresh berries or jam. Warm cake will soften the buttercream and make the stack slide.
Vanilla Buttercream
- Beat the butter with a paddle attachment on high speed for 3 minutes. It should change from yellow to a much paler, fluffy cream.
- Add the icing sugar / powdered sugar in 3 additions, mixing slowly at first, then beating on high for 3 minutes once mostly incorporated. The buttercream should become light and spreadable rather than grainy.
- Mix in the vanilla and milk for 30 seconds, using milk only as needed for a soft buttercream that still holds its form. Use it right away while it is smooth enough to spread or pipe.