Some desserts look like they took all afternoon, but these little beauties are one of my favorite kitchen shortcuts. Mini Cannoli Cups bring all the charm of a classic Italian dessert, creamy ricotta filling, a whisper of vanilla and cinnamon, and that irresistible crisp bite, without any deep-frying or fuss.
What makes this version such a keeper is the fix for the one thing that frustrates home bakers most, a runny cannoli filling. With one simple trick, these Mini Cannoli Cups turn out thick, creamy, and party-ready, whether you are setting out a holiday dessert tray or just want a bite-sized treat that disappears fast.
Why You’ll Love This Recipe
Foolproof filling: In my kitchen, the biggest win is the cornstarch mixed into the powdered sugar before it meets the ricotta cheese. It quietly absorbs excess moisture, so the cannoli filling stays thick, smooth, and easy to pipe.
Crispy, buttery cups: Refrigerated pie crust bakes into golden little shells with flaky edges and just enough structure to hold a generous spoonful of filling. The cinnamon sugar pressed into the dough gives every bite that bakery-case aroma.
Perfect for parties: These are the kind of bite-sized dessert I make when I want something impressive that does not keep me tied to the stove. The cups and filling can be prepped separately, which makes serving simple and stress-free.
Classic cannoli flavor: You still get everything people love about an Italian dessert like cannoli, sweet ricotta, vanilla extract, mini chocolate chips, and a delicate crunch. It tastes familiar, festive, and just a little special.
Ingredients and Substitutions
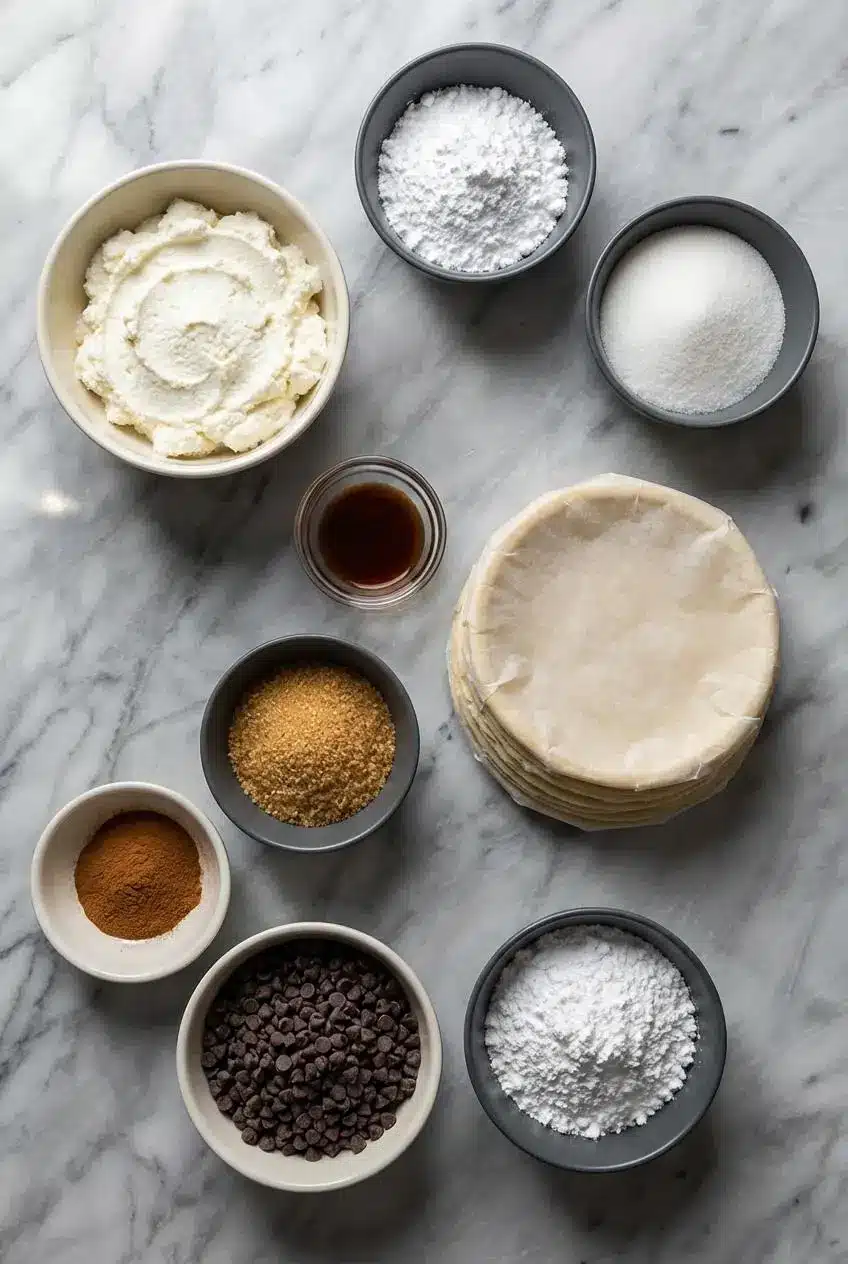
A short ingredient list is part of the charm here. Each piece plays a clear role, from the creamy ricotta filling to the crisp pie crust cups and simple chocolate garnish.
Ingredients
Filling:
- 1 container (15 oz) whole-milk ricotta cheese
- 1/2 cup powdered sugar
- 2 tablespoons granulated sugar
- 1/2 teaspoon vanilla
Cups:
- 1 box (14.1 oz) refrigerated Pillsbury™ Pie Crusts (2 Count), softened as directed on box
- 3 tablespoons turbinado sugar (raw sugar)
- 1 teaspoon ground cinnamon
Garnish:
- 1/4 cup miniature semisweet chocolate chips
- Additional powdered sugar
Ingredient Notes & Substitutions
Ricotta cheese: Whole-milk ricotta gives the filling its classic flavor and that softly creamy, slightly cheesy texture cannoli lovers expect. If you can find Impastata ricotta, it is an excellent upgrade because it is naturally denser and lower in moisture.
Mascarpone cheese: For a richer, silkier filling, you can replace half of the ricotta with mascarpone cheese. I like this when I want the filling to feel a little more luxurious while still keeping the traditional ricotta character.
Pie crust: Store-bought pie crust is the easiest path to sturdy, flaky cups with a buttery finish. If you want a different texture, wonton wrappers bake up extra thin and shatteringly crisp, while mini phyllo shells are a handy no-bake shortcut for fast entertaining.
Vanilla and citrus: Vanilla keeps the flavor classic and mellow, but a little orange zest can wake everything up beautifully. I often rub the zest into the granulated sugar with my fingertips first, which releases the oils and perfumes the filling in the loveliest way.
Powdered sugar and cornstarch: This is the quiet hero move for stable cannoli filling. Stirring cornstarch into the powdered sugar before blending it with the ricotta helps thicken excess whey without making the filling taste starchy or heavy.
How to Make Mini Cannoli Cups
Make the Filling
- In a large bowl, combine the powdered sugar with 1 tablespoon of cornstarch first, whisking well so there are no little clumps hiding in the mixture. Add the whole-milk ricotta, granulated sugar, and vanilla, then beat with an electric mixer on medium speed until the filling looks smooth, thick, and creamy rather than loose or grainy.
- Spoon the filling into a 1-gallon resealable plastic bag or piping bag, press out the excess air, and seal it. Let it chill in the refrigerator while you prepare the cups so it firms up even more.
Shape the Cinnamon Sugar Cups
- Heat the oven to 425°F. On a lightly floured work surface, unroll the softened pie crusts so they lie flat without cracking.
- Mix the turbinado sugar and ground cinnamon in a small bowl, then scatter the mixture evenly over both crusts. Roll lightly over the tops with a rolling pin so the sugar and spice settle into the dough instead of falling off later.
- Cut the pastry into 2 1/2- to 3-inch rounds, then gently but firmly press each one into an ungreased mini muffin tin. Make sure the dough fits snugly against the bottom and sides so you get neat little cups with plenty of room for filling.
Bake and Cool
Bake the pastry cups for about 10 minutes, until they are a deep golden brown and your kitchen smells like warm cinnamon sugar. Let them rest in the pan for about 15 minutes, then carefully transfer them to a wire rack and cool them completely so they stay crisp.
Fill and Finish
Right before serving, take the chilled filling from the refrigerator and snip a small opening in one bottom corner of the bag. Pipe a scant tablespoon into each cooled cup, then finish with miniature semisweet chocolate chips and a light dusting of powdered sugar for that classic cannoli shop look.
Secrets to Perfect Cannoli Cups

The cornstarch solution: Ricotta naturally carries a fair amount of whey, which is why so many homemade cannoli fillings turn loose after mixing. That single tablespoon of cornstarch acts like insurance, binding extra moisture so the filling holds soft peaks and pipes neatly instead of slumping.
The full cool-down: Warm shells and chilled filling are a bad match if you want crunch. Any trapped heat turns moisture into steam, and steam is exactly what makes those crisp pastry cups soften too quickly.
Pressing matters: I always press the dough firmly into the mini muffin tin because loose pastry tends to puff and shrink in odd places. A snug fit gives you a well-shaped cup, a flatter base, and more room for that creamy center.
The Science of a Perfect Cannoli Filling
Ricotta cheese is the heart of many beloved Italian dessert recipes because it brings gentle sweetness, a fresh dairy flavor, and a texture that feels lighter than cream cheese. Standard supermarket ricotta works well here, but traditional Impastata ricotta is even better if you can find it, since it is denser and contains less moisture.
When people compare ricotta cheese and mascarpone cheese, they are really talking about texture and richness. Ricotta gives you the classic cannoli personality, slightly textured, creamy, and pleasantly milky, while mascarpone adds a smoother, richer finish because of its higher fat content.
That is why a blend of the two can be so lovely. You keep the familiar cannoli flavor from the ricotta, but mascarpone rounds it out and makes the filling taste extra velvety.
Traditional bakers often strain ricotta to remove whey, which concentrates flavor and thickens the mixture naturally. My shortcut is faster and much friendlier for a busy home cook, because the cornstarch does the heavy lifting, helping you get that stable, pipeable filling without waiting overnight.
Shell Showdown: Choosing Your Perfect Cup
Pie Crust
This is the all-rounder and the method used in this recipe. Pie crust gives you buttery flavor, flaky layers, and enough strength to hold a generous amount of filling, and the same approach works beautifully in other handheld desserts like mini cherry pies, where structure matters just as much as flavor.
The trade-off is that you do need to cut, shape, and bake the dough. For me, that extra step is worth it because the finished cups taste homemade and hold up well on a dessert platter.
Wonton Wrappers
If you like an ultra-crispy shell, wonton wrappers are a fun alternative. Brush them lightly with butter, dust with cinnamon sugar, and bake them in the mini muffin tin until they turn deeply crisp and lightly bronzed around the edges.
They bake quickly and have a wonderfully delicate crunch, but the flavor is less rich and less traditional than pie crust. I think of them as a lighter, snappier take on cannoli cups.
Phyllo Shells
Pre-baked mini phyllo shells are the easiest shortcut of all. They are feather-light, crisp, and perfect when you need a no-bake party dessert that comes together fast.
The downside is that they are more fragile and a bit uniform in shape and texture. You lose some of that homemade feel, but for a busy holiday table, they are still a very smart option.
Pro Tips & Troubleshooting
Pro Tips for Success
- Rub a little orange zest into the granulated sugar before adding it to the filling if you want brighter flavor. That simple step releases the citrus oils and makes the filling smell incredible.
- A regular Ziplock-style bag works beautifully as a piping bag. I avoid stand-and-fill bags because the folded bottom makes it harder to snip a neat opening.
- Let the pastry cups cool completely on a wire rack before filling them. This is one of the easiest ways to protect that crisp texture.
- The filling can be made up to 4 days ahead, which makes party prep much easier. I often do this when I am building a dessert spread with several small sweets.
Common Mistakes to Avoid
- Do not fill the cups too early. Even a beautifully baked shell will start to soften within a couple of hours once the filling goes in.
- Do not use low-fat or skim ricotta if you can help it. It tends to be wetter and less flavorful, which makes the filling harder to stabilize and less satisfying to eat.
- Do not be timid when shaping the dough in the mini muffin tin. If the rounds are not pressed in firmly, they can puff up and leave too little space for the filling.
- Do not assume the cornstarch fixes every problem if the ricotta is extremely wet. Good whole-milk ricotta still gives you the best flavor and texture from the start.
Serving & Storage
Serving Ideas & Variations
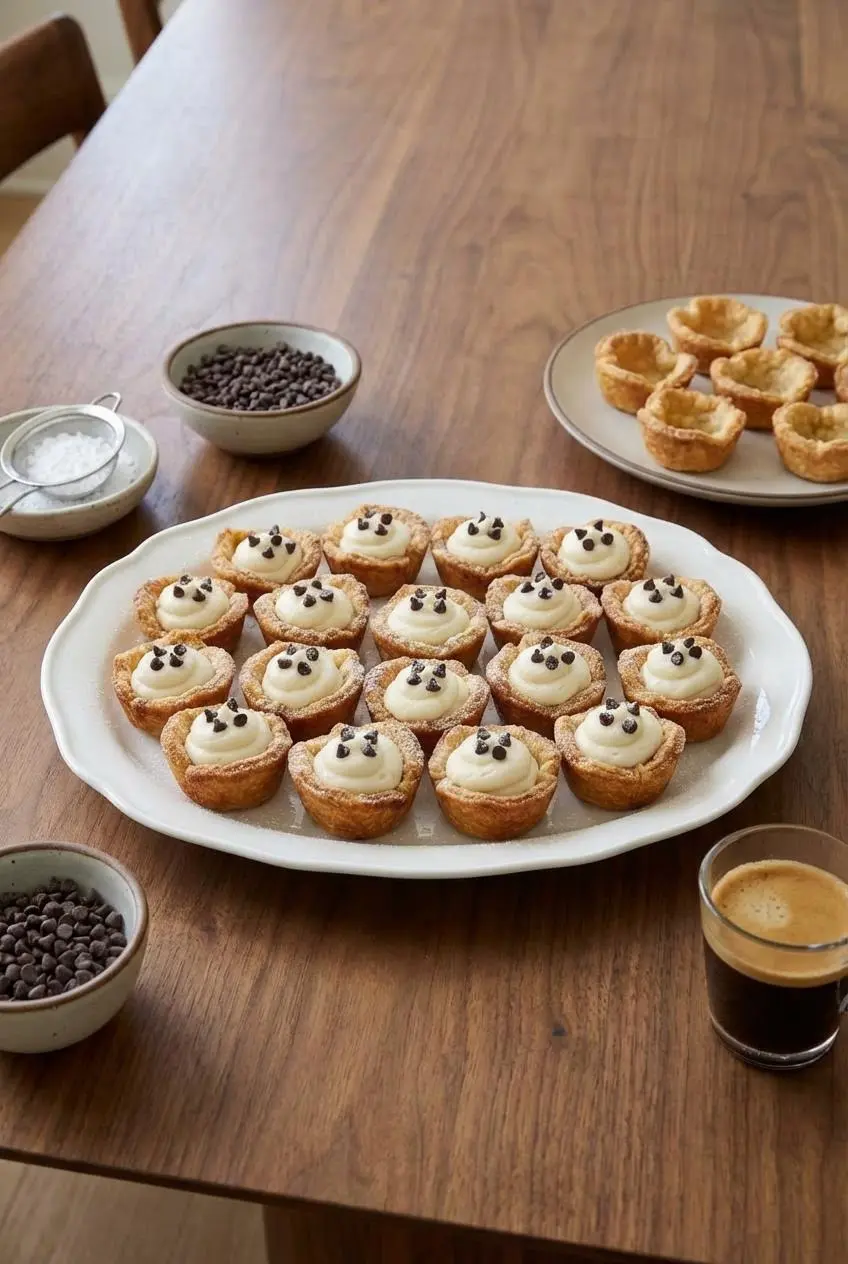
A DIY cannoli bar is always a hit at parties. I like to set out the empty cups, a bowl or bag of filling, and small dishes of mini chocolate chips, chopped pistachios, toasted coconut, and Amarena cherries so everyone can build their own perfect bite.
For a dressier tray, a little drizzle of melted semisweet or white chocolate makes these feel bakery-worthy with almost no extra effort. If you are planning a dessert table, these cannoli cups sit beautifully alongside other single-serve favorites like Oreo cheesecake bites, which add a rich, creamy contrast.
You can also play with the filling by adding almond extract, a splash of Marsala wine, or lemon zest in place of orange. For a spread built around mini desserts with different crust-and-filling styles, I also love pairing them with mini banana cream pies or creamy handheld treats like mini pudding cheesecakes.
Make-Ahead & Storage Instructions
These are ideal for prepping in stages. The cannoli filling can be made up to 4 days ahead and kept in an airtight container or piping bag in the refrigerator, while the baked, unfilled cups can stay at room temperature in an airtight container for up to 2 days.
If you have leftovers, store the filling and cups separately. I do not recommend refrigerating assembled Mini Cannoli Cups, because the moisture from the filling will soften the shells and take away that lovely crunch.
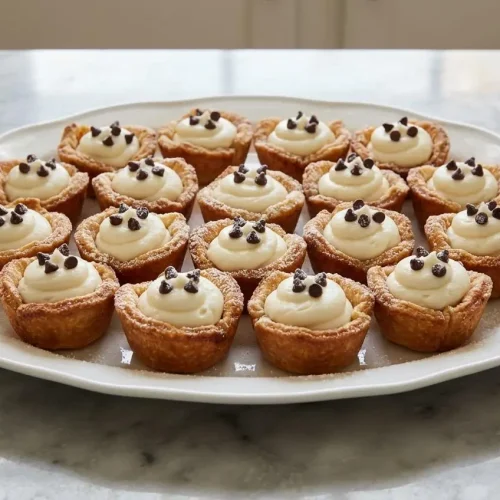
Mini Cannoli Cups

Equipment
- Mini Muffin Tin
- Electric Mixer
- large bowl
- Rolling Pin
- Piping bag (or large plastic bag)
- Wire rack
Ingredients
Filling:
- 1 container (15 oz) whole-milk ricotta cheese
- 1/2 cup powdered sugar
- 2 tablespoons granulated sugar
- 1/2 teaspoon vanilla
Cups:
- 1 box (14.1 oz) refrigerated Pillsbury™ Pie Crusts (2 Count), softened as directed on box
- 3 tablespoons turbinado sugar (raw sugar)
- 1 teaspoon ground cinnamon
Garnish:
- 1/4 cup miniature semisweet chocolate chips
- Additional powdered sugar
Instructions
Make the Filling
- In a large bowl, whisk together the powdered sugar and 1 tablespoon of cornstarch (not listed in ingredients, but a key tip from the article for thickening) until no clumps remain. Add the whole-milk ricotta, granulated sugar, and vanilla. Beat with an electric mixer on medium speed until the filling is smooth, thick, and creamy.
- Spoon the filling into a piping bag or a large resealable plastic bag. Seal the bag and chill it in the refrigerator while you prepare the cups.
Shape the Cinnamon Sugar Cups
- Heat the oven to 425°F. On a lightly floured surface, unroll the softened pie crusts.
- In a small bowl, mix the turbinado sugar and ground cinnamon. Sprinkle the mixture evenly over both crusts. Use a rolling pin to lightly press the sugar mixture into the dough.
- Using a 2 1/2 to 3-inch round cutter, cut circles from the pastry. Gently press each round into an ungreased mini muffin tin, ensuring it fits snugly against the bottom and sides.
Bake and Cool
- Bake for about 10 minutes, or until the pastry cups are deep golden brown.
- Let the cups rest in the pan for 15 minutes, then carefully transfer them to a wire rack to cool completely.
Fill and Finish
- Just before serving, snip a corner from the bag of chilled filling. Pipe about a tablespoon of filling into each cooled cup.
- Garnish with miniature semisweet chocolate chips and a light dusting of powdered sugar.
Notes
Nutrition
Conclusion
These Mini Cannoli Cups deliver everything people love about classic cannoli, creamy filling, crisp shells, and that sweet little dusting of powdered sugar, in a format that is easy to make and even easier to serve. The cornstarch trick takes the stress out of the process and gives you a filling you can count on.
Once you make them once, it is hard not to start dreaming up your own variations with pistachios, citrus, or mascarpone. They are the kind of dessert that looks festive on any table and vanishes one bite at a time.
Frequently Asked Questions
Why is my cannoli filling runny and how can I fix it?
Can I make mini cannoli cups ahead of time for a party?
What are the best shells to use for cannoli cups?
How should I store leftover cannoli cups to keep them fresh?
What variations can I try for the filling or toppings?
How can I make this recipe gluten-free?