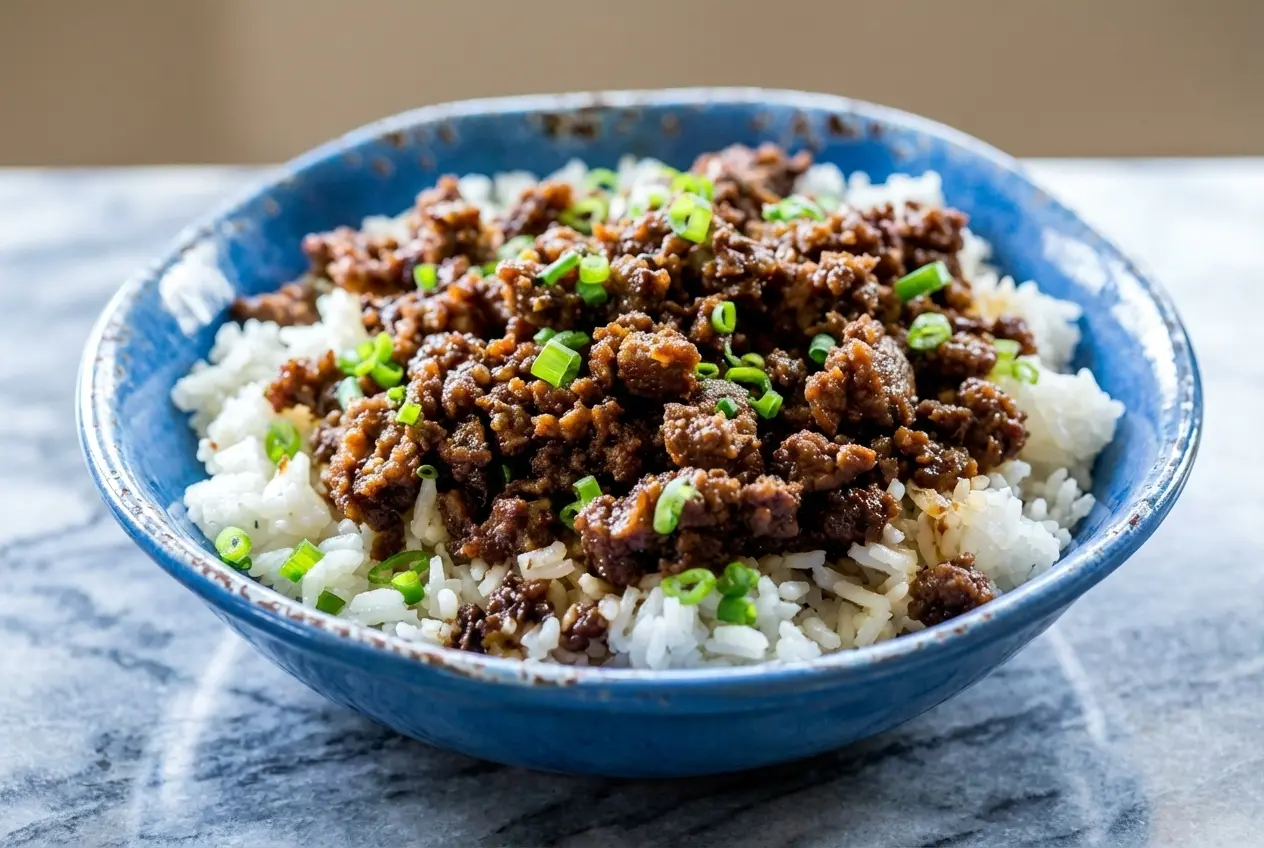
Some nights, dinner needs to happen fast, but you still want that first bite to feel exciting. In my kitchen, this Korean Ground Beef Bowl is the answer when the clock is ticking and everyone is hungry, because it delivers sweet heat, savory depth, and glossy, sticky beef in just 15 minutes.
What makes this version special is the way the sauce behaves in the pan. Instead of tasting flat or overly sweet, it turns into a rich glaze with crispy edges on the beef, the kind of weeknight shortcut that feels a little closer to restaurant food than standard skillet ground beef.
Why You’ll Love This Recipe
Fast but deeply flavorful: This is the kind of dinner I lean on when I want bold flavor without a sink full of dishes. The sweet, salty, and spicy balance lands somewhere between a quick rice bowl and the punchy appeal of korean beef tacos, only even easier to pull off on a busy weeknight.
The gochujang-honey twist: I discovered that adding Gochujang with honey creates a better glaze than sugar alone. It brings fermented depth, a little heat, and that lacquered finish you usually associate with Korean BBQ or Bulgogi.
Crispy edges matter: The biggest difference comes from the hard sear. When the beef gets proper contact with a hot cast iron skillet, the Maillard reaction gives you browned, caramelized bits instead of soft, gray crumbles.
Built for real life: These bowls reheat beautifully, which makes them ideal for meal prep. Most of the ingredients are pantry staples too, so you can make something that tastes special without a long grocery list.
Ingredients and Substitutions
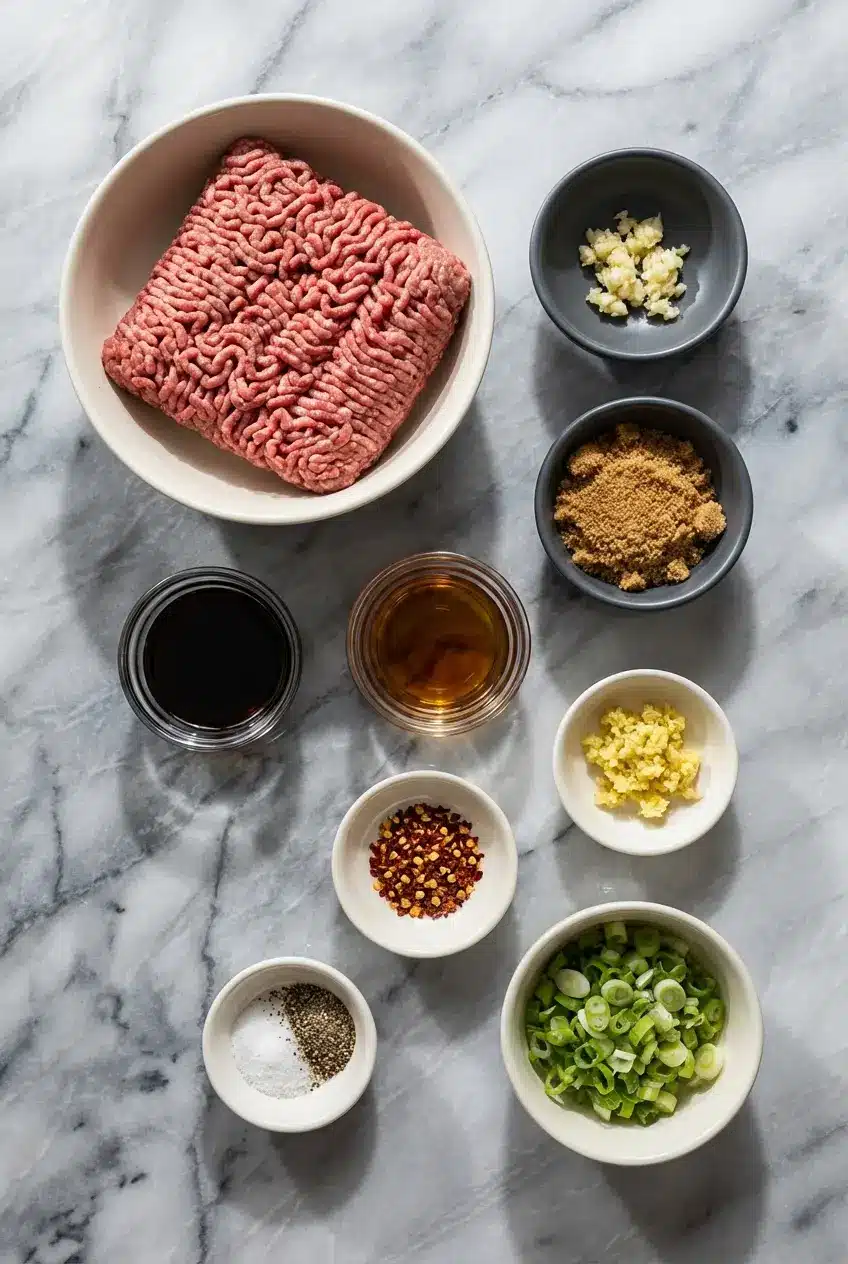
A short ingredient list does the heavy lifting here. Each piece plays a clear role, from the savory backbone of low-sodium soy sauce to the fresh lift from green onions.
Ingredients
- 1 pound ground beef
- 3 cloves garlic, minced
- 1/4 cup brown sugar
- 1/4 cup low-sodium soy sauce
- 1 Tablespoon sesame oil
- 1/2 teaspoon fresh ginger, minced
- 1/2 – 1 teaspoon crushed red pepper
- salt and pepper
- 1/2 cup sliced green onions
Ingredient Notes & Substitutions
Ground Beef: I like 90% or 93% lean ground beef for this bowl because it gives you enough richness for flavor without leaving too much grease behind. If you use a fattier blend, just be extra thorough when draining so the glaze can cling to the meat instead of sliding off.
Alternative Proteins: Ground turkey, chicken, or pork all work well with the same flavor profile. Turkey and chicken are leaner, so watch the pan closely and avoid overcooking, while pork gives you a slightly richer finish that pairs beautifully with the honey and Gochujang idea from the sauce.
Low-Sodium Soy Sauce: This is one ingredient I would not casually swap for regular soy sauce unless you know you like a saltier bowl. Because the sauce reduces in the skillet, the salt concentrates quickly, and low-sodium soy sauce keeps the final glaze balanced.
Gluten-Free Options: If you need a gluten-free version, tamari is the easiest substitute and keeps the flavor closest to the original. Coconut aminos also work, though they are a little sweeter and softer in flavor, so the bowl will taste slightly less punchy.
Fresh Ginger: Fresh ginger gives the sauce a brighter, livelier aroma than ground ginger. I keep a knob in the freezer and grate off what I need, which makes it easier to use and helps it last for weeks.
Sesame Oil: Use toasted sesame oil if you can find it, because that nutty aroma is part of what makes the bowl smell irresistible at the table. It is strongest when stirred in at the end, not cooked hard at the beginning.
How to Make Korean Ground Beef Bowl
Sear the Beef
- Set a large skillet over medium-high heat until it is properly hot, then add the ground beef. Let it cook undisturbed at first so the underside can brown deeply, about 2 to 3 minutes, which is how you build those crisp, dark edges instead of steaming the meat.
- Once the beef has started to develop color, break it up into chunks and continue browning. During the last couple of minutes of this stage, stir in the minced garlic so it softens and smells fragrant without burning or turning bitter.
Drain and Build the Sauce
- Pour off the excess fat from the pan before adding anything else. This one small step makes a big difference, because the sauce will coat the beef much better when it is not competing with grease.
- Add the brown sugar, soy sauce, sesame oil, ginger, salt, pepper, and crushed red pepper. Stir everything together until the beef is evenly coated and the sugar starts dissolving into the liquid in the pan.
Simmer Until Glossy
Let the mixture bubble for a few minutes, stirring now and then, until the sauce smells savory and sweet and turns shiny enough to cling to each piece of beef. You are looking for a lightly thickened glaze rather than a thin broth.
Finish the Bowls
Spoon the beef over steamed Jasmine rice and scatter the sliced green onions generously over the top. The hot rice catches every bit of sauce, and the fresh onions wake up the whole bowl with a clean, sharp finish.
Secrets for the Perfect Sticky Glaze
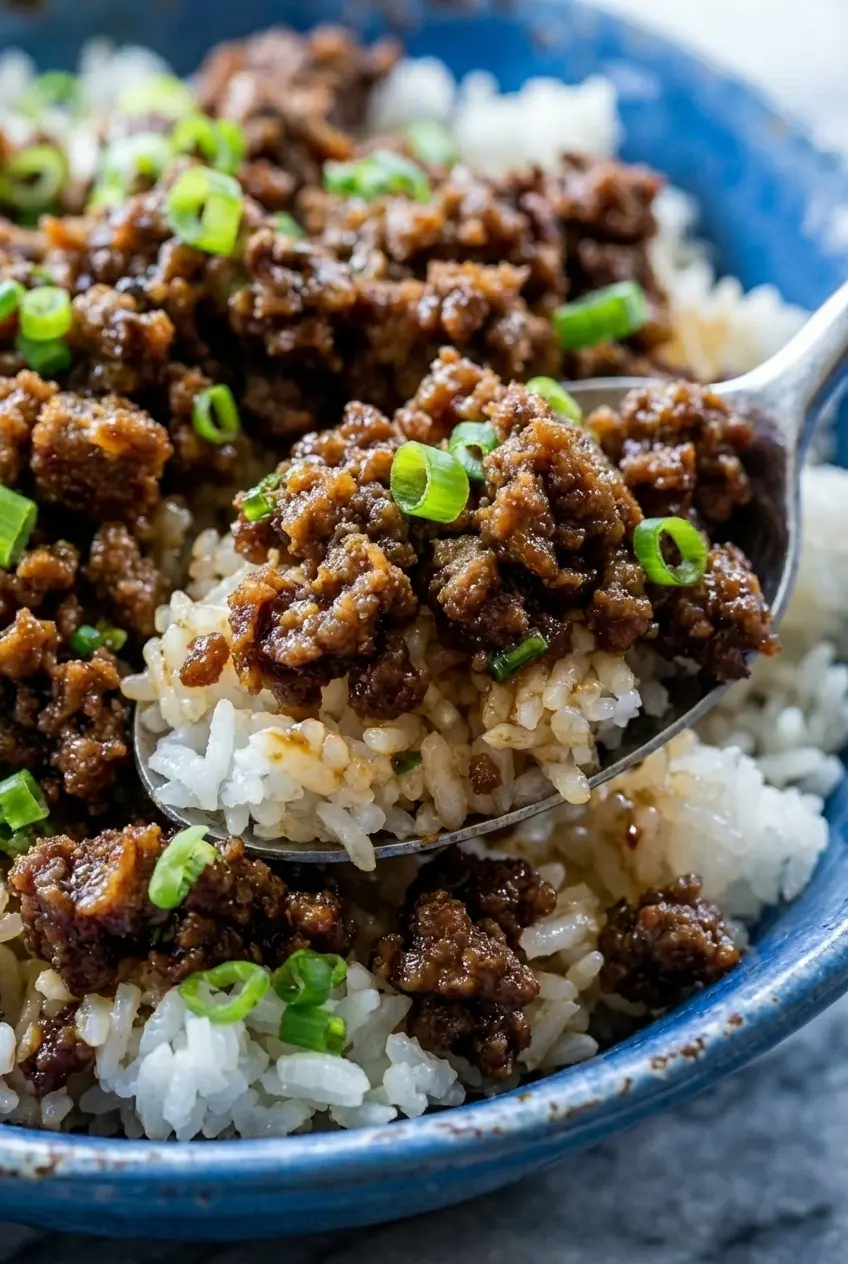
The magic of this bowl is not just the flavor, it is the texture of the sauce. Honey caramelizes differently than straight sucrose, so when you pair it with brown sugar, you get a stickier, more rounded glaze that clings to the beef instead of pooling at the bottom of the bowl.
If your sauce looks too loose after simmering, give it another minute or two over the heat so excess moisture can cook off. If it goes too far and starts looking overly thick, stir in 1 tablespoon of water or beef broth to loosen it back into that glossy, spoon-coating consistency.
Heat control is the other quiet secret. The beef needs strong initial heat for the Maillard reaction, because that deep browning is what gives the whole dish a savory backbone and keeps it from tasting like simple sweet soy ground beef.
Achieving Authentic Korean Flavor Profiles
Gochujang brings something red pepper flakes and hot sauce simply cannot. Its fermented, savory depth comes from an umami-rich fermentation process, which is exactly why a spoonful can make this bowl taste fuller, rounder, and much more layered than a basic sweet-spicy skillet sauce.
That is also why I prefer this glaze style over a one-note sauce. The combination of garlic, fresh ginger, soy, and chile gives the dish a Korean-inspired profile that nods toward Bulgogi flavors, while still staying weeknight-friendly and approachable for an American home kitchen.
Low-sodium soy sauce matters more than people think here. As the sauce reduces, the salt concentrates, so starting with a gentler soy sauce lets the sweetness, aromatics, and heat stay in balance instead of tipping into something harsh.
Pro Tips & Troubleshooting
Pro Tips
- Let the beef sit in the hot pan before breaking it up. Those first 2 to 3 undisturbed minutes create the best caramelized crust and the most flavor.
- Add garlic near the end of browning, not at the beginning. I have learned the hard way that early garlic can scorch fast in a hot skillet.
- Stir sesame oil in at the end if you want the fullest nutty aroma. Its fragrance fades quickly under prolonged high heat.
- Jasmine rice is my favorite base because its soft texture and floral scent match the sticky glaze beautifully. Its distinctive aromatic compounds are part of what makes the bowl smell so inviting the moment it hits the table.
Common Mistakes to Avoid
- Crowding the pan can ruin your sear. If the skillet is overloaded, the beef releases moisture and steams instead of browning.
- Draining too late leaves you with a greasy sauce. Always remove excess fat before adding the sugar and soy mixture.
- Using regular soy sauce can make the glaze too salty once it reduces. Low-sodium soy sauce gives you much better control.
- Overcooking lean proteins like turkey or chicken can make them dry. If you swap proteins, keep the same method but watch the timing closely.
Serving & Storage
Serving Ideas
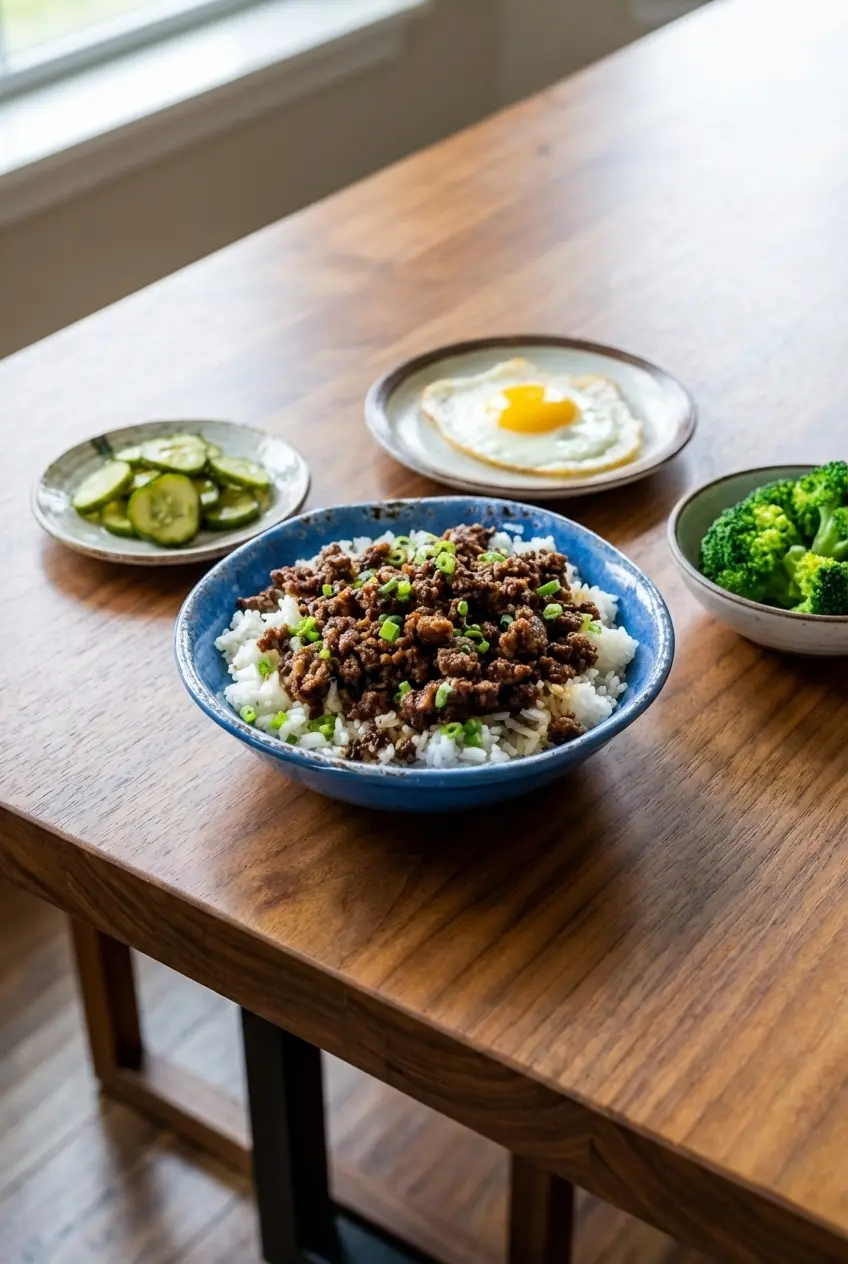
For the ultimate bowl, I love this beef with a sunny-side-up egg on top and a side of quick pickled cucumbers made with vinegar, sugar, and salt. That cool, sharp contrast cuts through the sticky glaze and makes every bite feel balanced.
If you want to round things out, steamed broccoli, sautéed snap peas, or shredded carrots fit right in. For a lower-carb plate, spoon the beef over cauliflower rice or tuck it into butter lettuce cups for a crisp, lighter finish.
This is also the kind of flavor profile that works well across a whole week of lunches. If you enjoy portable, Asian-inspired meal ideas with easy fridge storage, dishes like katsu musubi have that same practical charm, just in a grab-and-go form.
Storage & Reheating
Store cooked Korean ground beef in an airtight container in the refrigerator for up to 4 days. The flavor actually settles in nicely overnight, so leftovers often taste even deeper the next day.
For reheating, add a small splash of water before microwaving so the glaze loosens instead of tightening up. Use medium power if you can, and warm it just until hot, which helps the beef stay juicy rather than drying out around the edges.
If you are planning ahead for meal prep, you can freeze the cooked beef in portioned containers once it has cooled. Thaw it in the fridge, then reheat gently with that same splash of water for the best texture.
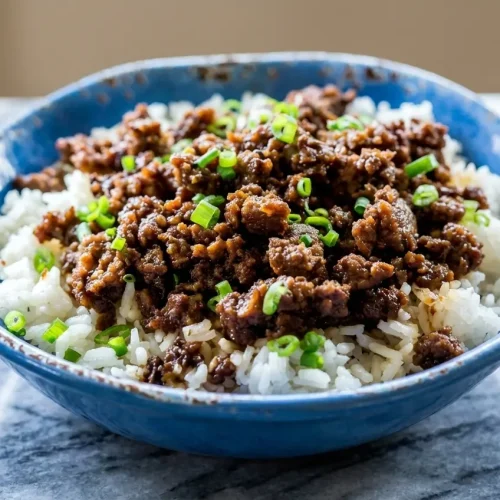
Quick Korean Ground Beef Bowl

Equipment
- Large Skillet
Ingredients
- 1 pound ground beef
- 3 cloves garlic, minced
- 1/4 cup brown sugar
- 1/4 cup low-sodium soy sauce
- 1 Tablespoon sesame oil
- 1/2 teaspoon fresh ginger, minced
- 1/2 – 1 teaspoon crushed red pepper
- salt and pepper
- 1/2 cup sliced green onions
Instructions
Sear the Beef
- Heat a large skillet over medium-high heat. Once hot, add the ground beef and let it sit undisturbed for 2 to 3 minutes to develop a deep, caramelized crust.
- Break the beef into chunks and continue browning. During the final 2 minutes of cooking, stir in the minced garlic until it is fragrant and softened.
Drain and Build the Sauce
- Carefully drain the excess fat from the pan so the sauce can coat the beef properly without becoming greasy.
- Stir in the brown sugar, soy sauce, sesame oil, ginger, salt, pepper, and crushed red pepper, ensuring the beef is evenly coated.
Simmer Until Glossy
- Let the mixture bubble for 2 to 3 minutes, stirring occasionally, until the sauce reduces into a thick, shiny glaze that clings to the beef.
Finish the Bowls
- Spoon the beef over bowls of steamed jasmine rice and garnish generously with the sliced green onions.
Notes
Conclusion
This bowl proves that a fast dinner does not have to taste rushed. The crispy sear, the sticky honey-style glaze, and the savory depth from Korean-inspired flavors turn a simple skillet supper into something you will genuinely crave again.
Once you make it, it is easy to play with the details, a little extra heat, a fried egg, or a pile of vegetables on the side. On the next busy night, it fits right alongside other quick comfort meals like chicken ramen, with the same cozy payoff and hardly any fuss.
Frequently Asked Questions
What is the best way to reheat these bowls without the beef getting dry?
Can I substitute ground ginger for fresh ginger?
How can I make this recipe less sweet but still flavorful?
What are the best vegetables to serve with a Korean beef bowl?
How long does cooked Korean ground beef last in the fridge?