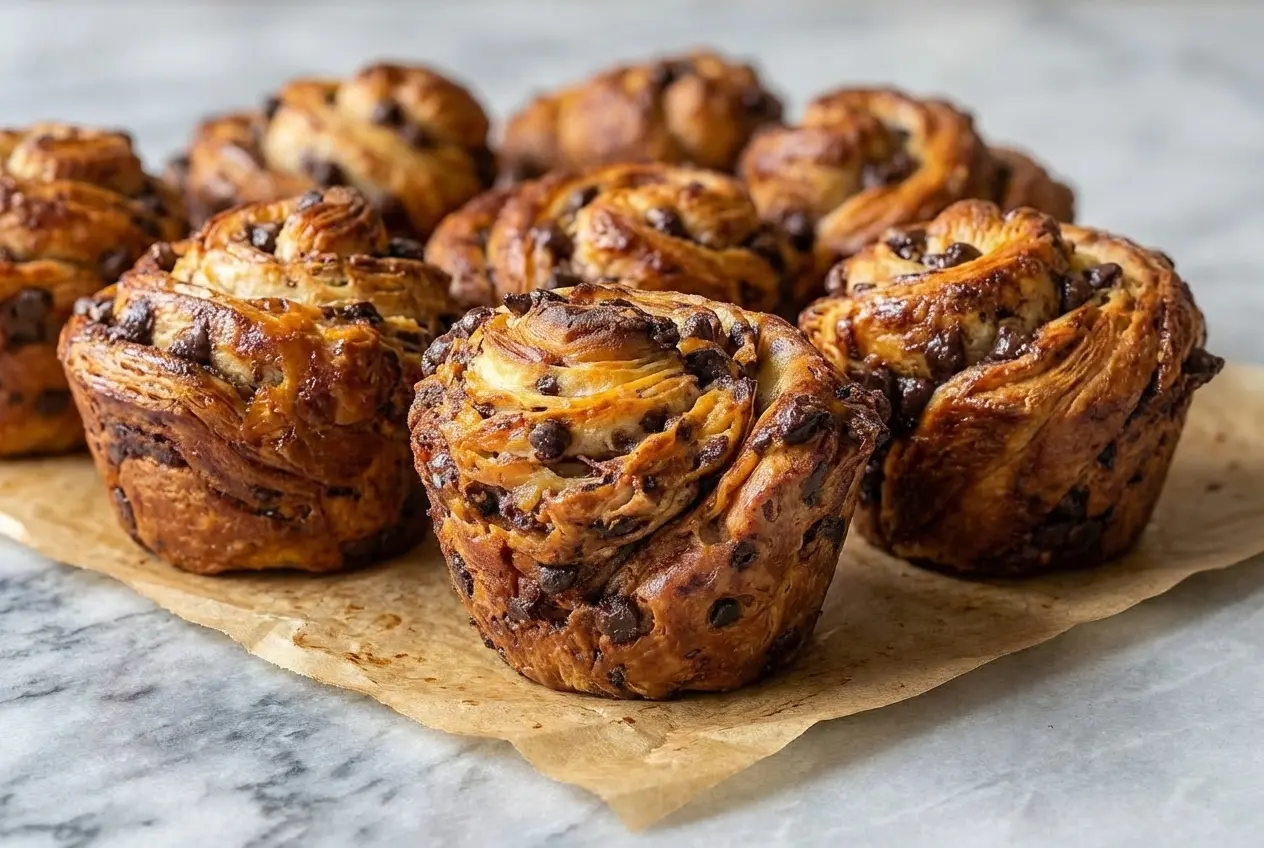
The first time I pulled a tray of Chocolate Chip Cruffins from the oven, the whole kitchen smelled like a downtown bakery at sunrise, buttery, toasted, and just sweet enough to make you hover by the oven door. That first bite is the magic, crisp outer layers that crackle and scatter, then a soft center with melty chocolate tucked into every spiral.
This recipe is for home bakers who want that bakery-style payoff without guessing their way through laminated dough. I’ll walk you through the process in a practical, reliable way, so those flaky layers feel completely doable in a real American home kitchen.
Why You’ll Love This Recipe
Bakery flavor at home: In my kitchen, this method gives you the drama of a professional pastry case without requiring a pastry-school setup. The laminated dough bakes up with crisp edges, tender inner coils, and that glorious contrast between buttery layers and melty chocolate.
The secret twist: That 1/2 teaspoon of espresso powder does not make these taste like coffee. It works the same quiet magic that salt does in great chocolate chip cookies, making the chocolate taste deeper, rounder, and more grown-up.
Better browning, better aroma: Malt powder is one of those small bakery tricks that changes everything. It helps encourage the Maillard reaction, which is just the simple science behind that deep golden crust and the warm, nostalgic smell that fills the kitchen as the cruffins bake.
Texture worth the wait: The outside turns shatteringly crisp while the interior stays soft and rich. When proofing and butter temperature line up just right, the butter block creates distinct layers that bloom beautifully in the muffin tin.
Ingredients and Substitutions
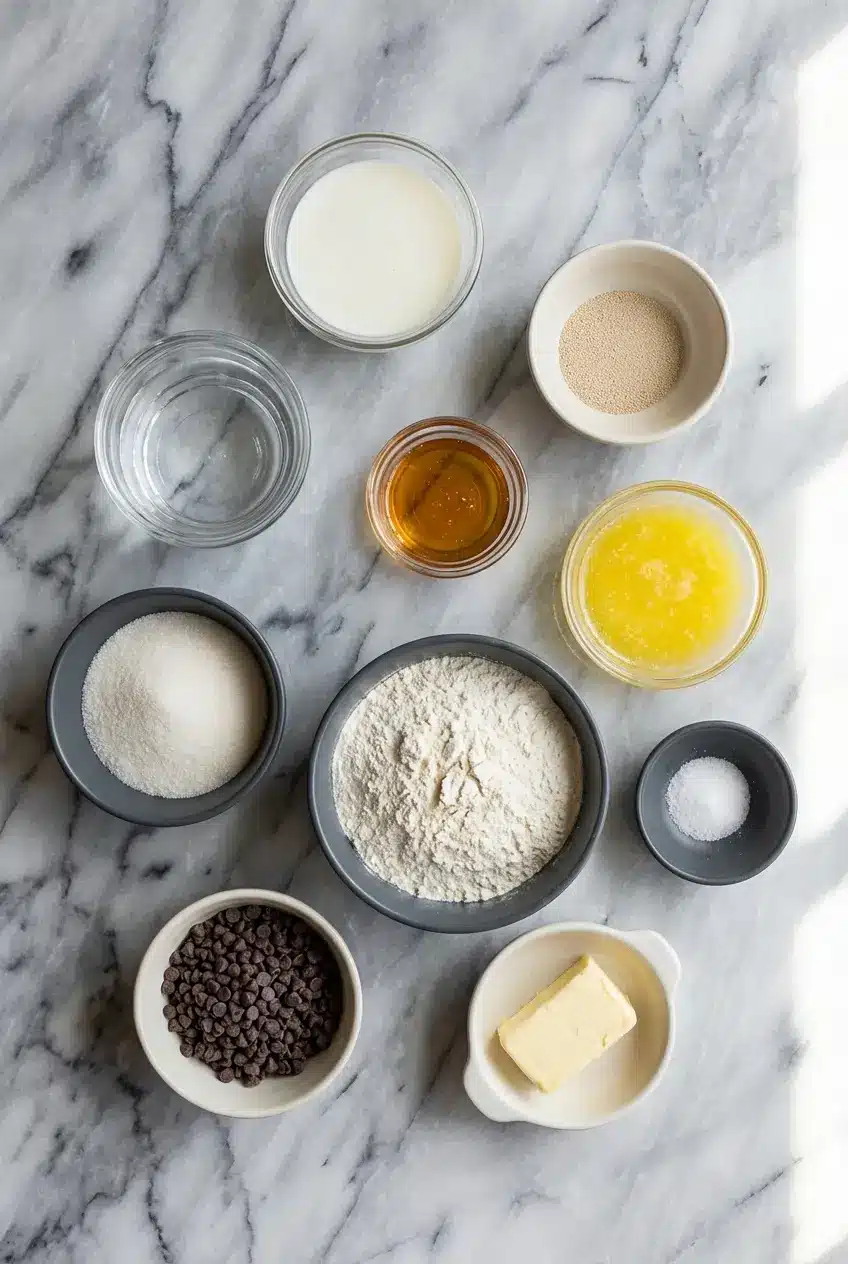
Each ingredient pulls real weight here, from the yeast that lifts the dough to the butter that builds those flaky layers. Keeping the measurements exact makes a big difference with pastry this delicate.
Ingredients
- 85 grams Warm Whole Milk
- 60 grams Warm Water
- 2 1/2 tsp. Active Dried Yeast
- 1 tbsp. Honey
- 25 grams Butter melted
- 20 grams Granulated Cane Sugar
- 250 grams All Purpose Flour
- 5 grams Salt
- 1 cup Mini Chocolate Chips
- 140 grams Unsalted Butter cold
Ingredient Notes & Substitutions
European-style butter: If you can find butter with 82 to 84 percent butterfat, use it for the butter block. It stays more pliable during lamination, which means it is less likely to crack into shards or weep into the dough, and that gives you cleaner, more defined layers.
Mini chocolate chips: These are far better than standard chips for Chocolate Chip Cruffins. Their smaller size slips into the dough without poking holes or tearing the thin layers, so your finished pastry stays flaky instead of patchy and compressed.
Malt powder: This recipe’s bakery aroma really shines with malt powder, even though it is not listed separately in the base ingredient list. Diastatic malt can support yeast activity and a bit more rise, while non-diastatic malt mostly boosts flavor and browning, both are useful, but diastatic needs a lighter hand.
Flour choice: All-purpose flour works beautifully and keeps the dough sturdy enough for rolling. If you like a slightly more delicate bite, a lower-protein pastry flour can soften the texture, but it also makes the dough a little more fragile during lamination folds.
Filling variations: Once you are comfortable with the base dough, a thin swipe of peanut butter, a spoonful of jam, or even a Nutella center can be lovely. The trick is restraint, because too much filling can smear between layers and weigh down the rise.
How to Make Chocolate Chip Cruffins
Bloom and mix the dough
- The night before, stir the active dry yeast, honey, warm whole milk, and warm water together in a bowl. Let it sit for 10 minutes, until the surface looks foamy and alive, with that unmistakable bready aroma that tells you the yeast is awake.
- Add the melted butter, sugar, flour, salt, and mini chocolate chips, then mix just until a rough, shaggy dough comes together. At this stage it will look a little uneven, and that is exactly right, you want everything hydrated, not perfectly smooth.
- Knead the dough for 2 to 3 minutes on a clean counter, or use a stand mixer with a dough hook for the same amount of time. You are looking for a dough that feels soft, supple, and pliable, not sticky like batter and not stiff like sandwich bread dough.
First rise and overnight rest
- Transfer the dough to a lightly greased bowl, cover it with plastic wrap, and let it rise in a warm spot for 1 hour. It should look puffed and slightly airy, even if it has not dramatically doubled yet.
- Move the covered bowl to the refrigerator and let it chill overnight. This rest deepens the flavor, firms the dough, and makes the detrempe much easier to roll cleanly the next morning.
Build the butter block and laminate
- The next morning, shape the cold butter into a 5×6 inch rectangle between parchment paper. Slice the butter into thirds first so it rolls out more evenly, and keep it cool but flexible, if it feels rock hard it will crack, and if it feels greasy it is too warm.
- On a well-floured surface, roll the dough to 11×7 inches. Set the butter block in the center lengthwise, fold the dough flaps over it, and pinch the seams closed so the butter is fully sealed inside.
- With a rolling pin, gently tap the dough horizontally, then vertically, before rolling it into a 20×10 inch rectangle. This light pounding helps spread the butter block without forcing it through the dough.
- Brush the surface with cold water, then fold both short ends inward so they meet in the middle, like an envelope. Fold once more lengthwise, like closing a book, then cover and chill on a flat plate for 30 minutes so the butter and dough stay at the same temperature.
- Repeat the same pounding and rolling process, this time bringing the dough to a 24×10 inch rectangle. Fold it the exact same way, cover it again, and chill for 1 hour to relax the gluten and protect the lamination folds.
- Let the dough sit on the counter for 10 to 20 minutes away from direct heat or sunlight. You want it cool enough to hold the layers, but relaxed enough to roll without snapping back.
Shape, proof, and bake
- On a very well-floured surface, roll the dough into a rectangle about 1/4 inch thick and trim the edges with a pizza cutter or serrated knife for neat, even layers. Slice the dough into 6 to 8 equal strips, then roll each strip up tightly into a spiral, using dental floss if needed for especially clean cuts without squashing the dough.
- Butter a jumbo muffin tin and place each spiral into a cup. Cover loosely with plastic wrap and let them rise for 1 to 2 hours, until doubled and pleasantly wobbly, when you gently shake the pan, they should jiggle a little like gelatin.
- Preheat the oven to 425°F. Brush the tops with egg wash, then bake on the middle rack for 15 to 18 minutes, until the cruffins are deeply golden on top and the layers look lifted and crisp around the edges.
Secrets for a Flaky Golden Crust
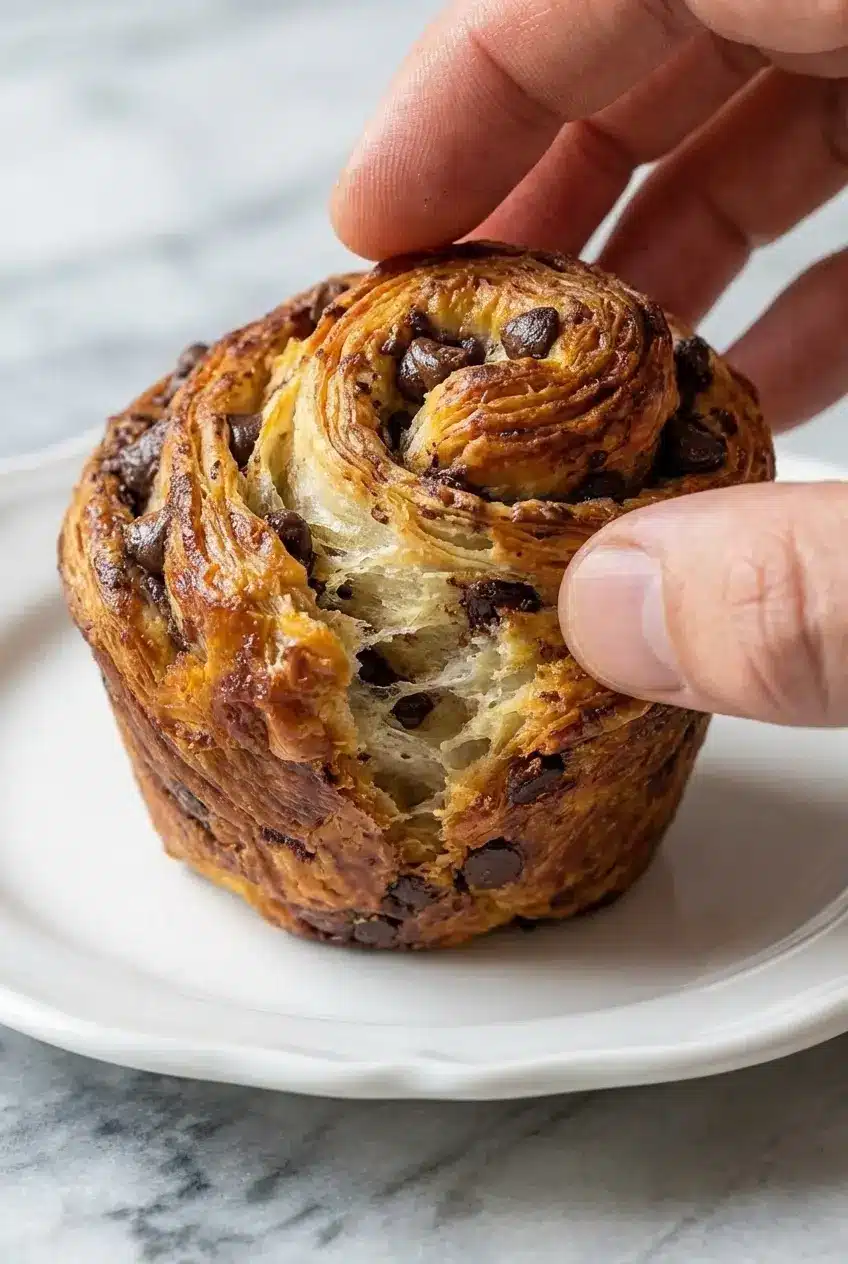
The whole game with laminated dough is temperature. The detrempe and the butter block need to feel equally cool and flexible, because hard butter shatters into chunks, while soft butter melts into the flour and steals the definition from your layers.
Cold water brushed on before folding is not a random step, it helps create the steam that pushes those layers apart in the oven. That steam is one of the quiet reasons cruffins get that dramatic lift and honeycomb-like interior instead of a tight, bread-like crumb.
If you notice butter pooling in the muffin tin, the oven was likely too cool or the cruffins were under-proofed before baking. When they go in before they are properly risen, the butter can escape before the structure has time to set, and you lose both lift and flake.
Malt powder also earns its keep here by helping the crust brown more deeply. Combined with an egg wash, it encourages a fuller Maillard reaction, which is why the tops come out glossy, golden, and smelling like the best corner bakery on a cold morning.
Mastering Lamination in Any Environment
Humid kitchens can make laminated dough feel softer and tackier much faster. In that case, I dust with a little extra flour as needed and lean on longer chilling times, because a dough that feels manageable in dry weather can turn sticky and unruly when the air is heavy.
High altitude brings its own personality to baking, especially with active dry yeast and enriched doughs like this one. The dough may rise too quickly and then slump, so slightly reducing the yeast or increasing the oven temperature by 15°F can help the structure set faster and keep the cruffins tall.
Regular muffin tins work in a pinch, but jumbo tins give the laminated dough more room to spiral upward instead of spreading outward. If you bake often, it is worth noticing how your own oven behaves too, because convection heat may brown the tops faster than a conventional oven and can call for a closer eye in the last few minutes.
The resting phases matter just as much as the rolling. Every chilled pause relaxes gluten, keeps the butter block distinct, and preserves the delicate layering that creates that dramatic internal lift once the dough hits the heat.
Pro Tips & Troubleshooting
Expert Baker Tips
- Use a pizza cutter for the straightest, cleanest strips. Even edges help the spirals bake evenly and look more polished once they rise in the muffin tin.
- Brush away every bit of excess flour between lamination folds. Too much loose flour keeps the layers from bonding, and that can leave gaps instead of a unified pastry structure.
- Trust the jiggle test more than the clock during final proofing. When the pan gives a gentle wobble, the cruffins are usually ready for the oven.
- If you want a finishing drizzle after baking, a quick understanding of melting chocolate helps keep it glossy and fluid rather than thick or grainy. I like a light zigzag over cooled cruffins when I want them to feel extra bakery-case fancy.
Common Pitfalls to Avoid
- Do not rush the chilled rests. The gluten needs time to relax, or the dough will spring back while rolling and compress the layers you worked so hard to build.
- Avoid using very high-moisture grocery store butter for the butter block when possible. It can push the texture toward soft and bread-like instead of crisp and flaky.
- If the dough gets warm while shaping, chill it briefly before continuing. Warm dough encourages butter leakage and can blur the lamination folds.
- Make sure the seams are sealed well when you lock in the butter. Even a small opening can let butter escape during rolling or baking.
Serving & Storage
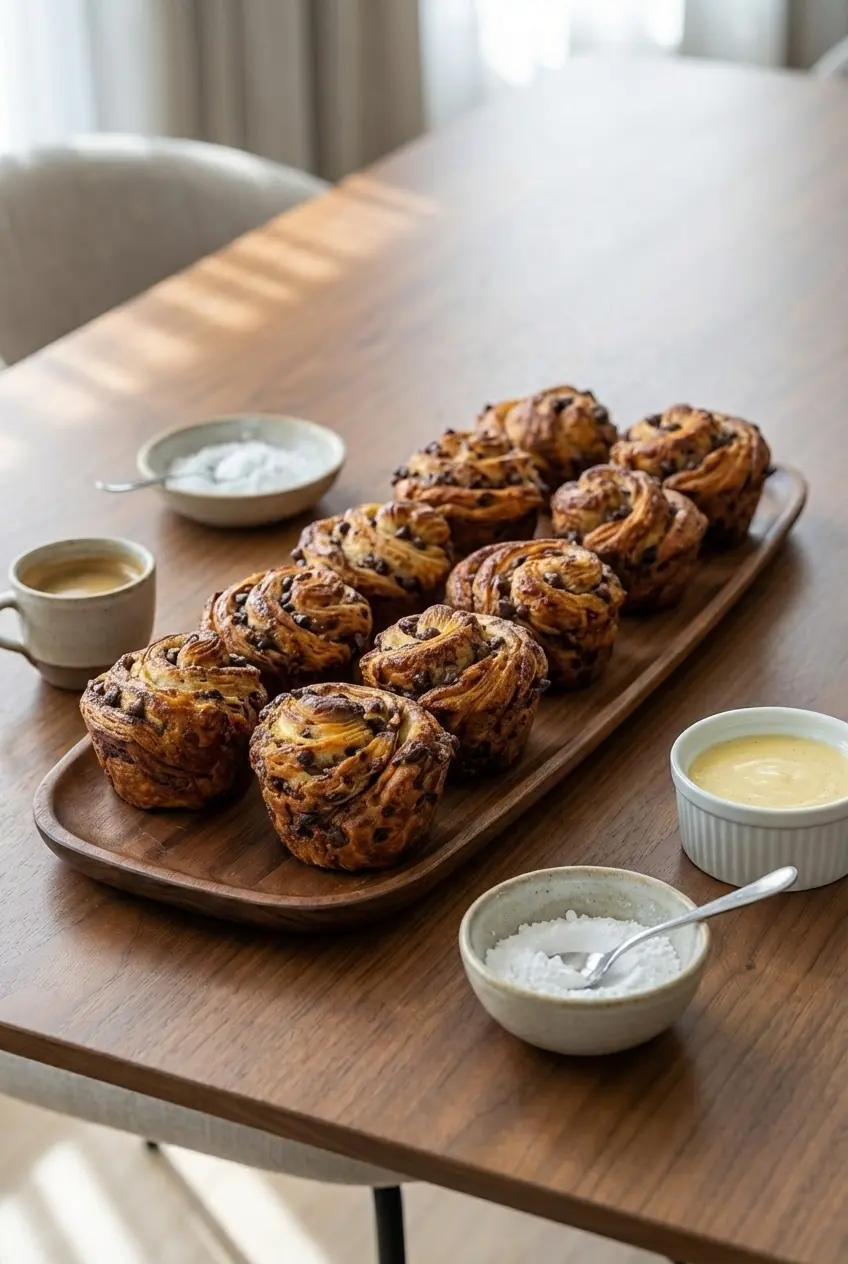
Serving Suggestions
These are best served warm, when the outer layers are still crackly and the chocolate is soft. A dusting of powdered sugar gives them that classic bakery finish, and a quick roll in cinnamon sugar while hot makes them taste like the love child of a croissant and a churro.
For a full café-style moment, I love serving them with a strong espresso or a cup of rich French hot chocolate. If you want to dress dessert up a little, a spoonful of vanilla bean custard on the side turns one cruffin into a plate-worthy treat.
Storage & Freezing for Freshness
At room temperature, store leftover cruffins in an airtight container for up to 2 days. They are still tasty after that, but the crisp layers start to soften, which is why I prefer reheating rather than eating them straight from the container.
For reheating, the oven or air fryer is your best friend. Warm them at 350°F for 3 to 5 minutes until the exterior turns shatter-crisp again, and skip the microwave, which tends to make the pastry chewy and rubbery.
If you want bake-on-demand freshness, freeze the shaped, unbaked cruffins right in the muffin tin until firm, then transfer them to a freezer-safe container or bag. You can bake them directly from frozen, just add 5 to 8 minutes to the bake time and watch for that same deeply golden finish.
If you know you want a quicker breakfast option on another day, freezing before the final proof works especially well. Once baked, let them cool slightly before serving so the layers can set, otherwise the centers can feel a bit too soft from trapped steam.
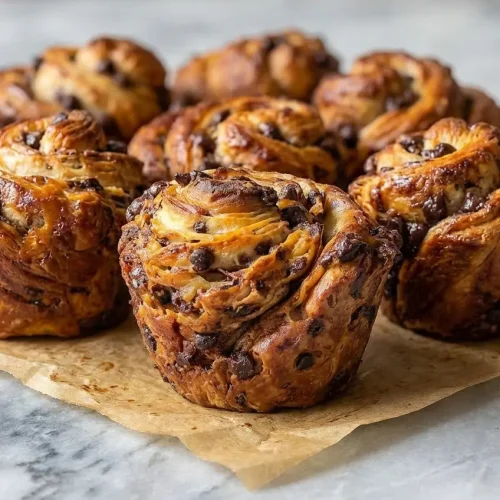
Chocolate Chip Cruffins

Equipment
- Jumbo muffin tin
- Rolling Pin
- Pizza Cutter
- Parchment Paper
- Stand mixer with dough hook
Ingredients
- 85 grams Warm Whole Milk
- 60 grams Warm Water
- 2 1/2 tsp. Active Dried Yeast
- 1 tbsp. Honey
- 25 grams Butter melted
- 20 grams Granulated Cane Sugar
- 250 grams All Purpose Flour
- 5 grams Salt
- 1 cup Mini Chocolate Chips
- 140 grams Unsalted Butter cold
Instructions
Bloom and mix the dough
- The night before, stir the active dry yeast, honey, warm whole milk, and warm water together in a bowl. Let it sit for 10 minutes until the surface looks foamy and alive.
- Add the melted butter, sugar, flour, salt, and mini chocolate chips. Mix just until a rough, shaggy dough comes together and all ingredients are hydrated.
- Knead the dough for 2 to 3 minutes on a clean counter or use a stand mixer with a dough hook until the dough feels soft, supple, and pliable.
First rise and overnight rest
- Transfer the dough to a lightly greased bowl, cover with plastic wrap, and let it rise in a warm spot for 1 hour until puffed.
- Move the covered bowl to the refrigerator and let it chill overnight to deepen the flavor and make the dough easier to roll.
Build the butter block and laminate
- The next morning, shape the cold butter into a 5×6 inch rectangle between parchment paper. Ensure it is cool but flexible to prevent cracking.
- On a well-floured surface, roll the dough to 11×7 inches. Place the butter block in the center, fold the dough flaps over it, and pinch the seams to seal the butter inside.
- Gently tap the dough with a rolling pin horizontally and vertically before rolling it into a 20×10 inch rectangle.
- Brush with cold water and fold both short ends inward to meet in the middle, then fold once more like a book. Wrap and chill for 30 minutes.
- Repeat the rolling process to reach a 24×10 inch rectangle. Fold the same way, cover, and chill for 1 hour to relax the gluten.
- Let the dough sit on the counter for 10 to 20 minutes before shaping to allow it to relax slightly.
Shape, proof, and bake
- Roll the dough to 1/4 inch thickness and trim edges. Slice into 6 to 8 equal strips and roll each into a tight spiral.
- Place spirals into a buttered jumbo muffin tin. Cover loosely and proof for 1 to 2 hours until doubled and wobbly.
- Preheat oven to 425°F. Brush tops with egg wash and bake for 15 to 18 minutes until deeply golden and crisp.
Notes
Nutrition
Conclusion
These Chocolate Chip Cruffins earn every minute of the process. The espresso powder deepens the chocolate, the malt powder coaxes out that bakery-style aroma and color, and the finished pastry comes out with those beautiful golden spirals that feel a little showy in the best way.
If you have been curious about homemade laminated dough, this is a wonderful place to start. Lean into the overnight rest, keep an eye on temperature, and make the recipe your own once you get the rhythm of it.
Frequently Asked Questions
Can I use refrigerated crescent roll dough as a shortcut?
Why did my cruffins lose their shape in the oven?
What is the best type of chocolate to use?
How do I store and reheat leftovers?