
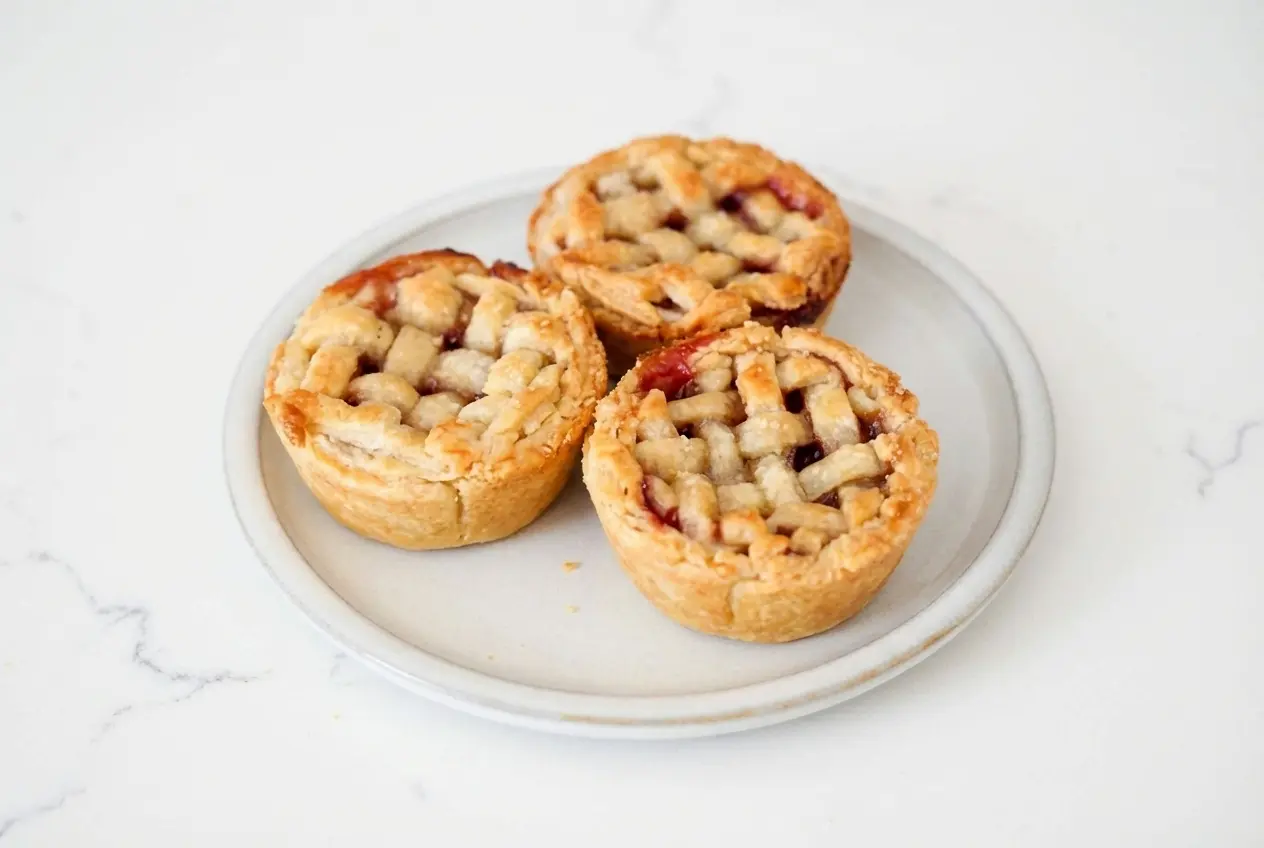
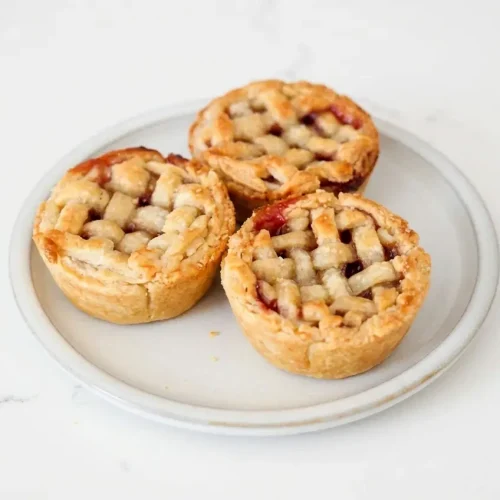
Mini Cherry Pies are the kind of dessert that disappear fast at a summer picnic, right alongside the deviled eggs and pasta salad. In my kitchen, they always feel like the best part of classic homemade cherry pie, but tucked into a flaky, handheld form that is easy to share.
These little pies are perfect for potlucks, backyard cookouts, and bake sales when you want something nostalgic with a bit more charm. The filling turns sweet, tart, and jammy, and the cardamom and brown butter give them that extra bakery-case magic people remember.
Why You’ll Love This Recipe
Big pie flavor, smaller package: These handheld desserts deliver everything people love about cherry pie, flaky crust, glossy fruit, and buttery edges, without needing forks or plates. I love serving them when I want summer potluck treats that feel homemade and a little special.
The secret twist: A pinch of cardamom in the filling adds a warm, floral note that lifts the cherries instead of overpowering them. It makes the sweet-tart fruit taste deeper and more rounded, especially once the homemade cherry pie filling starts to turn jammy in the oven.
That nutty golden crust: Brushing the lattice crust with brown butter before the egg wash gives the tops a richer, toastier flavor than a standard finish. In my kitchen, that extra step bridges the fruity filling and buttery pastry in a way plain mini pies rarely do.
Texture that really delivers: These mini cherry pies bake up flaky, buttery, sweet, tart, and perfectly jammy. If you already have a soft spot for mini apple pies, this cherry version with cardamom and brown butter has a brighter, more summery edge.
Ingredients and Substitutions
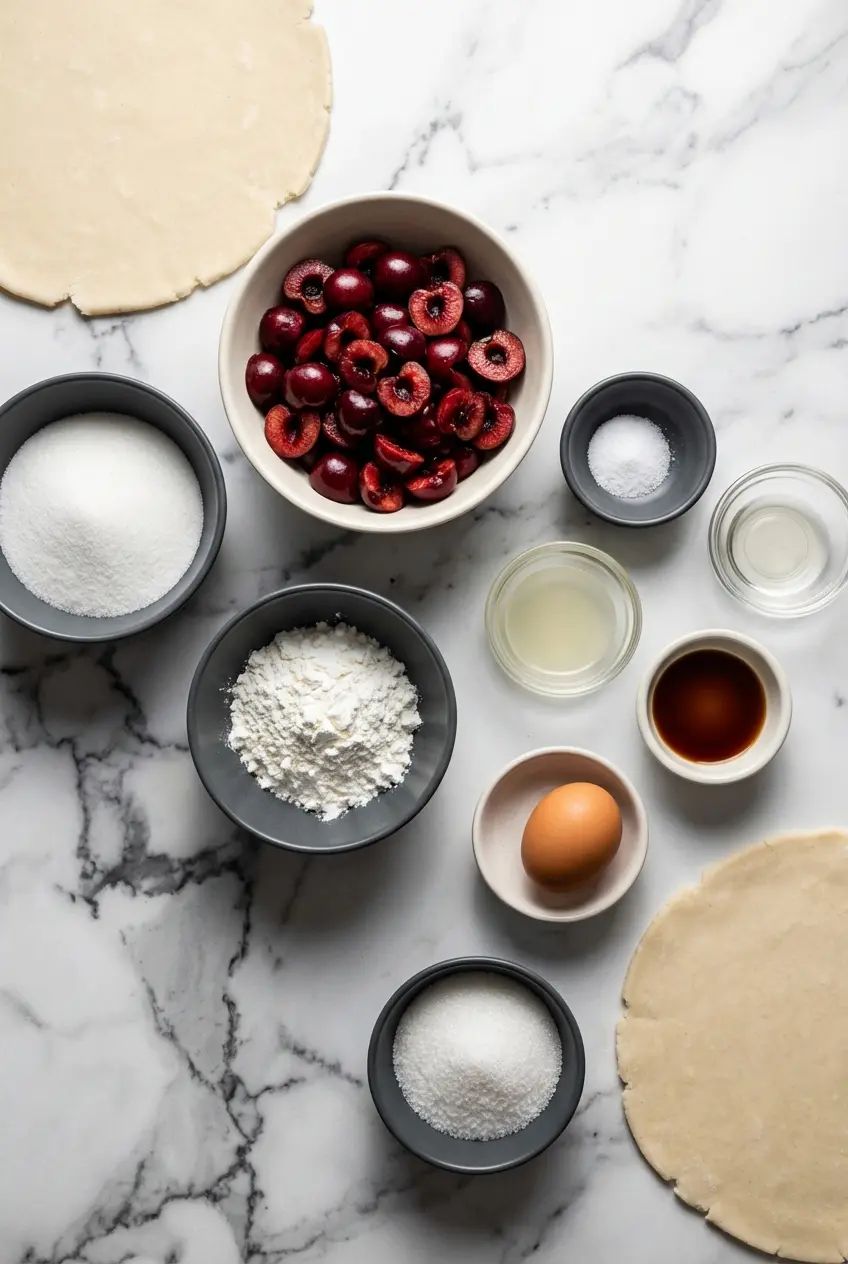
A short ingredient list does the heavy lifting here, letting the cherries shine while the extracts, spice, and crust build that classic pie-shop flavor.
Ingredients
- 2 1/2 cups (380 g) cherries pitted and quartered (about 60 cherries)
- 1/3 cup (70 g) sugar
- 2 Tablespoons (20 g) cornstarch
- 1/4 teaspoon salt
- 1 teaspoon lemon juice
- 3/4 teaspoon vanilla extract
- 1/2 teaspoon almond extract
- 2 pie crusts store bought or homemade
- 1 large egg
- 1 Tablespoon coarse sugar
Ingredient Notes & Substitutions
Cherries: Sweet cherries give you a softer, rounder flavor, while tart cherries bring more punch and a brighter pie-shop tang. If your fruit is especially sour, I sometimes nudge the sugar up slightly, but if the cherries are very ripe and sweet, the listed amount usually lands just right.
Cardamom: A pinch is all you need. It should sit quietly in the background, adding a gentle floral warmth that makes the cherry flavor taste more layered instead of obviously spiced.
Cornstarch: This is what creates that jammy set once the cherry juices heat up in the oven. People often call it a cornstarch slurry effect, even though it is mixed straight into the fruit here, and it is essential for keeping the filling thick enough for tidy little pies.
Pie crust: An all-butter pie dough gives the richest flavor and the flakiest bite, especially if you love a deeply savory pastry edge. That said, a high-quality store-bought dough works beautifully when you want to save time, and I use it myself for busy holiday weekends.
Brown butter glaze: You will need a little browned butter for brushing the lattice before the egg wash. Even a small amount changes the aroma of the crust, adding nutty, caramel-like depth that pairs beautifully with coarse sugar.
How to Make Mini Cherry Pies
Prep the oven and filling
- Heat your oven to 375°F/190°C before you start assembling. If you have a dark-colored standard muffin pan, use it for the crispiest bottoms and faster browning, while a light aluminum pan will still work but usually needs a little more time in the oven.
- In a medium bowl, combine the quartered cherries, sugar, cornstarch, salt, lemon juice, vanilla extract, almond extract, and a pinch of cardamom. Stir until the fruit is evenly coated, then let it sit for at least 10 minutes so the cherries release their juices and the mixture starts looking glossy and syrupy.
Roll, cut, and fill the crusts
- Set one chilled pie crust on a lightly floured surface and keep the second one cold for later. Roll from the center outward in one direction, giving the dough a quarter turn after each pass so it stays round and does not cling to the counter.
- Once the dough reaches about 11 to 12 inches (28 to 30 cm) across, cut 8 to 9 circles with a 4-inch (10 cm) cutter. Nestle each round into a muffin cup, pressing gently in the center while guiding the sides down with your other hand so the dough settles in without tearing, and patch any small rip with a scrap of dough if needed.
- Gather the leftover dough from that first crust and set it aside. Roll out the second crust the same way, cut the remaining 3 to 4 circles for the rest of the pan, and reserve the extra dough because that is what you will use for the lattice crust tops.
- Spoon about 1 Tablespoon of the cherries alone into each crust, leaving the liquid behind in the bowl for the moment. This keeps the fruit portion generous without flooding the cups too early.
- Now divide the juices from the bowl among the pies, using a little less than 1 Tablespoon per pie. You want enough liquid to help create a homemade cherry pie filling as it bakes, but not so much that it bubbles over the edges.
- Slide the filled muffin pan into the fridge while you prepare the lattice. That quick chill helps the pastry stay firm and bake up flakier.
Weave the lattice and finish the tops
- Cut the remaining dough into strips about 1/4-inch (6 mm) wide with a knife or bench scraper. On a lightly floured surface, arrange half the strips vertically, fold back every other strip, lay one strip horizontally across, then fold the vertical pieces back down to begin the weave.
- For the next row, fold back the opposite vertical strips, place another horizontal strip just above the last one, and fold the dough back into place. Keep repeating that pattern until you have one large lattice or a few smaller ones, depending on how your dough is behaving.
- Use a 2 1/2-inch (6 cm) round cutter to stamp out lattice circles. Slip a bench scraper or small spatula underneath each one and place it over a filled pie, pressing lightly around the edges so the top adheres without squashing the pattern.
- Beat the egg in a small bowl. First, brush each lattice lightly with browned butter, then follow with a thin coat of egg wash and a scattering of coarse sugar for sparkle and crunch.
Bake and cool
Bake the pies on the center rack for 22 to 25 minutes, looking for bubbling filling and deeply golden edges. In a dark-colored pan, they are usually ready around 22 minutes, while a light-colored aluminum pan often needs closer to 25 minutes to fully brown. Let them rest in the pan for exactly 5 minutes, then carefully lift them out with a fork and transfer them to a wire rack so the bottoms stay crisp instead of steaming soft.
The Science of Flavor and Flakiness
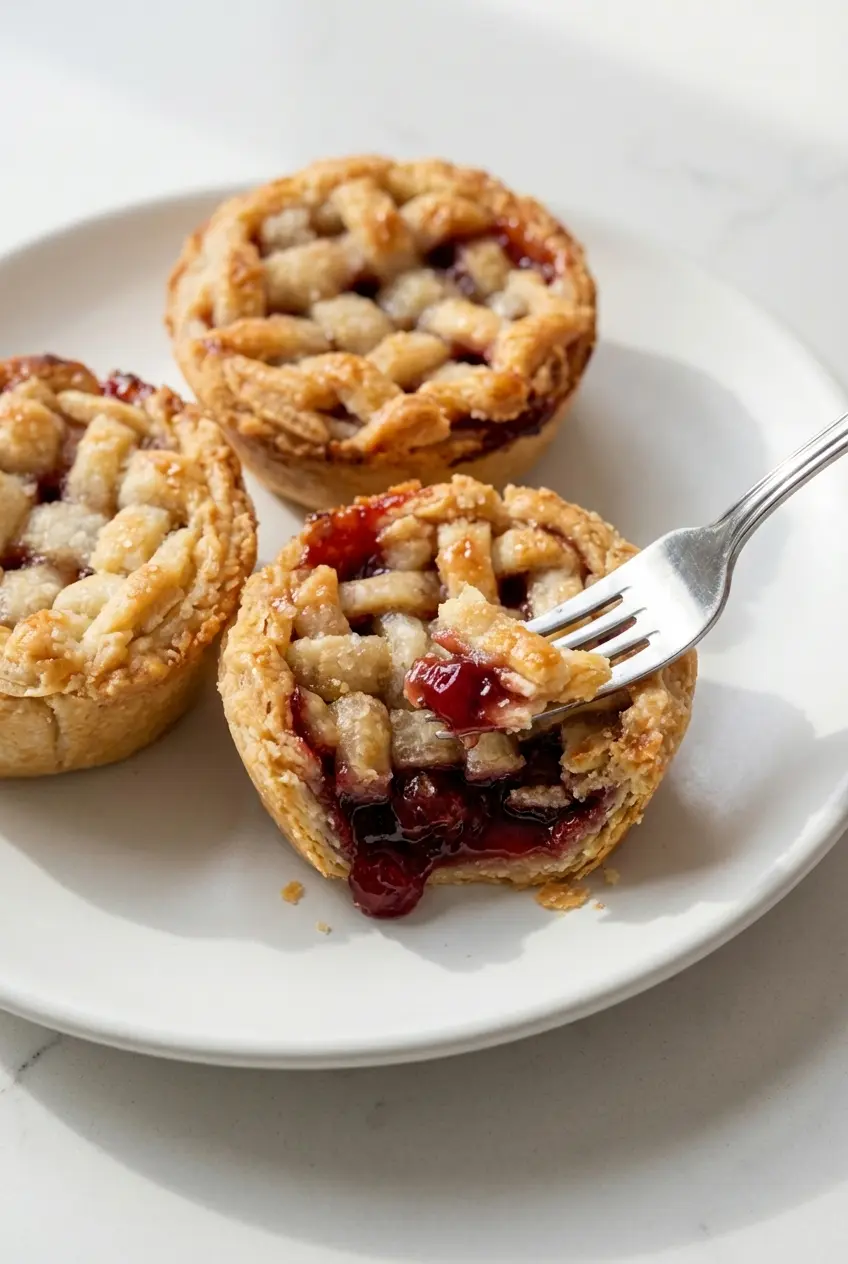
Cherry and almond are such a natural pair because they share the same aromatic compound (benzaldehyde), which is why even a small splash of almond extract makes cherry taste more intensely like itself. In practice, that means the filling tastes fuller and more fragrant without needing a long ingredient list.
The brown butter finish does more than add richness. When the butter solids brown, it creates the Maillard reaction, developing caramelized, nutty notes that a plain egg wash cannot deliver on its own, and that is exactly why the lattice crust tastes deeper and toastier.
Maceration is one of my favorite bits of baking science in this recipe. Letting the cherries sit with sugar for at least 10 minutes pulls out their natural juices, and when those juices bake with cornstarch, they thicken into a glossy filling without needing a saucepan first.
Choosing the Right Pan and Preventing Soggy Bottoms
A standard muffin pan is the sweet spot for these mini cherry pies because it gives you enough room for a proper fruit filling and a defined lattice crust. A mini muffin pan can work, but the smaller wells heat faster, so plan on reducing the bake time and start checking several minutes early, usually around 14 to 18 minutes, to avoid scorched edges before the filling has a chance to settle.
Pan color matters more than many home bakers realize. In baking science, dark-colored metal absorbs heat more aggressively, which helps the bottom crust brown faster, while light aluminum reflects more heat and often stretches the bake closer to the full 25 minutes.
Since you cannot easily blind-bake these tiny shells in a muffin tin, soggy bottoms are all about smart assembly and cooling. Use only about 1 Tablespoon of fruit plus a little less than 1 Tablespoon of liquid per pie, chill the filled pan before baking, and get the pies onto a wire rack right after their 5-minute rest so steam does not soften the bottoms.
The lattice crust also plays a practical role here, not just a pretty one. Because it leaves vents between the strips, moisture can escape more easily during baking, which helps the filling stay jammy rather than watery.
Pro Tips & Troubleshooting
Pro Tips
- Use a dark-colored muffin pan whenever possible. It gives the bottom crust a head start and helps the pies turn crisp and golden much faster.
- Let the cherries macerate for the full 10 minutes. That short wait builds flavor and creates the syrupy juices that become a jammy filling in the oven.
- Roll the dough from the center outward in one direction, turning it a quarter turn after each pass. That keeps the crust from sticking and helps avoid overworking the gluten.
- If you love fruit desserts with a flaky pastry shell, the same make-ahead rhythm works beautifully in recipes like mini apple pies, where keeping the dough cool is just as important for clean layers.
Common Mistakes to Avoid
- Do not press the dough into the muffin cups with sharp fingernails. Tiny punctures in the bottom crust can let filling seep underneath and stick.
- Do not overfill the pies with cherry liquid. Too much juice causes boil-over, messy lattice tops, and sticky muffin tins.
- Do not remove the pies straight from the pan the second they leave the oven. They need exactly 5 minutes to firm up, or the crust and filling can collapse.
Serving & Storage
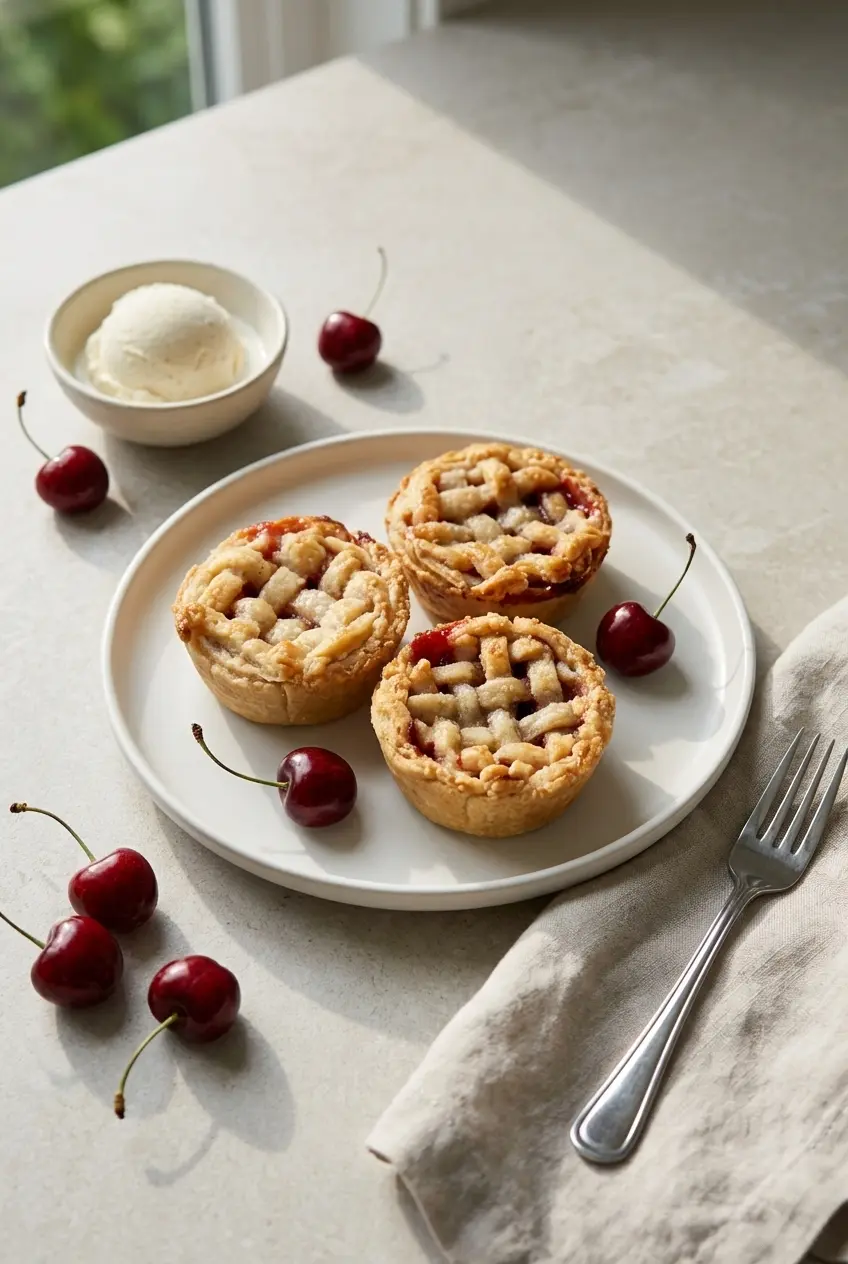
Serving Ideas
These are wonderful served slightly warm, when the crust is still crisp and the filling is soft and fragrant. I love them with vanilla bean ice cream, cherry chocolate chip ice cream, or a cloud of freshly whipped cream with the tiniest drop of almond extract stirred in.
For a grown-up version, a splash of bourbon or amaretto can be added while the cherries macerate, and both play beautifully with the cardamom and almond notes. If weaving a lattice is not your thing, a buttery streusel topping gives these pies a more rustic, bakery-crumble feel.
Storage and Transportation Tips
For summer picnics and potlucks, I pack these in a hard-sided container with layers of parchment paper so the lattice tops do not get crushed on the ride over. They travel especially well alongside other sturdy fruit desserts, much like our mini peach cobblers, which hold their shape nicely once cooled.
Fruit pies like these can usually handle storing leftovers at room temperature for up to 2 days, as long as they are kept covered and your kitchen is reasonably cool. After that, I move them to the fridge, where they keep well for a couple more days, though the crust is always best the day they are baked.
To freeze unbaked mini pies, assemble them fully, place the pan in the freezer until firm, then transfer the pies to a freezer-safe container. You can bake them from frozen, just adding a few extra minutes and watching for a bubbling center and a thoroughly browned crust.
To reheat baked pies and bring back some of that flaky texture, use a 350°F oven for several minutes rather than the microwave. Gentle oven heat refreshes the pastry far better and keeps the filling from turning gummy.
Mini Cherry Pies

Equipment
- Standard muffin pan
- 4-inch round cutter
- 2 1/2-inch round cutter
- Wire rack
Ingredients
- 2 1/2 cups (380 g) cherries pitted and quartered (about 60 cherries)
- 1/3 cup (70 g) sugar
- 2 Tablespoons (20 g) cornstarch
- 1/4 teaspoon salt
- 1 teaspoon lemon juice
- 3/4 teaspoon vanilla extract
- 1/2 teaspoon almond extract
- 2 pie crusts store bought or homemade
- 1 large egg
- 1 Tablespoon coarse sugar
Instructions
Prep the oven and filling
- Heat your oven to 375°F/190°C. If possible, use a dark-colored standard muffin pan for better browning on the bottom crust.
- In a medium bowl, combine the quartered cherries, sugar, cornstarch, salt, lemon juice, vanilla extract, and almond extract. Stir until evenly coated and let sit for at least 10 minutes to allow the fruit to macerate and create a syrupy glaze.
Roll, cut, and fill the crusts
- On a lightly floured surface, roll out one chilled pie crust to about 11 to 12 inches. Cut 8 to 9 circles with a 4-inch cutter and gently press them into the muffin cups.
- Roll out the second crust, cut the remaining circles for the pan, and reserve all the extra dough for the lattice tops.
- Spoon about 1 Tablespoon of cherries alone into each crust, then divide the remaining juices among the pies (about 1 Tablespoon per pie). Chill the filled muffin pan in the fridge while you prepare the lattice.
Weave the lattice and finish the tops
- Cut the reserved dough into 1/4-inch strips. Weave the strips on a floured surface to create a lattice pattern, then stamp out circles using a 2 1/2-inch round cutter.
- Place a lattice circle over each pie, pressing lightly to adhere. Brush with egg wash (and browned butter if available) and sprinkle generously with coarse sugar.
Bake and cool
- Bake on the center rack for 22 to 25 minutes until the filling is bubbling and the crust is deeply golden. Let the pies rest in the pan for exactly 5 minutes.
- Carefully lift the pies out of the pan and transfer them to a wire rack to cool so the bottoms stay crisp.
Notes
Nutrition
Conclusion
These mini cherry pies hit that perfect balance of nostalgic and a little unexpected, with tart-sweet fruit, a whisper of cardamom, and a brown butter gloss that makes the crust taste extra special. They are the kind of bake that looks impressive on the table but still feels warm and homey.
If you are heading to a cookout, packing a picnic, or just craving a handheld dessert with real pie flavor, this is a batch worth making. Once you have the method down, it is easy to play with small variations and make the recipe your own.
Frequently Asked Questions
Can I use canned cherry pie filling instead of fresh cherries?
How do I prevent the bottom of my mini pies from getting soggy?
Can I freeze these mini cherry pies?
What is the best way to reheat mini hand pies?
Do I have to weave a lattice crust, or can I use a solid top?
Can I use store-bought pie crust for mini pies?


1 thought on “Flaky Mini Cherry Pies with Brown Butter Glaze”