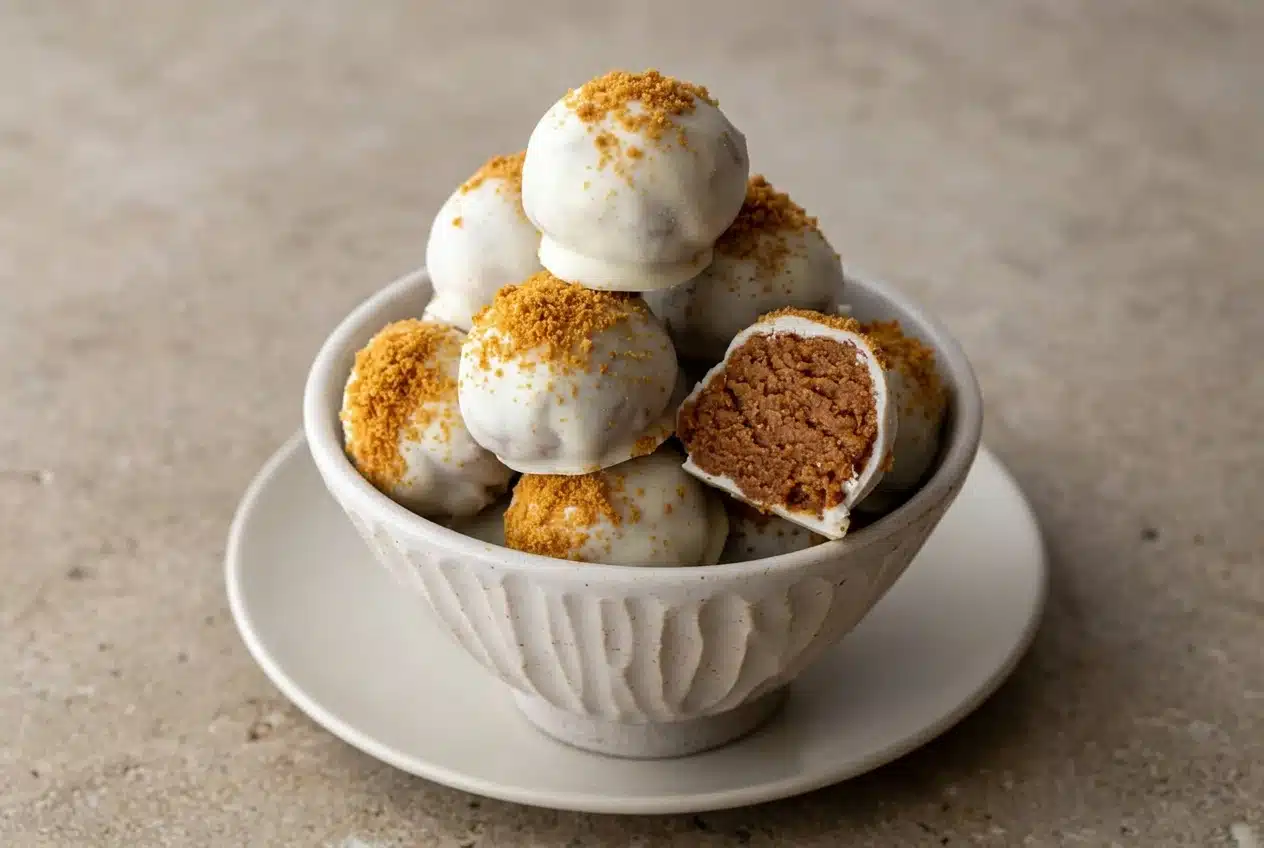
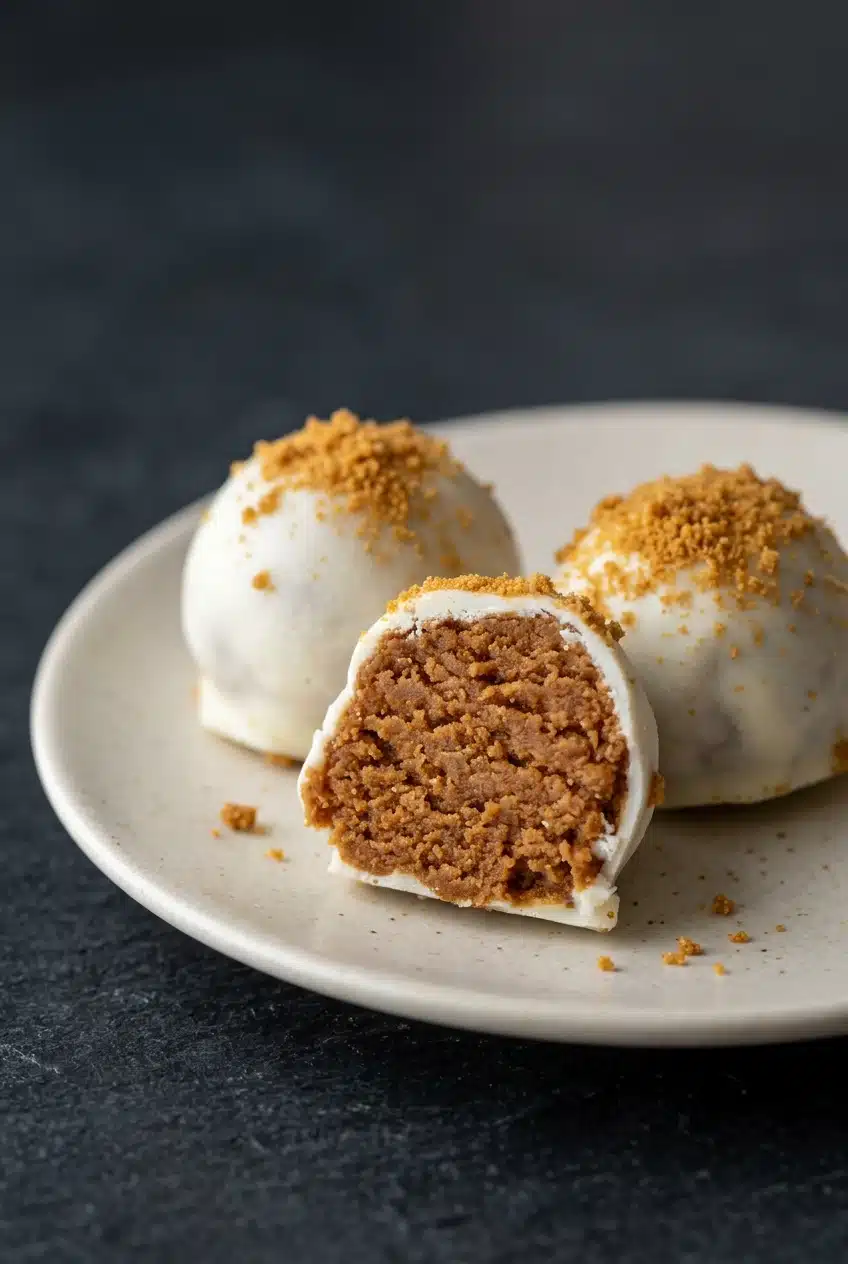
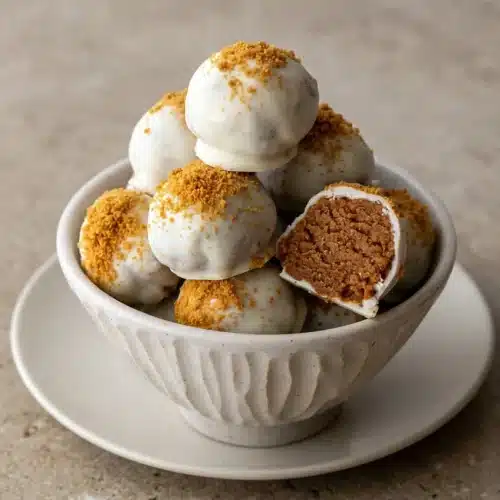
Biscoff truffles are no-bake cookie candies made with finely crushed spiced cookies, softened cream cheese, and vanilla, then dipped in white chocolate. The result is a crisp shell around a creamy, caramelized cookie center.
These bite-size treats bring the flavor of Biscoff cookies into a soft, tangy filling. Reserved cookie crumbs or optional holiday sprinkles give the pale coating a pretty finish.
You don’t need an oven, and the refrigerator does the work of firming the centers before dipping. Fine crumbs make all the difference.
Check the processed cookies for coarse pieces before mixing; the crumbs should resemble fine, dry sand.
Key Ingredients and Smart Substitutions
Cookie crumbs supply spice and structure, cream cheese adds moisture and tang, and vanilla rounds out the aroma. White chocolate creates the contrasting shell, while optional sprinkles add color and crunch.
- 8.8 ounce package Biscoff cookies
- 5 ounces cream cheese (softened)
- 1/2 teaspoon vanilla extract
- 12 ounces white chocolate melts (or candy melts)
- Holiday sprinkles (if desired)
Lotus Biscoff cookies give the filling its caramelized cinnamon-spice flavor. Other speculoos cookies offer a similar direction, though their sweetness, spice, and crumb texture can differ.
Softened full-fat block cream cheese is a useful choice for a cohesive filling. It should blend into the crumbs without leaving pale streaks. Vanilla supports the cookie flavor rather than competing with it.
I’d pay closest attention to crumb texture here: jagged cookie pieces make a smooth center much harder to achieve.
For coating, the formats have different strengths:
- White chocolate melting wafers or candy melts: Convenient for a fluid dipping coating and the choice used here.
- Chopped white chocolate baking bars: Offer cocoa-butter flavor, although their handling and setting characteristics differ from confectionery coatings.
- Almond bark: A vanilla-flavored confectionery coating option, rather than the same product as white chocolate.
- Standard white baking chips: Can remain thicker when melted, making them less convenient for a thin, even shell.
Step-by-Step Guide to Making Biscoff Truffles
Allow 30 minutes for preparation and 90 minutes total, including the refrigerator chill. The recipe yields 15 truffles.
- Process the cookies into a uniform powder, pausing and pulsing again wherever larger pieces remain.
The finished crumbs should look sandy, with no obvious cookie shards. - Set aside a couple of tablespoons for garnish as you transfer the crumbs to a large mixing bowl.
The reserved portion should have the same fine texture as the crumbs for the filling. - Work the softened cream cheese and vanilla into the crumbs until the mixture becomes cohesive.
Look for an even brown color without pale streaks or loose, dry pockets. - Portion the mixture into balls measuring 1.5 inches across and arrange them on a plate lined with wax paper.
Keep the portions similar in size so the finished truffles look consistent. - Refrigerate the shaped centers for one hour.
They should feel firm enough to retain their shape during dipping. - Use a candy melter to liquefy the white chocolate, then select its “warm” setting.
The coating should flow smoothly rather than fall in thick clumps. - Coat each center individually, lift it out with a dipping fork, and transfer it onto waxed paper.
A continuous white layer should cover the cookie filling. - Finish each freshly dipped piece with reserved crumbs or optional holiday sprinkles.
The coating should still look glossy and tacky enough to hold the decoration.
Without a food processor, a heavy-duty resealable bag and rolling pin offer an optional crushing approach. Crush thoroughly and check the corners of the bag for coarse pieces. A sturdy spatula can work the softened cream cheese into the crumbs by hand.
If you don’t have a candy melter, a microwave in short bursts with stirring between bursts, or a double boiler with gentle heat, offers an alternative for melting. Follow the coating package’s directions and keep water out of the chocolate.
Expert Tips for Smooth Dipping and Mistake Prevention
Watch the dough and coating as you work; their texture gives you better guidance than dipping faster.
- Rough or cracked centers: Coarse crumbs or uneven mixing can leave weak spots. Grind thoroughly, mix until uniform, and gently compact each portion before rolling.
- Pale streaks in the filling: Cream cheese that hasn’t softened enough is harder to incorporate. Start with softened cheese and keep mixing until the color looks even.
- Thick coating: If chocolate starts falling from the fork in heavy ribbons, check the candy melter’s warm setting. Avoid increasing the heat aggressively or adding unmeasured rescue ingredients.
- Chocolate puddles underneath: Excess coating creates a flat “foot.” Let it drain from the dipping fork, gently tap the fork, and scrape its underside before transferring the truffle.
- Decorations sliding off: The shell may already be setting. Dip and decorate one piece at a time, while the surface still looks glossy.
- Cracked shells: Stick with the refrigerator chill described above rather than improvising a colder chilling stage.
- Oily-looking coating: Keep cookie butter as a separate optional finish rather than blending it heavily into the shell; spread-enriched coatings may behave differently.
Flavor, Coating, and Binder Variations
Keep these optional directions separate from the ingredient quantities and method above.
Cookie Butter Drizzle and Flaky Sea Salt Finish
A cookie butter drizzle adds another layer of caramelized cookie flavor. Flaky sea salt offers a sweet-salty contrast to the white chocolate without changing the creamy filling.
Condensed Milk or Cookie Butter Binder (No Cream Cheese)
Sweetened condensed milk and smooth cookie butter are possible binder directions, but neither is a direct measured replacement here. Condensed milk can create a sweeter center; cookie butter emphasizes spice and may give a denser texture.
Cream cheese contributes the tangy contrast that also makes creamy Biscoff cheesecake appealing. Choose another binder for a different flavor, rather than expecting an identical result.
Dark Chocolate or Milk Chocolate Coating
- Dark chocolate: Offers a deeper cocoa contrast to the sweet cookie filling.
- Milk chocolate: Gives a rounder, sweeter cocoa flavor than dark chocolate.
- Leftover coating and crumbs: Suggest a bark-style treat as a separate use, rather than another addition to the truffle filling.
Ingredient Allergens and Dairy-Free Adaptations
Dietary adaptations need ingredient-by-ingredient checking. Plant-based cream cheese, a cookie butter binder, and dairy-free white chocolate are possible directions, but they aren’t validated replacements for this recipe.
Check current labels on cookies, spreads, cream cheese alternatives, coatings, and sprinkles for wheat, soy, dairy, and cross-contact information. Don’t assume that a familiar brand or a cream cheese-free filling makes the finished candy suitable for every guest.
Holiday Gifting and Dessert Platter Ideas
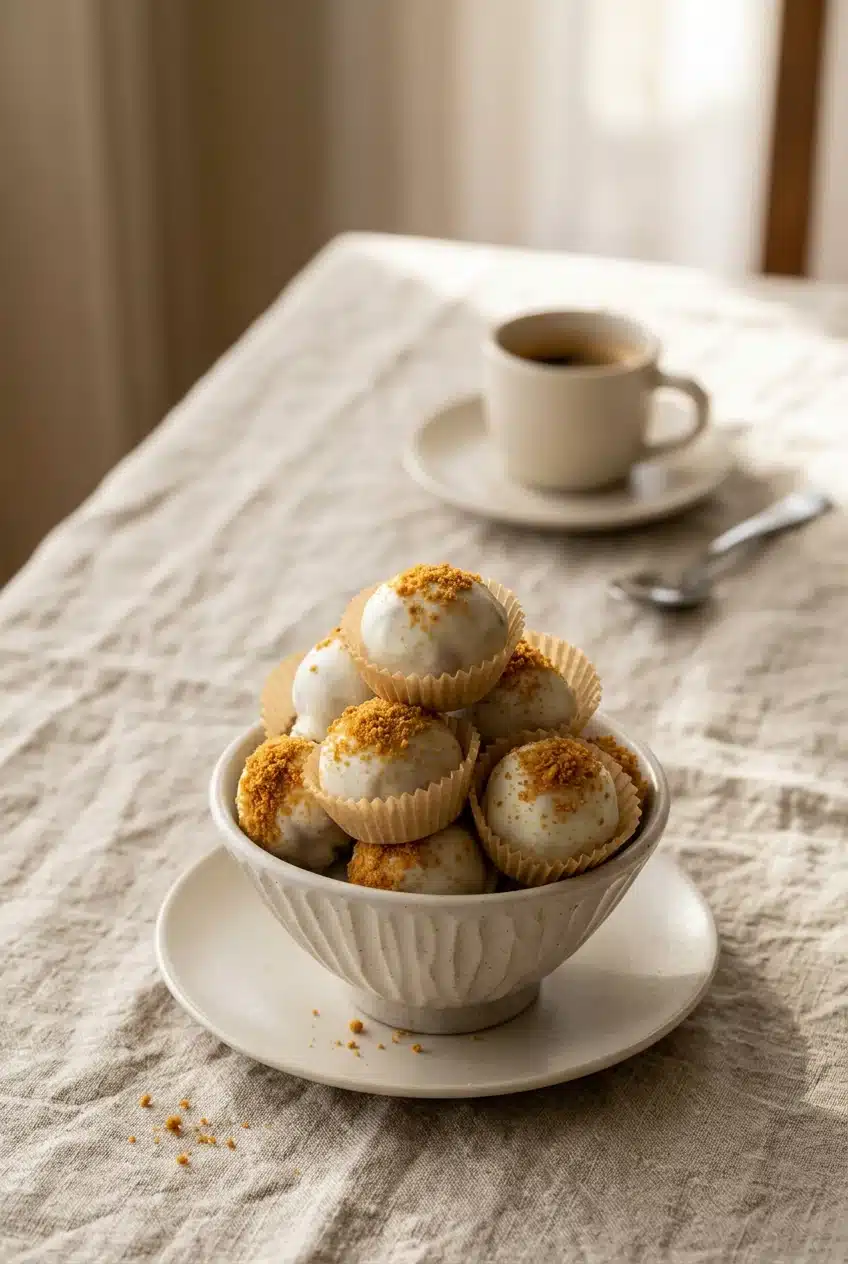
Mini candy liners give each truffle its own spot in a decorative tin or gift box. Cellophane bags offer another festive presentation direction, with packaging chosen to avoid crushing the decorations.
Pair the spiced centers with espresso, coffee, shortbread, or a holiday cookie platter. For a playful upright presentation, take inspiration from homemade cake pops; treat that as a separate styling variation, not a change to the method above.
Planning Your Prep and Refrigerator Chill
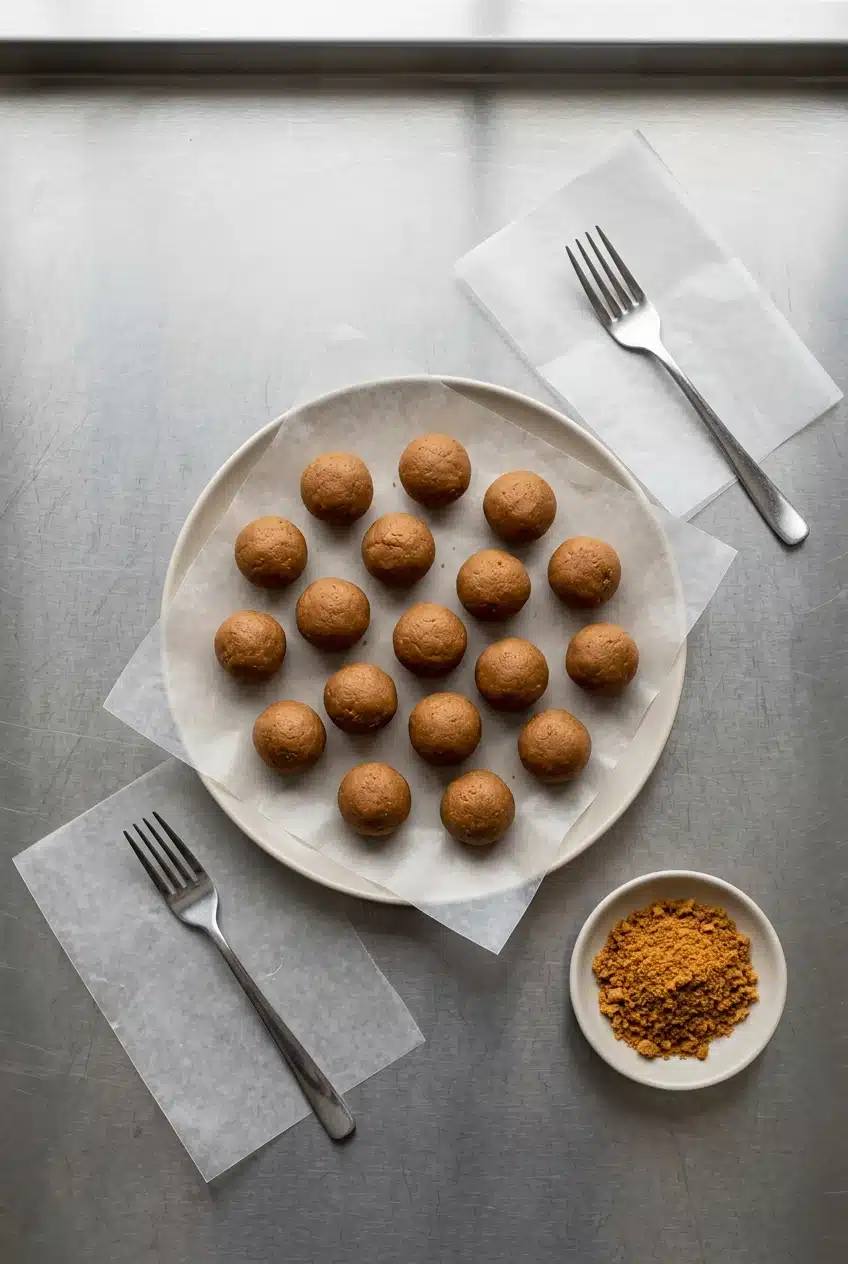
Build the refrigerator chill into your preparation schedule rather than treating it as optional downtime. Set out the dipping fork, waxed paper, and reserved garnish before starting the coating stage so you can decorate each piece promptly.
As a precaution with the cream cheese filling, keep finished truffles covered and chilled. Follow the cream cheese package’s storage directions, and don’t treat the chocolate shell as a reason to leave the centers unrefrigerated.
Final Thoughts
A crisp white chocolate shell and creamy spiced center make these truffles a satisfying contrast of textures. Fine crumbs and an evenly mixed filling give them their best start.
Keep your garnish ready and watch for that freshly dipped, glossy surface. A little attention at that moment makes the finishing touch much easier.
Frequently Asked Questions
What Are Biscoff Truffles and What Do They Taste Like?
They’re no-bake cookie candies with a creamy filling and chocolate coating. This version tastes of caramelized spiced cookies, tangy cream cheese, vanilla, and sweet white chocolate.
Do Biscoff Truffles Need to Be Refrigerated?
Keep this cream cheese version chilled as a precaution. The preparation also includes a refrigerator chill before dipping, which helps the centers hold their shape.
Can I Make Biscoff Truffles Without a Food Processor?
Yes, hand-crushing is an optional approach described above. Aim for uniformly fine crumbs; coarse pieces make the filling harder to shape smoothly.
What Is the Best White Chocolate for Dipping Biscoff Truffles?
White chocolate melts or candy melts are the most straightforward choice for this method. Chopped baking bars offer another option, while standard baking chips can give a thicker dipping consistency.
Can I Make Biscoff Truffles Without Cream Cheese?
Cookie butter or sweetened condensed milk are possible alternative binder directions. They change sweetness and texture, so don’t substitute them directly using the cream cheese quantity.
How Can I Protect the Chocolate Shell?
Follow the refrigerator chilling step and maintain a smooth coating with the candy melter’s warm setting. Handle dipped pieces gently and decorate while the shell is still tacky; no handling approach guarantees a crack-free finish.
Biscoff Truffles

Equipment
- Food processor
- Large Mixing Bowl
- Candy melter
- Dipping fork
- Wax paper
Ingredients
- 8.8 ounce package Biscoff cookies
- 5 ounces cream cheese softened
- 1/2 teaspoon vanilla extract
- 12 ounces white chocolate melts or candy melts
- Holiday sprinkles if desired
Instructions
- Process the cookies into a uniform powder, pausing and pulsing again wherever larger pieces remain. The finished crumbs should look sandy, with no obvious cookie shards.
- Set aside a couple of tablespoons for garnish as you transfer the crumbs to a large mixing bowl. The reserved portion should have the same fine texture as the crumbs for the filling.
- Work the softened cream cheese and vanilla into the crumbs until the mixture becomes cohesive. Look for an even brown color without pale streaks or loose, dry pockets.
- Portion the mixture into balls measuring 1.5 inches across and arrange them on a plate lined with wax paper. Keep the portions similar in size so the finished truffles look consistent.
- Refrigerate the shaped centers for one hour. They should feel firm enough to retain their shape during dipping.
- Use a candy melter to liquefy the white chocolate, then select its “warm” setting. The coating should flow smoothly rather than fall in thick clumps.
- Coat each center individually, lift it out with a dipping fork, and transfer it onto waxed paper. A continuous white layer should cover the cookie filling.
- Finish each freshly dipped piece with reserved crumbs or optional holiday sprinkles. The coating should still look glossy and tacky enough to hold the decoration.