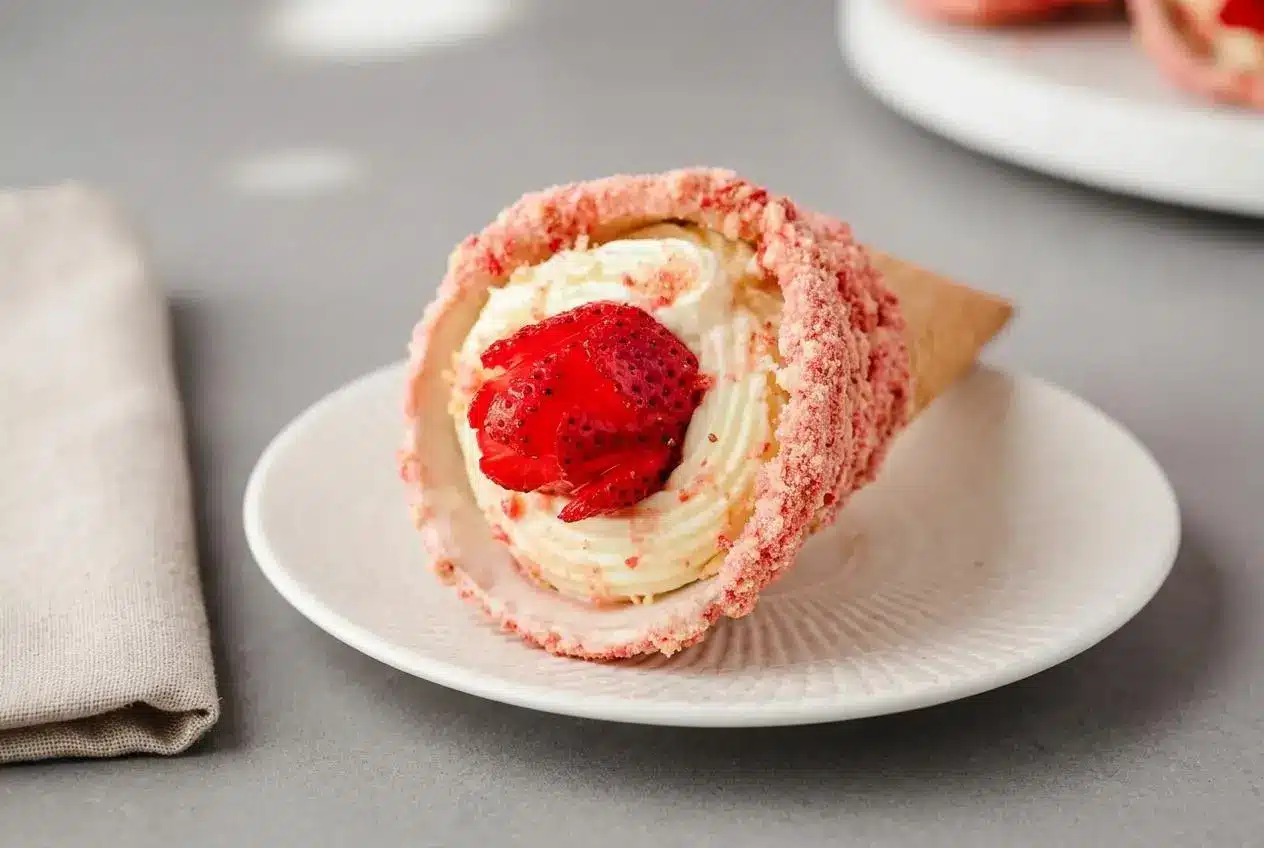
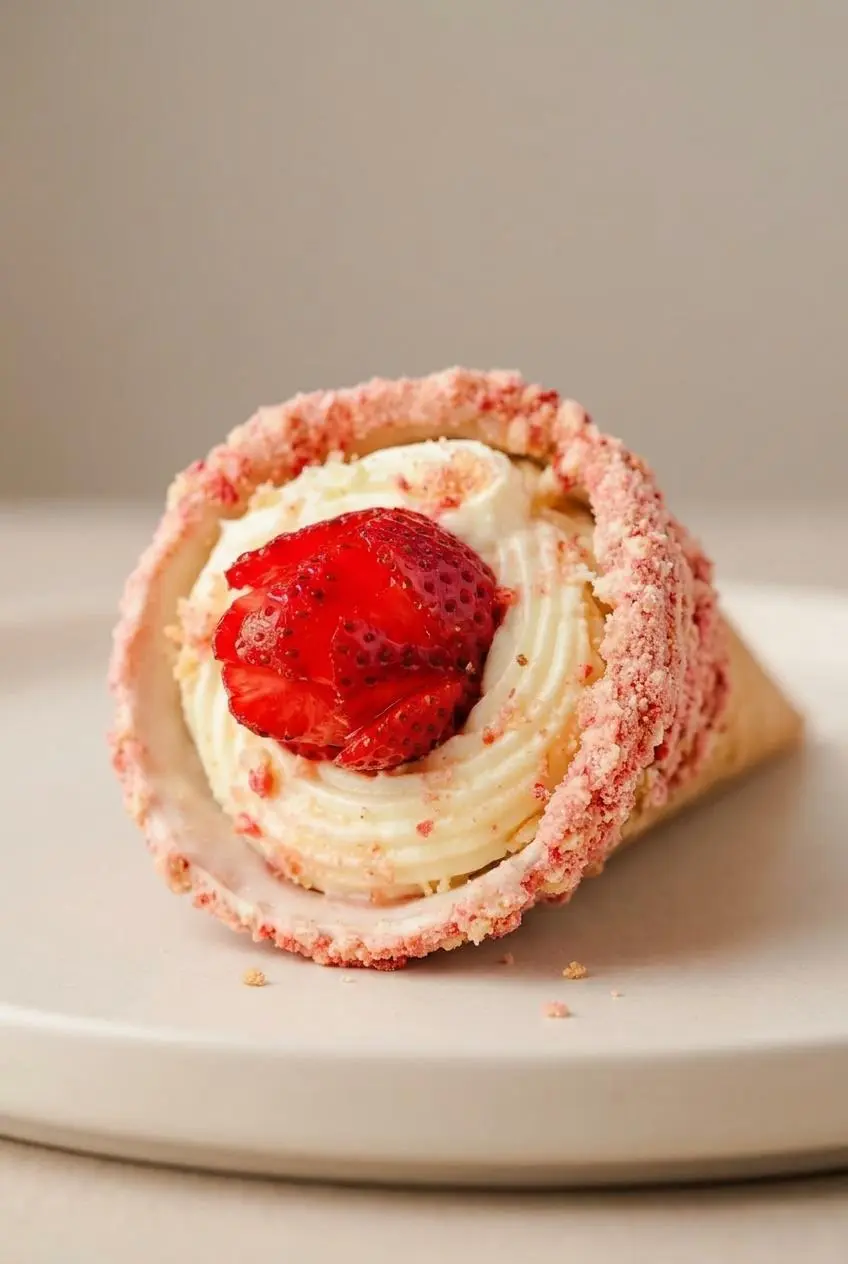
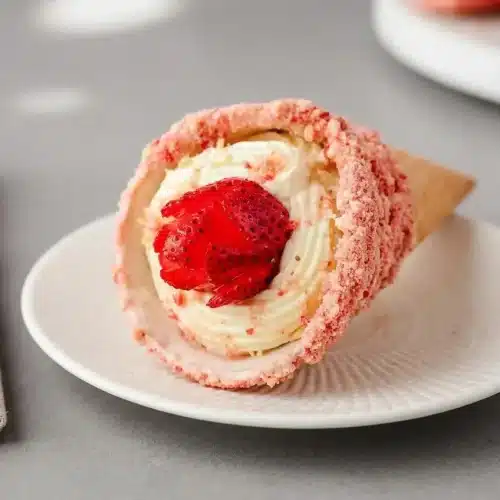
Make strawberry crunch cheesecake cones by sealing waffle cones with melted white chocolate, coating the outside with Golden Oreo and freeze-dried strawberry crumbs, and piping in chilled vanilla cheesecake filling. These no-bake handheld desserts combine a crisp shell, creamy center, and bright berry crunch.
They have the nostalgic strawberry-and-vanilla flavor of strawberry shortcake ice cream bars, with a fluffy cheesecake center instead of ice cream. The pink cookie coating adds a satisfying crunch without needing the oven.
The trick is to prepare the shells and filling separately, then bring them together just before serving. A thin chocolate coating inside each cone helps protect that crisp waffle texture. Save a little crumble for the last bite.
Clear space for a parchment-lined tray before melting the chocolate so every coated cone has somewhere to set.
What You Need for Strawberry Crunch Cheesecake Cones
White chocolate helps seal the cones and hold the berry-cookie coating, while cream cheese and whipped cream give the filling structure. Vanilla adds warmth, lemon juice balances the sweetness, and strawberries bring a fresh finish.
For the ice cream cones
- 2 & 1/3 cups (350gms) white chocolate melts
- 3/4 cup (125 gms) refined coconut oil
- 1 packet (4.7oz) 133gms) Golden Oreos
- 40 ish (1.4oz/40gms) freeze dried strawberries
- 12 large (two scoop) waffle ice cream cones
Cheesecake filling
- 2 x 8 ounce tubs (450gms total) full fat cream cheese
- 1/2 cup (110gms) white sugar
- 2 teaspoons vanilla extract
- 1/2 teaspoon lemon juice
- 1 cup (250mls) thickened cream, heavy cream or heavy whipping cream, divided
To decorate – optional
- 12 fresh strawberries
White chocolate and refined coconut oil: The oil loosens the melted chocolate into a thin, fluid coating that drains out of the cones easily. Choose refined coconut oil for a neutral flavor; unrefined oil can bring a noticeable coconut taste.
Golden Oreos and freeze-dried strawberries: Remove the cookie centers before processing. The cookie pieces provide a sweet, crisp backbone, while the dried berries add concentrated strawberry flavor and tartness without fresh-fruit juice. Keep the crumbs coarse enough to feel crunchy rather than sandy.
Full-fat cream cheese: Choose dense cream cheese rather than a whipped or spreadable product. US full-fat block cream cheese is a dependable choice for firm piping; tub spreads can have a softer consistency. Let the cream cheese reach room temperature before beating so it blends without stubborn lumps.
Heavy whipping cream: In US stores, heavy cream or heavy whipping cream is the choice here. Whipping it to firm peaks gives the filling lift, while gentle folding preserves the air that helps the cheesecake stand tall.
Have an electric mixer, food processor, microwave-safe bowl, parchment paper, and a piping bag with a large tip ready. A straw or skewer helps spread chocolate inside the narrow cones.
I’d wait a couple of minutes before lifting the processor lid after crushing the berries so the fine strawberry dust settles instead of floating into the air.
How to Make Strawberry Crunch Cheesecake Cones Step by Step
Finish the chocolate-coated shells first, then make and chill the filling. This recipe makes 12 large cones, with 30 minutes of preparation and 2 hours of chilling and setting time, for a total of 2 hours 30 minutes.
Seal and Coat the Waffle Cones
To make ice cream cones
- Cover a baking tray with parchment and melt the white chocolate in a microwave-safe bowl using 30-second intervals.
Continue until the melts become smooth with no solid pieces remaining. - Stir the coconut oil into the melted chocolate, using additional brief microwave bursts if needed to melt it completely.
The combined coating should flow freely rather than fall from the spoon in thick blobs. - Pour some coating into a cone, rotate it to reach the interior, and use a straw or skewer to spread a thin layer before shaking out the excess.
Check that the coating reaches the narrow tip without leaving bare patches. - Rest the coated cone on the prepared tray and treat the remaining cones the same way while the inner layers set.
The interiors should look evenly coated rather than pooled with chocolate. - Remove the Oreo cream centers, pulse the cookies into coarse breadcrumbs, and transfer the crumbs to a bowl.
Stop while distinct little cookie pieces remain. - Process the freeze-dried strawberries separately to a breadcrumb texture, then wait a few minutes before opening the lid and mixing them with the cookie crumbs.
The finished mixture should have an even scattering of pink berry pieces throughout. - Arrange the cones beside separate plates of melted coating and strawberry crumbs, with the tray nearby.
Keep everything within reach so the chocolate stays wet during coating. - Roll approximately the upper third of a cone through the melted chocolate, shake away the excess, and immediately roll it through the crumbs.
The strawberry-cookie pieces should cling to the wet coating without sliding off. - Return the finished cone to the tray and repeat the dipping process with the remaining cones.
Leave the shells undisturbed until the outer coating has set.
Make the No-Bake Cheesecake Filling
To make the cheesecake filling
- Start with room-temperature cream cheese and beat it briefly to loosen its texture.
It should look pliable and creamy rather than cold and chunky. - Mix in the sugar, vanilla, and lemon juice on low speed, scraping the bowl as needed, then transfer the smooth mixture to another bowl.
Keep mixing until the sugar has dissolved and no cream cheese lumps remain. - Whip the cream to firm peaks, then gently fold it through the cream cheese mixture.
The cream should hold its shape when the beaters lift, and the combined filling should look airy without white streaks. - Cover the filling and refrigerate it for 2 hours before transferring it to a piping bag fitted with a large tip.
The chilled mixture should hold a defined ridge rather than slump flat. - Pipe the chilled cheesecake into the chocolate-sealed cones just before serving.
Fill the narrow interior before building a swirl above the rim.
Pipe and Garnish with Strawberry Roses
The chilled filling should support a soft swirl without dripping down the cone. If using the optional fresh strawberries, leave the rose cutting until serving time because thin petals wilt quickly.
To decorate
- Make the optional strawberry roses just before serving by cutting thin, shallow slices around each berry, starting near its bottom and gently easing the slices outward.
A small or medium berry may give three to five petals around each ring and only two petal layers. - Set a strawberry rose into the center of each filled cone and scatter extra strawberry-cookie crumbs over the cheesecake.
The fruit should sit securely without flattening the piped swirl.
Tips for Crispy Cones and Smooth Cheesecake Filling
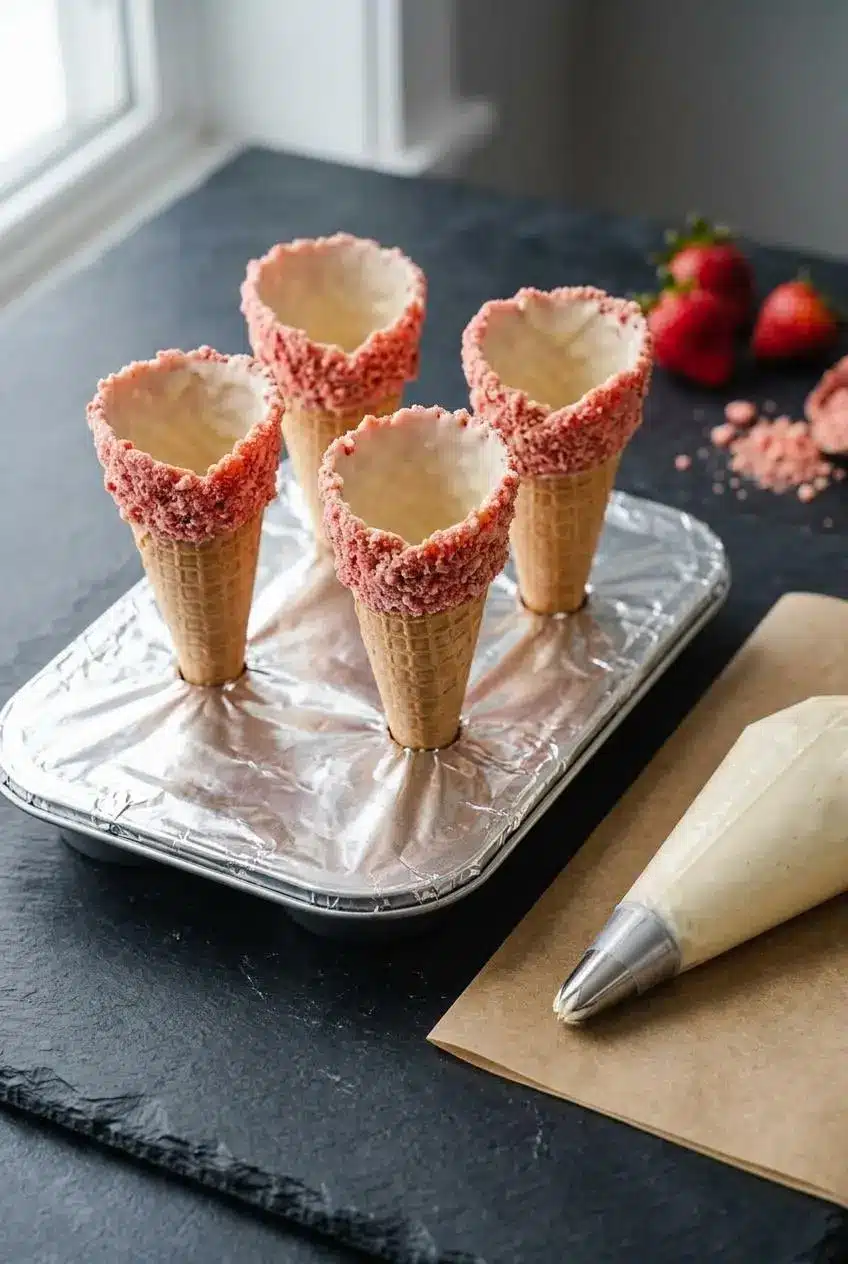
Most texture problems come from cold cream cheese, chocolate that sets before dipping, or cones filled too early. A little attention at those stages saves plenty of frustration.
- Keep cones upright: Stretch aluminum foil tightly over a muffin tin and poke holes sized to support the cones without crushing them. Tall drinking glasses also work if their rims support the cones securely. Check stability before adding filling.
- Protect the waffle shell: Aim for a continuous inner chocolate layer, especially near the tip. It helps separate the moist filling from the cone, but it doesn’t make an assembled cone stay crisp indefinitely.
- Fix lumpy filling early: Cold cream cheese resists blending. Let it soften before starting, and beat out lumps before folding in whipped cream; vigorous mixing afterward can flatten the filling.
- Loosen thick coating: If the chocolate mixture thickens while you work, give it a brief microwave burst and stir. Don’t force a cone through stiff chocolate, which can pull at its fragile edge.
- Help crumbs stick: Roll each cone in the crumbs immediately after dipping. If the thin chocolate layer has already set, the crumbs won’t adhere properly.
- Preserve the garnish: Slice strawberry roses at serving time. Early cutting encourages wilting and juice release, which can dampen the cheesecake surface and surrounding crumbs.
For an optional less-sweet finish, fold fine sea salt and fresh lemon zest into the filling. You can also tuck some crunch crumbs into the sealed cone tip before piping for a crisp final bite. Keep these additions separate from the main method.
If you’d rather skip shells altogether, strawberry cheesecake mousse offers a similar creamy dessert experience served in cups.
Easy Variations and Shortcut Options
Keep the homemade version as written for the signature vanilla-and-berry balance, or choose an optional shortcut to suit your schedule and available ingredients.
Shortcut Option and Fresh Berry Layering
Premade Philadelphia no-bake cheesecake filling can replace the homemade filling for faster assembly. It is a ready-to-use dessert filling, not plain Philadelphia cream cheese, so check the container carefully. Keep it chilled and fill the prepared cones at serving time.
For more fruit texture, alternate cheesecake with diced fresh strawberries and strawberry glaze inside the sealed cone. Drain excess juice from the diced berries and use restrained fruit layers so the filling still supports the swirl. A spoonable homemade strawberry filling is another optional fruit layer.
Crunch Topping and Cookie Swaps
These coatings have different textures, so choose based on whether you want tart fruit flavor, a sweeter crumble, or a quick cookie topping.
- Freeze-dried strawberries and Golden Oreos: This combination gives bright berry tartness and distinct cookie crunch without adding butter.
- Strawberry gelatin powder, cookie crumbs, and melted butter: This optional style tastes sweeter and more candy-like, with a richer crumb texture; it isn’t a direct measure-for-measure replacement for dried berries.
- Strawberry wafer cookies: Crush them for a quick pink topping with a light, sweet wafer crunch.
- Nilla wafers, shortbread, or graham crackers: These can replace the Golden Oreos, but they won’t supply strawberry flavor by themselves.
For a different flavor direction, try one of these optional changes:
- Chocolate Oreo cones: Use chocolate cookie crumbs for a cocoa contrast with the vanilla filling and strawberries.
- Biscoff cones: Use crushed Biscoff cookies for spiced crunch, or add a cookie butter swirl between cheesecake layers.
Make-Ahead Timeline, Storage, and Serving Ideas
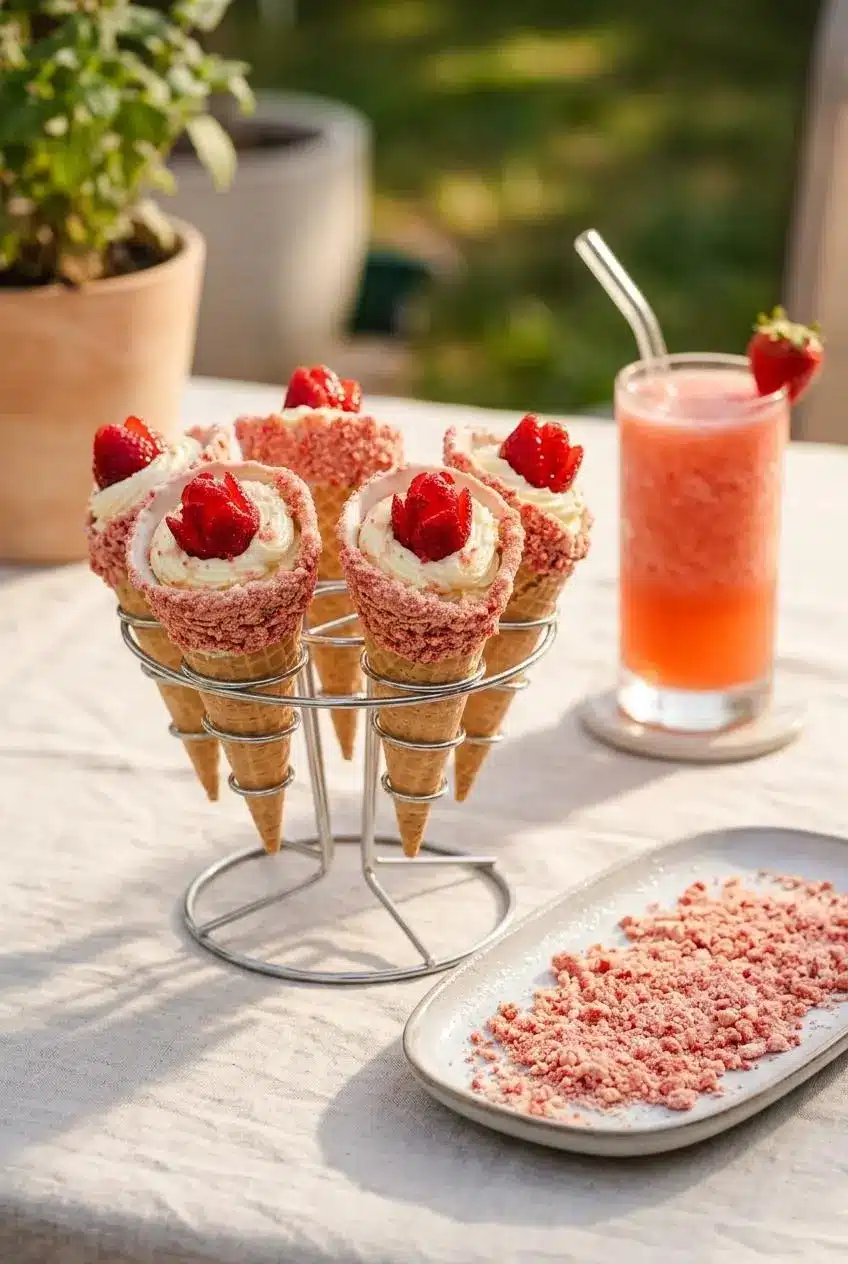
Prepare components separately and leave final assembly for serving. The filling already needs a refrigerator rest, so use that pause to let the cone coatings set and organize your serving stand.
- Dry crunch: Keep the strawberry-cookie crumbs in an airtight container away from humidity. Use a dry spoon whenever you remove some.
- Unfilled coated cones: Once the chocolate has set completely, place the shells in an airtight container in a cool, dry spot. Arrange them without pressing their coated rims together.
- Cheesecake filling: Keep it covered and refrigerated, either in a bowl or in a closed piping bag. Keep the filling chilled until assembly.
- Fresh garnish: Leave the strawberry rose cutting until the cones are ready to serve.
- Assembled leftovers: Refrigerate them in a covered container with enough clearance to protect the swirls. Expect the waffle shells and crumbs to soften as they sit.
For a party, pipe a serving batch rather than putting every cone out at once. Keep the remaining filling chilled, avoid leaving dairy-filled cones sitting in warm weather, and replenish the stand as needed.
An upright cone stand makes serving easiest. A chilled platter scattered with extra crumbs also works if you arrange the cones so the cheesecake tops don’t touch. For a bright contrast to the rich filling, serve frozen strawberry lemonade alongside them.
Conclusion
These cones bring together creamy vanilla cheesecake, tart strawberry crumbs, and a crisp waffle shell without turning on the oven. Give the inner chocolate coating time to set, then let the chilled filling do the rest.
Finish with fresh strawberry roses or keep the topping all crunch. For your next gathering, try the optional crumble tucked into the cone tip for a satisfying last bite.
Frequently Asked Questions
How Do You Keep Strawberry Crunch Cheesecake Cones From Getting Soggy?
Coat the entire cone interior with melted white chocolate, including the narrow tip. Let the coating set completely before adding filling. Pipe in chilled cheesecake just before serving for the best crunch.
What Is the Strawberry Crunch Coating Made Of?
It combines Golden Oreo cookies with their cream centers removed and freeze-dried strawberries. Pulse them separately into coarse crumbs, mix together, and press onto the cones while the white chocolate coating is wet.
Can I Use Premade Philadelphia No-Bake Cheesecake Filling?
Yes, ready-to-use Philadelphia no-bake cheesecake filling works as an assembly shortcut. Use it instead of the homemade filling, with optional diced strawberry layers inside the chocolate-sealed cones.
How Should You Store the Cones Before Serving?
Keep the set, coated shells airtight and separate from the refrigerated filling. Fill and garnish them at serving time rather than storing them assembled when crispness matters.
Where Can I Get Strawberry Crunch Topping if I Cannot Find Freeze-Dried Strawberries?
Crushed strawberry wafer cookies make a quick homemade alternative. For a sweeter crumble style, use the optional strawberry gelatin powder, cookie crumb, and melted butter combination described above.
Strawberry Crunch Cheesecake Cones

Equipment
- Stand mixer (or electric hand held beaters)
- Food processor
- Parchment Paper
Ingredients
For the ice cream cones
- 2 & 1/3 cups white chocolate melts (350gms)
- 3/4 cup refined coconut oil (125 gms)
- 1 packet Golden Oreos (4.7oz) 133gms)
- 40 ish freeze dried strawberries (1.4oz/40gms)
- 12 large waffle ice cream cones (two scoop)
Cheesecake filling
- 2 x 8 ounce tubs full fat cream cheese (450gms total)
- 1/2 cup white sugar (110gms)
- 2 teaspoons vanilla extract
- 1/2 teaspoon lemon juice
- 1 cup thickened cream, heavy cream or heavy whipping cream (250mls), divided
To decorate – optional
- 12 fresh strawberries
Instructions
To make ice cream cones
- Cover a baking tray with parchment and melt the white chocolate in a microwave-safe bowl using 30-second intervals. Continue until the melts become smooth with no solid pieces remaining.
- Stir the coconut oil into the melted chocolate, using additional brief microwave bursts if needed to melt it completely. The combined coating should flow freely rather than fall from the spoon in thick blobs.
- Pour some coating into a cone, rotate it to reach the interior, and use a straw or skewer to spread a thin layer before shaking out the excess. Check that the coating reaches the narrow tip without leaving bare patches.
- Rest the coated cone on the prepared tray and treat the remaining cones the same way while the inner layers set. The interiors should look evenly coated rather than pooled with chocolate.
- Remove the Oreo cream centers, pulse the cookies into coarse breadcrumbs, and transfer the crumbs to a bowl. Stop while distinct little cookie pieces remain.
- Process the freeze-dried strawberries separately to a breadcrumb texture, then wait a few minutes before opening the lid and mixing them with the cookie crumbs. The finished mixture should have an even scattering of pink berry pieces throughout.
- Arrange the cones beside separate plates of melted coating and strawberry crumbs, with the tray nearby. Keep everything within reach so the chocolate stays wet during coating.
- Roll approximately the upper third of a cone through the melted chocolate, shake away the excess, and immediately roll it through the crumbs. The strawberry-cookie pieces should cling to the wet coating without sliding off.
- Return the finished cone to the tray and repeat the dipping process with the remaining cones. Leave the shells undisturbed until the outer coating has set.
To make the cheesecake filling
- Start with room-temperature cream cheese and beat it briefly to loosen its texture. It should look pliable and creamy rather than cold and chunky.
- Mix in the sugar, vanilla, and lemon juice on low speed, scraping the bowl as needed, then transfer the smooth mixture to another bowl. Keep mixing until the sugar has dissolved and no cream cheese lumps remain.
- Whip the cream to firm peaks, then gently fold it through the cream cheese mixture. The cream should hold its shape when the beaters lift, and the combined filling should look airy without white streaks.
- Cover the filling and refrigerate it for 2 hours before transferring it to a piping bag fitted with a large tip. The chilled mixture should hold a defined ridge rather than slump flat.
- Pipe the chilled cheesecake into the chocolate-sealed cones just before serving. Fill the narrow interior before building a swirl above the rim.
To decorate
- Make the optional strawberry roses just before serving by cutting thin, shallow slices around each berry, starting near its bottom and gently easing the slices outward. A small or medium berry may give three to five petals around each ring and only two petal layers.
- Set a strawberry rose into the center of each filled cone and scatter extra strawberry-cookie crumbs over the cheesecake. The fruit should sit securely without flattening the piped swirl.