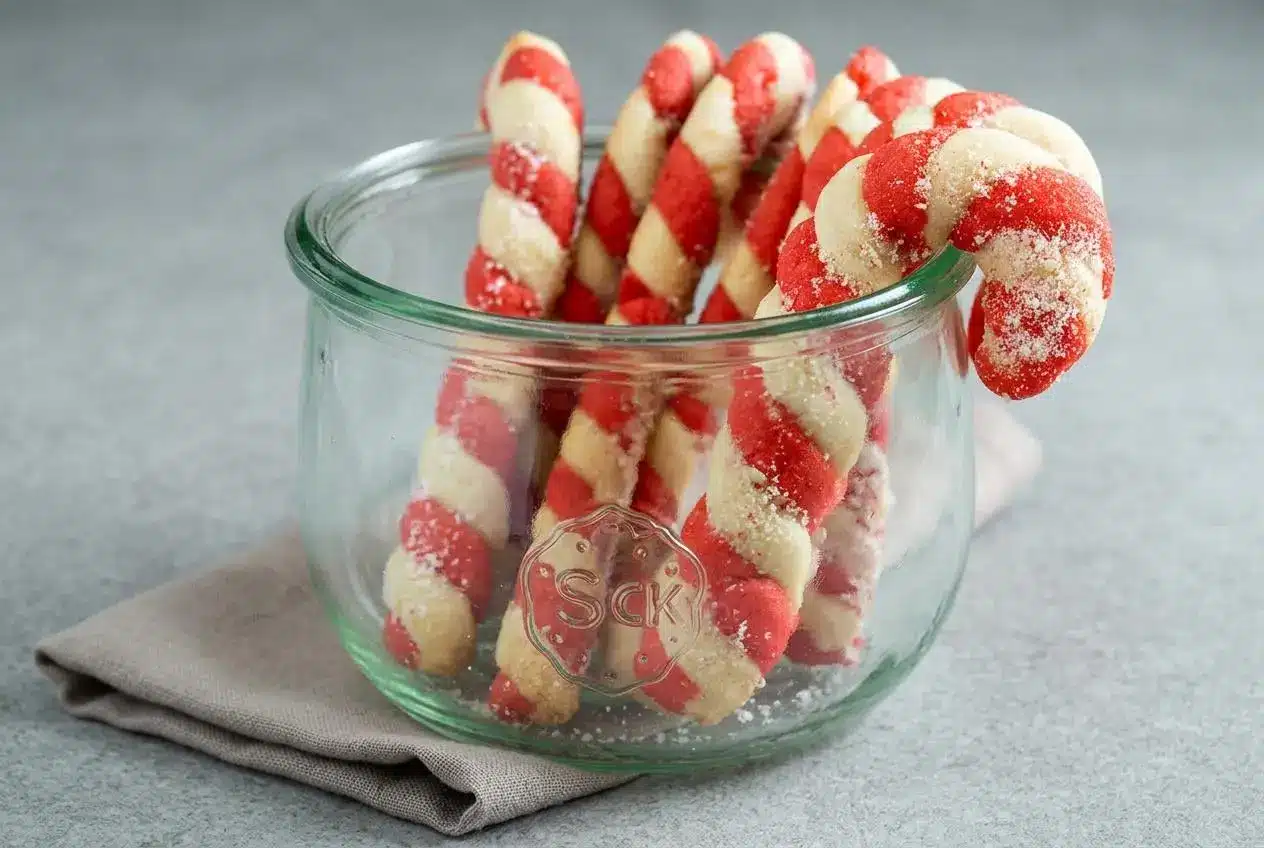
Make candy cane cookies by chilling a buttery dough, coloring half red, and twisting red and white ropes into curved canes. Bake at 350°F, then immediately add crushed peppermint sugar for a tender cookie with a crisp, minty finish.
These candy cane cookies bring together the familiar flavor of a peppermint sugar cookie and the cheerful shape of a Christmas candy cane. The dough rolls into slender ropes that hold their stripes when you keep it cool and handle it gently.
The butter gives each bite richness, while a peppermint sugar topping adds a little crunch. Plan for the dough’s chilling time before you start shaping, rather than trying to squeeze these into a last-minute baking session. The shaping gets easier with each pair of ropes.
Clear a cool patch of counter and keep a ruler nearby before you begin rolling.
Ingredients You Will Need and Why They Matter
Butter supplies richness, the sugars balance structure and tenderness, and flour and egg hold the dough together. Vanilla rounds out the peppermint flavor, gel coloring creates the red stripes, and crushed hard candy gives the topping its distinctive crunch.
- 1 cup butter
- 1 cup sugar
- 1/4 cup powdered sugar
- 1 teaspoon vanilla extract
- 1 teaspoon peppermint extract
- 1 egg
- 2 1/2 cups all-purpose flour
- 1 teaspoon baking powder
- 1/2 teaspoon salt
- Red food coloring gel
- 2 tablespoons finely crushed peppermint candies
- 2 tablespoons granulated sugar
Butter: Start with cool, pliable butter, around 65°F. A finger should leave a shallow indentation without sinking into a greasy, shiny surface. Butter that feels almost melted makes the dough harder to handle, even before you start rolling.
The sugars: The cup of sugar and the powdered sugar go into the dough; reserve the final 2 tablespoons of granulated sugar for the topping. Granulated sugar contributes sweetness and structure, while powdered sugar helps create a finer, tender crumb. Chilling and careful handling still matter for keeping the canes defined.
Flour, egg, and leavening: Measure the flour without packing it into the cup. Excess flour can make thin ropes crack. The egg binds the dough, baking powder gives it lift, and salt keeps the sweetness balanced.
Color and peppermint: Concentrated red gel adds strong color without the extra liquid needed to achieve the same shade with liquid dye. Use hard peppermint candies or candy canes for the topping, not soft, puffy mints. Crush them finely enough to sprinkle evenly, but leave some tiny pieces for crunch.
I check the butter’s surface as well as its softness: a slight finger dent is useful, but a greasy sheen means it needs cooling before mixing.
How to Make Candy Cane Cookies Step by Step
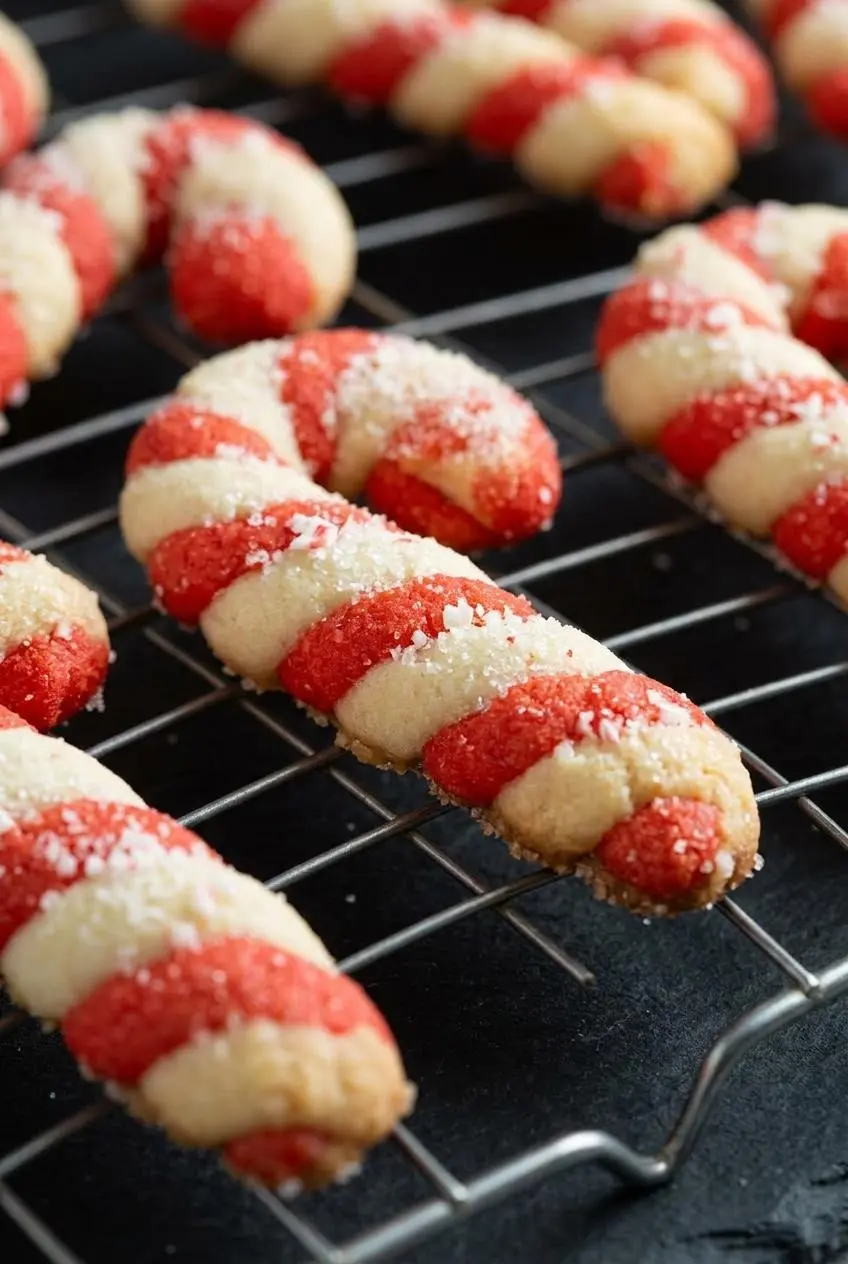
This recipe makes about 3 1/2 to 4 dozen cookies. Have a large mixing bowl, a small bowl, a hand mixer, an ungreased baking sheet, and a wire cooling rack ready.
- Combine the butter, 1 cup sugar, powdered sugar, vanilla, peppermint extract, and egg in a large bowl using the mixer’s low setting, then stir in the flour, baking powder, and salt.
Stop once the dough comes together and no dry flour remains, keeping the mixing brief to protect its tenderness. - Separate the dough into equal halves, work red gel coloring into one half to reach your preferred shade, and wrap the two portions individually in plastic wrap before refrigerating for 3 to 4 hours.
Both portions should feel firm rather than soft and greasy when you begin shaping. - Mix the finely crushed peppermint candies with the remaining 2 tablespoons granulated sugar in a small bowl and reserve it for topping.
The candy pieces should distribute throughout the sugar so each sprinkle contains both. - Set the oven to 350°F and let it preheat before baking.
A fully heated oven helps the chilled shapes begin setting promptly. - Portion 1 level teaspoon from each dough color, roll each piece into a 5-inch rope, and wind the two ropes around each other while pressing their ends together.
Keep the ropes similar in thickness and secure their tips so the stripes stay joined rather than springing apart. - Arrange the paired ropes on an ungreased baking sheet with their tops curved into hooks, bake for 8 to 10 minutes, sprinkle immediately with the peppermint sugar, and transfer to a wire rack to finish cooling.
Look for lightly browned bottoms and pale tops, and apply the topping while the cookies are hot so it can cling to the surface.
The most useful baking cue is underneath the cookie. Don’t wait for a brown top: that can dry out the tender crumb and dull the red stripes. The edges and bottoms should show light color while the tops remain pale.
Have the topping beside the oven before the baking time ends. Residual heat helps the peppermint sugar soften slightly against the cookies; once they cool, more of it will fall away.
Tips and Troubleshooting for Rolling and Twisting
When shaping becomes frustrating, check the dough’s temperature before changing its ingredients. Sticky dough and cracking dough need different fixes.
How to Fix Sticky or Cracking Cookie Dough
- Sticky after chilling: Return the dough to the refrigerator until it firms up, then try a very light dusting of powdered sugar on the work surface. Use just enough to release the rope, not a thick coating.
- Soft, shiny ropes: Warm hands or a warm counter can soften the butter as you work. Keep the waiting dough wrapped in the refrigerator and bring out manageable portions.
- Cracks as you roll: The dough may be too cold to bend. Gently press the small portion between your palms until it becomes pliable, then roll again with lighter pressure.
- Crumbly despite gentle warming: Press the portion together before rolling rather than stretching loose crumbs into a rope. Avoid adding generous amounts of flour, which can make the problem worse.
The goal is dough that bends without smearing. Like the rich crumb in classic shortbread cookies, this texture benefits from restrained handling rather than repeated kneading.
Even 5-Inch Ropes That Stay Together
Roll from the center outward with relaxed fingers. Pressing hard in one spot creates a thin section that can break when you join the colors. If one end becomes pointed, gently compress it and roll again.
Use a ruler to check the first ropes, then keep matching that length. Length matters, but so does thickness: a thick red rope paired with a thin white one makes an uneven cookie that can brown unevenly.
Lay the colors side by side and wind them together gently. Lightly press their meeting surfaces, give the joined rope a gentle roll if needed, and pinch both ends. Avoid stretching it longer as you work.
Curve the hook on the baking sheet rather than carrying a finished, delicate cane across the counter. Make a relaxed bend instead of a tight curl, and support the curve when moving the baked cookie.
Flavor and Shape Variations
Choose an optional variation for flavor or convenience, while keeping the red-and-white peppermint canes as the main method.
- Peppermint canes: Keep the mint extract and two-color shaping for peppermint flavor throughout.
- Almond canes: Change the dough’s extract for a bakery-style flavor beneath the minty topping.
- Round cookies: Skip the coloring and rope shaping when you prefer a less hands-on format.
Old-Fashioned Almond Extract Candy Cane Cookies
Replace the peppermint extract with pure almond extract, keeping the vanilla. This gives the dough a rounded almond aroma, while the peppermint sugar still adds a cool, crunchy finish.
Almond extract can taste assertive, so follow the product’s baking directions rather than adding an extra splash. Keep the same chilling and shaping approach.
Quick Round Crushed Candy Cane Drop Cookies
For an optional round version, leave the dough uncolored and fold finely crushed hard candy canes into it. A light coating of flour on the candy can help distribute the pieces, but it won’t stop exposed candy from melting.
Portion the dough into rounds and, if desired, flatten them gently with the bottom of a glass. This saves shaping work, not chilling time. Different thicknesses will bake differently, so use pale tops and lightly colored bottoms as your guide rather than assuming the cane timing fits every round.
For another colorful option without rope shaping, try colorful sprinkle cookies.
Dairy-Free and Chocolate-Dipped Options
For a dairy-free adaptation, try firm plant-based butter sticks labeled for baking rather than soft tub spreads. Products vary, so expect possible differences in dough firmness and spreading. Check the labels on the butter substitute, candy, and chocolate if avoiding dairy.
For a chocolate finish, dip the curved ends of fully cooled cookies into melted dark chocolate and add crushed peppermint before the chocolate sets. Support the whole cookie as you dip so its hook doesn’t carry all the weight.
Make-Ahead and Storage Guide
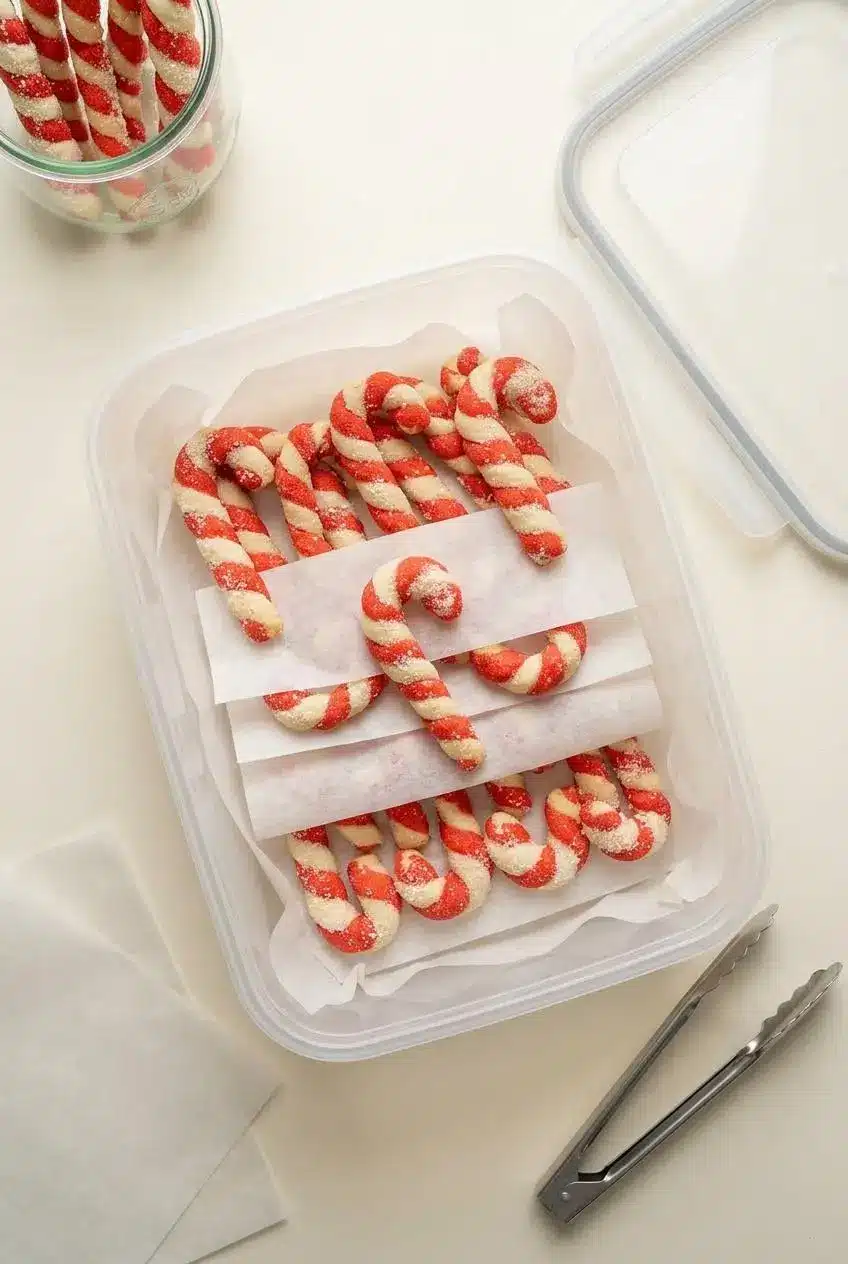
Plan your baking around the required dough chill, and protect the finished cookies from moisture and breakage.
Keep the two wrapped dough portions separate during chilling. When shaping in batches, leave the unused portion refrigerated so it stays firm enough to roll. Prepare the peppermint sugar before baking so there’s no delay when the cookies come out.
For storing baked cookies:
- Let them cool completely on the rack before closing them in a container.
- Use a dry, airtight container to limit moisture reaching the candy topping.
- Place wax paper or parchment between layers to reduce sticking and rubbing.
- Arrange the canes flat instead of standing them on their curved ends.
- Keep them separate from moist baked goods that could soften the topping.
Don’t seal warm cookies in a tin. Trapped steam can make the peppermint coating tacky and soften the surface. If you’re packing gifts, cool the cookies fully before assembling the boxes.
Festive Serving and Holiday Gifting Ideas

The curved shape makes these especially charming beside hot chocolate, warm milk, or warm spiced cider. If a hook fits comfortably over a mug rim, hang it there just before serving; don’t force a narrow curve onto a thick mug.
For a cookie exchange platter, lay the canes in overlapping rows with their hooks facing the same direction. Pair them with festive eggnog cookies for a contrast to the cool peppermint flavor.
Choose a shallow, parchment-lined tin or rigid gift box for transport. Nest the cookies flat with paper between layers, and fill empty space with folded parchment so they don’t slide around. Keep the lid from pressing against the hooks.
Cellophane bags work for small gifts if you add a firm backing. Tie ribbon around the bag above the cookies, never around the delicate curved handles.
Conclusion
These buttery peppermint canes reward patient chilling and gentle shaping. Keep the dough cool, roll evenly, and watch for pale tops with lightly golden bottoms.
If the ropes stick, a light dusting of powdered sugar can help. Give each hook a little support, then enjoy that tender crumb and peppermint crunch.
Frequently Asked Questions
Why Is My Candy Cane Cookie Dough Too Sticky or Hard to Twist?
Sticky dough usually needs more chilling or a lighter touch. Return it to the refrigerator until firm and dust the work surface lightly with powdered sugar. If it cracks instead, warm the small portion gently between your palms until it bends without breaking.
Can I Use Almond Extract Instead of Peppermint Extract?
Yes. Replace the peppermint extract with pure almond extract for an old-fashioned bakery flavor, keeping the vanilla. Follow the extract’s baking directions for strength. The crushed peppermint topping will still give the cookies a minty finish.
Do I Have to Use Red Gel Food Coloring Instead of Liquid Food Dye?
Gel is strongly recommended for this dough. It creates a vivid red without adding much liquid. Liquid coloring may require enough extra moisture to make the ropes sticky, particularly if you’re aiming for a deep red rather than pink.
Can I Make Candy Cane Cookie Dough Ahead of Time?
The dough already needs a chilling stage, so plan mixing before your shaping session. Wrap each color separately and follow the chilling instructions above. Keep the waiting dough refrigerated while you roll and bake each batch.
Can I Make These Cookies With Dairy-Free Butter?
You can try firm plant-based butter sticks intended for baking. Soft tub spreads may produce dough that behaves differently and spreads more. Check all ingredient labels when avoiding dairy, and expect texture and shaping results to vary by product.
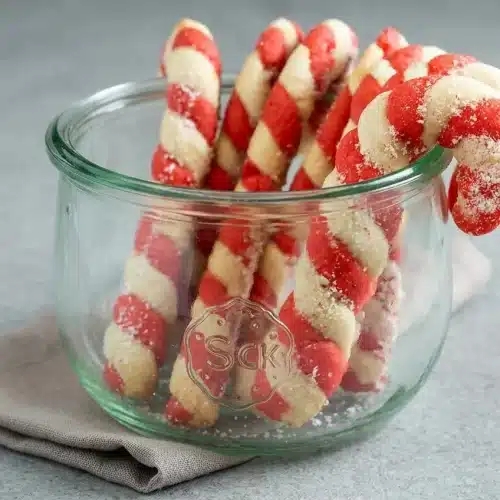
Candy Cane Cookies

Equipment
- Small & Large Mixing Bowl
- Hand mixer
- Baking Sheet
- Cooling Rack
Ingredients
- 1 cup butter
- 1 cup sugar
- 1/4 cup powdered sugar
- 1 teaspoon vanilla extract
- 1 teaspoon peppermint extract
- 1 egg
- 2 1/2 cups all-purpose flour
- 1 teaspoon baking powder
- 1/2 teaspoon salt
- Red food coloring gel
- 2 tablespoons finely crushed peppermint candies
- 2 tablespoons granulated sugar
Instructions
- Combine the butter, 1 cup sugar, powdered sugar, vanilla, peppermint extract, and egg in a large bowl using the mixer’s low setting, then stir in the flour, baking powder, and salt. Stop once the dough comes together and no dry flour remains, keeping the mixing brief to protect its tenderness.
- Separate the dough into equal halves, work red gel coloring into one half to reach your preferred shade, and wrap the two portions individually in plastic wrap before refrigerating for 3 to 4 hours. Both portions should feel firm rather than soft and greasy when you begin shaping.
- Mix the finely crushed peppermint candies with the remaining 2 tablespoons granulated sugar in a small bowl and reserve it for topping. The candy pieces should distribute throughout the sugar so each sprinkle contains both.
- Set the oven to 350°F and let it preheat before baking. A fully heated oven helps the chilled shapes begin setting promptly.
- Portion 1 level teaspoon from each dough color, roll each piece into a 5-inch rope, and wind the two ropes around each other while pressing their ends together. Keep the ropes similar in thickness and secure their tips so the stripes stay joined rather than springing apart.
- Arrange the paired ropes on an ungreased baking sheet with their tops curved into hooks, bake for 8 to 10 minutes, sprinkle immediately with the peppermint sugar, and transfer to a wire rack to finish cooling. Look for lightly browned bottoms and pale tops, and apply the topping while the cookies are hot so it can cling to the surface.