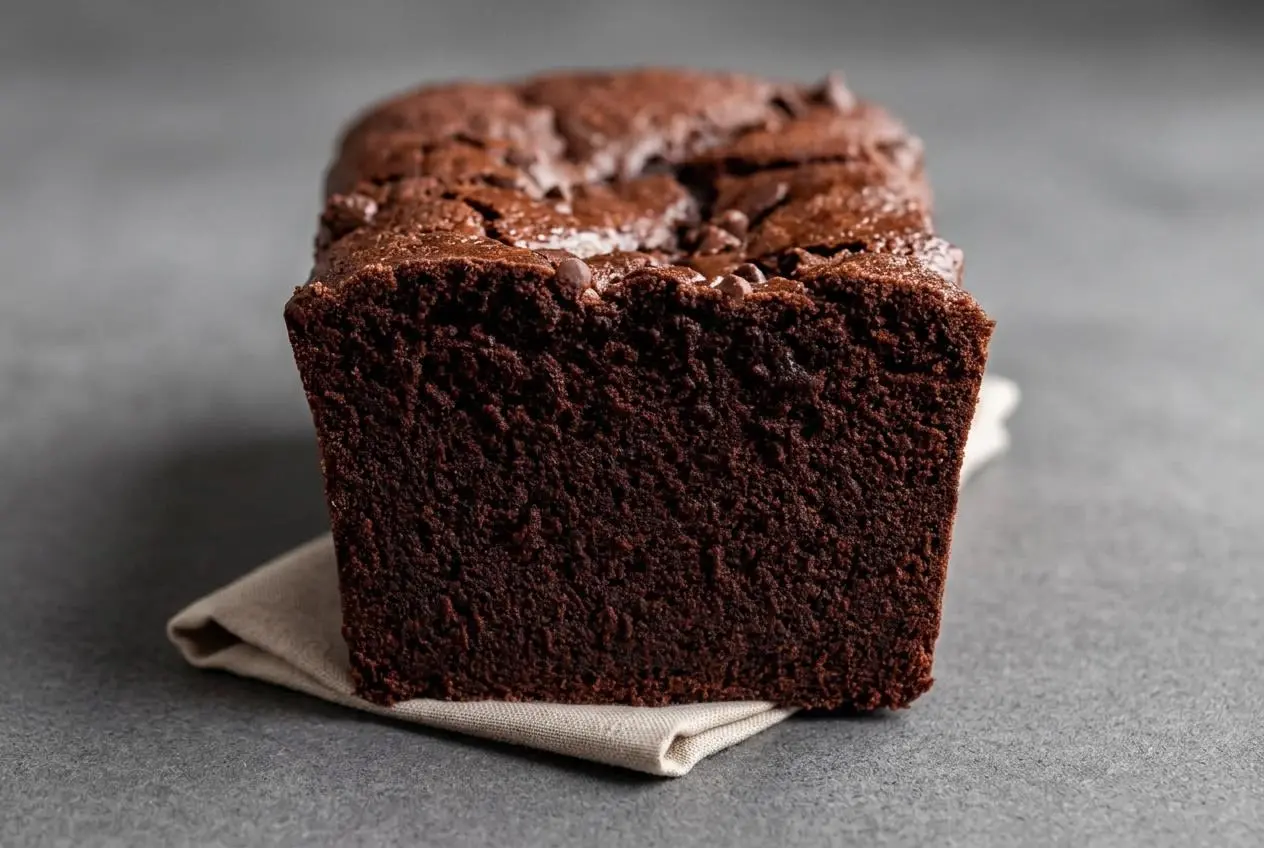
Hot fudge brownie bread is a rich chocolate dessert baked in a loaf pan, with a crackly brownie crust and a dense, sliceable center. Melted chocolate and Dutch-processed cocoa give it deep flavor; bake at 350°F until a tester carries moist crumbs, not liquid batter.
A thin, glossy crust gives way to a soft chocolate interior in this hot fudge brownie bread. It has the richness of a brownie with the height of a dessert loaf, making it easy to cut into generous slices.
The scratch version gets its fudgy character from melted chocolate and butter, without requiring hot fudge sauce in the batter. Add a warm sauce drizzle at serving time if you want the full sundae treatment. The moist-crumb test makes the difference.
Set the eggs out before you begin, and have a spatula ready so you can switch from beating to gentle folding at the right stage.
Key Ingredients for Hot Fudge Brownie Bread and Why They Work
Chocolate and cocoa build flavor, butter and milk provide richness and moisture, and flour and eggs give the loaf structure. Sugar supports the delicate crust, while vanilla, salt, and baking soda contribute aroma, balance, and lift.
- 1 cup Semi-Sweet Chocolate, melted
- 1 cup All-Purpose Flour
- ½ cup Dutch-Processed Cocoa Powder
- 1/2 tsp Baking Soda
- 1/2 tsp Salt
- 2 Large Eggs, room temperature
- 1 cup Granulated Sugar
- ¾ cup Whole Milk
- 2 tsp Vanilla Extract
- ½ cup Unsalted Butter, melted
Flour gives this tall loaf enough support to hold together when sliced. Spoon it into the measuring cup and level the surface rather than packing it down. Extra flour can turn the soft brownie center into a heavier, drier crumb.
Unsalted butter contributes richness and tenderness without changing the measured salt balance. Whole milk supplies moisture and helps loosen the chocolate mixture. Sugar sweetens the cocoa and supports the shiny surface, while vanilla rounds out the chocolate flavor and salt keeps the sweetness from tasting flat.
Baking soda provides lift, but this loaf should remain dense rather than airy like a sponge cake. Measure it carefully and check that it hasn’t passed its expiration date.
I prefer to let the melted chocolate and butter lose their sharp heat before mixing them in, so the egg mixture stays smooth.
Real Melted Chocolate vs. Dutch Cocoa
Melted chocolate and cocoa powder do different jobs here. Chocolate contains cocoa solids, cocoa butter, and sugar, so it adds richness as well as flavor. Cocoa powder brings concentrated chocolate flavor without the same amount of fat.
Dutch-processed cocoa has reduced acidity and typically gives a darker color and a rounded cocoa taste. Keep it for this recipe rather than treating natural cocoa as an interchangeable substitute, since the two behave differently with leavening.
A semi-sweet baking bar is a useful choice for smooth melting. Chocolate in the 60 to 70 percent range gives a darker, less sweet result, so consider that a flavor choice rather than a requirement. There’s no need to replace the listed semi-sweet chocolate to get a rich loaf.
The Aerating Power of Room-Temperature Eggs
The egg-and-sugar stage builds the batter’s initial volume. Room-temperature eggs whip readily, and beating them long enough creates a pale, fluffy mixture that helps support the loaf.
After about 4 to 4 1/2 minutes, the mixture should approach twice its starting volume. Lift the beaters and look for a thick ribbon that briefly rests on the surface before blending back in. This stage also helps develop the thin brownie crust.
Once the flour enters the bowl, the goal changes. Stop building air and start preserving the volume you’ve already created with slow, deliberate folds.
How to Make Hot Fudge Brownie Bread
Plan on about 25 minutes of preparation, 55 to 60 minutes of baking, and additional cooling before slicing. The loaf yields 8 slices; the center needs time to firm after it leaves the oven.
- Prepare an 8 1/2 x 4 1/2-inch metal loaf pan with flour-based baking spray and a parchment sling, then heat the oven to 350°F with the rack in the middle.
Leave parchment extending above the long sides so you can lift the loaf without tipping it out. - Melt the chocolate in a medium microwave-safe bowl using 1-minute intervals, then melt the butter separately using 30-second intervals and let both cool slightly.
The chocolate should look smooth and glossy, and the butter should be fully liquid without remaining solid pieces. - Combine the flour, Dutch-processed cocoa, baking soda, and salt in a medium bowl with a whisk.
A uniform color with no visible cocoa pockets helps distribute the dry ingredients evenly. - Whip the eggs and sugar in a large bowl with a hand mixer or stand mixer at medium-high speed for about 4 to 4 1/2 minutes.
Look for a pale, fluffy mixture that has nearly doubled in volume and falls from the beaters in a thick ribbon. - Blend the melted chocolate, milk, and vanilla into the whipped egg mixture, stopping when they are mostly incorporated.
The mixture should turn chocolate brown, though a little unevenness is fine before folding. - Use a spatula to fold the dry mixture into the wet mixture, then fold in the melted butter.
Sweep down through the batter and lift it over itself until no dry pockets or butter streaks remain, avoiding vigorous beating. - Transfer the batter to the prepared pan, add a few semi-sweet chocolate chips on top if desired, and bake at 350°F for 55 to 60 minutes.
A toothpick inserted into the center should emerge carrying damp crumbs without a coating of liquid batter. - Rest the baked loaf in its pan for about 15 to 20 minutes, then lift it onto a wire rack to finish cooling.
The loaf should feel more settled before lifting, while the rack lets moisture escape from the bottom and sides.
Check the deepest part of the center rather than an edge, which cooks sooner. A crackly top can appear before the interior finishes baking, so use the tester result rather than the crust alone.
Let the loaf finish cooling before cutting it. The chocolate-rich crumb is fragile while hot, and an early slice can tear even when the loaf has baked properly.
Essential Equipment and Pan Preparation
An 8 1/2 x 4 1/2-inch metal loaf pan gives this batter the intended depth. Pan material matters because a tall chocolate loaf needs its center to bake before its edges become dry.
A light-colored metal pan is the most straightforward choice. Dark coatings can brown the outside faster, while glass holds heat differently and may continue cooking the edges after removal. Neither is an automatic failure, but don’t assume the same results or make an unverified temperature adjustment.
A wider pan produces a shallower loaf and may change the baking time. Use the specified dimensions when possible, especially on your first bake.
- Coat the pan: Apply flour-based baking spray to the bottom and sides, including the corners.
- Fit the parchment: Cut a strip that covers the bottom and both long sides, with enough overhang to grasp above the rim.
- Press it into place: Crease the parchment where the bottom meets the sides so it sits against the pan rather than floating across the corners.
- Lift evenly: After the pan-cooling stage, grasp both overhangs and support the loaf as you move it to the rack.
You’ll also need separate microwave-safe bowls for the chocolate and butter, mixing bowls, an electric mixer, a flexible spatula, and a wire rack. The spatula handles the thick batter more gently than running the mixer through the flour stage.
Troubleshooting Common Loaf Mistakes
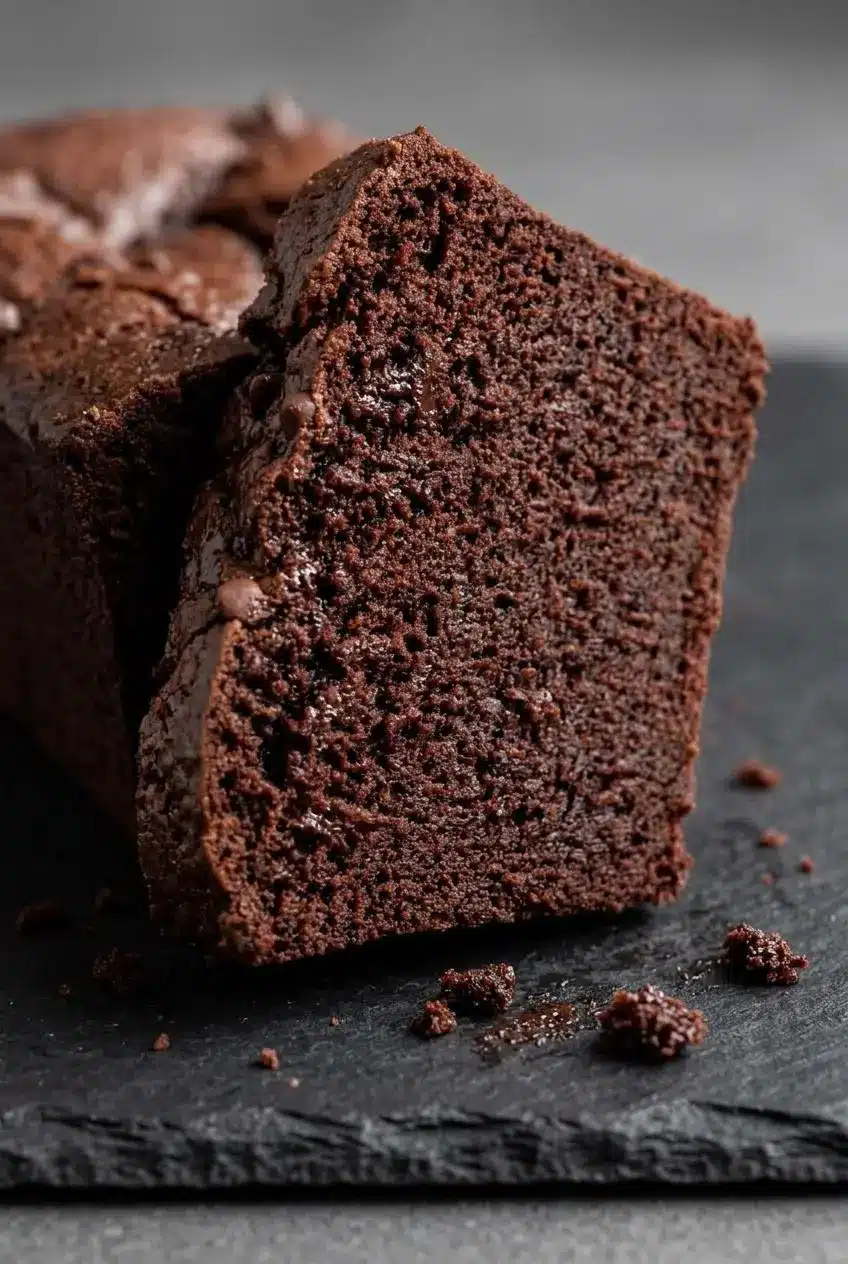
A fudgy loaf should feel dense and moist, but it shouldn’t have a liquid center or a gummy bottom. Match the problem to the likely cause before changing the recipe.
- A deeply sunken middle: The center may have been underbaked even though the crust looked finished. Test the deepest section for moist crumbs without wet batter before removing the loaf.
- A rise followed by collapse: Excessive beating after the flour goes in can create an unstable batter and toughen the crumb. Use the mixer for the egg stage, then switch to the spatula.
- A heavy loaf with little lift: Old baking soda can lose effectiveness, while too much flour weighs down the batter. Check the soda and spoon and level the flour.
- Dry edges: Overbaking or a dark pan may cook the outside too aggressively. Use a light metal pan and stop baking when the center reaches the moist-crumb stage.
- A sticky bottom: Leaving the loaf in the pan until fully cold can trap moisture. Move it to the rack after the specified pan rest.
- A loaf that breaks during removal: Lifting too early or pulling from one side can split the tender center. Let it settle first and use both parchment handles.
- Crumbly slices: Hot slicing or overbaking can cause tearing and crumbling. Cool completely and use a sharp knife with gentle strokes rather than pressing straight down.
The tester tells a useful story. A shiny smear of flowing batter means the center needs more baking. Soft crumbs that cling to the wood indicate the desired fudgy texture. A completely clean tester can signal that you’ve gone beyond that point, especially if the edges also feel firm and dry.
If your oven consistently bakes unevenly, an oven thermometer can help you check the actual oven setting. Don’t compensate for a recurring oven problem by adding flour or changing the chocolate balance.
Easy Variations and Box-Mix Hacks
Keep the scratch loaf unchanged for the most predictable result, then choose an optional flavor accent or a separate shortcut version.
- Espresso flavor: Stir a little espresso powder into the melted chocolate for a roasted flavor that complements the cocoa.
- Sweet-salty finish: Sprinkle flaky sea salt over the batter before baking for contrast against the rich crumb.
- Hot fudge topping: Drizzle warm sauce over individual slices just before serving instead of soaking the whole loaf.
- Cocoa glaze: Add a prepared cocoa glaze to the cooled loaf for a frosting-style finish, letting it settle before slicing.
For a different chocolate loaf with fruit in the batter, try chocolate banana bread rather than adding banana to this batter and changing its moisture balance.
The Boxed Mix Shortcut: Easy Hot Fudge Loaf
A boxed version uses a different batter from the scratch loaf. For this optional adaptation, combine one standard box of brownie mix with 12 ounces of jarred hot fudge sauce, 3 large eggs, and 1/3 cup vegetable oil.
Stir until evenly combined, transfer to a prepared, parchment-lined loaf pan, and bake at 350°F for about 50 to 55 minutes. Check for moist crumbs without liquid batter, then let the loaf settle before unmolding and cooling.
Box sizes and formulas vary, so treat that time as a guide rather than a guarantee. Don’t add the box’s usual water or other additions on top of this formulation, and don’t force an oversized batch into a pan that cannot hold it comfortably.
Dietary Adjustments: Gluten-Free and Dairy-Free Swaps
For an optional gluten-free adaptation, choose a cup-for-cup baking blend intended to replace all-purpose flour and containing xanthan gum. Use it in place of the listed flour, and check the chocolate, cocoa, baking spray, and any toppings for gluten-containing ingredients.
For a dairy-free adaptation, replace the butter with unsalted plant-based butter suited to baking, use dairy-free chocolate, and replace the whole milk with oat milk. Check hot fudge sauce separately if you plan to serve it.
These swaps can change tenderness, sweetness, and how quickly the center sets. Use the same oven setting and begin with the stated baking window, but let the crumb test decide when the loaf is ready rather than assuming an identical baking time.
Storage, Make-Ahead, and Freezing Instructions
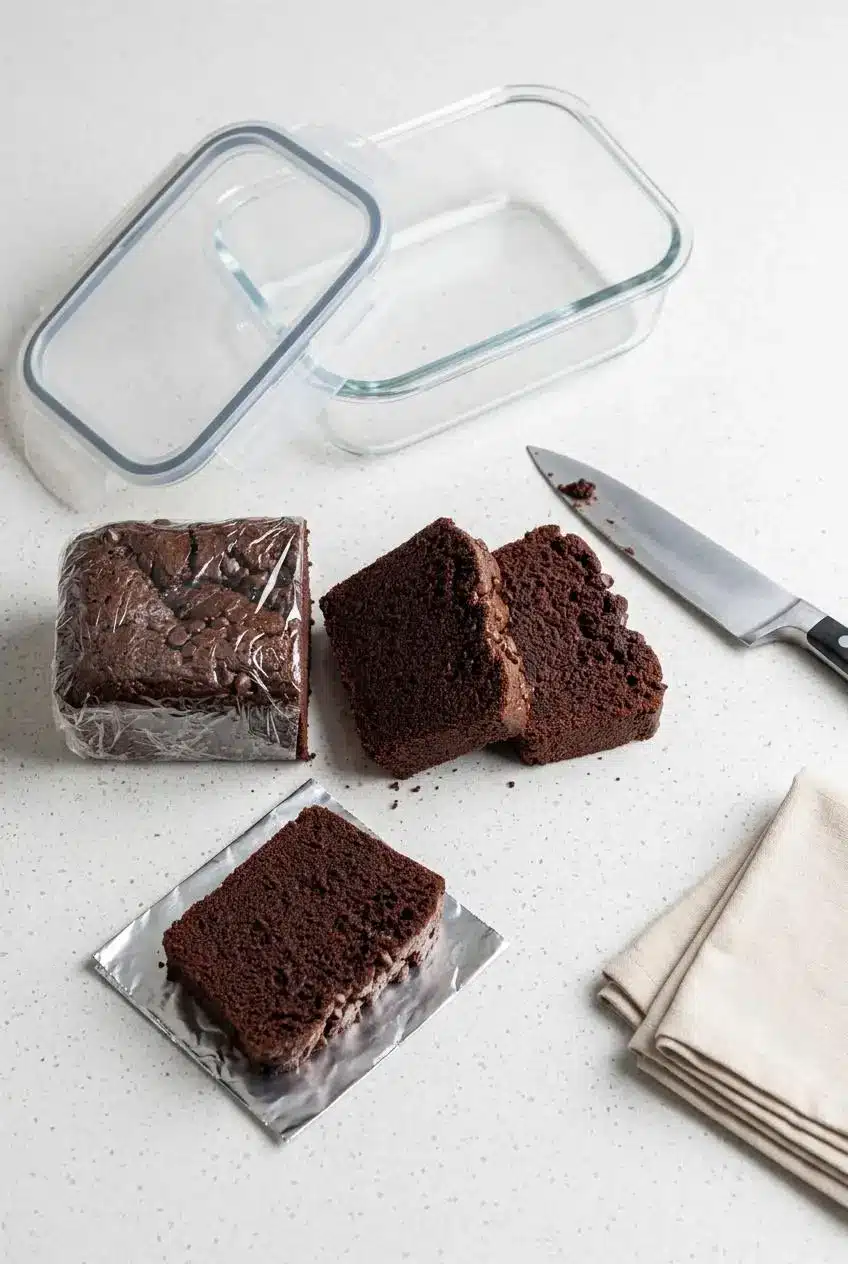
Cool the loaf completely before wrapping it. Sealing warm bread traps steam against the crust and can leave the surface tacky.
Wrap the plain loaf tightly in plastic wrap, with an optional outer layer of aluminum foil, and keep it covered at room temperature. For make-ahead serving, leave it unsliced until needed and keep sauce, ice cream, berries, and cream separate.
To freeze, cut the fully cooled loaf into individual portions. Wrap each slice once or twice in plastic wrap, then place the wrapped slices in a freezer-safe container to protect them from air and crushing.
Keep portions covered as they thaw so the surfaces don’t dry out. If you prefer a warm slice, remove the wrapping and reheat gently in a microwave-safe dish or an oven-safe dish, checking frequently and stopping when warm. Prolonged reheating can dry the edges.
Serving and Plating Suggestions
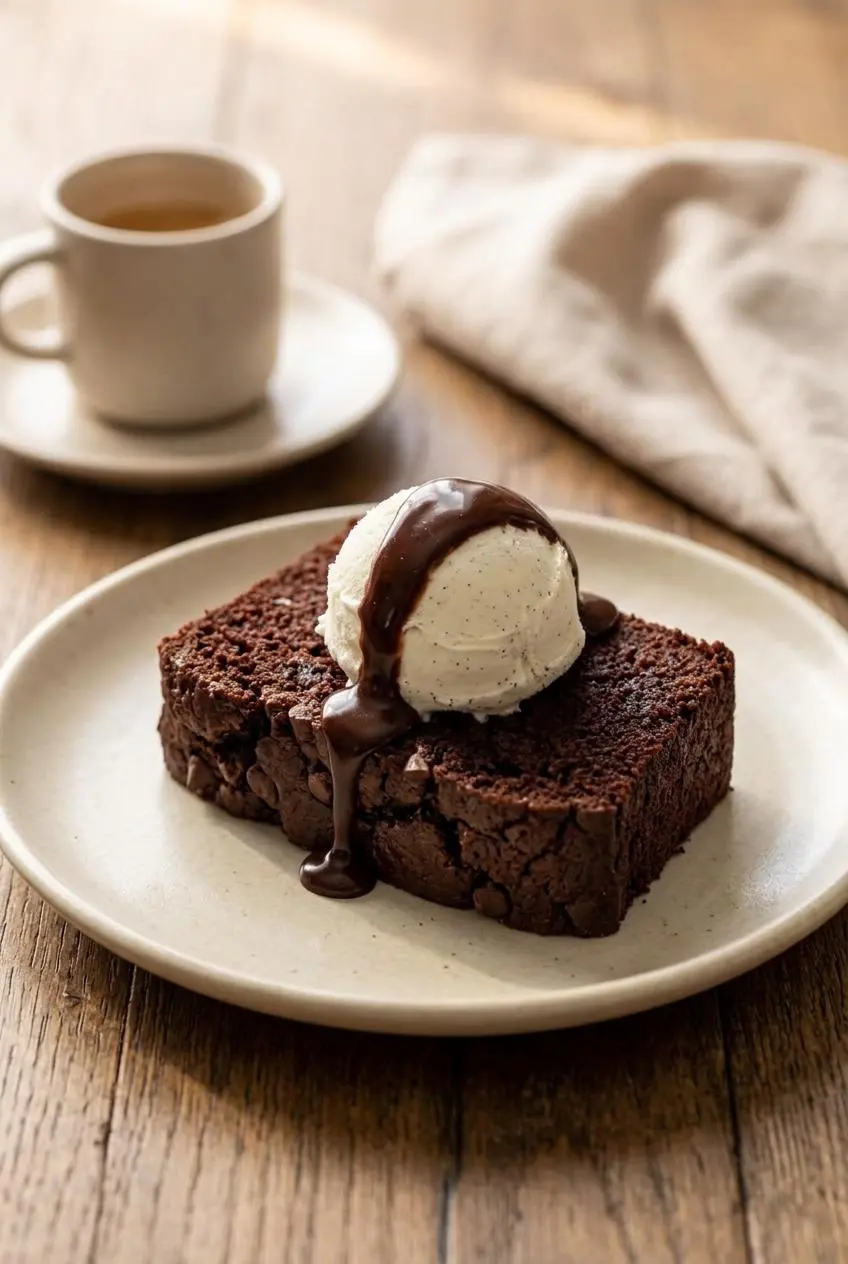
Slice the cooled loaf first, then warm individual portions if desired. That gives you cleaner slices without sacrificing a warm dessert.
- Hot fudge sundae platter: Top warm slices with vanilla bean ice cream and a ribbon of warm hot fudge sauce, adding both just before serving.
- Coffee pairing: Serve a chilled or room-temperature slice with strong black espresso for a bitter contrast to the sweet chocolate.
- Berry dessert plate: Add tart raspberries and softly whipped chantilly cream to balance the dense crumb with freshness and a lighter texture.
For a dessert spread, arrange plain slices on a platter and offer toppings separately. Guests can choose their own combination, and the crust stays intact until serving.
Conclusion
This chocolate loaf brings together a delicate brownie crust and a dense, fudgy center. Give the eggs their full whipping time, fold gently, and trust moist crumbs rather than waiting for a dry tester.
Keep it plain or finish it with espresso flavor and flaky salt. Let it cool before slicing, then warm a portion when you’re ready for that soft chocolate bite.
Frequently Asked Questions
Can I Make Hot Fudge Brownie Bread Using a Boxed Mix?
Yes. The optional shortcut combines one standard box of brownie mix, 12 ounces of hot fudge sauce, 3 large eggs, and 1/3 cup vegetable oil. Bake in a prepared, lined loaf pan at 350°F for about 50 to 55 minutes, using moist crumbs rather than the clock alone to judge doneness.
Why Did My Brownie Loaf Sink in the Middle After Baking?
An underbaked center is a common cause, particularly when the outside looks done first. Excessive beating after adding flour can also weaken the texture; old baking soda may contribute to poor lift. Check the center carefully and fold the flour in gently.
How Can I Tell When Brownie Bread Is Done Without Drying It Out?
Insert a toothpick or wooden skewer into the deepest part of the center. It should carry soft, moist crumbs without flowing batter. Don’t keep baking solely to make the tester completely clean, since that can dry the loaf.
Can I Freeze Hot Fudge Brownie Bread Slices for Later?
Yes. Cool the loaf completely, slice it, and wrap each portion tightly in plastic wrap before placing it in a freezer-safe container. Freeze the slices without sauce or other toppings so you can finish each portion when serving.
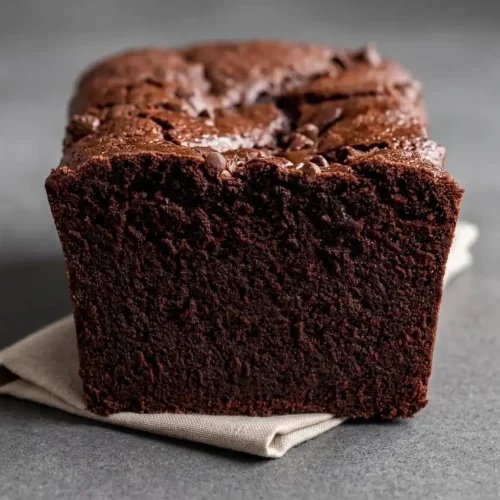
Hot Fudge Brownie Bread

Equipment
- 8 1/2 x 4 1/2-inch metal loaf tin
- Parchment paper sleeve
- Microwaveable bowls
- Mixing Bowls
- Electric hand mixer or stand mixer
- Silicone spatula
- Wire cooling rack
Ingredients
- 1 cup Semi-Sweet Chocolate melted
- 1 cup All-Purpose Flour
- ½ cup Dutch-Processed Cocoa Powder
- 1/2 tsp Baking Soda
- 1/2 tsp Salt
- 2 Large Eggs room temperature
- 1 cup Granulated Sugar
- ¾ cup Whole Milk
- 2 tsp Vanilla Extract
- ½ cup Unsalted Butter melted
Instructions
- Prepare an 8 1/2 x 4 1/2-inch metal loaf pan with flour-based baking spray and a parchment sling, then heat the oven to 350°F with the rack in the middle. Leave parchment extending above the long sides so you can lift the loaf without tipping it out.
- Melt the chocolate in a medium microwave-safe bowl using 1-minute intervals, then melt the butter separately using 30-second intervals and let both cool slightly. The chocolate should look smooth and glossy, and the butter should be fully liquid without remaining solid pieces.
- Combine the flour, Dutch-processed cocoa, baking soda, and salt in a medium bowl with a whisk. A uniform color with no visible cocoa pockets helps distribute the dry ingredients evenly.
- Whip the eggs and sugar in a large bowl with a hand mixer or stand mixer at medium-high speed for about 4 to 4 1/2 minutes. Look for a pale, fluffy mixture that has nearly doubled in volume and falls from the beaters in a thick ribbon.
- Blend the melted chocolate, milk, and vanilla into the whipped egg mixture, stopping when they are mostly incorporated. The mixture should turn chocolate brown, though a little unevenness is fine before folding.
- Use a spatula to fold the dry mixture into the wet mixture, then fold in the melted butter. Sweep down through the batter and lift it over itself until no dry pockets or butter streaks remain, avoiding vigorous beating.
- Transfer the batter to the prepared pan, add a few semi-sweet chocolate chips on top if desired, and bake at 350°F for 55 to 60 minutes. A toothpick inserted into the center should emerge carrying damp crumbs without a coating of liquid batter.
- Rest the baked loaf in its pan for about 15 to 20 minutes, then lift it onto a wire rack to finish cooling. The loaf should feel more settled before lifting, while the rack lets moisture escape from the bottom and sides.