Cream cheese mints are creamy, no-bake candies made by beating softened cream cheese with mint flavoring, food coloring, and powdered sugar. Knead the mixture into a pliable dough, then shape it in candy molds or press it into ridged discs with a fork.
With their sweet mint flavor and melt-in-your-mouth center, cream cheese mints bring nostalgic charm to wedding receptions, holiday platters, and bridal showers. The cream cheese adds a gentle tang that keeps each bite from tasting like sugar alone.
You can match the colors to your celebration without buying specialty equipment. A flexible candy mold makes decorative shapes, while a fork gives you classic little discs. The dough texture makes the difference.
Stop using the mixer when the dough becomes stiff, and finish kneading on a clean cutting board.
Key Ingredients for Classic Cream Cheese Mints
Cream cheese supplies richness and moisture, powdered sugar gives the candy its structure, mint flavoring adds a cool aroma, and food coloring creates the festive finish. Balancing those roles helps the dough hold its shape without losing its creamy texture.
- 8 oz. pkg. cream cheese, softened
- 2 lb. pkg. powdered sugar
- 1/2 tsp. mint flavoring
- food coloring
Cream cheese: Choose full-fat brick-style cream cheese for a predictable, firm dough. Spreadable tubs, whipped products, and reduced-fat versions can behave differently and make shaping more difficult. Soften the cheese enough to beat out the lumps, but don’t melt it.
Powdered sugar: The 2 pounds of sugar provide sweetness and absorb moisture, turning the creamy mixture into moldable candy dough. Confectioners sugar is another name for powdered sugar. Add it gradually so you can incorporate it evenly rather than leaving dry pockets.
Mint flavoring: Measure carefully. Peppermint extract and concentrated candy oil aren’t interchangeable at the same amount, so check the product’s directions before choosing a flavoring. Don’t automatically use the listed measure for a highly concentrated oil.
Food coloring: Gel coloring adds color without much additional liquid; liquid coloring also works when used sparingly. Begin with a restrained tint because the color can deepen as the dough rests.
I prefer to check softened cream cheese with a spatula: it should spread smoothly without looking melted or watery.
How to Make Cream Cheese Mints: Step-by-Step Instructions
Mix the flavor and color into the cream cheese before adding the sugar. That order distributes both evenly while the mixture is still soft enough for the mixer to handle.
- Beat the softened cream cheese in a mixing bowl until no lumps remain.
The mixture should look creamy and spread smoothly against the bowl. - Incorporate the measured mint flavoring, then mix in a small amount of food coloring.
The cream cheese should have an even tint with no streaks before you deepen the color. - Work the powdered sugar into the mixture gradually, stopping the mixer when the dough becomes too stiff to turn comfortably.
The mixture will change from a soft cream into a dense dough as the sugar absorbs moisture. - Transfer the dough to a clean cutting board and knead in any remaining powdered sugar by hand.
Look for a smooth, non-sticky texture resembling modeling clay, with no loose sugar pockets. - For molded candies, press small portions into candy mold cavities and release each piece onto a sheet pan.
The dough should fill the details and emerge with a defined shape rather than stretching. - For fork-shaped candies instead, roll about a tablespoon of dough into each ball, arrange on a sheet pan, and gently flatten with fork tines.
Each disc should show clear ridges without splitting around the edges. - Pack the shaped candies in an airtight container with parchment or waxed paper between the layers, and keep refrigerated or frozen until needed.
Separating the layers protects the shapes and helps prevent the candies from sticking together.
Molding With Candy Forms
Flexible silicone or rubber molds make release easier than rigid forms. As an optional handling aid, lightly dust the cavities with powdered sugar, then shake out the excess. A heavy coating can blur delicate details.
Press the dough into the corners before leveling the back. Flex the mold gently to release the mint instead of tugging at the candy. If it stretches or leaves dough behind, check the dough consistency before filling the next cavity.
Easy Fork-Tine Press Method
Roll similarly sized portions between your palms, leaving space between them on the sheet pan. Press straight down with a fork rather than dragging the tines across the surface. A light powdered-sugar dusting on the fork can help with sticking.
For an optional sparkling finish, roll the balls in granulated sugar before pressing. This adds a slight surface crunch. Tablespoon-sized portions make larger candies than small decorative molds, so expect a lower yield with this method.
Essential Recipe Tips and Drying Technique

A firm, matte exterior helps these mints handle neatly, but it doesn’t establish that the candy is suitable for extended room-temperature storage. Keep the mints chilled rather than relying on a prolonged countertop drying period.
Don’t seal away candies with a visibly wet surface and expect them to become firm inside the container. Arrange them separately while checking their texture, and avoid trapping surface moisture. A less glossy, slightly chalky appearance is a texture cue, not a food-safety test.
- Sticky dough: Incomplete sugar incorporation can leave the dough tacky. Knead in the remaining measured powdered sugar thoroughly before considering an extra light dusting.
- Crumbly dough: Excess dusting sugar or uneven mixing can cause cracks. Knead a small piece until cohesive and avoid adding more sugar automatically.
- Cracked fork discs: Heavy pressure can split the edges. Flatten gently and stop as soon as the ridges appear.
- Color streaks: Coloring added late is harder to distribute through stiff dough. Knead until uniform, and mix the tint into the cream cheese first next time.
- Soft molded details: Dough that’s too tacky can stretch during release. Finish incorporating the sugar and use a light mold dusting rather than forcing the candy out.
- Humid kitchen: Moist air makes surface firming less predictable. Work in a cool, air-conditioned space when possible, and keep trays away from steam.
Don’t push a struggling mixer through the final kneading stage. Hand pressure lets you work the dough without straining the motor, and you’ll feel immediately whether the texture is smooth or still gritty with loose sugar.
Flavor and Color Variations for Events
Keep these optional changes separate from the listed recipe, and check each flavoring’s concentration before substituting.
- Peppermint or spearmint: Peppermint gives a sharper cooling flavor, while spearmint offers a gentler herbal character.
- Vanilla: Vanilla shifts the candy toward a creamy confection without the cooling mint finish.
- Almond: Almond extract adds a fragrant flavor suited to pastel celebration candies; consider guest allergies before choosing it.
- Pastel colors: Divide the finished dough and knead different gel colors into each portion for coordinated pink, lavender, green, or blue batches.
- Citrus and spearmint: An optional touch of finely grated lemon zest adds brightness, though the zest will interrupt an otherwise smooth surface.
Make-Ahead Storage and Freezing Guide
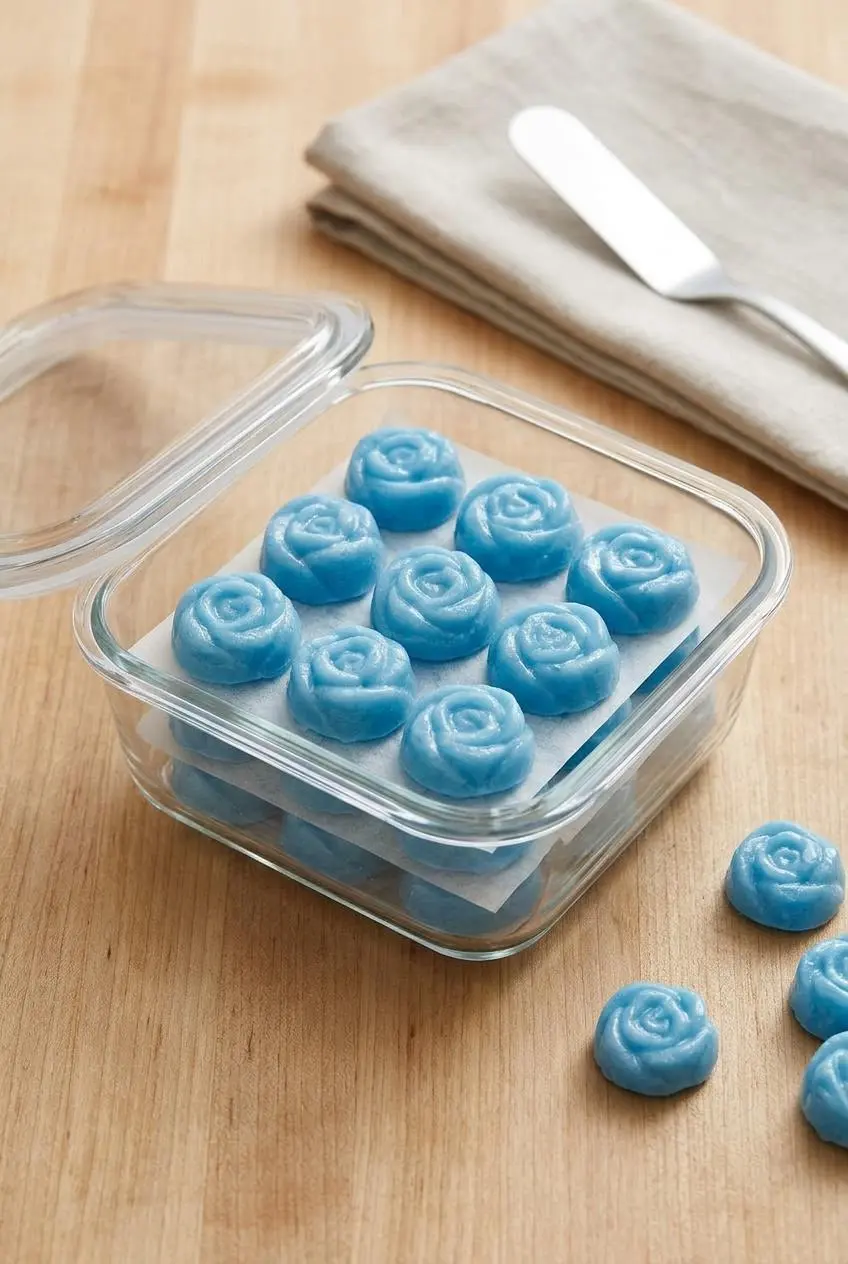
Protecting the mints from moisture and pressure matters more than choosing a decorative container. Use a rigid airtight box so the shapes don’t get crushed, and separate every layer with parchment or waxed paper.
Refrigerator and Serving Storage
Keep the packed mints refrigerated until needed. Arrange them without compressing the layers, and keep the container closed to limit moisture exposure and absorption of refrigerator odors.
For serving, put out a portion and keep the reserve chilled. Don’t treat the sugar content or firm exterior as proof that these cream cheese candies belong in the pantry.
Freezer Storage
You can freeze the mints in an airtight container with paper between the layers. Choose a rigid container with enough room to preserve the decorative shapes without leaving the candies loose enough to tumble around.
Label the container and avoid stacking heavy packages on it. Freezing doesn’t replace careful handling, and there’s no verified freezer lifespan given here for this formulation. Keep the candies protected from moisture when bringing them back out for serving.
Serving Ideas and Event Planning Yields
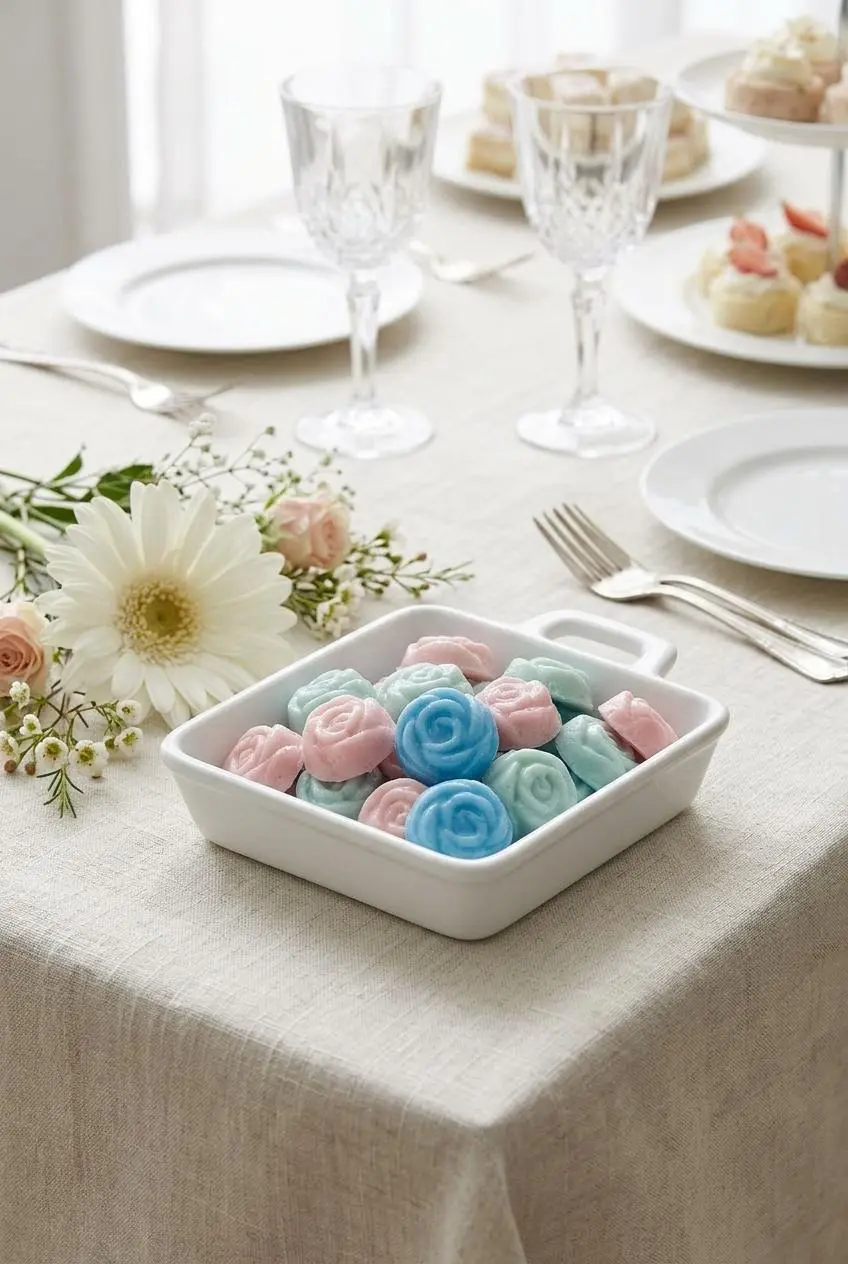
Plan on 3 to 4 bite-sized mints per guest as a practical starting point, then adjust for favor bags and other desserts. This recipe yields about 200 small mints, although mold size and portion size will change your actual count.
Multiply the guest count by your chosen portion. For 50 guests, that means 150 to 200 mints; for 100 guests, plan for 300 to 400. Count the finished candies before packaging, especially if you’ve used the larger tablespoon-sized fork method.
- Weddings and showers: Group matching pastel colors on tiered platters, with the delicate molded shapes toward the front.
- Holiday gatherings: Alternate seasonal colors in shallow candy bowls so guests can take a mint without disturbing a tall stack.
- Party favors: Pack firm candies in food-safe cellophane pouches and handle them gently so the designs stay intact.
For another dessert at a spring celebration, pair the mints with lemon cream cheese bars. Their citrus flavor adds variety alongside the cool mint finish.
Conclusion
Smooth cream cheese, evenly mixed flavoring, and thoroughly kneaded sugar make these candies creamy inside and easy to shape. Use molds for decorative details or a fork for familiar ridged discs.
Keep color and flavor changes restrained, protect the finished shapes, and store the mints chilled. A well-balanced dough is your best starting point for a pretty party batch.
Frequently Asked Questions
How Long Does It Take for Cream Cheese Mints to Dry?
There’s no verified room-temperature drying schedule for this formulation. Look for a firmer, matte exterior as a texture cue, but keep the mints chilled rather than using prolonged countertop drying. Humidity and candy thickness affect surface firming.
What Is the Difference Between Butter Mints and Cream Cheese Mints?
Cream cheese mints use cream cheese and powdered sugar for a creamy, gently tangy no-bake candy. Butter mints use butter for their richness. Some traditional butter mints involve cooked and pulled sugar, while other homemade versions are no-bake, so cooking alone doesn’t distinguish every version.
How Many Cream Cheese Mints per Person Should You Make for a Wedding?
Start with 3 to 4 small mints per guest. At that rate, about 200 mints cover 50 guests generously. Add a separate allowance for favor bags, and use your actual finished count rather than assuming every mold produces the same yield.
Can You Freeze Cream Cheese Mints in Advance?
Yes. Pack the mints in a rigid airtight container with parchment or waxed paper between the layers. Protect the shapes from crushing and moisture; an exact freezer storage duration isn’t established here.

Cream Cheese Mints

Equipment
- Mixer
- Cutting board
- candy mold
- Sheet Pan
Ingredients
- 8 oz. pkg. cream cheese softened
- 2 lb. pkg. powdered sugar
- 1/2 tsp. mint flavoring
- food coloring
Instructions
- Beat the softened cream cheese in a mixing bowl until no lumps remain. The mixture should look creamy and spread smoothly against the bowl.
- Incorporate the measured mint flavoring, then mix in a small amount of food coloring. The cream cheese should have an even tint with no streaks before you deepen the color.
- Work the powdered sugar into the mixture gradually, stopping the mixer when the dough becomes too stiff to turn comfortably. The mixture will change from a soft cream into a dense dough as the sugar absorbs moisture.
- Transfer the dough to a clean cutting board and knead in any remaining powdered sugar by hand. Look for a smooth, non-sticky texture resembling modeling clay, with no loose sugar pockets.
- For molded candies, press small portions into candy mold cavities and release each piece onto a sheet pan. The dough should fill the details and emerge with a defined shape rather than stretching.
- For fork-shaped candies instead, roll about a tablespoon of dough into each ball, arrange on a sheet pan, and gently flatten with fork tines. Each disc should show clear ridges without splitting around the edges.
- Pack the shaped candies in an airtight container with parchment or waxed paper between the layers, and keep refrigerated or frozen until needed. Separating the layers protects the shapes and helps prevent the candies from sticking together.