
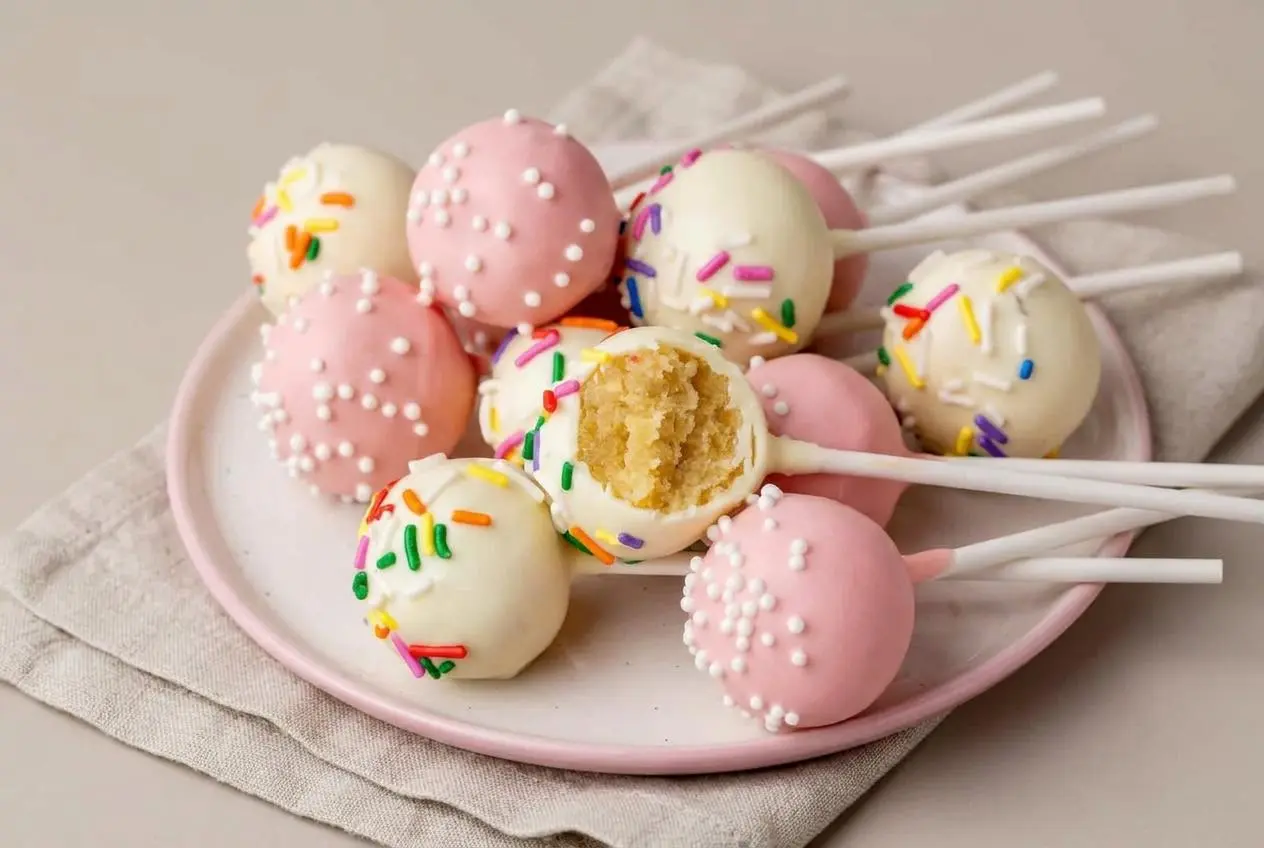
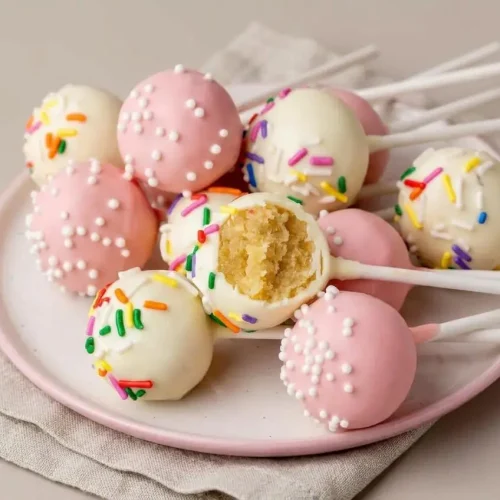
Make cake pops by baking a vanilla cake, crumbling it finely, blending it with buttercream, rolling and chilling the mixture, then coating each ball in melted candy.
These cake pops have a fudgy center beneath a crisp, sweet candy shell. The key is using enough frosting to bind the crumbs without making the mixture soft or greasy.
Once the dipping rhythm clicks, they feel surprisingly manageable. That glossy shell is worth the chill time.
Keep the cake completely cool before crumbling it, and return shaped balls to the refrigerator whenever they begin to soften.
Essential Ingredients and Coating Choices
Each ingredient contributes to a tender crumb, a moldable center, or a clean-setting shell that gives every pop its signature crunch.
Cake
- 1 and 2/3 cups (209g) all-purpose flour (spooned & leveled)
- 1/2 teaspoon baking powder
- 1/4 teaspoon baking soda
- 1/2 teaspoon salt
- 1/2 cup (8 Tbsp; 113g) unsalted butter, softened to room temperature
- 1 cup (200g) granulated sugar
- 1 large egg, at room temperature
- 2 teaspoons pure vanilla extract
- 1 cup (240ml) whole milk (or buttermilk)
Frosting
- 7 Tablespoons (99g) unsalted butter, softened to room temperature
- 1 and 3/4 cups (210g) confectioners sugar
- 2-3 teaspoons heavy cream or whole milk
- 1 teaspoon pure vanilla extract
Coating
- 24 ounces (678g) candy melts (or white chocolate bars)
- sprinkles
Flour gives the cake enough structure to crumble neatly, while butter and whole milk keep the baked crumb tender. The frosting’s 99g butter-to-210g confectioners sugar balance creates a firm binder rather than a wet paste. If desired, add a pinch of fine sea salt and a drop of almond extract to the frosting for a less sugary finish.
I spoon flour into the measuring cup and level it off, because packed flour makes the cake dense and harder to blend into smooth crumbs.
Scratch Cake and Buttercream Components
A sturdy vanilla cake works especially well because it breaks down into even, sandy crumbs instead of large fluffy pieces. The cake should feel dry enough to rub between your fingers, with no damp chunks hiding in the center.
Buttercream turns those crumbs into a clay-like mixture that rolls without cracking. If the mixture feels greasy, stop mixing rather than adding more frosting. The existing buttercream needs time to distribute through the crumbs.
For another vanilla baking project with a similarly soft but structured crumb, try these tender vanilla cupcakes.
Candy Melts vs. Melting Wafers
Candy melts and melting wafers are designed to melt smoothly and set firm without tempering. They are the easiest choice for a glossy shell with a clean snap. White chocolate bars can also work, though their thickness can vary, so melt them gently and stir often.
Regular chocolate needs tempering to set with the same sheen and firm finish. Untempered chocolate can remain soft or streaky, which makes upright drying more difficult.
How to Make Cake Pops Step by Step
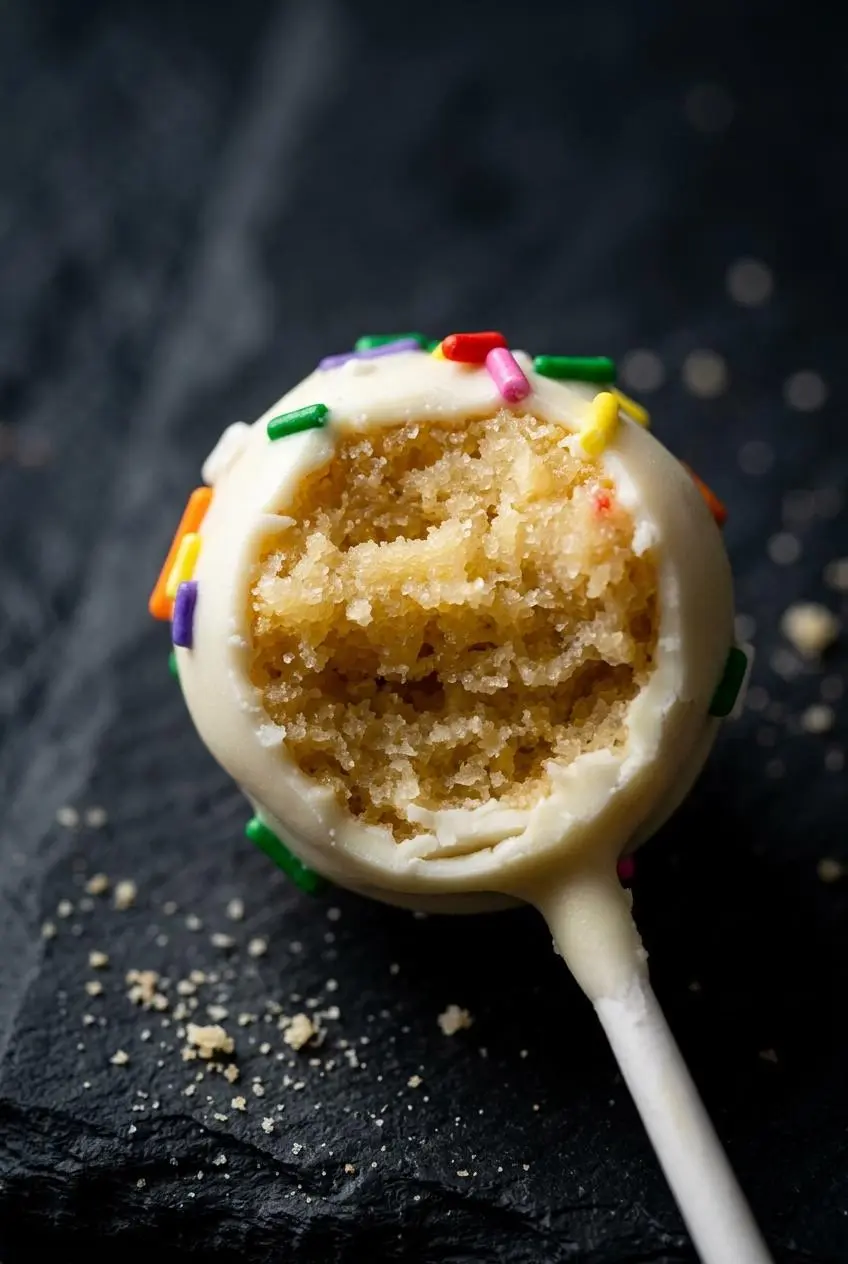
Take your time with cooling, crumbing, and chilling. Those three stages create round pops that stay intact when they meet the coating.
Make the Cake
- Heat the oven to 350°F (177°C) and grease a 9-inch springform pan.
Coat the pan evenly so the baked cake releases without tearing. - Whisk the flour, baking powder, baking soda, and salt in a medium bowl, then set it aside.
The dry mixture should look evenly blended with no visible pockets of leavening. - Beat the softened butter and sugar for about 3 minutes until pale and creamy, then beat in the egg and vanilla on high speed.
Scrape the bowl as needed so no buttery streaks remain around the sides. - Mix in the dry ingredients and milk on low speed until combined, then scrape the bottom with a spatula and spread the thick batter in the pan.
The batter should be even and free of large lumps before it goes into the oven. - Bake for 30-36 minutes, tenting loosely with foil if the top darkens too quickly.
A toothpick inserted at the center should come out clean when the cake is done. - Cool the cake completely in its pan on a wire rack.
The cake must feel fully cool before it is crumbled so the frosting does not melt into it.
Make the Frosting and Shape
- Beat the frosting butter on medium speed for about 2 minutes, then mix in the confectioners sugar, cream, and vanilla on low.
Increase to high speed and beat for 3 minutes until the frosting is smooth and creamy. - Break the cooled cake over the frosting, removing any very crisp edges if they seem tough, then mix on low until combined.
The crumbs should become a uniform, moldable mixture with no large cake pieces. - Scoop 1 Tablespoon (about 20g) of mixture and roll it into a ball on a lined baking sheet.
Each ball should be about 1 inch wide and smooth enough to hold its shape. - Refrigerate the balls for 2 hours, or freeze for 1 hour, then reroll any that have flattened and return the tray to the refrigerator.
Work with only a couple of cold balls at once so they remain firm for dipping.
Dip and Decorate
- Melt the candy melts or chocolate in a 2-cup liquid measuring cup, microwaving in 20-second intervals and stirring after each round.
Stop when the coating is glossy and fluid, with no unmelted lumps. - Take out 2 or 3 chilled cake balls, dip about 1/2 inch of each lollipop stick in coating, and push it halfway into the center.
You should feel slight resistance as the stick settles into the cold ball. - Lower each pop straight into the coating until covered, including the joint where the stick meets the cake ball.
A single vertical dip keeps the surface smooth, so avoid swirling the pop in the cup. - Tap your wrist gently against the measuring-cup rim to release excess coating, then add sprinkles and stand the pop upright in a styrofoam block or box.
The coating should drip in a thin ribbon rather than collect in a heavy puddle at the bottom. - Let the coating set for up to 1 hour before storing the finished pops in the refrigerator.
The shell is ready when it feels firm and dry to the touch.
Baking and Fine Crumbing
Do not roll warm cake. Warm crumbs absorb frosting unevenly and can turn pasty. Once cool, rub the cake between clean hands until it resembles fine, sandy crumbs. Large chunks create air pockets, which show up later as rough bumps beneath the candy shell.
Rolling and Chilling Uniform Spheres
Use the 1 Tablespoon portion for consistently sized 20g balls. Roll with light pressure between your palms, then smooth each chilled ball once more before dipping. The 2-hour refrigerator chill gives the center enough firmness to stay round under the coating.
Step-by-Step Dipping and Decorating Guide
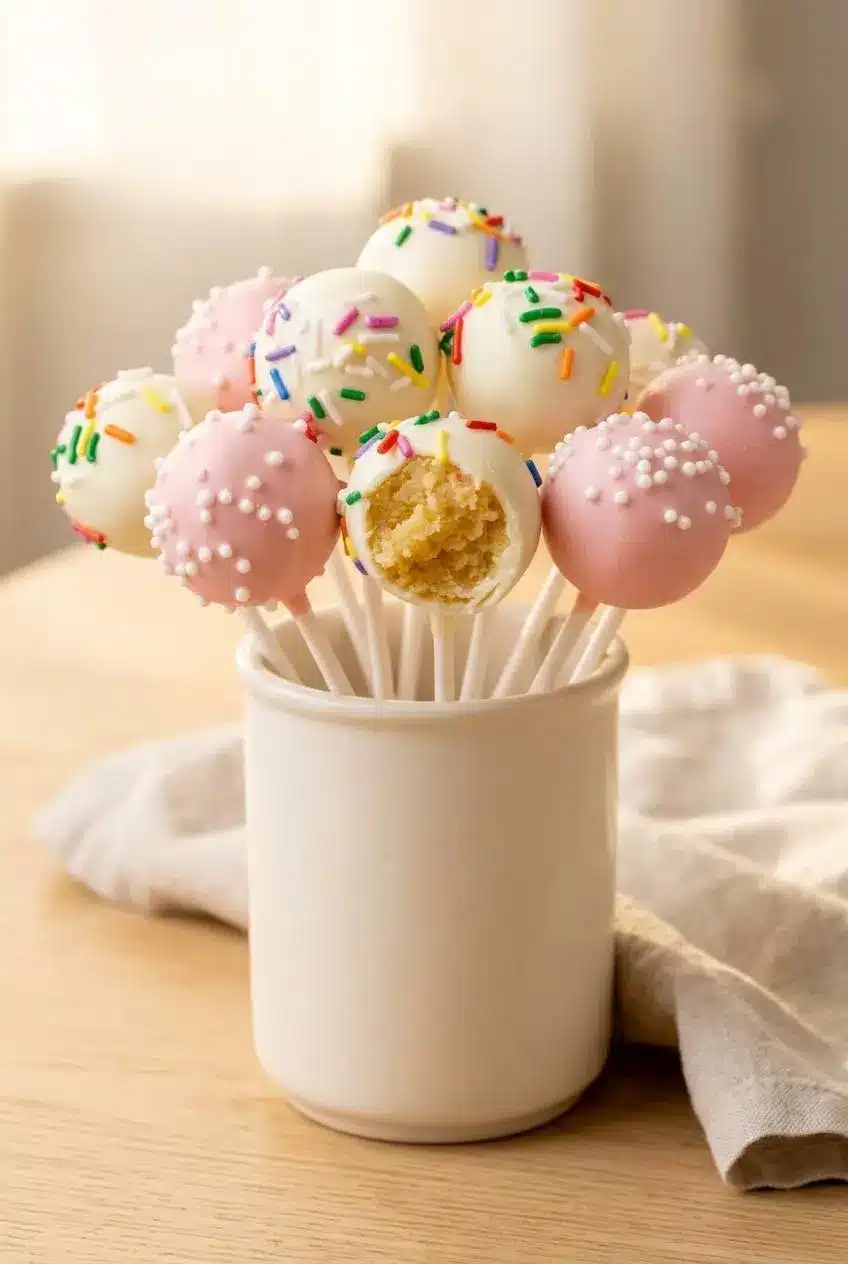
Dipping succeeds when the cake balls are cold, the coating is fluid, and the stick has a secure candy anchor. Keep most of the tray chilled while working with two or three at a time.
Stick Anchoring Technique
Coat the first 1/2 inch of the lollipop stick, then slide it halfway into the ball. As the candy firms, it acts like a small anchor between stick and cake. Pressing the stick all the way through can weaken the opposite side and make the ball more likely to split.
Dipping, Tapping, and Upright Drying
A narrow measuring cup gives enough depth for full coverage without repeatedly turning the pop. Dip once, lift straight up, and tap your wrist lightly against the rim until the excess falls away. Do not bang the stick hard against the cup, which can loosen the anchor.
A styrofoam block works well, but a clean upside-down colander, egg carton, or sturdy jar filled with dried rice can hold sticks upright while the shell sets. For a flat display, let coated pops set on parchment instead, knowing they will have a small flat base.
Troubleshooting Common Cake Pop Mistakes
Most problems come down to texture or temperature, and both are easy to correct before the whole batch is dipped.
- Cracked shells: Very cold or frozen-solid centers can expand when they hit warm coating. Let ice-cold balls sit briefly before dipping, and allow very warm melted candy to cool slightly.
- Thick coating: Stir in vegetable oil or melted vegetable shortening 1/2 teaspoon at a time until the candy flows smoothly from the spoon. Add slowly so the coating stays able to set.
- Falling cake balls: Dip the stick tip in coating first, insert it only halfway, and let the ball remain well chilled before dipping. Also cover the stick-to-cake joint with coating.
- Oozing or misshapen centers: The cake mixture likely contains too much frosting or was not chilled long enough. Reroll the balls after chilling and keep them cold between batches.
- Heavy coating pools: Use the gentle wrist-tapping motion until the drip thins. A hard shake can crack the shell or send sprinkles flying across the counter.
Flavor Variations and Easy Shortcuts
Keep the main method as written, then use these optional flavor paths when you want a different party theme or a quicker starting point.
The Quick Box Mix Method
For a shortcut, bake a standard 15.25 oz boxed yellow or vanilla cake mix, cool it fully, then combine the crumbs with 1/3 cup prepared canned frosting. Add the frosting gradually if the baked cake seems especially moist, stopping as soon as the mixture rolls smoothly.
If you prefer a scratch alternative with a classic flavor profile, a homemade yellow cake gives you a sturdy center for rolling.
Popular Flavor Combinations
- Chocolate cake pops: Use chocolate sponge with cocoa buttercream and a dark chocolate coating for a deeper, less candy-sweet flavor.
- Birthday Funfetti cake pops: Fold rainbow sprinkles into vanilla batter and finish with rainbow nonpareils for a colorful celebration version.
- Red velvet cream cheese pops: Blend red velvet crumbs with tangy cream cheese frosting, then coat in white candy melts for contrast.
For a cookies-and-cream-inspired dessert spread, a rich oreo cake is a fitting place to borrow flavor ideas.
Make-Ahead and Storage Guidelines
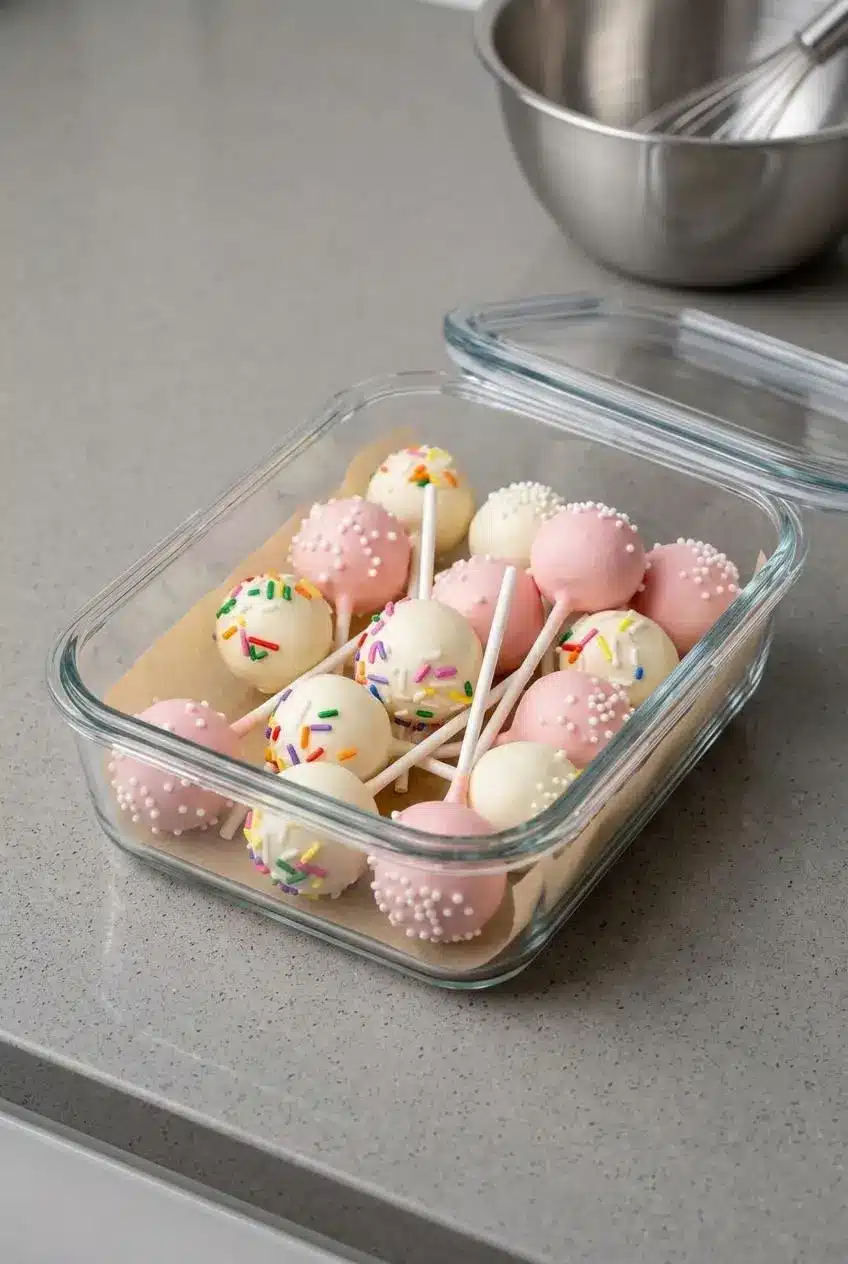
Chill finished pops in an airtight container once the coating has set, keeping them protected from moisture and strong refrigerator odors. Arrange them in a single layer when possible so decorations stay neat.
Chilled Storage and Party Prep
The finished pops can be refrigerated for up to 1 week, as directed in the method. For party prep, shape and chill the cake balls before dipping, then keep the coating work for closer to serving so the shell looks its best.
Freezer timing has not been established for this method, so avoid relying on a fixed freezing schedule. If you need to prepare in stages, use the chilled shaping step and keep the balls covered until ready to coat.
Condensation Prevention Tips
Moisture dulls a candy shell and can make sprinkles bleed. Keep the container closed while the pops are chilled, and avoid moving very cold pops straight into a warm, humid room. Let the container warm gradually before opening it.
Conclusion
Homemade cake pops bring together a tender vanilla center, a crisp coating, and colors or sprinkles that suit any celebration. The scratch cake gives the finished pops a soft, fudgy bite without losing their shape.
Keep the balls properly chilled, anchor every stick with melted coating, and tap off excess candy gently. Those small details make the whole batch feel polished.
Frequently Asked Questions
Why Did My Cake Pops Crack After Dipping?
Cracks usually come from a sharp temperature difference between very cold cake balls and warm coating. Let frozen-solid balls rest briefly before dipping. Allow melted candy to cool slightly if it feels very warm. Use chilled, firm balls rather than hard-frozen ones.
How Do I Keep Cake Balls From Falling Off Their Sticks?
Dip the stick tip in melted coating before inserting it halfway into a cold cake ball. Let that coating set into a firm anchor before dipping. Do not push the stick through the entire ball. Coat the joint where the stick meets the cake ball.
Can I Make Cake Pops Ahead of Time and Freeze Them?
You can prepare the cake balls through the chilling stage before dipping. A tested freezer timeline is not included here, so use the refrigerated prep method and coat the pops when you are ready to finish them.
What Is the Best Way to Thin Thick Candy Melts?
Stir in vegetable oil or melted vegetable shortening 1/2 teaspoon at a time. Mix completely before deciding whether it needs more. Stop when the coating looks glossy and falls in a smooth ribbon. Keep additions small so the coating can still set firmly.
Cake Pops

Equipment
- 9-inch Springform Pan
- Electric Mixer
- Baking Sheet
- 2-cup liquid measuring cup
- Lollipop sticks
- Styrofoam block
Ingredients
Cake
- 1 2/3 cups all-purpose flour (spooned & leveled) 209g
- 1/2 teaspoon baking powder
- 1/4 teaspoon baking soda
- 1/2 teaspoon salt
- 1/2 cup unsalted butter, softened to room temperature 8 Tbsp; 113g
- 1 cup granulated sugar 200g
- 1 large egg, at room temperature
- 2 teaspoons pure vanilla extract
- 1 cup whole milk (or buttermilk) 240ml
Frosting
- 7 Tablespoons unsalted butter, softened to room temperature 99g
- 1 3/4 cups confectioners sugar 210g
- 2-3 teaspoons heavy cream or whole milk
- 1 teaspoon pure vanilla extract
Coating
- 24 ounces candy melts (or white chocolate bars) 678g
- sprinkles
Instructions
Make the Cake
- Heat the oven to 350°F (177°C) and grease a 9-inch springform pan. Coat the pan evenly so the baked cake releases without tearing.
- Whisk the flour, baking powder, baking soda, and salt in a medium bowl, then set it aside. The dry mixture should look evenly blended with no visible pockets of leavening.
- Beat the softened butter and sugar for about 3 minutes until pale and creamy, then beat in the egg and vanilla on high speed. Scrape the bowl as needed so no buttery streaks remain around the sides.
- Mix in the dry ingredients and milk on low speed until combined, then scrape the bottom with a spatula and spread the thick batter in the pan. The batter should be even and free of large lumps before it goes into the oven.
- Bake for 30-36 minutes, tenting loosely with foil if the top darkens too quickly. A toothpick inserted at the center should come out clean when the cake is done.
- Cool the cake completely in its pan on a wire rack. The cake must feel fully cool before it is crumbled so the frosting does not melt into it.
Make the Frosting and Shape
- Beat the frosting butter on medium speed for about 2 minutes, then mix in the confectioners sugar, cream, and vanilla on low. Increase to high speed and beat for 3 minutes until the frosting is smooth and creamy.
- Break the cooled cake over the frosting, removing any very crisp edges if they seem tough, then mix on low until combined. The crumbs should become a uniform, moldable mixture with no large cake pieces.
- Scoop 1 Tablespoon (about 20g) of mixture and roll it into a ball on a lined baking sheet. Each ball should be about 1 inch wide and smooth enough to hold its shape.
- Refrigerate the balls for 2 hours, or freeze for 1 hour, then reroll any that have flattened and return the tray to the refrigerator. Work with only a couple of cold balls at once so they remain firm for dipping.
Dip and Decorate
- Melt the candy melts or chocolate in a 2-cup liquid measuring cup, microwaving in 20-second intervals and stirring after each round. Stop when the coating is glossy and fluid, with no unmelted lumps.
- Take out 2 or 3 chilled cake balls, dip about 1/2 inch of each lollipop stick in coating, and push it halfway into the center. You should feel slight resistance as the stick settles into the cold ball.
- Lower each pop straight into the coating until covered, including the joint where the stick meets the cake ball. A single vertical dip keeps the surface smooth, so avoid swirling the pop in the cup.
- Tap your wrist gently against the measuring-cup rim to release excess coating, then add sprinkles and stand the pop upright in a styrofoam block or box. The coating should drip in a thin ribbon rather than collect in a heavy puddle at the bottom.
- Let the coating set for up to 1 hour before storing the finished pops in the refrigerator. The shell is ready when it feels firm and dry to the touch.


2 thoughts on “Cake Pops”