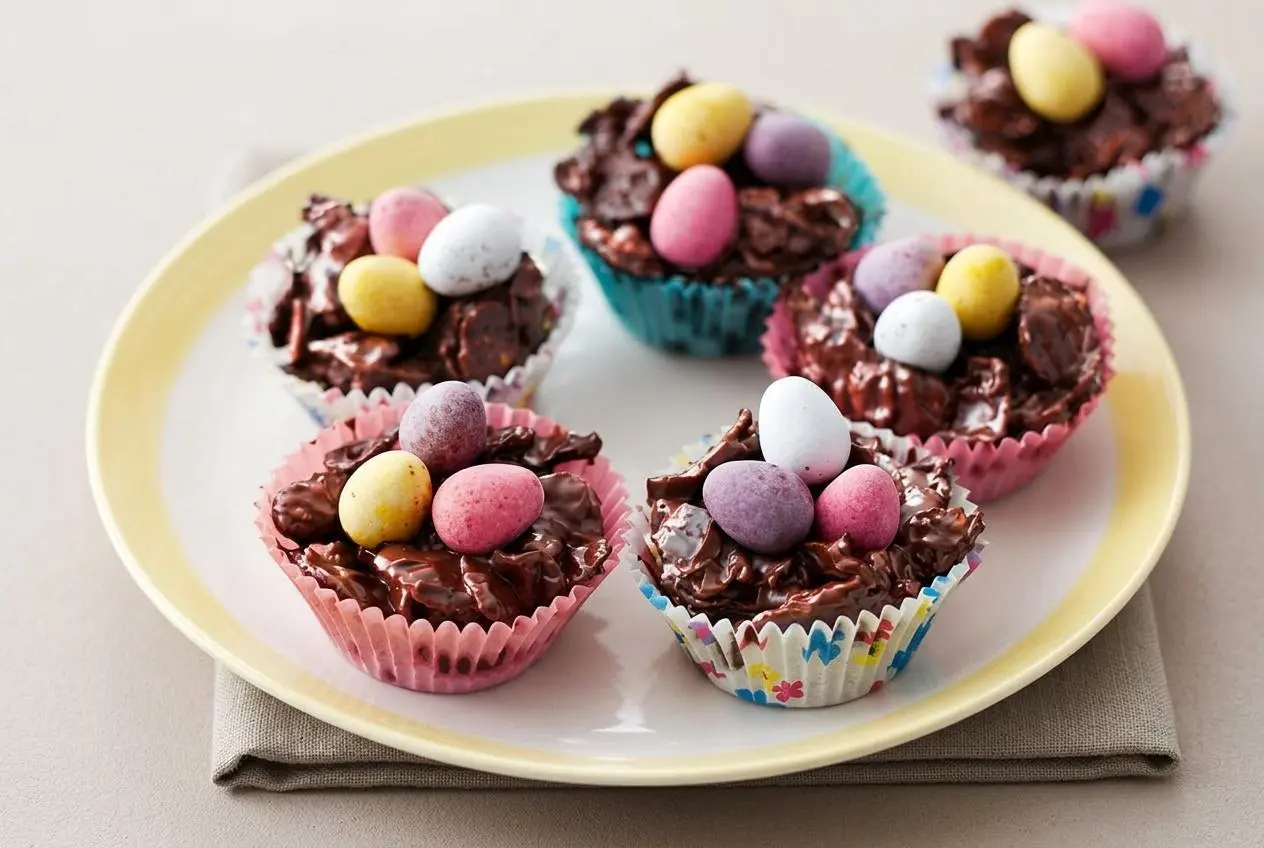
To make Chocolate Easter Egg Nest Cakes, melt chocolate, butter, and golden syrup gently, fold in cereal without crushing it, shape into lined tins, add mini eggs, and chill until firm.
Chocolate Easter egg nest cakes are a classic no-bake Easter treat with a glossy chocolate coating and a satisfying crunch in every bite. They look festive, but the method is wonderfully straightforward.
You’ll love how easily they come together and how much texture you get from such a small amount of effort. The key is keeping the melt smooth and the cereal light.
Keep the heat low from the start, because once chocolate overheats or catches stray water, it can turn grainy fast.
The Science of Perfect No-Bake Nests
These nests work so well because each part of the base has a clear job. Chocolate gives the nests their rich flavor and final structure, but on its own it can set quite firm. Butter softens that set, adds richness, and helps the finished nests bite cleanly instead of turning into hard little bricks.
Golden syrup is the quiet hero here. It helps bind the cereal together while keeping the chocolate mixture slightly softer once chilled. That’s what gives you a crisp nest that still yields when you bite into it, rather than a brittle cluster that shatters.
Butter choice matters. Use block butter, not spreadable tubs or margarine-style spreads. Those products usually contain more water, and that extra moisture can make melted chocolate split or look greasy instead of smooth and glossy.
Chocolate choice matters too. Dark chocolate gives the cleanest set and a deeper cocoa flavor. A mix of dark and milk chocolate makes the nests sweeter and softer tasting. White chocolate is a different story because it behaves differently when melted, which is why it needs its own handling in the FAQ below.
When the mixture is right, it should look smooth, shiny, and thick enough to cling lightly to the cereal. That glossy sheen is your sign that the fat and chocolate are still working together.
Ingredients
Each ingredient here adds something important, from the rich chocolate shell to the crisp nest shape and the soft set that keeps each bite pleasant.
- 225g dark chocolate or a mix of dark and milk chocolate, broken into small pieces
- 2 tbsp golden syrup
- 50g butter
- 75g cornflakes or puffed rice cereal
- 36 mini chocolate eggs
The chocolate forms the base and sets firmly once chilled. Butter rounds out the flavor and keeps the texture from becoming too hard. Golden syrup adds flexibility and helps the mixture coat the cereal evenly. Cornflakes give the most classic nest look, while puffed rice creates a lighter, more clustered texture. The mini eggs finish the nests with color and a little extra crunch.
I find that breaking the chocolate quite small before melting helps it turn smooth faster, which makes it easier to keep that glossy finish.
How to Make Chocolate Easter Egg Nest Cakes

- Set paper cases into a 12-hole fairy cake tin so the nests hold their shape as they chill.
The lined tin keeps the mixture neat and makes each nest easier to lift out later. - Put the chocolate, golden syrup, and butter in a heatproof bowl over a pan of gently simmering water, making sure the bowl does not touch the water, then stir now and then until melted.
Stop as soon as the mixture looks smooth and glossy, because higher heat can make the chocolate seize or split. - Take the bowl off the heat and fold in the cornflakes gently until every flake is coated.
Use a light hand so the cereal stays craggy and crisp instead of getting crushed into dense clumps. - Spoon the mixture into the cases, then press 3 mini chocolate eggs into the center of each one and chill for 1 hour, or until fully set.
Shape a small well while the nests are still warm so the eggs sit neatly and the finished nests hold their form.
Choosing Your Crunchy Nest Base
If you want to change the look or texture, you can swap the cereal base without changing the spirit of the recipe. The best choice depends on whether you want classic crunch, a more twig-like nest, or a sweet-salty finish.
Classic Cornflake Crunch
Cornflakes are the traditional option for a reason. They stay crisp, catch the chocolate mixture well, and create a bold, jagged shape that really looks like a little nest. They also hold up nicely during folding, as long as you stir gently.
Realistic Shredded Wheat
Crushed Shredded Wheat gives the most natural nest look because the strands resemble tiny twigs. It’s a great option if you want a more detailed finish for an Easter dessert platter.
It also needs the butter and syrup in this recipe more than cornflakes do. Shredded Wheat is drier and denser, so the added fat and syrup help coat it evenly and keep the nests from setting too hard.
Salty-Sweet Chow Mein Noodles
Crunchy chow mein noodles make a fun American-style variation. They give a more wiry shape and a salty edge that balances the sweetness of the chocolate and mini eggs really well.
If you use them, keep the mixing gentle just as you would with cereal. Their shape can snap quickly, and the best nests keep plenty of texture.
How to Fix Split or Seized Chocolate
Most problems happen during melting, and they usually come down to too much heat or unwanted moisture. If you want a little extra help with melting chocolate safely, that guide walks through the double-boiler basics in more detail.
- If the chocolate looks grainy or stiff, it likely got too hot or caught a few drops of water. Take it off the heat right away and stop stirring aggressively.
- If the mixture looks oily or separated, spreadable butter is often the culprit. Next time, use block butter so the fat and chocolate stay better emulsified.
- If it has already split, whisk in a teaspoon of warm milk or boiling water off the heat. Add it gradually and stir until the mixture comes back together and looks glossy again.
- If the cereal starts breaking apart in the bowl, the folding was too rough. Use a large spoon or spatula and turn the mixture over itself instead of stirring hard.
Storage and Make-Ahead Instructions
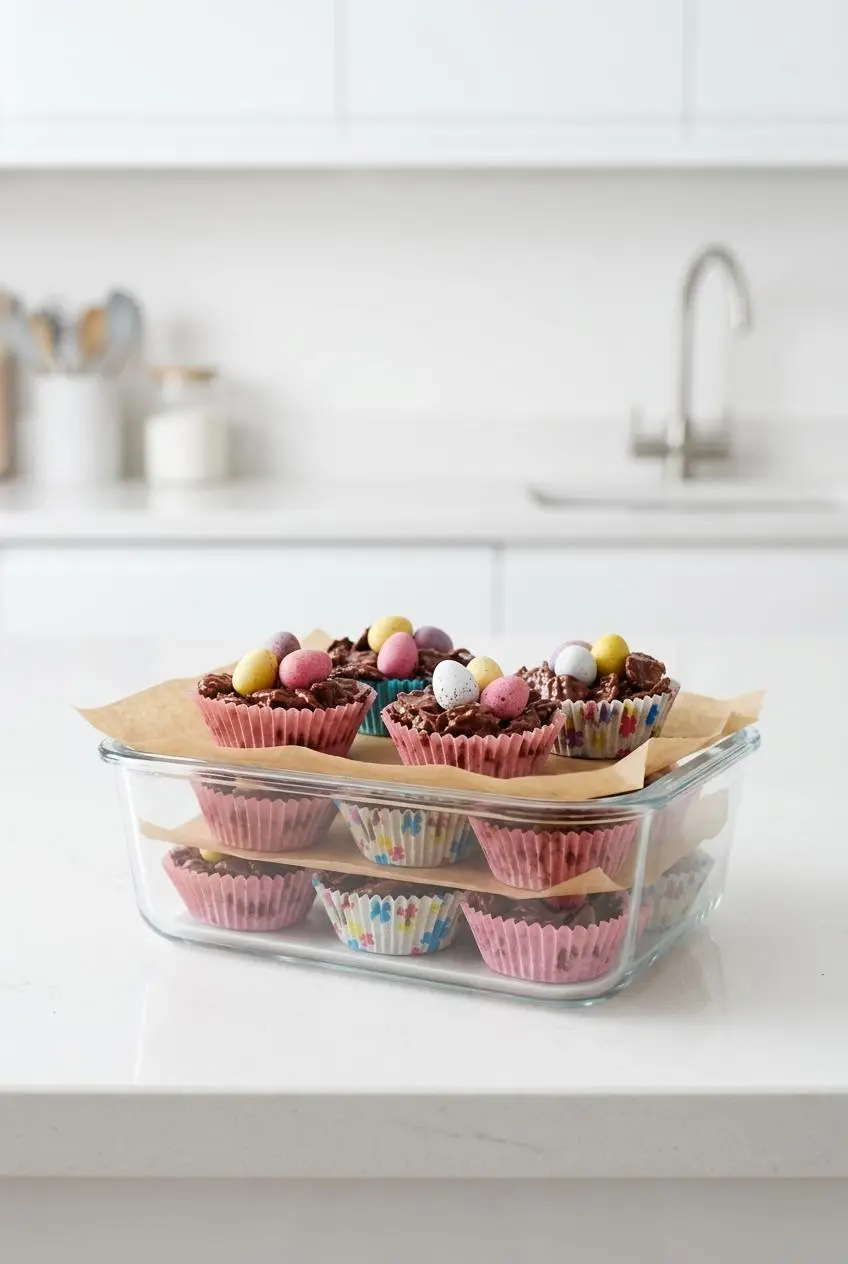
Once the nests are fully set, keep them in an airtight container with parchment between the layers so they stay crisp and don’t stick together. If your kitchen is warm, it’s better to keep them chilled.
For a US kitchen, refrigerator storage is best handled with good cold holding habits for butter- and dairy-based foods, including keeping perishables properly chilled at 40 °F or below for food safety and texture protection, as explained in refrigeration and food safety.
These are a good make-ahead Easter treat because they set cleanly in the fridge and can be kept covered until you’re ready to serve. For the best crunch, avoid leaving them uncovered, and let them sit at room temperature briefly before serving if they feel very firm straight from the fridge.
Creative Serving and Customization Ideas
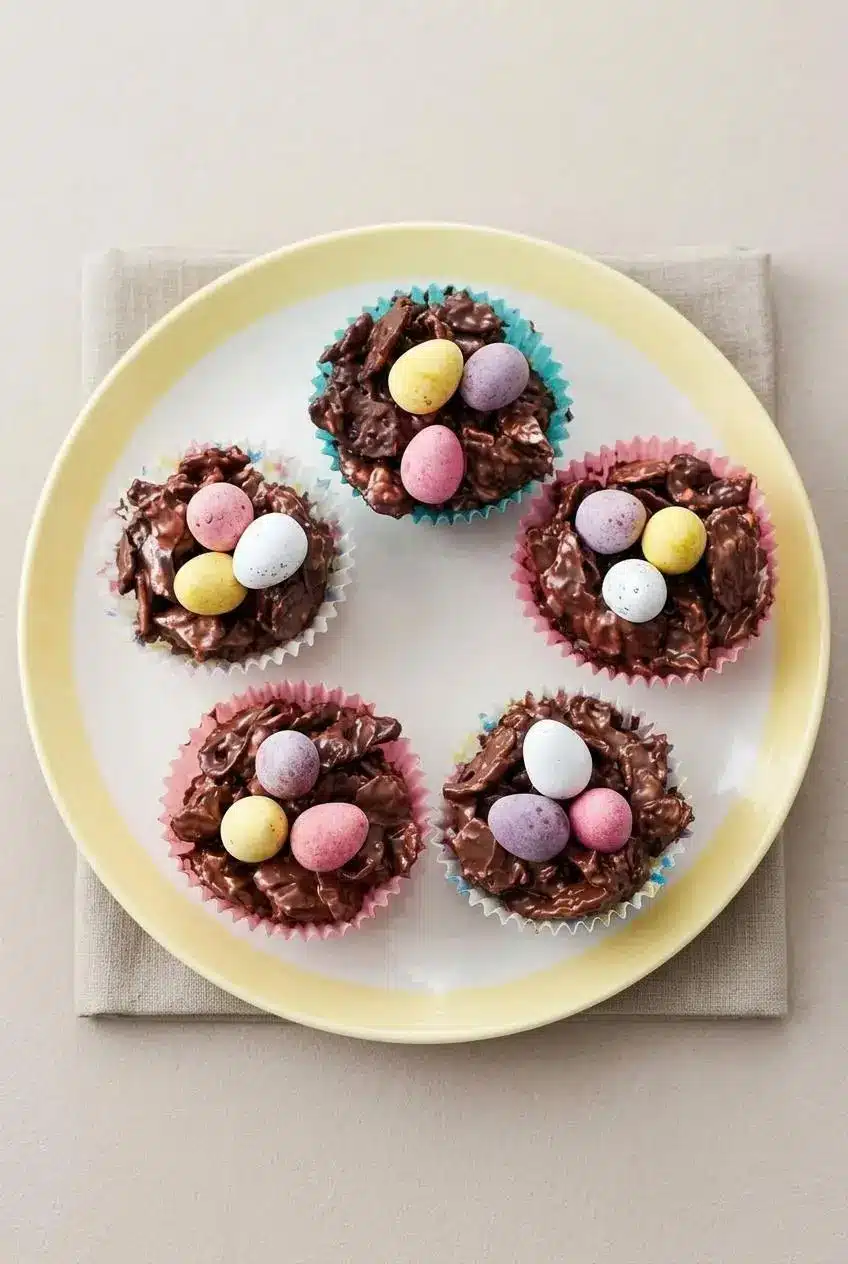
These nests fit beautifully on an Easter Sunday dessert platter, especially next to other chilled no-bake treats like chocolate yogurt bark. They also work well as edible place settings for a spring brunch table.
If you want a small flavor twist, fold a pinch of toasted shredded coconut and a pinch of flaky sea salt into the warm mixture before shaping. The coconut adds a toastier aroma, and the salt sharpens the chocolate flavor without changing the character of the nests.
You can also vary the mini eggs by color to match the rest of your Easter table. A mix of speckled eggs gives the nests a slightly more natural look, while bright candy-coated eggs make them feel more playful.
Conclusion
These chocolate nests are easy, festive, and genuinely satisfying to eat because they balance rich melted chocolate with plenty of crunch. They’re also a great no-bake option when you want something cheerful without turning on the oven.
The biggest trick is simple: melt the chocolate gently and keep the mixture glossy. Once you’ve got that part right, the rest is pure Easter fun.
Questions fréquentes
What Is the Best Alternative to Golden Syrup?
Light corn syrup is the closest swap for texture and sweetness. Honey works too, but it adds a stronger flavor that you’ll notice in the finished nests. Maple syrup can be used if that’s what you have, though the flavor will be softer and a bit less classic.
Can I Use White Chocolate for These Nests?
Yes, but white chocolate behaves differently from dark or milk chocolate. It does not mix as well with butter and golden syrup, so it’s better to melt it on its own if you want to use it for nests. Expect a sweeter result and a softer flavor overall.
Why Did My Chocolate Mixture Split?
The usual cause is overheating, especially if the bowl gets too hot over the pan. Spreadable tub butter can also cause trouble because of its higher water content. Use block butter and very gentle heat, and if it separates, try whisking in a tiny spoonful of warm liquid off the heat.
Do I Have to Use Paper Cupcake Liners?
No, they’re helpful but not essential. You can lightly grease a nonstick or silicone muffin tin with butter or oil, shape the nests directly inside, and chill until firm. Once set, loosen them carefully and lift them out gently so the edges stay intact.

Chocolate Easter Egg Nest Cakes

Equipment
- 12-hole fairy cake tin
- Paper cases
- Heatproof bowl
- Saucepan
Ingredients
- 225 g dark chocolate or a mix of dark and milk chocolate, broken into small pieces
- 2 tbsp golden syrup
- 50 g butter
- 75 g cornflakes or puffed rice cereal
- 36 mini chocolate eggs
Instructions
- Set paper cases into a 12-hole fairy cake tin so the nests hold their shape as they chill. The lined tin keeps the mixture neat and makes each nest easier to lift out later.
- Put the chocolate, golden syrup, and butter in a heatproof bowl over a pan of gently simmering water, making sure the bowl does not touch the water, then stir now and then until melted. Stop as soon as the mixture looks smooth and glossy, because higher heat can make the chocolate seize or split.
- Take the bowl off the heat and fold in the cornflakes gently until every flake is coated. Use a light hand so the cereal stays craggy and crisp instead of getting crushed into dense clumps.
- Spoon the mixture into the cases, then press 3 mini chocolate eggs into the center of each one and chill for 1 hour, or until fully set. Shape a small well while the nests are still warm so the eggs sit neatly and the finished nests hold their form.