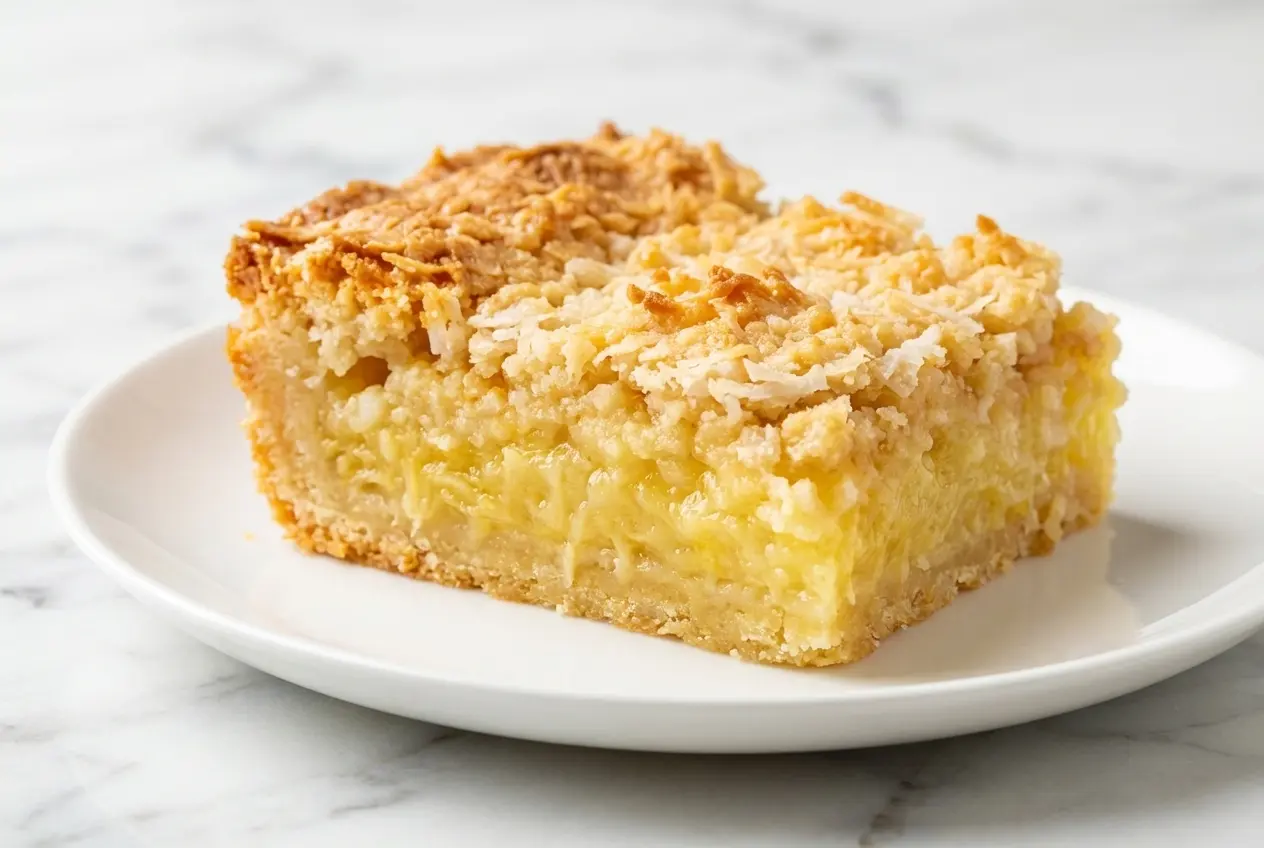
There is something about a pan of Pineapple Bliss Bars that feels right at home on a picnic table, tucked between the lemonade and the paper plates at a summer potluck. In my kitchen, these are the bars I bake when I want a tropical dessert that tastes sunny and comforting, but still slices neatly and travels well.
This guide walks you through every part of the process, from building a buttery shortbread crust to getting that sweet, chewy pineapple center just right. If you have ever wondered how to keep fruit bars from turning soggy or overly sweet, you are in exactly the right place.
Why You’ll Love This Recipe
Perfectly balanced sweetness: I discovered that a little kosher salt in the crust makes all the difference. It keeps the brown sugar and sweetened flaked coconut from tasting heavy, and it brings out the rich flavor of the butter in the best way.
The flavor bridge: A teaspoon of high-quality vanilla extract in the filling ties the whole bar together. In my kitchen, it softens the bright edge of the crushed pineapple and connects it beautifully to the creamy coconut notes.
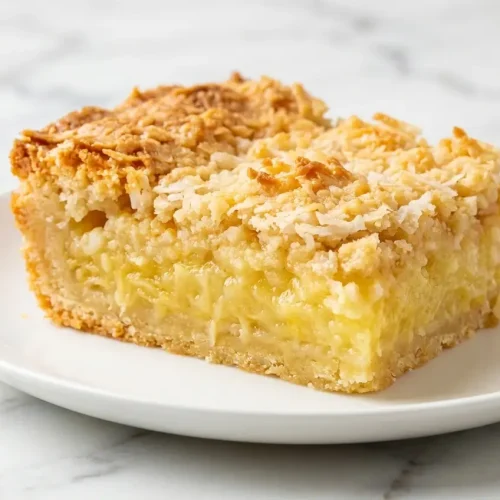
Texture worth chasing: These bars give you three good things in one bite, a firm shortbread crust, a dense and chewy tropical center, and a crisp crumb topping. That contrast is what makes them feel bakery special instead of ordinary.
Reliable for gatherings: Because the layers bake up sturdy and slice clean once cooled, they are ideal for cookouts, bake sales, and family dinners. They taste nostalgic, but the little twist in the crust and filling makes them feel more polished.
Ingredients and Substitutions
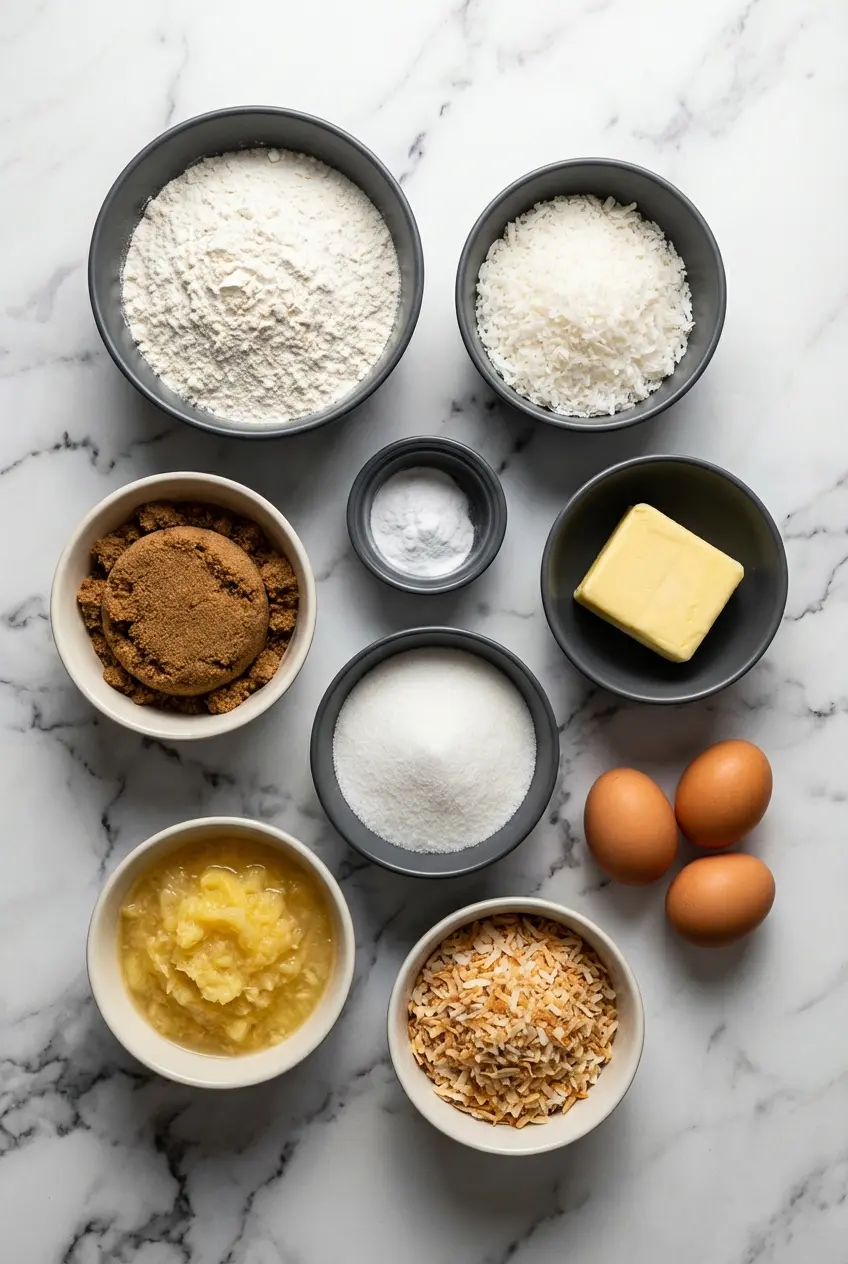
A short list of pantry staples and a can of pineapple turn into something buttery, chewy, and deeply comforting. Each ingredient has a job, especially in the crust and filling.
Ingredients
- 3 1/2 c. all purpose flour, divided
- 1 c. sweetened flaked coconut
- 1 c. firmly packed brown sugar
- 1 tsp. baking soda
- 1 c. butter, divided
- 1 c. sugar
- 3 large eggs
- 1 (20 oz.) can crushed pineapple, drained well
- Garnish: toasted flaked coconut
Ingredient Notes & Substitutions
Crushed pineapple: This is the best choice for the classic texture because it disperses evenly through the batter and helps create that signature chewy center. Whether you use canned or fresh, the fruit must be drained aggressively or the filling can turn loose and heavy.
Sweetened flaked coconut: Sweetened flaked coconut adds both sweetness and chew, which is a big part of why these bars feel so satisfying. If you want a different kind of tropical crunch, chopped macadamia nuts are a lovely swap and bring a buttery bite of their own.
Butter: Real butter matters here, especially for the shortbread crust. Margarine does not give the same rich flavor or crisp, crumbly texture, and in my experience it makes the base taste flatter and softer.
Vanilla extract: Even though it is a small addition, a good vanilla rounds out the pineapple and coconut beautifully. It is one of those quiet ingredients that makes people ask why your bars taste more complete than most.
Sour cream: For a softer, tangier finish, you can fold 1/2 cup of sour cream into the filling. It gives the center a slightly more custard-like feel without taking away the tropical character.
Flavor variations: A splash of dark rum or coconut extract in the pineapple mixture can make these feel a little more grown-up and vacation-ready. I keep it subtle so the fruit still leads, but even a small amount adds warmth and depth.
How to Make Pineapple Bliss Bars
Prep the Pan and Build the Crumb Base
- Heat your oven to 350 and lightly grease a 13 x 9 inch baking pan so the bars release easily later. A thin coat is enough, you just want insurance around the corners and edges.
- In a large bowl, stir together 2 1/2 cup flour, the coconut, brown sugar, baking soda, and 1/2 tsp of kosher salt. That little bit of salt is the quiet hero here, because it sharpens the buttery shortbread flavor and keeps the sweetness in check.
- Cut in 1/2 cup of butter with a pastry blender or two knives until the mixture looks sandy and crumbly, with small buttery bits throughout. It should hold together if you squeeze a handful, but still fall apart easily.
- Set aside 1 cup of this crumb mixture for the topping, then press the rest firmly and evenly into the bottom of the prepared pan. Aim for a compact, level layer so the crust bakes up sturdy instead of patchy.
Pre-Bake the Crust
Bake the crust for 10 minutes, just until it begins to look lightly set and smells faintly buttery. This quick head start is essential, because it keeps the wet pineapple filling from soaking into raw flour and turning the bottom layer gummy.
Mix the Filling
- While the crust bakes, beat the remaining 1/2 cup butter and sugar in a medium bowl with an electric mixer on medium speed until creamy and lighter in texture. Room temperature butter works best here and gives you a smoother, more even batter.
- Add the eggs one at a time, beating well after each addition so the mixture stays glossy and emulsified. This helps the filling bake up evenly instead of looking curdled or streaky.
- Gradually blend in the remaining 1 cup flour until the batter is smooth. Then stir in the well-drained pineapple and 1 tsp high-quality vanilla extract, which gives the filling a fuller aroma and links the bright fruit with the coconut beautifully.
Assemble and Bake
- Spread the pineapple mixture over the warm baked crust, easing it all the way to the edges in an even layer. Sprinkle the reserved crumb topping evenly over the surface so every square gets a little crisp finish.
- Bake for 25 minutes, or until a wooden pick inserted comes out clean. The top should look lightly golden at the edges, and the center should feel just set rather than wet or jiggly.
- Finish with toasted flaked coconut over the top and let the bars cool completely before cutting into squares. The cooling time is what helps them firm up into clean, tidy pieces instead of falling apart on the knife.
Secrets For A Perfect Bake
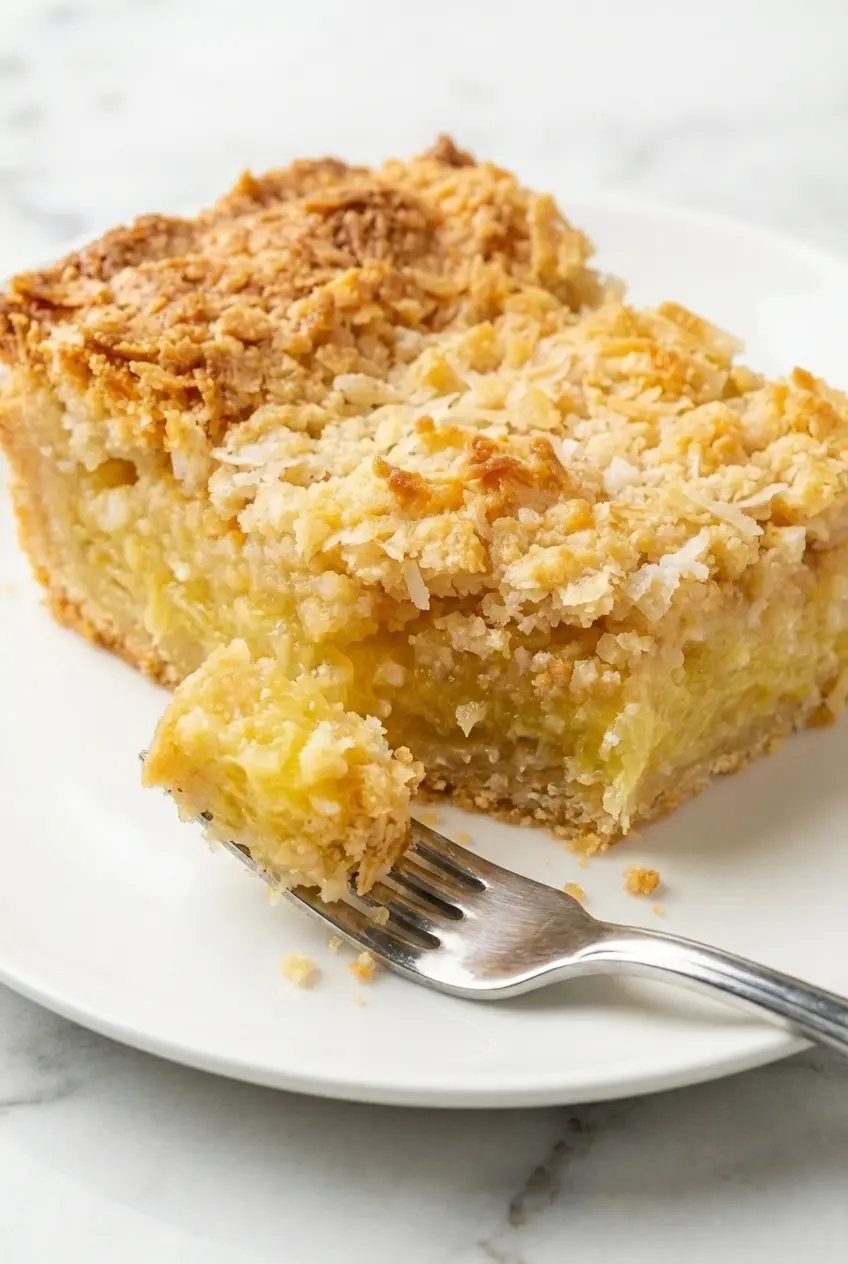
The number one thing I watch for is doneness in the center. You want golden-brown edges on the crumb topping and a middle that looks set, not shiny or loose, and a wooden pick should come out clean but not bone dry.
That 10-minute pre-bake on the bottom crust is not optional if you want a proper shortbread crust. Skip it, and the pineapple layer can seep into the flour and leave you with a raw, gooey base instead of a firm, buttery foundation.
Room temperature eggs and butter make the filling noticeably smoother. When they blend easily, the batter holds the fruit more evenly and bakes into a tidy, dense layer instead of separating or baking unevenly.
I also press the crust in firmly, especially into the corners, so it bakes as one solid layer. A loose base can crumble under the moist filling, while a compact one gives you that clean bakery-style bite.
Baking With Fresh Versus Canned Pineapple
Canned crushed pineapple is the easy winner for consistency because it is soft, evenly sweet, and predictable in moisture. That matters in a recipe like this, where too much juice can throw off the texture of the whole pan.
If you want to use fresh fruit, choose a very ripe pineapple and chop it finely, or pulse it briefly in a food processor so it mimics the texture of crushed pineapple. If you are starting with a whole fruit, this guide to cutting fresh pineapple makes the prep much less messy, especially when you want small, even pieces for baking.
Fresh pineapple also benefits from a short simmer on the stove for a few minutes before it goes into the batter. That helps cook off extra water and softens the fruit, so it behaves more like canned pineapple and does not weigh down the filling.
No matter which kind you use, drain it as thoroughly as you can. I like to press the pineapple in a fine-mesh sieve or blot it with paper towels until it looks almost surprisingly dry, because that is the best insurance against a soggy crust.
Pro Tips & Troubleshooting
Pro Tips
- Drain the canned pineapple far more than you think you need to. Pressing it in a fine-mesh sieve or squeezing away extra moisture with paper towels is the single best way to protect the crust.
- Toast the coconut garnish in a dry skillet for 3 to 5 minutes before adding it to the finished bars. It turns deeper golden, smells nutty, and gives the top a prettier, more polished look.
- Use room temperature eggs and butter for the filling so the batter comes together smooth and creamy. This helps the fruit stay evenly distributed instead of sinking or clumping.
- Reach for a pastry blender if you have one, because it cuts the butter into the flour without warming it too quickly. That keeps the crumb topping light and sandy instead of dense.
Common Mistakes to Avoid
- Leaving too much liquid in the pineapple can turn the center mushy and make the bottom crust feel almost spoonable. These bars need drained fruit, not juicy fruit.
- Forgetting the kosher salt in the crust can leave the dessert tasting flat and overly sweet. Even a small amount gives the shortbread more character and balance.
- Skipping the 10-minute crust pre-bake often leads to a raw dough layer under the filling. The base needs that early oven time to set before the pineapple goes on top.
- Working the butter into the flour with warm hands instead of a pastry blender or two knives can melt it too fast. When that happens, the crumb mixture loses the texture that makes these bars so good.
Serving And Storage
Serving Ideas
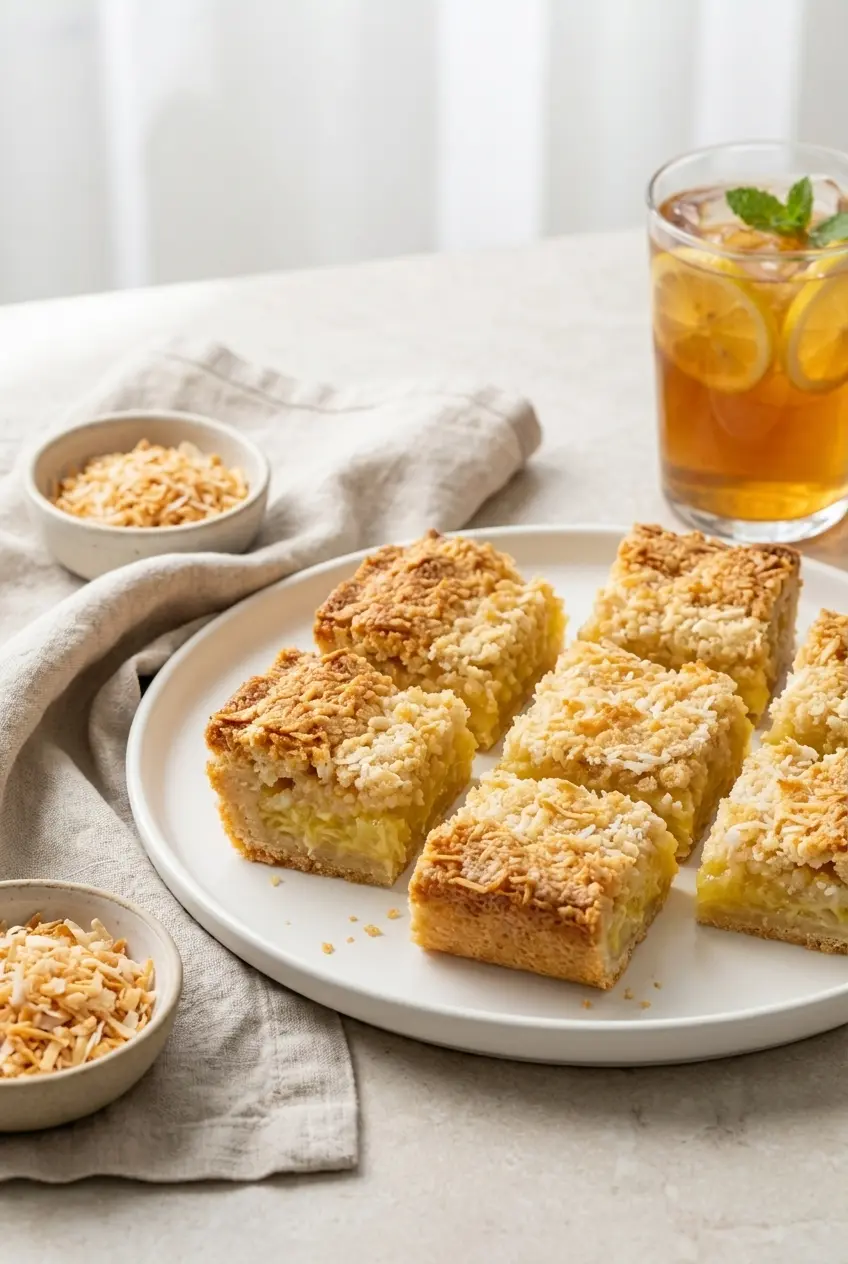
For a cool, classic finish, serve these bars chilled with a dollop of freshly whipped cream. The cold temperature makes the pineapple layer pleasantly dense and chewy, which I think is when they are at their best.
If you want something a little more indulgent, serve them slightly warm with a scoop of vanilla bean or coconut ice cream. That hot-and-cold contrast turns a simple pan dessert into something worthy of a backyard dinner party.
Clean slices come down to patience more than knife skills. Chill the bars completely, then cut with a sharp knife wiped clean with a warm, damp cloth between each slice so the crumb topping stays neat instead of dragging.
On especially hot summer weekends, I like to pair these with other chilled tropical sweets, and a creamy pineapple fluff dessert makes a fun companion for the same kind of easy, make-ahead table. The contrast works well, since these bars are chewy and buttery while that style of dessert is airy and cool.
Storage & Make-Ahead
Because these bars contain fruit and a buttery filling, they keep best in an airtight container in the refrigerator for up to 5 days. The fridge also helps preserve that dense, chewy texture that makes them so satisfying.
For longer storage, wrap individual bars tightly in plastic wrap and place them in a freezer-safe zip-top bag. They freeze well for up to 3 months, and an overnight thaw in the fridge brings them back beautifully.
If you are making them ahead for a gathering, bake them the day before and chill them overnight. They slice more cleanly the next day, and the flavors seem to settle together in the nicest way.
Pineapple Bliss Bars

Equipment
- 13 x 9-inch baking pan
- large bowl
- Pastry blender
- Electric Mixer
Ingredients
- 3 1/2 c. all purpose flour, divided
- 1 c. sweetened flaked coconut
- 1 c. firmly packed brown sugar
- 1 tsp. baking soda
- 1 c. butter, divided
- 1 c. sugar
- 3 large eggs
- 1 (20 oz.) can crushed pineapple, drained well
- Garnish: toasted flaked coconut
Instructions
Prep the Pan and Build the Crumb Base
- Preheat your oven to 350 degrees F and lightly grease a 13 x 9 inch baking pan.
- In a large bowl, whisk together 2 1/2 cups of the flour, the flaked coconut, brown sugar, and baking soda.
- Use a pastry blender or two knives to cut in 1/2 cup of the butter until the mixture is sandy and crumbly.
- Set aside 1 cup of this crumb mixture to use as the topping later. Press the remaining mixture firmly and evenly into the bottom of the prepared baking pan.
Pre-Bake the Crust
- Bake the crust for 10 minutes until it is lightly set. This prevents the filling from making the base soggy.
Mix the Filling
- In a medium bowl, beat the remaining 1/2 cup of butter and the white sugar with an electric mixer until creamy and light.
- Add the eggs one at a time, beating well after each addition to ensure a smooth, emulsified batter.
- Gradually stir in the remaining 1 cup of flour until blended, then fold in the well-drained crushed pineapple.
Assemble and Bake
- Spread the pineapple filling evenly over the warm, pre-baked crust, reaching all the way to the edges.
- Sprinkle the reserved 1 cup of crumb mixture over the top of the filling.
- Bake for 25 minutes, or until the center is set and a wooden pick inserted comes out clean.
- Garnish with toasted flaked coconut and allow the bars to cool completely in the pan before slicing into squares.
Notes
Conclusion
These bars are the kind of old-fashioned tropical dessert that always disappears fast, but the little additions of kosher salt in the crust and vanilla in the filling give them a more balanced, bakery-style finish. You get buttery shortbread, chewy pineapple coconut filling, and a crisp crumb topping in every bite.
If this flavor combination wins you over, a slice of coconut dream cake is right in the same sunny spirit. I would love to hear how your pan turned out, especially if you added the toasted coconut on top or played with one of the tropical variations.
Frequently Asked Questions
Do pineapple bliss bars need to be refrigerated?
Can I use fresh pineapple instead of canned?
How do I prevent the shortbread crust from getting soggy?
Why is the bottom crust of my fruit bars soggy?
Can these bars be frozen for later?
How do you cut dessert bars cleanly without crumbling?