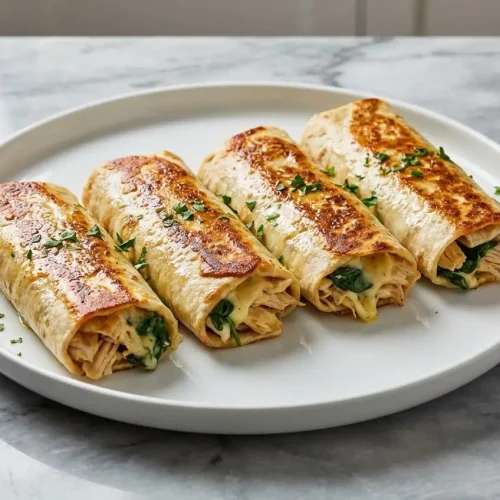
Easy Cheesy Garlic Chicken Wraps

Get your weeknight dinner saved with these incredibly easy and satisfying low-carb wraps! They feature tender shredded chicken, gooey melted cheese, and a rich garlic flavor, all wrapped in a crispy, golden tortilla.
Equipment
- Medium skillet
- Air Fryer (optional)
Ingredients
- 2 cups cooked chicken breasts, shredded
- 1 cup shredded mozzarella cheese
- 1/2 cup shredded cheddar cheese
- 2 cloves garlic, minced
- 1/4 cup cream cheese, softened
- 1 tablespoon olive oil
- 4 large low-carb tortillas or wraps
- 1 tablespoon fresh parsley, chopped
- Salt and pepper to taste
- 1 handful baby spinach
Instructions
Build the Garlicky Cheese Base
- Set a medium skillet over medium heat and add the olive oil. Stir in the minced garlic and cook for 30 to 60 seconds, just until fragrant. Be careful not to let it darken.
- Add the softened cream cheese and stir as it loosens. Once it starts to melt, add the shredded mozzarella and cheddar, then keep stirring until everything turns into a smooth, creamy sauce.
Warm the Filling
- Add the shredded cooked chicken to the skillet and toss until every strand is coated in the cheesy garlic mixture. Let it cook for another 2 to 3 minutes, until the chicken is heated through.
- Season with salt and pepper to taste. Fold in the baby spinach and cook just until it wilts into the filling, then stir in the chopped parsley.
Fill and Roll the Wraps
- Warm the low-carb tortillas lightly in a dry skillet or microwave until they feel soft and pliable. This step makes rolling easier and helps prevent cracks.
- Lay one warmed tortilla on a flat surface and spoon about one-quarter of the filling down the center. Fold in the sides, then roll it up snugly from the bottom.
Crisp Them in the Skillet
- Heat another tablespoon of olive oil in the same skillet over medium heat. Place the wraps seam-side down and cook for 2 to 3 minutes per side until the outside turns golden brown and crisp, and the cheese is gooey.
Notes
Pro-Tip: Warm tortillas before filling them. It’s the best way to prevent tearing and get a tight, neat roll. Also, avoid overstuffing the wraps, as this can cause them to burst in the pan.
Air Fryer Method: To cook in an air fryer, preheat it to 375°F (190°C). Arrange the wraps in a single layer in the basket and cook for 6-8 minutes, flipping halfway through, until golden and crisp.
Storage & Reheating: The filling can be made ahead and stored in the fridge for up to 3 days. Store fully cooked wraps in an airtight container in the fridge for 2 days. For the best texture, reheat in a skillet or air fryer, not the microwave.
Variations: For a spicy kick, add diced jalapeños or use Pepper Jack cheese. For a bacon ranch version, add crumbled bacon and a spoonful of ranch seasoning to the filling.
Nutrition information is estimated based on common ingredients and serving sizes and may vary.
Nutrition
Calories: 520kcalCarbohydrates: 15gProtein: 35gFat: 30gSaturated Fat: 14gCholesterol: 110mgSodium: 1100mgPotassium: 400mgFiber: 8gSugar: 3gVitamin A: 2IUVitamin C: 1mgCalcium: 30mgIron: 10mg
Tried this recipe?Let us know how it was!