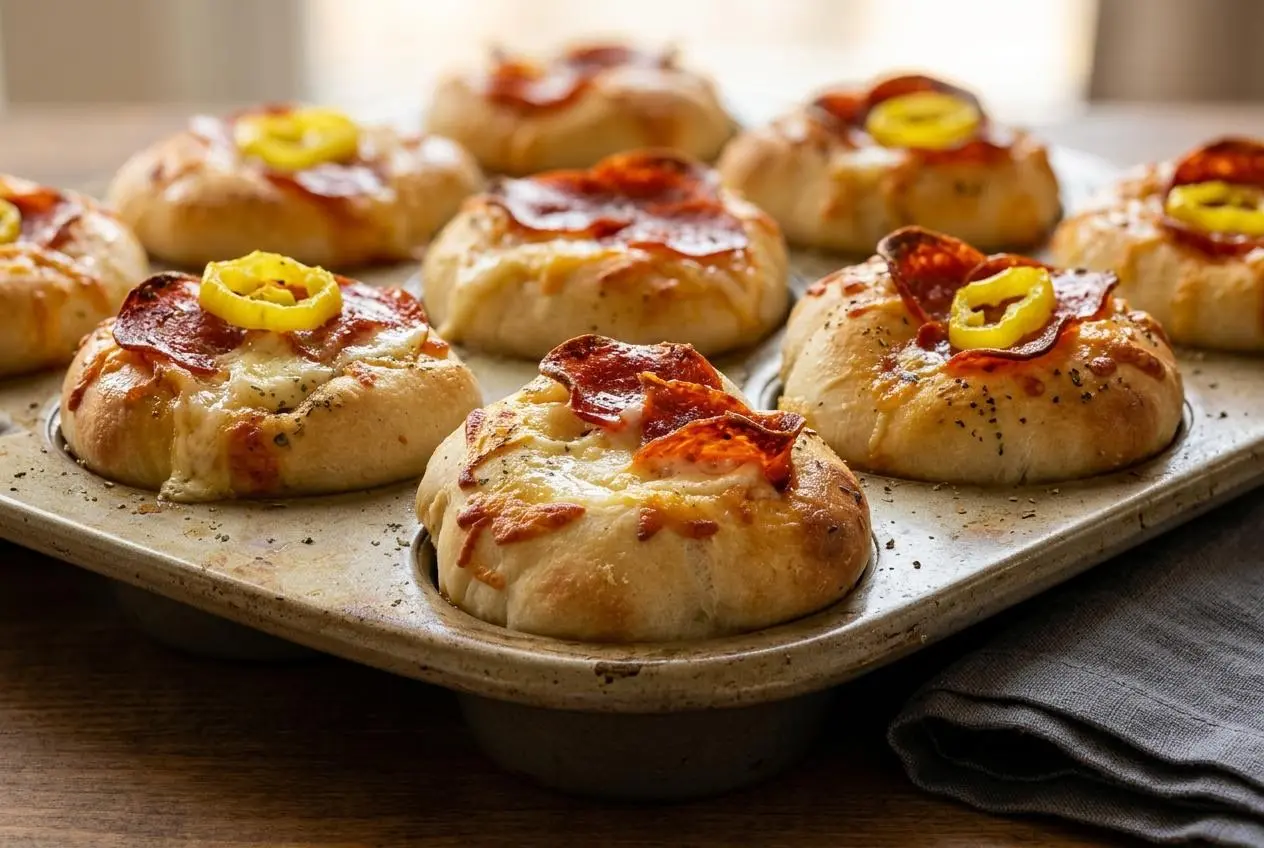
Sourdough pizza bombs are stuffed dough pockets filled with cheese and toppings, then baked at 375F until golden. This Sourdough Pizza Bombs Recipe uses sourdough starter plus yeast for flavor, lift, and a much more reliable rise.
These are the kind of snack that disappears fast: soft dough, melty mozzarella, and crisped edges with a buttery oregano finish. They work for lunch, game day, or a warm after-school bite.
The best part is the smell once that garlic-buttery top starts to toast in the oven. And one tiny sealing trick makes a big difference.
Cold dough is much easier to fold and seal cleanly, so if your dough feels warm and slack, give it a quick chill before shaping.
Key Ingredients and Tools for Pizza Bombs
Each ingredient pulls its weight here, building rise, chew, moisture, richness, and that classic pizza flavor packed into a soft golden crust.
- 1 cup sourdough starter
- 1 1/2 cup warm water
- 1 Tablespoon active dry yeast
- 1 Tablespoon salt
- 2 Tablespoons sugar
- 2 Tablespoons olive oil
- 4-5 cups unbleached flour
- 2-3 Tablespoons butter, melted
- shredded mozzarella cheese
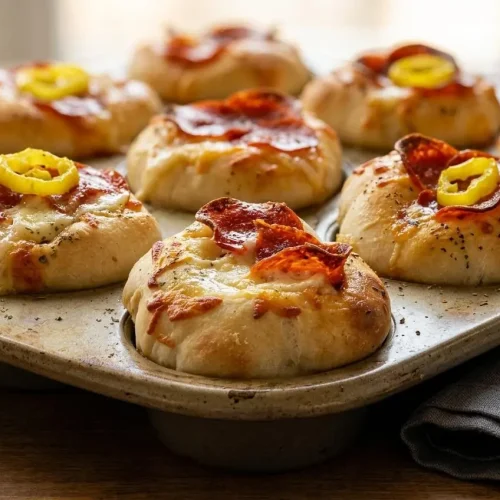
- Your favorite pizza toppings (we use pepperoni and banana peppers!)
- Dried oregano
The sourdough starter gives the dough its tang and depth. Active starter works beautifully, but discard can work too if you want flavor without depending on it for the full rise. The active dry yeast does the heavy lifting on speed, so you get sourdough character with a much more predictable dough.
Sugar helps feed that yeast-boosted dough and supports browning, which is why these bake up with such a nice golden color. Olive oil keeps the dough supple and easier to work with, while salt keeps the flavor from tasting flat.
For the filling, low-moisture shredded mozzarella is the best choice if you want gooey cheese without a watery center. Fresh mozzarella carries too much moisture for this style unless you drain it very well. Pepperoni works especially well because it adds flavor without soaking the dough.
Flour matters most during handling. This dough starts soft and sticky, so a well-floured work surface and lightly floured hands keep it manageable while you knead and shape. Too little flour on the counter is when dough starts clinging, tearing, and making a mess.
I like working with cold starter and a generous dusting of flour because the dough stays calmer and far easier to shape cleanly.
A stand mixer with a dough hook makes the mixing smoother, but you can finish the dough by hand once it hits the sticky stage. For baking, muffin tins give the most defined individual shape and help support the sides as the bombs puff. A 9×13 baking dish turns them into more of a pull-apart style, which is great for sharing. Stoneware or cast iron can give you a slightly crisper bottom, especially if you like more contrast between the soft center and the baked exterior.
How to Make Sourdough Pizza Bombs
This method is straightforward once you know what the dough should feel like. Aim for soft and tacky at first, then knead until it turns smooth and stops grabbing your hands.
- Combine the sourdough starter, warm water, active dry yeast, salt, sugar, and olive oil in a mixing bowl.
The mixture should look loose and evenly blended before any flour goes in. - Mix with a dough hook and add the flour gradually as the dough starts to come together.
It will move from shaggy and wet to a soft mass that still looks a little sticky. - Keep adding flour until you have a soft, sticky dough rather than a stiff one.
The dough should cling slightly to the bowl but still gather around the hook. - Flour your work surface well, then turn the dough out and dust the top.
This extra flour keeps the dough from welding itself to the counter. - Lightly flour your hands before kneading the dough.
That small step makes the dough much easier to handle without tearing. - Knead until the dough feels soft, smooth, and no longer sticks to your hands.
When it is ready, it should feel tacky but not messy and spring back a bit when pressed. - Set the dough in a well-oiled dish, cover it, and let it rise.
Look for visible expansion and a puffier, airier feel before moving on. - Preheat the oven to 375F.
Getting the oven ready now helps the shaped bombs bake evenly without waiting around. - Press the risen dough down, then knead it briefly again to form a smooth ball.
This redistributes the air and makes the dough easier to portion evenly. - Divide the dough into 24 pieces.
Even portions help the pizza bombs bake at the same pace and finish with a more uniform shape. - Take one piece, knead it two or three times, roll it into a ball, and flatten it.
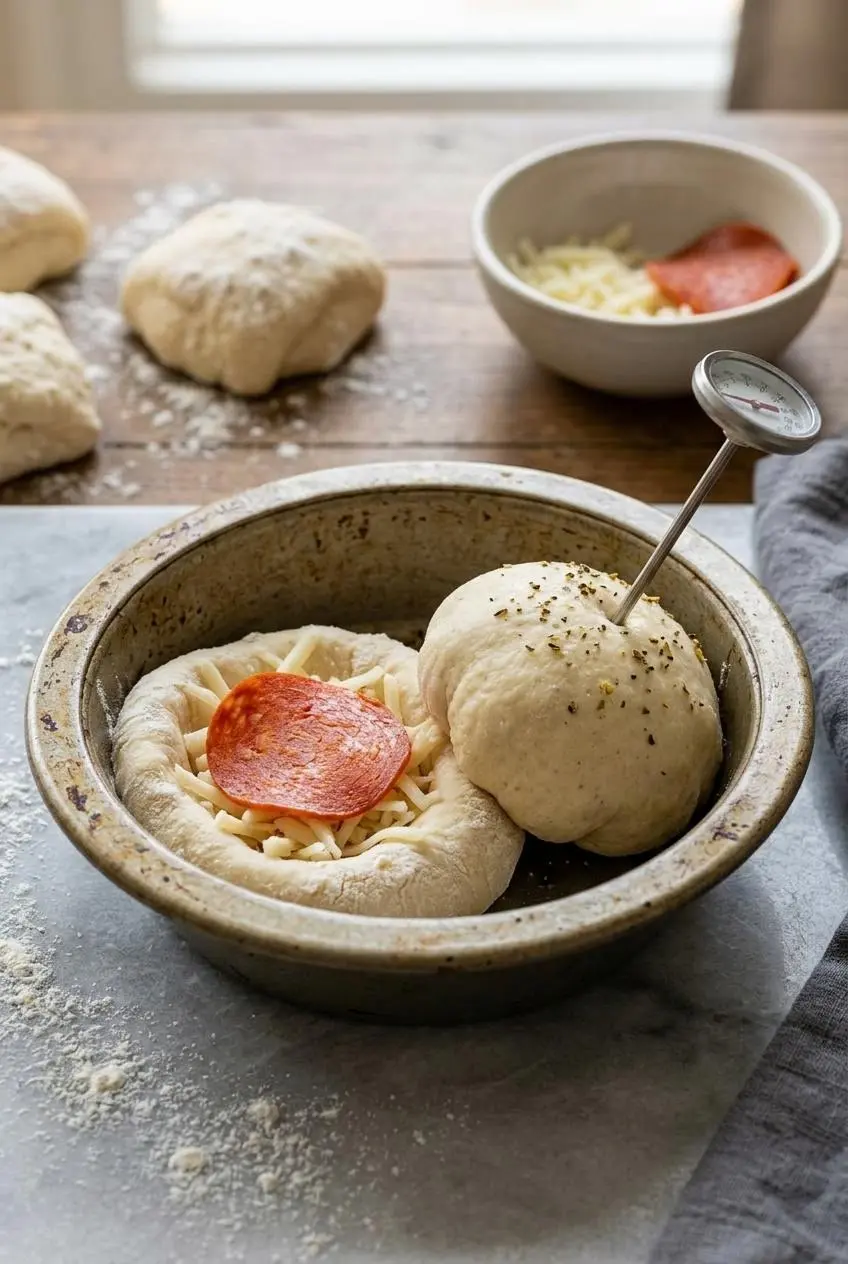
You want a compact round that can hold filling without becoming too thin at the center. - Add the filling with cheese first, then your toppings.
Keeping the cheese underneath helps cushion the dough from wetter toppings. - Roll the filled dough up, fold it in half, and place it in your baking pan.
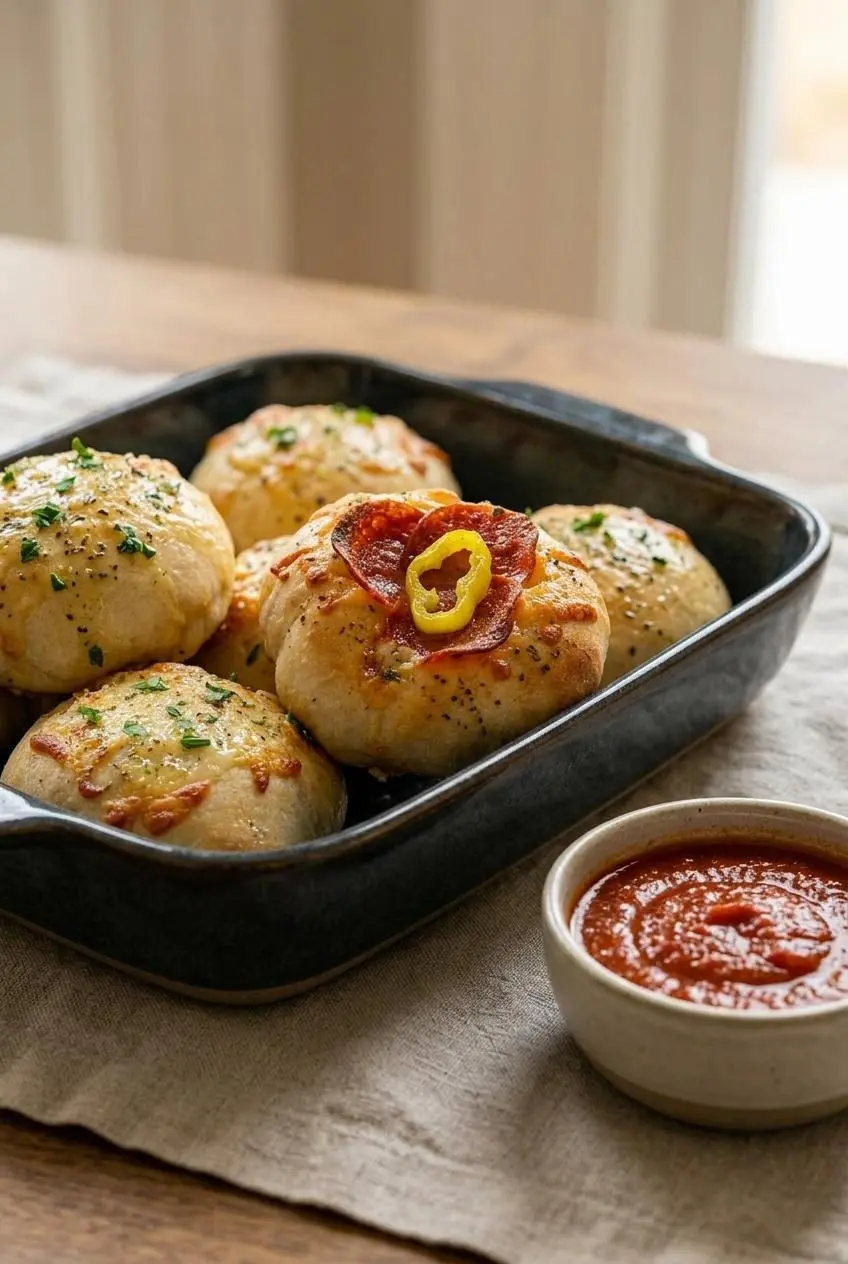
Muffin tins make more distinct bombs, while a 9×13 dish gives you a pull-apart bake. - Repeat with the remaining dough pieces until all 24 are shaped and in the pan.
Try to keep the filled pieces similar in size so none overbake while others lag behind. - Bake for 15 minutes.
The dough should start setting, puffing, and taking on light color around the edges. - Brush the tops with melted butter and sprinkle with dried oregano.
This is where the rich toasted aroma starts showing up in a big way. - Return the pan to the oven for another 5 minutes.
The tops should finish golden brown and the crust should look dry and baked rather than pale. - If you used a muffin pan, remove the pizza bombs and cool them on a rack.
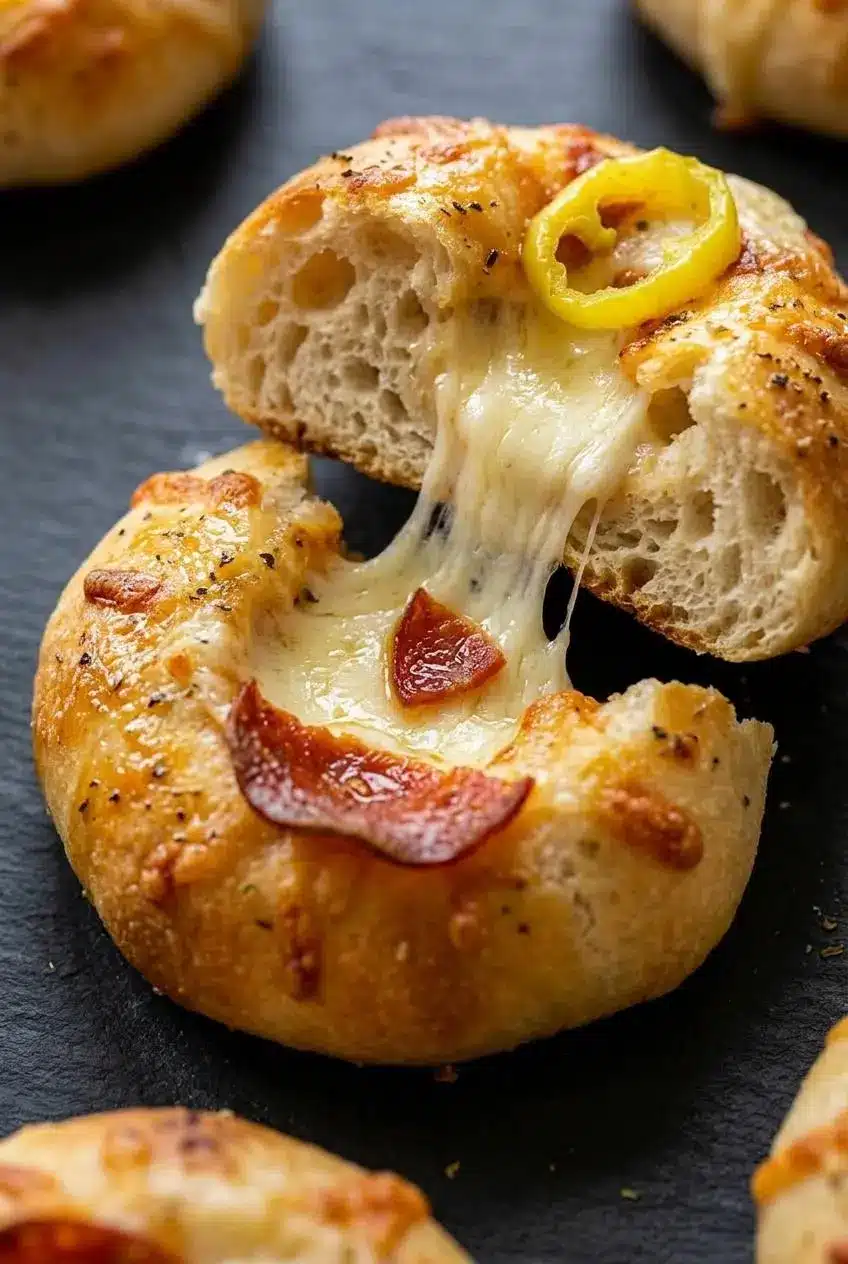
This keeps the bottoms from trapping steam and turning soft. - Serve warm with warm pizza sauce for dipping.
The centers should be melty and the crust should pull apart easily while still holding the filling.
Because the filling includes meat for many versions, reheating leftovers until the center reaches 165 °F for foods containing meat or poultry is a sensible extra check.
Secrets to Sealing Pizza Bombs
If your cheese keeps escaping, the problem is usually shape, filling placement, or a weak seam. A few small adjustments fix most blowouts.
- Flatten each dough piece into about a 4-inch round. That gives you enough surface area to wrap the filling without stretching the dough paper-thin.
- Keep the sauce, cheese, and pepperoni in the exact center. Filling near the edges is the fastest route to leaks.
- Go easy on the sauce. Too much liquid creates pressure inside the bomb and can burst the bottom seam during baking.
- Gather the edges up and pinch firmly until the seam feels sealed all the way across. If you see a gap, pinch again.
- Set each one seam-side down in the pan. That gives the dough some help from its own weight while it bakes.
- Poke a tiny vent in the top with a toothpick. That little steam vent lets trapped heat escape so the bombs are less likely to split open.
- Gently flatten the shaped bombs once they are in the pan. That helps prevent wild puffing and keeps the center from lifting the seam apart.
High-moisture toppings need extra care. Fresh tomatoes, very wet mushrooms, or juicy peppers can make the inside soggy and weaken the seal, so stick with drier toppings or drain them well before using.
Sourdough Pizza Bombs Dough Method
Even dough portions make these bake more evenly, and a scale helps more than you might think.
If you want 24 pizza bombs of similar size, weigh the full dough after kneading and divide that total by 24. That gives you a target weight for each piece in grams, which is much more consistent than eyeballing. It also helps keep some bombs from overbaking while larger ones stay doughy in the center.
This section is also where leftover dough shines. If you already have cold sourdough pizza dough from another bake, you can use that instead of mixing a fresh batch. Chilled dough is easier to portion, fold, and pinch because it is firmer and less sticky. Warm dough tends to relax the second you shape it, which makes sealing much fussier.
If you need a non-sourdough fallback for another batch, homemade pizza dough works as a useful comparison point for texture and shaping.
One more dough cue: after kneading, the surface should look smoother and the dough should feel tacky rather than wet. If it still leaves a heavy smear on your hands, keep kneading with a light dusting of flour on the surface instead of dumping in a lot at once.
Sourdough Pizza Bombs Storage and Reheating
These are best warm, but leftovers can still be very good if you cool and reheat them the right way.
Let the pizza bombs cool before storing so trapped steam does not soften the crust. Keep them covered and chilled, especially because the filling includes cheese and often pepperoni. Proper refrigeration matters for dairy-based fillings and other perishables, and safe refrigeration and storage practices for perishable foods help protect both texture and freshness.
For reheating, the oven is the best first choice because it brings the crust back to life instead of softening it. Warm them at 350F until heated through and crisp on the outside. An air fryer works well too and usually revives the edges even faster.
If your filling includes meat, reheat until the center is hot all the way through. Microwave reheating works in a pinch, but it tends to soften the dough and can leave the center hot while the crust turns limp, so it is not the best route if crispness matters.
Sourdough Pizza Bombs Variations
The base version is classic, but there is plenty of room to play as long as you keep the fillings on the drier side.
Pure Sourdough Pizza Bombs
Yes, you can make these without commercial yeast. Omit the active dry yeast and let the dough bulk ferment for 4 to 8 hours, then give it about 2 hours to proof before shaping, depending on how lively your starter is.
Watch the dough more than the clock. It should look puffed, slightly aerated, and easier to stretch, not dense and stubborn. This version gives you a more pronounced sourdough flavor, but it takes more patience and the rise can vary with room temperature and starter strength.
Garlic Butter Glazed Pizza Pockets
For a richer finish, brush each flattened dough round with a thin layer of garlic-infused olive oil before adding the filling. That light coating can help create a little barrier between the dough and the sauce, which is useful when you want to reduce sogginess.
You can also brush the tops with melted butter mixed with garlic and fresh parsley before baking, then finish with oregano if you like. The result leans a little more toward pizza pocket territory, in the best way.
Sourdough Pizza Rolls vs Pizza Bombs
Pizza bombs are fully enclosed pockets, so the filling stays trapped inside the dough. Pizza rolls are shaped from a filled log, then sliced into spirals, often with floss for neat cuts before baking.
If you want the rolled version instead, crispy pizza rolls are a handy point of comparison. Bombs are better for gooey centers. Rolls are better when you want more exposed swirls and crisp edges.
Creative Low-Moisture Fillings
Dry fillings are the easiest way to avoid burst seams and soggy interiors. Good options include:
- Crispy bacon bits for smoky crunch.
- Mini pepperoni for easy portioning and less grease pooling.
- Sun-dried tomatoes for concentrated flavor without extra liquid.
- Basil pesto in a light smear instead of a spoonful of loose sauce.
- Chopped roasted vegetables that have been cooked down well first.
If you want another bold filling direction, buffalo chicken pockets offer a spicier stuffed idea with the same general low-moisture mindset.
Conclusion
These pizza bombs are a crowd-pleasing way to turn sourdough starter into something warm, cheesy, and easy to share. The dough bakes up soft inside, golden outside, and the buttery oregano finish makes them smell almost unfairly good.
If you remember one thing, make it this: pinch the seams tightly and add that tiny vent on top. That little bit of care is what keeps the cheese where you want it.
Frequently Asked Questions
Can I make these pizza bombs without commercial yeast?
Yes. Omit the yeast and rely on an active sourdough starter for the rise. Plan on a longer fermentation, with bulk fermentation for 4 to 8 hours and about 2 hours of proofing after that. The exact timing depends on your starter strength and room temperature, so look for dough that is puffed and airy rather than flat.
How do I prevent my pizza bombs from leaking cheese?
Keep the filling in the center and avoid overstuffing the dough round. Pinch the seam tightly, then place each bomb seam-side down in the pan. A tiny toothpick vent on top helps release steam so the seam is less likely to burst.
Can you freeze sourdough pizza bombs before baking?
This recipe is best shaped and baked fresh unless you are already comfortable working with frozen dough. If you do freeze them, keep the bombs well wrapped and bake straight from cold, watching for full browning and a hot center rather than relying on a fixed extra time. Because freezing details can vary with pan, dough thickness, and filling, visual cues matter more than a hard number here.
What is the best way to reheat leftovers to keep them crispy?
Use a 350F oven or air fryer until the pizza bombs are heated through and the crust perks back up. The oven gives the most even result, while the air fryer is great for reviving crisp edges quickly. Microwaving is fine for speed, but it usually softens the dough.
Sourdough Pizza Bombs Recipe

Equipment
- Stand mixer with dough hook
- Muffin tins or stoneware muffin pan
- 9×13 Baking Dish
Ingredients
- 1 cup sourdough starter
- 1 1/2 cup warm water
- 1 Tablespoon active dry yeast
- 1 Tablespoon salt
- 2 Tablespoons sugar
- 2 Tablespoons olive oil
- 4-5 cups unbleached flour
- 2-3 Tablespoons butter melted
- shredded mozzarella cheese
- Your favorite pizza toppings such as pepperoni and banana peppers
- Dried oregano
Instructions
- Combine the sourdough starter, warm water, active dry yeast, salt, sugar, and olive oil in a mixing bowl. The mixture should look loose and evenly blended before any flour goes in.
- Mix with a dough hook and add the flour gradually as the dough starts to come together. It will move from shaggy and wet to a soft mass that still looks a little sticky.
- Keep adding flour until you have a soft, sticky dough rather than a stiff one. The dough should cling slightly to the bowl but still gather around the hook.
- Flour your work surface well, then turn the dough out and dust the top. This extra flour keeps the dough from welding itself to the counter.
- Lightly flour your hands before kneading the dough. That small step makes the dough much easier to handle without tearing.
- Knead until the dough feels soft, smooth, and no longer sticks to your hands. When it is ready, it should feel tacky but not messy and spring back a bit when pressed.
- Set the dough in a well-oiled dish, cover it, and let it rise. Look for visible expansion and a puffier, airier feel before moving on.
- Preheat the oven to 375F. Getting the oven ready now helps the shaped bombs bake evenly without waiting around.
- Press the risen dough down, then knead it briefly again to form a smooth ball. This redistributes the air and makes the dough easier to portion evenly.
- Divide the dough into 24 pieces. Even portions help the pizza bombs bake at the same pace and finish with a more uniform shape.
- Take one piece, knead it two or three times, roll it into a ball, and flatten it. You want a compact round that can hold filling without becoming too thin at the center.
- Add the filling with cheese first, then your toppings. Keeping the cheese underneath helps cushion the dough from wetter toppings.
- Roll the filled dough up, fold it in half, and place it in your baking pan. Muffin tins make more distinct bombs, while a 9×13 dish gives you a pull-apart bake.
- Repeat with the remaining dough pieces until all 24 are shaped and in the pan. Try to keep the filled pieces similar in size so none overbake while others lag behind.
- Bake for 15 minutes. The dough should start setting, puffing, and taking on light color around the edges.
- Brush the tops with melted butter and sprinkle with dried oregano. This is where the rich toasted aroma starts showing up in a big way.
- Return the pan to the oven for another 5 minutes. The tops should finish golden brown and the crust should look dry and baked rather than pale.
- If you used a muffin pan, remove the pizza bombs and cool them on a rack. This keeps the bottoms from trapping steam and turning soft.
- Serve warm with warm pizza sauce for dipping. The centers should be melty and the crust should pull apart easily while still holding the filling.