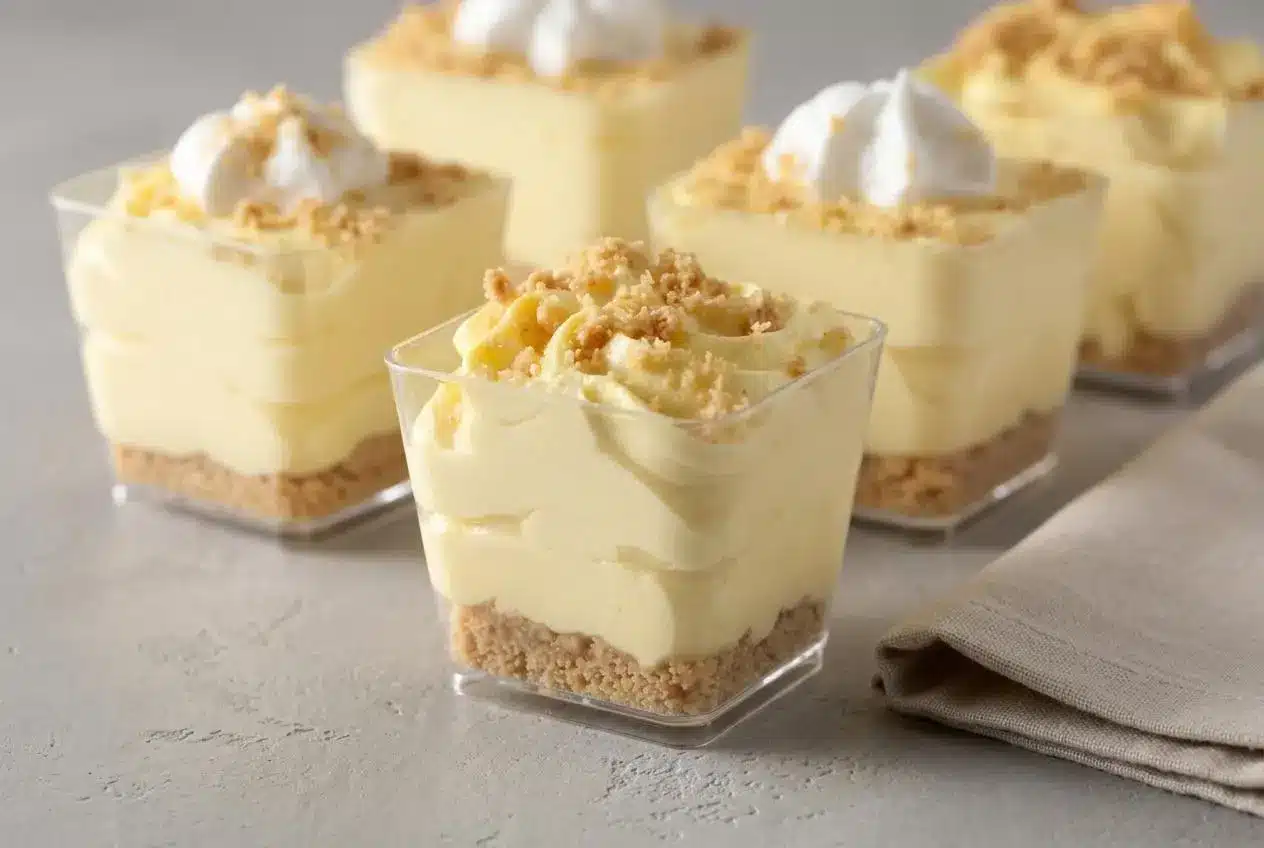
No-Bake Lemon Cheesecake Mousse Cups are a quick chilled dessert with a creamy lemon cheesecake filling and buttery graham crumb layers. They work because whipped cream adds lift, cream cheese adds body, and lemon filling brings bright flavor and thickness.
No-Bake Lemon Cheesecake Mousse Cups land somewhere between cheesecake and mousse, which is exactly why they disappear fast on a dessert table. The texture is light, silky, and tangy, with just enough crumb for contrast.
You do not need the oven, and you do not need gelatin for the main version here. The key is getting the cream cheese fully smooth before you fold in the whipped cream.
Let the cream cheese soften completely before you start, and let the melted butter cool a bit so it does not soften the mousse layer on contact.
Understanding the Role of Each Ingredient
This dessert sets beautifully in the fridge because each ingredient has a specific job. Fat gives the mousse structure, whipped cream traps air, and the lemon filling adds both brightness and body.
The Structure: Cream Cheese
Full-fat block cream cheese is the backbone here. It chills into a firm, cheesecake-like base that holds the mousse shape in individual cups without tasting dense or heavy.
Spreadable whipped cream cheese can work in a pinch, but it usually contains more air and a looser texture, so the finished cups tend to set softer. If you want that classic rich bite that feels closer to cheesecake, block cream cheese is the better pick.
That cream cheese and citrus pairing is the same reason baked desserts like lemon cream cheese bars feel so balanced, but here the texture stays cooler, fluffier, and more mousse-like.
The Aeration: Heavy Whipping Cream
Heavy whipping cream is what gives this dessert its airy lift. When you whip it to stiff peaks, it creates tiny trapped air bubbles that turn the filling from rich and thick into something light enough to pipe.
Soft peaks droop over when you lift the beaters. Stiff peaks stand upright with only a slight bend at the tip. Go too far and the cream starts to look grainy or clumpy, which makes folding harder and the mousse less smooth.
A quick check helps here: rub a little whipped cream between two fingers. If the sugar feels dissolved and the cream looks glossy rather than gritty, you are in good shape.
The Flavor: Lemon Curd vs. Pie Filling
This recipe uses lemon pie filling, which brings sweetness, citrus flavor, and built-in thickness. That makes it especially useful in a no-bake mousse because it blends smoothly into the cream cheese and helps the filling hold its shape.
If you swap in lemon curd, expect a richer, more intensely tart flavor and a denser finish because curd is usually more concentrated. If you use a very sweet canned filling, you may want the full amount of powdered sugar to taste just right. If you use a sharper homemade curd, the mousse can taste brighter and slightly less sweet.
Fresh lemon juice brings a cleaner citrus edge than bottled juice, but it is best treated as an optional flavor boost in variations rather than part of the official base recipe. A little acidity helps wake up the dairy flavors, while the thicker lemon component keeps the mousse from feeling flat.
Ingredients
Each ingredient earns its place here, building creamy structure, airy lift, bright lemon flavor, buttery crunch, and that pale sunny color that makes the cups look as fresh as they taste.
Mousse
- 1 cup heavy whipping cream or non-dairy whip topping
- 1 cup lemon pie filling
- 12 ounces unwhipped cream cheese
- 1 teaspoon vanilla extract
- a few drops yellow food coloring, optional
- 1 cup powdered sugar
Graham Cracker Crumbs
- 1/2 cup graham cracker crumbs
- 2 Tablespoons sugar
- 2 Tablespoons melted butter or margarine
The whipped cream keeps the mousse light, while the cream cheese gives it body and that cheesecake flavor. Lemon pie filling adds tang and thickness, powdered sugar smooths and sweetens, and the graham mixture gives each cup a buttery, lightly crisp contrast.
I always press a fingertip into the cream cheese before mixing. If it gives easily with no cool, firm center, it is soft enough to blend into a truly smooth mousse.
How to Make No-Bake Lemon Cheesecake Mousse Cups
The method is fast, but the texture depends on doing each stage in the right order. Whip first, beat the base until silky, fold gently, then layer with cooled crumbs so the mousse stays airy.
Preparation
- Whip the heavy whipping cream in an electric mixer until stiff peaks form, then transfer it to another bowl and set it aside.
The cream should stand up when the beaters lift, looking smooth and fluffy rather than loose or grainy. - Beat the lemon pie filling and cream cheese in the mixer until fully smooth before adding the vanilla extract, yellow food coloring, if using, and powdered sugar.
When it is ready, the mixture should look glossy and thick, with no small cream cheese lumps hiding in the bowl. - Fold the whipped cream into the cream cheese mixture in batches with a rubber spatula until no streaks remain.
Use broad, gentle turns so the mousse stays light and cloud-like instead of becoming flat and heavy. - Stir together the graham cracker crumbs, sugar, and melted butter or margarine until the crumbs are evenly coated.
The mixture should feel like damp sand, and the butter should be warm at most, not hot, before it goes near the cold mousse.
Assembly
- Spoon a small layer of crumbs into the bottom of each cup, pipe in the mousse, and finish with more crumbs on top before chilling to serve.
The layers should look neat and hold their shape, with the mousse sitting high and creamy rather than slumping.
If you want a little extra aroma, finely grated lemon zest can be stirred into the graham crumb mixture before assembly. It stays optional, but it gives the crust layer a fresher citrus perfume without changing the structure of the recipe.
A piping bag makes the cups look tidy, especially in small glasses or mini jars, but a spoon works perfectly well if you are going for casual rather than fancy.
Tips for a Smooth and Lump-Free Mousse
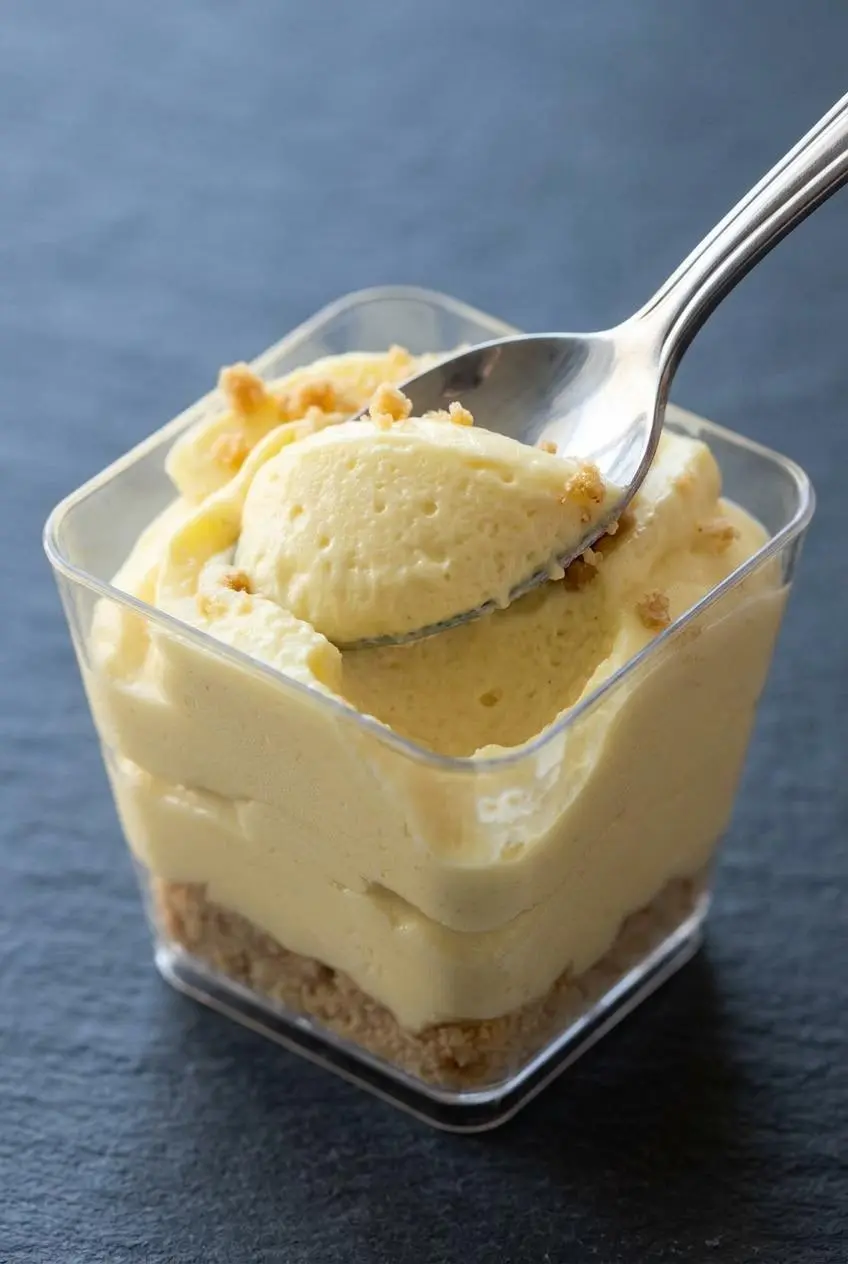
If your mousse turns out lumpy, the cream cheese is usually the reason. The good news is that this is one of the easiest texture problems to prevent and one of the easiest to rescue.
- Cut the cream cheese into small cubes and let it sit at room temperature until fully soft. Smaller pieces warm faster and blend more evenly than a whole block.
- Beat the cream cheese with the lemon filling until the mixture falls in thick satin ribbons from the paddle or beaters. That ribbon stage tells you the base is smooth enough for folding.
- If the whipped cream looks loose, keep whipping just until the peaks hold. If it starts looking clumpy, stop right away before it edges toward butter.
- If the mousse base looks lumpy after mixing, set the bowl over warm water for a brief moment, then beat again. The gentle warmth helps soften stubborn bits without melting the whole mixture.
- If the finished mousse seems flat, the whipped cream was likely stirred in too aggressively. Fold in batches and scrape from the bottom up to keep as much air as possible.
- If the crumb layer turns greasy, the butter was probably too hot. Let it cool slightly before mixing so the crumbs stay loose and the bottom mousse layer does not melt.
Many home cooks wonder if they can rescue a lumpy bowl after forgetting to soften the cream cheese. Usually, yes. Gentle warmth plus a little extra mixing can smooth the base enough to save the texture before the whipped cream goes in.
Storage, Chilling, and Make-Ahead Guide
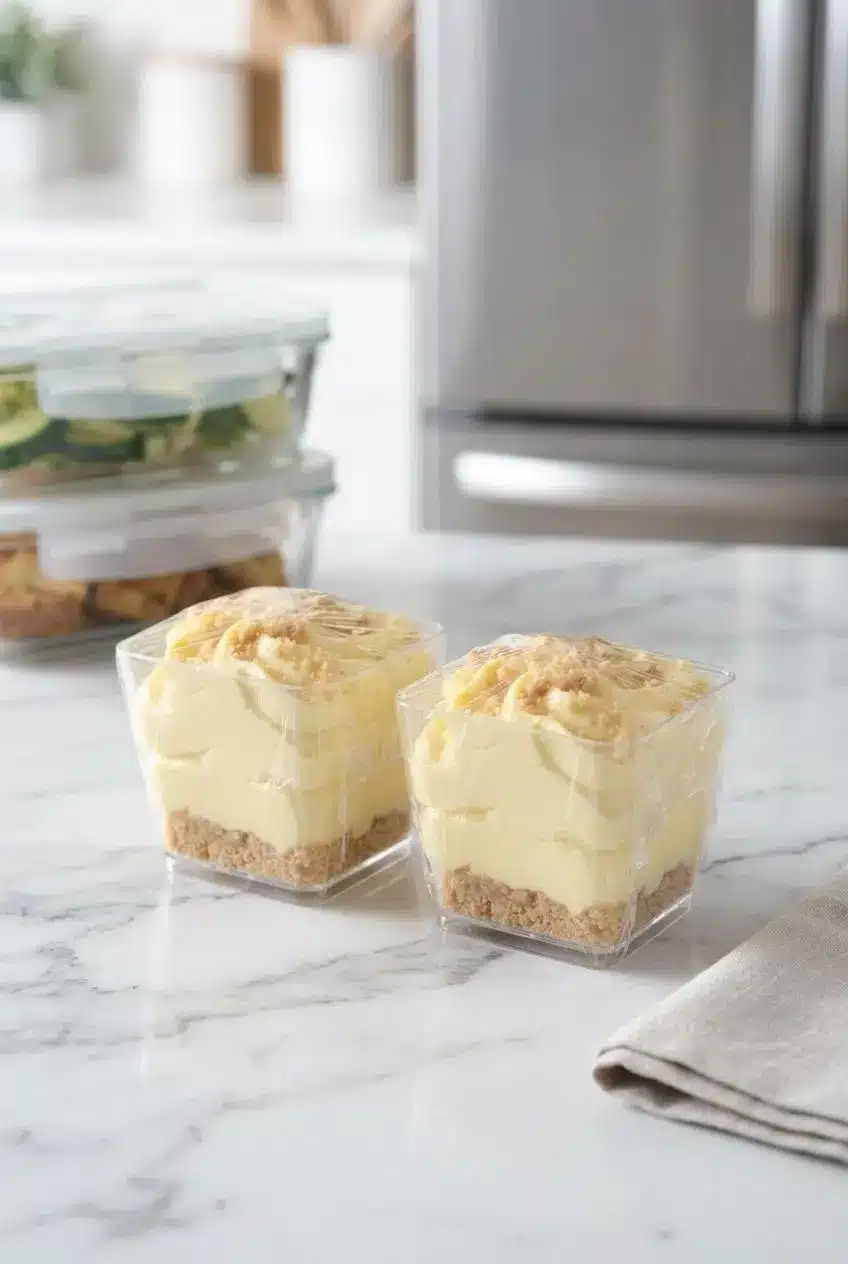
Because this is a dairy-based dessert, keep the cups well covered and chilled until serving. For U.S. kitchens, perishable dairy ingredients such as cream and soft cheese should stay in a refrigerator kept at 40 °F or below.
Cover the cups so the surface does not dry out or pick up fridge odors. If you are making them ahead for a party, wait to add delicate garnishes like fresh berries, mint, or thin lemon slices until just before serving.
The mousse needs time in the refrigerator to firm up and the crumb layer softens slightly as it rests, which makes the texture more cheesecake-like. A couple of hours usually gives the cups a much better set than serving them right away.
For a buffet or party table, do not leave these cups out too long. Perishable foods such as cheesecake should be discarded after more than two hours at room temperature above 40 °F, as outlined for cheesecake left at room temperature for more than two hours.
Creative Customization and Flavor Swaps
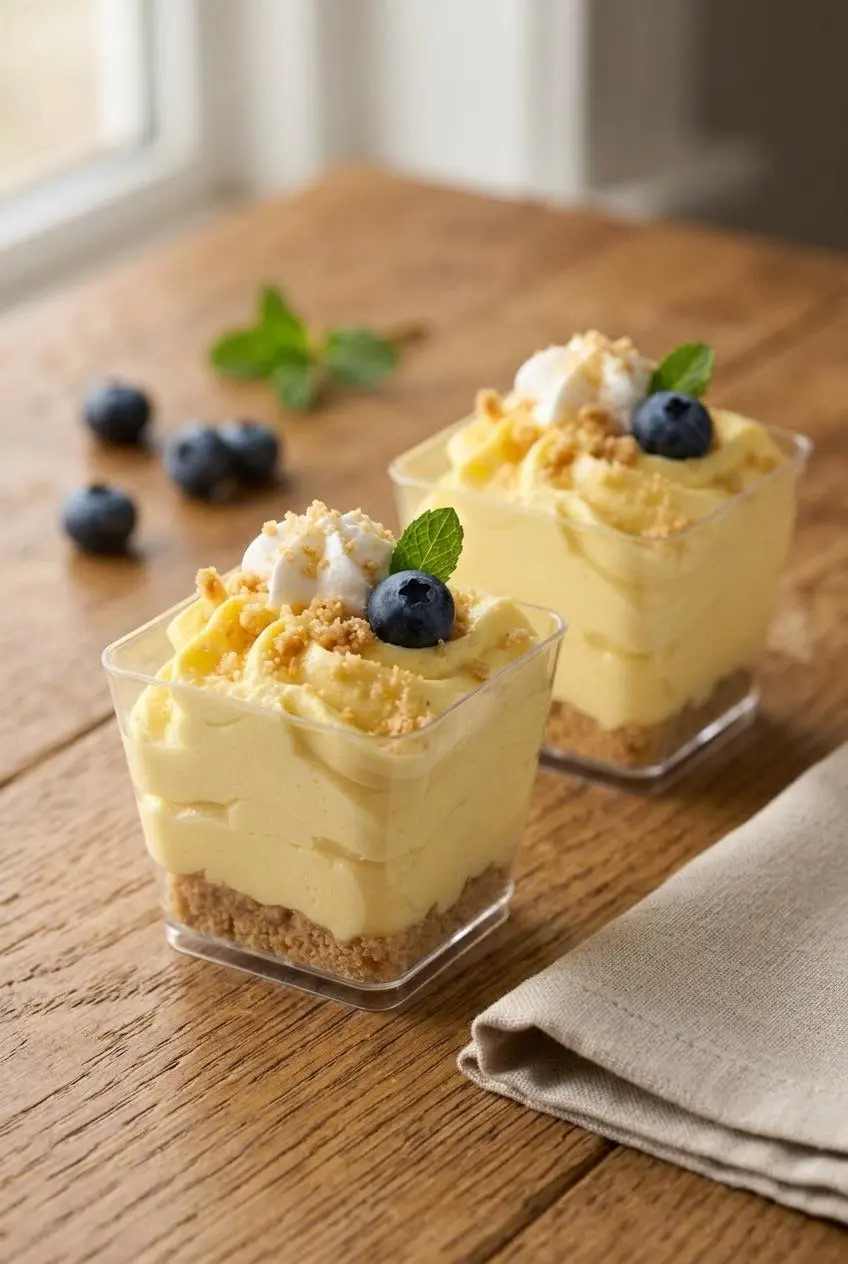
This dessert is easy to adapt once you know what changes texture and what only changes flavor. Keep the official recipe as written for the most dependable set, then use these ideas when you want a different finish.
Gluten-Free Crust Alternatives
For a gluten-free version, swap the graham cracker crumbs with gluten-free cookie crumbs or crushed almond-flour shortbread. You want the same damp-sand texture once the butter is mixed in, so choose crumbs that are dry enough to absorb the fat and hold together.
High-Protein Blender Swaps
To lighten the filling, blend cottage cheese or Greek yogurt until completely smooth and replace part of the cream cheese. Cottage cheese gives more protein and a mild tang, while Greek yogurt makes the mousse brighter and softer. Keep this as an optional variation, since both swaps reduce some of the rich cheesecake firmness.
Gelatin vs. No-Gelatin: Whipping Options
The no-gelatin method is easier and faster, and it keeps the texture soft, creamy, and airy. A gelatin-stabilized mousse usually slices or holds sharper edges better, but it takes extra steps and changes the mouthfeel to something a bit firmer and less cloud-like.
For these cups, properly whipped cream plus full-fat cream cheese is enough structure for a chilled dessert. If you use whipped topping instead of heavy cream, the set is usually stable but slightly fluffier and sweeter.
Using Alternative Fruit Fillings
Raspberry or strawberry pie filling can replace the lemon filling for a fruitier version with less tang. Because berry fillings are often sweet, taste the cream cheese base before serving and adjust only in future batches if you prefer a less sugary finish.
If berry flavors are what you want, strawberry cheesecake mousse is a natural next variation to try.
Choosing the Best Glassware
Mini mason jars and shot glasses work well for parties because the portions stay tidy and easy to grab. Wine glasses or small dessert cups feel a little more classic for a sit-down meal, and they show off the layers nicely.
Very small cups make the mousse taste richer because each bite gets more crumb contrast. Slightly larger glasses let the airy texture shine more.
Mousse vs. Pudding: What Makes It Airy?
Mousse gets its lightness from whipped cream folded into the base, which adds air and a delicate structure. Pudding is usually thicker, smoother, and more uniform because it relies on starch or cooked thickening rather than aeration.
That is why this dessert feels cool and almost cloud-soft on the spoon, while pudding feels heavier and more settled. Same comfort zone, different texture personality.
Whipped vs. Block Cream Cheese
Block cream cheese gives the mousse better body and a firmer chilled finish. Whipped cream cheese blends quickly, but because it already contains extra air, the mousse can end up softer and slightly less cheesecake-like.
If you want a cleaner piped shape, choose block cream cheese. If you care more about speed than structure, whipped cream cheese can still work, but the cups may not look quite as defined.
Instant Pudding Shortcut Method
If you need a very fast shortcut, lemon instant pudding can stand in for some of the lemon flavoring in a looser, more dessert-cup style version. The result tastes good, but it shifts the texture away from classic cheesecake mousse and closer to a creamy pudding parfait.
That version is practical when time is tight, but the scratch-style cream cheese and whipped cream base gives a fuller lemon cheesecake flavor.
Fresh Juice vs. Bottled Lemon Juice
Fresh lemon juice tastes brighter and cleaner, while bottled juice can taste a little flatter or more one-note. If you add a small squeeze to an optional variation, fresh juice is usually the better match for the rich dairy base.
The main recipe already gets its lemon flavor from pie filling, so added juice is not necessary for structure. Think of it as a flavor adjustment, not a required fix.
Conclusion
These mousse cups are quick to make, easy to portion, and rich without feeling too heavy. The contrast between silky filling and buttery crumbs does a lot of the work for you.
Once you get comfortable folding whipped cream gently into a smooth base, this dessert becomes wonderfully low-stress. Chill them well, serve them cold, and enjoy the lemony payoff.
Frequently Asked Questions
Can I freeze these lemon mousse cups?
It is best to treat them as a chilled dessert unless you are comfortable experimenting with texture. Freezing can change the mousse and crumb layers, so the cups may lose some of their velvety feel after thawing. If you do try it, freeze without fresh garnishes and thaw slowly in the refrigerator before serving.
Do I need gelatin to make this mousse set?
No. Full-fat cream cheese and properly whipped heavy cream give the cups enough structure to set when chilled. The key is whipping the cream to stiff peaks and folding it in gently so the air stays in the mousse. If the mousse seems soft, it usually needs more chilling time or a smoother cream cheese base, not gelatin.
How do I make my mousse extra yellow without food coloring?
Use a rich, deeply colored lemon curd if you are making a variation with curd instead of pie filling. A tiny pinch of ground turmeric can also warm the color naturally, but use a very light hand so the flavor stays focused on lemon. Even without extra color, the mousse should still look pale, fresh, and inviting.
What can I use instead of heavy whipping cream?
You can use the non-dairy whip topping listed in the official ingredients. Whipped coconut cream can also work as an optional swap, though it adds its own flavor and can set a little differently. Whatever you choose, the substitute needs enough body to fold in and hold air so the mousse stays light.
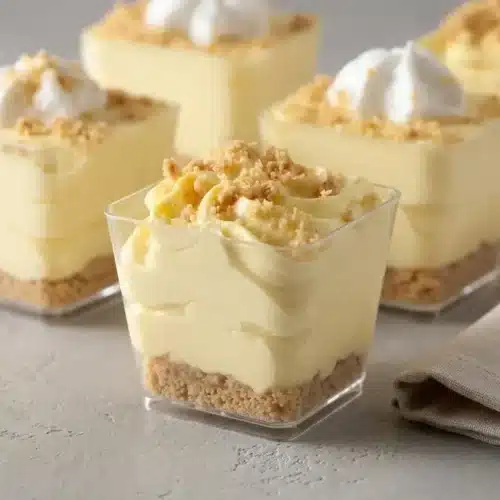
No-Bake Lemon Cheesecake Mousse Cups

Equipment
- Electric Mixer
- Piping bag
- Piping tip (1M)
- Rubber spatula
Ingredients
Mousse
- 1 cup heavy whipping cream or non-dairy whip topping
- 1 cup lemon pie filling
- 12 ounces unwhipped cream cheese
- 1 teaspoon vanilla extract
- a few drops yellow food coloring optional
- 1 cup powdered sugar
Graham Cracker Crumbs
- 1/2 cup graham cracker crumbs
- 2 Tablespoons sugar
- 2 Tablespoons melted butter or margarine
Instructions
Preparation
- Whip the heavy whipping cream in an electric mixer until stiff peaks form, then transfer it to another bowl and set it aside. The cream should stand up when the beaters lift, looking smooth and fluffy rather than loose or grainy.
- Beat the lemon pie filling and cream cheese in the mixer until fully smooth before adding the vanilla extract, yellow food coloring, if using, and powdered sugar. When it is ready, the mixture should look glossy and thick, with no small cream cheese lumps hiding in the bowl.
- Fold the whipped cream into the cream cheese mixture in batches with a rubber spatula until no streaks remain. Use broad, gentle turns so the mousse stays light and cloud-like instead of becoming flat and heavy.
- Stir together the graham cracker crumbs, sugar, and melted butter or margarine until the crumbs are evenly coated. The mixture should feel like damp sand, and the butter should be warm at most, not hot, before it goes near the cold mousse.
Assembly
- Spoon a small layer of crumbs into the bottom of each cup, pipe in the mousse, and finish with more crumbs on top before chilling to serve. The layers should look neat and hold their shape, with the mousse sitting high and creamy rather than slumping.