Skip to content
In my kitchen, nothing beats the moment a loaf hits the cooling rack and the crust starts to crackle. The whole room smells like warm yeast and toasted wheat, and you can almost hear the crumb settling as it cools.
This Artisan Bread is the kind of no-knead dough that feels too easy to be real, yet bakes up with a blistered crust and an airy, chewy center. If you have ever wanted bakery vibes at home without the workout, this is the loaf to learn, and I will walk you through the why as much as the how.
Why You’ll Love This Recipe (The Secret Twist)
Zero-knead confidence: This no-knead dough relies on time and hydration level, not muscle, so it is approachable even if you are new to yeast.
The secret crust booster: By adding 1/2 teaspoon of diastatic malt powder to the dry mix, I get more reliable rise and a crust that browns like a pro.
Better flavor with real science: The enzymes help convert starches into sugars, which feeds yeast and intensifies the Maillard reaction for that deep chestnut color.
Big payoff, simple tools: A preheated Dutch Oven delivers dramatic oven spring, plus that crackly “singing bread” finish I chase every bake.
Ingredients and Substitutions

This Artisan Bread keeps the ingredient list lean, which means each choice matters. Flour quality, yeast type, salt, and water temperature are what steer the rise, crust, and crumb structure.
Ingredients
- 3 cups (450g) flour, bread or plain/all purpose
- 2 tsp instant or rapid rise yeast
- 2 tsp cooking / kosher salt, NOT table salt
- 1 1/2 cups (375 ml) very warm tap water, NOT boiling or super hot (ie up to 55°C/130°F)
Dough shaping
- 1 1/2 tbsp flour, for dusting
Ingredient Notes & Substitutions
Flour (Bread Flour vs all-purpose): Bread Flour has more protein, which builds stronger gluten and a chewier crumb structure with nicer holes. All-purpose works, but the loaf tends to be slightly softer and less “bready” in chew.
Yeast (Instant vs Active Dry): Instant yeast is designed to be mixed right into the dry ingredients and wakes up fast. Active dry yeast can still work, but it typically needs a little more patience and can be less predictable if it is older.
Salt: Cooking or kosher salt gives clean salinity and plays nicely with fermentation. Table salt can taste harsher, and because the grains are finer it is easy to over-salt by volume.
Water temperature: Very warm tap water helps the dough start fermenting efficiently, but anything over 130°F can damage yeast. I aim for warm, not hot, so the bowl feels pleasantly warm to the touch.
Diastatic malt powder (the twist): This is my “professional secret” addition, stirred into the dry ingredients with the flour, yeast, and salt. A tiny amount nudges browning and aroma without making the bread taste sweet.
How to Make Artisan Bread
Mix and Build the No-Knead Dough
- In a large bowl, mix the flour, yeast, and salt together, including the malt powder with the dry ingredients. Pour in the very warm tap water, then use the handle of a wooden spoon to stir until no dry flour remains.
- The dough should look shaggy, wet, and sloppy, not kneadable, but also not runny like cake batter. If it looks too dry or too soupy, adjust with a touch more water or flour to get that “sticky but scoopable” consistency.
Let It Rise (and Optionally Cold Ferment)
- Cover the bowl with cling wrap or a plate, then leave it on the counter for 2 to 3 hours, until doubled. You want it wobbly like jelly and bubbly on top, which is a great sign fermentation is active.
- If after 1 hour it looks sleepy, move it somewhere warmer so the yeast can get going.
- At this stage, bake right away or refrigerate the dough for up to 3 days for deeper flavor development.
- If the dough was refrigerated, leave the bowl on the counter for 45 to 60 minutes while the oven preheats, because cold dough will not rise as well.
Preheat for Maximum Oven Spring
Put the Dutch Oven in the oven with the lid on, then preheat to 230°C/450°F (220° fan) for 30 minutes prior to baking. I often go 30 to 45 minutes total preheat, because the hotter the pot, the better the oven spring.
Shape, Transfer, and Bake Until Crackling
- Sprinkle the work surface with 1 tbsp flour, scrape the dough out, then sprinkle the top with 1/2 tbsp flour.
- Using a dough scraper or similar tool, fold the sides inward about 6 times to form a rough round, focusing on deflating big bubbles and building a little surface tension.
- Slide a large piece of parchment/baking paper next to the dough, then flip the dough onto the paper so the smooth side is up. Nudge it toward the center and reshape into a round(ish) loaf, and remember lopsided equals more ridges and more crunchy bits.
- Carefully remove the piping hot Dutch Oven, then use the parchment paper to lower the dough into the pot and put the lid on.
- Bake 30 minutes covered, then bake 12 minutes uncovered, until the crust is deep golden and crispy.
- Cool on a rack for 10 minutes before slicing, so the crumb sets and stays airy instead of turning gummy.
Mastering the Bake: Temperature & Tools

Internal Temperature Benchmarks
The most reliable way I know to confirm doneness is a thermometer, because crust color can fool you. Aim for an internal temperature of 205 to 210°F in the center of the loaf.
Dutch Oven Comparison (and the No-Pot Method)
An enamel-coated Dutch Oven is forgiving and easy to clean, especially if you bake often and do not want to fuss with seasoning. Raw cast iron holds heat aggressively, which can boost oven spring, but it needs basic care to avoid rust.
What matters most is the sealed environment that traps steam inside the pot during the covered bake. That steam phase keeps the crust flexible early on, letting the loaf expand before it sets.
Without a pot, a baking stone or heavy sheet pan can work, plus a separate pan of water to generate steam. The goal is the same, strong bottom heat and moisture early, then dry heat to brown and crisp.
Pro Tips & Troubleshooting
Pro Tips
- Use a kitchen scale when you can, because cup measurements can vary by up to 20% and that changes hydration level fast.
- Listen for “singing bread” as it cools, a gentle crackling sound that signals a well-developed crust.
- Score with a Bread Lame or sharp knife to control expansion and prevent random blowouts.
- Preheat the Dutch Oven for at least 30 to 45 minutes for better oven spring.
- Fermentation experiments are easier when leftovers become sourdough discard pancakes for weekend breakfasts.
Common Mistakes to Avoid
- Flat loaves: Over-proofing can weaken structure, and water over 130°F can kill yeast before it starts.
- Gummy crumb: Cutting while the bread is still hot traps steam, so the interior stays tacky instead of setting.
- Dense texture: Old yeast or an overly cool rise spot can slow fermentation and reduce lift.
- Too much handling: Overworking the dough during shaping knocks out the bubbles you waited hours to build.
Serving & Storage

Serving Ideas
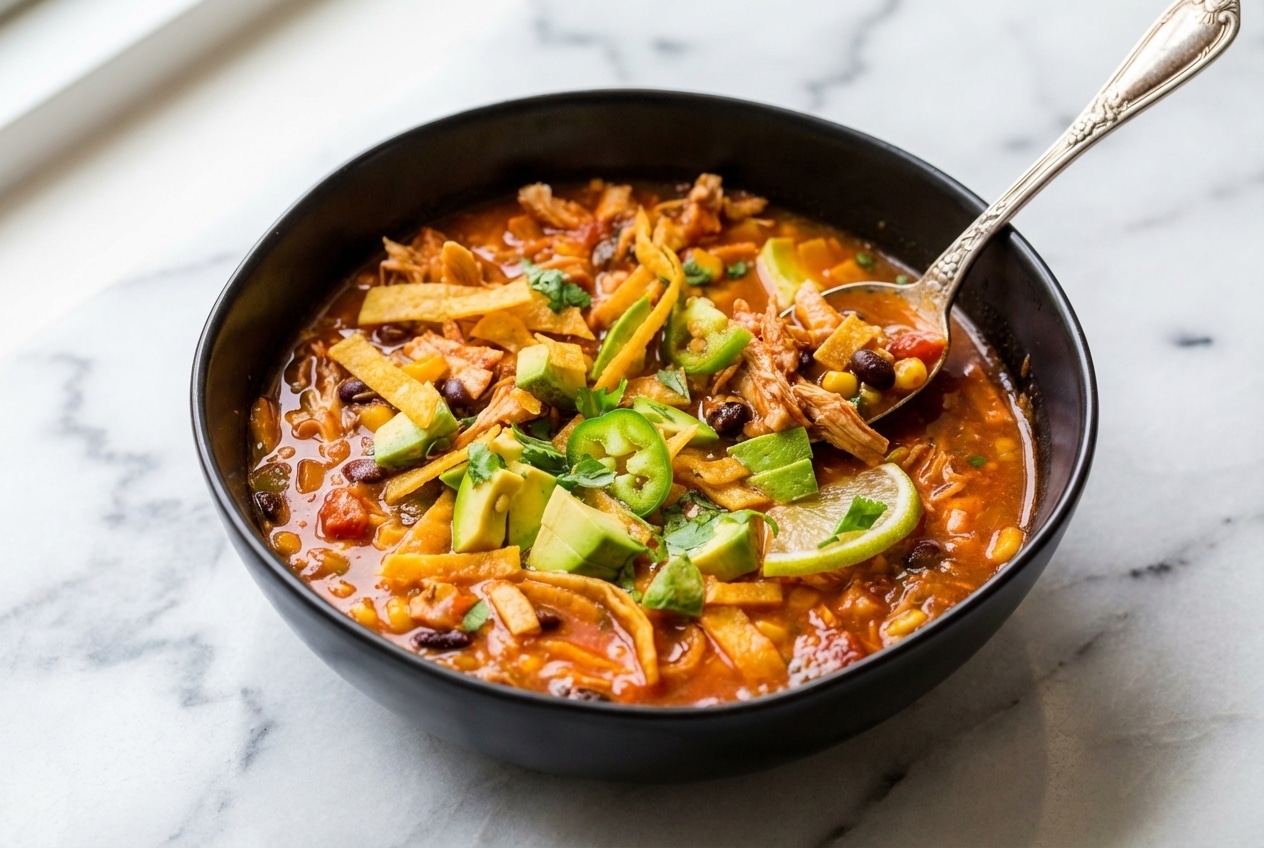
My favorite first slice is warm with salted honey-butter, it melts into the nooks and makes the crust taste even toastier. For dinner, the loaf is ideal alongside soups and stews, especially a warm bowl of taco soup when you want something hearty to dip.
For an appetizer vibe, use thick slices for heirloom tomato bruschetta with balsamic glaze. When you want something smaller and shareable, garlic bread rolls bring the same comfort in pull-apart form.
Storage Tips (Keeping the Crunch)
To keep the crust crisp, avoid plastic bags, they trap moisture and soften everything overnight. I store the loaf cut-side down on a board for the first day, or use a paper bag or bread box for better airflow.
For longer storage, slice before freezing so you can take only what you need. Re-crisp straight from thawed slices in a hot oven for a few minutes until the edges feel dry and the crust sounds snappy.

Easy Artisan Bread
Equipment
- large bowl
- Wooden Spoon
- Dutch oven with lid
- Parchment/baking paper
- Dough scraper (optional)
- Cooling Rack
Ingredients
- 3 cups flour, bread or plain/all purpose 450g
- 2 tsp instant or rapid rise yeast
- 2 tsp cooking / kosher salt NOT table salt
- 1 1/2 cups very warm tap water 375 ml; not boiling or super hot (up to 55°C/130°F)
- 1/2 tsp diastatic malt powder stirred into the dry ingredients
- 1 1/2 tbsp flour for dusting (dough shaping)
Instructions
Mix and Build the No-Knead Dough
- In a large bowl, mix the flour, yeast, and salt together, including the malt powder with the dry ingredients. Pour in the very warm tap water, then stir with the handle of a wooden spoon until no dry flour remains.
- The dough should look shaggy, wet, and sloppy—sticky but scoopable, not runny like cake batter. If needed, adjust with a touch more water or flour to reach the right consistency.
Let It Rise (and Optionally Cold Ferment)
- Cover the bowl with cling wrap or a plate and leave on the counter for 2 to 3 hours, until doubled and bubbly on top.
- If after 1 hour it looks sleepy, move it somewhere warmer so the yeast can get going.
- At this stage, bake right away or refrigerate the dough for up to 3 days for deeper flavor development.
- If the dough was refrigerated, leave it on the counter for 45 to 60 minutes while the oven preheats, because cold dough will not rise as well.
Preheat for Maximum Oven Spring
- Put the Dutch oven in the oven with the lid on, then preheat to 230°C/450°F (220° fan) for 30 minutes prior to baking.
Shape, Transfer, and Bake Until Crackling
- Sprinkle the work surface with 1 tbsp flour, scrape the dough out, then sprinkle the top with 1/2 tbsp flour.
- Using a dough scraper or similar tool, fold the sides inward about 6 times to form a rough round, deflating big bubbles and building a little surface tension.
- Slide a large piece of parchment/baking paper next to the dough, then flip the dough onto the paper so the smooth side is up. Nudge and reshape into a round(ish) loaf.
- Carefully remove the piping hot Dutch oven, then use the parchment paper to lower the dough into the pot and put the lid on.
- Bake 30 minutes covered, then bake 12 minutes uncovered, until the crust is deep golden and crispy.
- Cool on a rack for 10 minutes before slicing.
Notes
Nutrition
Conclusion
That tiny hit of diastatic malt powder turns a simple no-knead dough into Artisan Bread with deeper color, better lift, and a more complex aroma. The “wobbly jelly” stage can feel strange the first time, but it is exactly what you want for an open, airy crumb structure.
If you bake it, snap a photo of your oven spring and scoring, it is the most satisfying proof. On days you want a softer lunch loaf, sourdough sandwich bread is a great contrast in texture.
FAQ
What is the best flour for artisan bread?
Bread Flour is best if you want a chewier bite and stronger crumb structure. All-purpose flour works, but the loaf will be slightly less elastic and less open.
How do I get a crispy crust on my bread at home?
Use a thoroughly preheated Dutch Oven for the covered bake, because the trapped steam keeps the crust flexible for oven spring. The diastatic malt powder also boosts browning through a stronger Maillard reaction.
Can I make this recipe gluten-free?
Not with the same results using this exact formula, because gluten is what holds the gas bubbles that create the airy interior. A true gluten-free artisan loaf needs a different blend and method to replace that structure.
Why is my bread gummy in the middle?
The usual causes are slicing too early or underbaking. Cool it for 10 minutes on a rack, and confirm doneness with an internal temperature of 205 to 210°F.
How long can I store the dough in the refrigerator?
You can refrigerate the dough for up to 3 days. Let it sit out for 45 to 60 minutes while the oven preheats before shaping and baking.
Can I make this without a Dutch oven?
Yes. Bake on a preheated stone or heavy tray and add a separate pan of water to create steam, then finish uncovered to brown and crisp the crust.