Skip to content
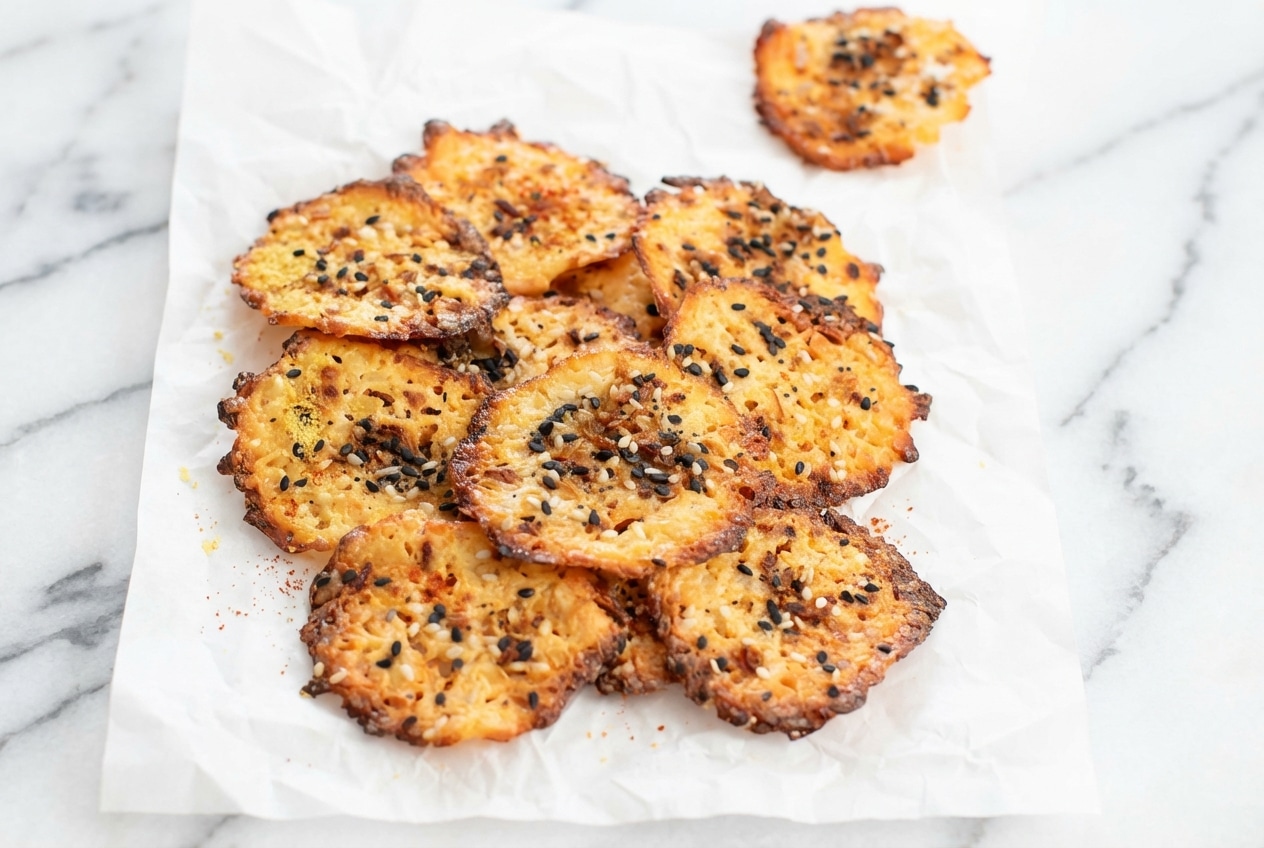
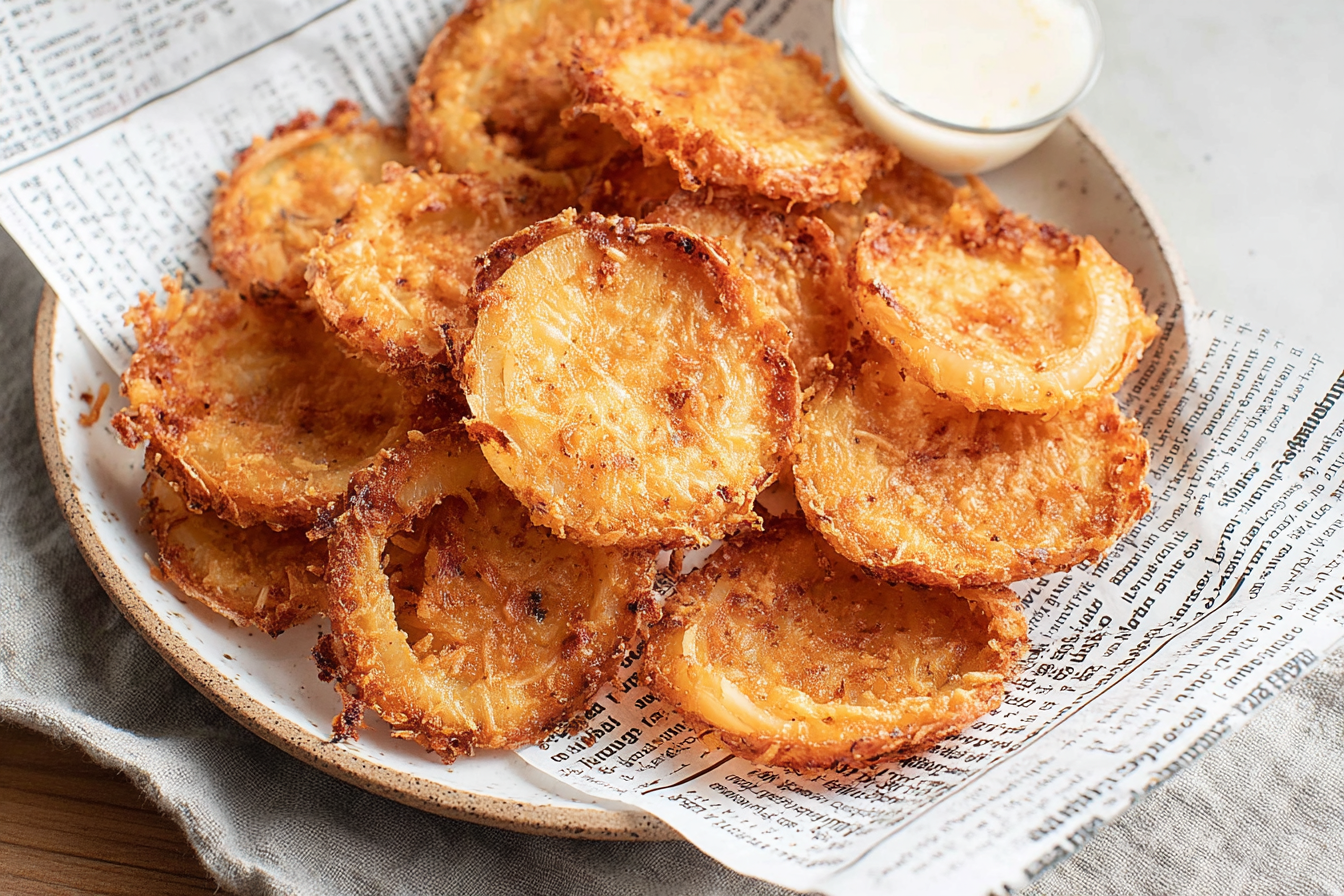
Viral high-protein snack trends come and go, but this one earned a permanent spot in my kitchen. The first time I made cottage cheese chips, I honestly expected a sad, chewy “almost chip” situation, and instead I got that shatteringly crisp snap you can hear across the room.
These are for anyone chasing a low carb, keto snack that still feels like a real treat. I’ll walk you through the little details that matter, from thickness to cooling, so your Cottage cheese turns into crisp, golden rounds instead of a puddle.
Why You’ll Love This Recipe
The Umami Boost: In my batches, a light dusting of nutritional yeast plus a pinch of smoked paprika gives a “barbecue chip” vibe, savory and nutty, without adding moisture that would soften the crunch.
Superior Texture: Nutritional yeast isn’t just flavor, it also helps manage surface moisture so the chips dehydrate into a snap instead of bending into a chew.
Keto and Gluten-Free Powerhouse: It starts as a single-ingredient base that’s naturally gluten-free and low carb, and it delivers that high protein satisfaction that makes mindless snacking easier to avoid.
Fridge Staple, New Tricks: Cottage cheese is endlessly versatile, and these chips are only one direction it can go. A collection of cottage cheese recipes helps you use up every tub with purpose.
Ingredients and Substitutions

This recipe is deliberately minimalist, because the texture depends on how the cottage cheese dehydrates in the oven. Once you nail the technique, you can play with seasonings without losing that crisp bite.
Ingredients
- 1 cup (256 g) whole milk small curds cottage cheese (4% milkfat)
Ingredient Notes & Substitutions
Fat Content Matters: 4% milkfat is the sweet spot for structure and flavor, it bakes up sturdier and more satisfying than low-fat tubs that tend to weep and turn fragile.
Small Curd Cottage Cheese: Small curd spreads more evenly when you flatten it, which means more consistent dehydration and fewer chips that are overdone on the edge but pale in the middle.
Stabilizers (the not-so-scary secret): In this specific bake, brands with stabilizers or thickeners often behave better because the curds hold together while moisture evaporates, instead of collapsing into a watery puddle.
Nutritional Yeast: This is my favorite “secret dusting” for a cheesy, umami pop, and it stays dry, which helps the surface crisp instead of steaming.
Smoked Paprika: Just a pinch turns the aroma warm and smoky, like opening a bag of barbecue chips, especially once the Maillard reaction starts browning the edges.
Everything Bagel Seasoning (optional): This is a fun swap for the yeast and paprika when you want something garlicky and toasty, and I usually reach for a salt-free blend since cottage cheese already brings plenty of salinity.
How to make cottage cheese chips
Prep the Pan and Heat
- Heat the oven to 350°F (177°C), then set a rack in the middle so the heat dries the chips evenly. Line a large cookie sheet with parchment paper, and don’t skimp here, sturdy parchment is the difference between clean lift-off and frustrating sticking.
Scoop, Space, and Flatten
- Use a 1 tbsp cookie scoop to portion the cottage cheese onto the prepared sheet, leaving about 2 inches between mounds. That space matters because airflow is what turns moisture into crispness.
- With the back of a metal spoon, press each mound into a neat round, aiming for 3/16 to 1/4 inch thick. You want a tidy, even disk, because thick centers stay chewy while thin edges can overbrown.
- If you’re seasoning, add it now so it clings to the moist surface. I like a whisper-light coat of nutritional yeast and a pinch of smoked paprika, it bakes in like a savory crust.
Dehydration Bake and the Cooling Set
- Bake for about 40-50 minutes, watching the transformation from bubbling white to deeply golden. Start checking around 20 minutes, and rotate the pan then, since most ovens have hot spots that can brown one side faster.
- Pull the tray when the edges are dark brown and the tops look browned across the surface, golden to medium brown is the zone. The aroma should shift from milky to toasty and nutty, that’s your Maillard reaction telling you you’re close.
- Let the chips cool fully on the pan, about 20-30 minutes after baking. This is where the “shatter” happens, warm chips will feel bendy, then they firm up as the steam finishes escaping.
- Enjoy once fully set and cooled, and store any not eaten right away in an airtight container or sealed bag and consume within a few hours. Move leftovers not consumed within a few hours into the fridge or freezer.
Secrets to Achieving the Perfect Crunch

Thickness is everything: That 3/16 to 1/4 inch target is not fussy for no reason, it’s the line between a crisp chip and a chewy bite. If you like extra snap, I stay closer to 3/16 inch, which is about 5 mm.
The Brand Factor: Some cottage cheese releases water aggressively as it heats, and that’s when you get the dreaded puddle. I’ve had the most consistent success with tubs that include stabilizers like guar gum or carrageenan, because the rounds hold their shape while dehydration happens.
Middle rack, always: Too high and the tops brown before the moisture leaves, too low and you get greasy edges with soft centers. A centered rack position turns this into a steady dehydration bake, similar in principle to how moisture management matters for a cottage cheese flatbread, just taken further until crisp.
Pro Tips & Troubleshooting
Pro Tips
- Use high-quality name-brand parchment paper, cheap sheets are the number one sticking culprit.
- Flatten with a metal spoon, it glides and makes cleaner, more even rounds.
- Rotate the pan at the 20-minute mark to even out oven hot spots.
- Chase color, not just time, the best crunch happens at a darker golden to brown finish.
- Let the chips cool on the pan for 20-30 minutes, the snap develops as they set.
Common Mistakes to Avoid
- Pulling them at 20 minutes because they “look done”, they will be chewy.
- Eating them warm, the texture won’t be crisp until fully cooled.
- Using low-fat or fat-free cottage cheese, it commonly bakes into a puddle.
- Spacing scoops too close together, trapped steam prevents dehydration.
- Skipping parchment paper, the chips can weld to the pan.
Serving & Storage

Creative Serving Ideas
I love these as a salty dipper with acidic tomato salsa, the brightness cuts the richness beautifully. They also scoop like a dream, and a creamy dip like buffalo chicken dip turns them into a full snack-board situation.
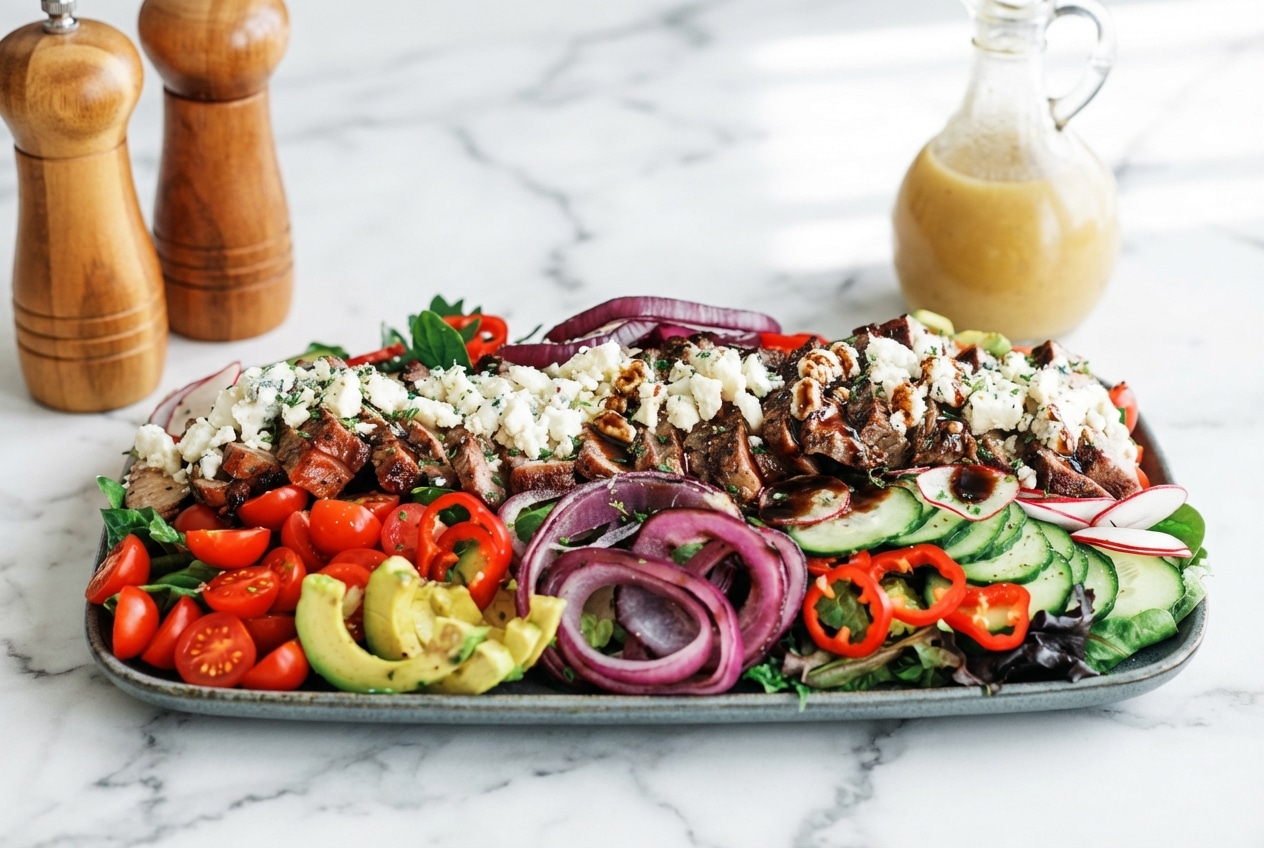
They’re also excellent crumbled over a Greek salad as gluten-free “croutons”, especially with cucumbers and feta. The chips add crunch and protein without the bread, and they stay punchy against a lemony dressing.
Storage and Reviving the Crunch
For peak crispness, keep them at room temperature in an airtight container and snack within a few hours. Humidity is the enemy, so if your kitchen runs damp, you’ll notice they soften faster.
If they lose their snap, a quick revival works: re-bake or air fry for 1-2 minutes, just until they feel dry again. Let them cool for a few minutes afterward, because they crisp as they settle.

Crispy High-protein Cottage Cheese Chips
Equipment
- Cookie sheet
- Parchment Paper
- 1 tbsp cookie scoop
- Metal spoon
Ingredients
Ingredients
- 1 cup whole milk small curds cottage cheese (4% milkfat) 256 g
Instructions
Prep the Pan and Heat
- Preheat your oven to 350°F (177°C) and position a rack in the middle for even air circulation. Line a large cookie sheet with high-quality parchment paper to prevent sticking.
Scoop, Space, and Flatten
- Use a 1 tablespoon cookie scoop to portion the cottage cheese onto the prepared baking sheet, ensuring at least 2 inches of space between each mound for proper airflow.
- Using the back of a metal spoon, gently press each mound into a tidy round. Aim for a thickness between 3/16 and 1/4 inch (about 5 mm) to ensure a uniform crunch.
- If using seasonings like nutritional yeast or smoked paprika, sprinkle a light layer over the surface now so they adhere to the moist cottage cheese.
Dehydration Bake and the Cooling Set
- Bake for 40 to 50 minutes. Rotate the pan at the 20-minute mark to account for oven hot spots. Watch for the color to transition from bubbling white to a deep golden brown.
- Remove the tray once the edges are dark brown and the centers are fully golden. The aroma should be toasty and nutty.
- Allow the chips to cool completely on the pan for 20 to 30 minutes. This resting phase is essential for the chips to firm up and achieve a shattering crispness.
Notes
Nutrition
Conclusion
There’s something a little magical about turning a humble tub into cottage cheese chips that crackle and crunch. Keep the thickness precise, aim for that deep golden color, and let the cooling do its quiet work.
Once you’ve got the base down, the seasonings are where you can show off, nutritional yeast and smoked paprika for smoky umami, or everything bagel for a deli-style bite. If you’re in a cottage cheese phase, a round-up of cottage cheese recipes keeps the inspiration rolling without wasting a spoonful.