Skip to content
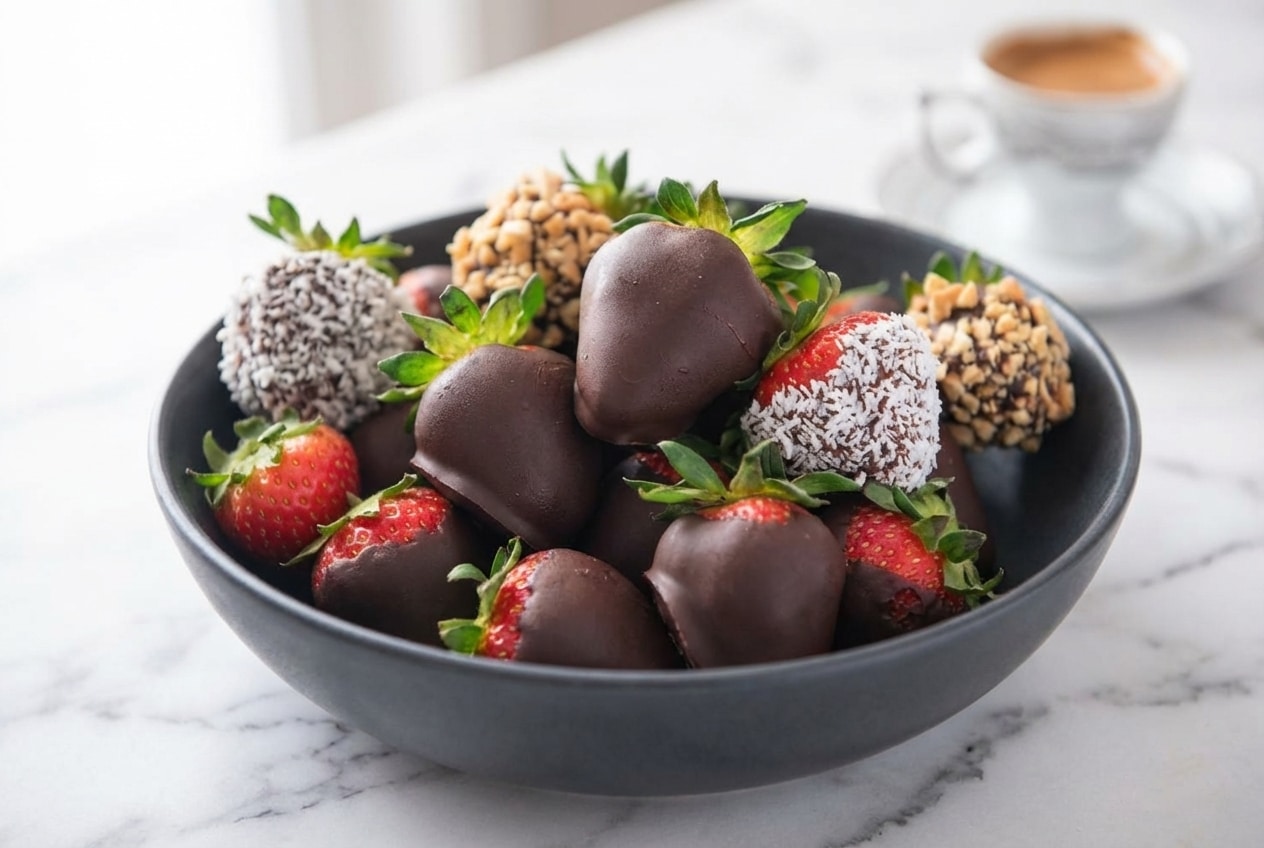
In my kitchen, chocolate covered strawberries are the first thing people reach for, whether it’s a Valentine’s Day plate, a baby shower dessert table, or a “just because” treat after dinner.
They look effortless, but we’ve all had that heartbreak moment, the chocolate slides, the berries sweat, and the whole tray turns into a glossy puddle. This is my go-to method for a clean, crisp shell with that satisfying snap, using a tiny bit of kitchen science that makes home berries look like they came from a chocolatier’s case.
Why You’ll Love This Recipe
Double-Barrier “Snap” method: In my tests, a whisper of cornstarch on very dry berries helps manage surface moisture, and a pinch of instant espresso powder makes the cocoa taste deeper without turning it “coffee.”
No more weeping: When the berry stays dry and room temp, the cocoa butter can cling properly, so you don’t get that watery layer that loosens the shell.
That contrast everyone loves: You get a glossy bite with a clean snap first, then the juicy burst of strawberry right after, like a little magic trick on your tongue.
Beginner-friendly chocolate science: You skip full tempering chocolate, but still dodge common issues like seizing and dull, bloomed finishes.
Ingredients and Substitutions

These are simple pantry ingredients, but each one has a job, shine, texture, and that clean bite. The only real “rule” is treating water like the enemy of melted chocolate.
Ingredients
- 1 cup (175g) chocolate chips
- 2 tsp vegetable oil (or grapeseed oil, canola, peanut or other neutral oil)
- 500g / 1 lb strawberries (~25 strawberries, depends on size)
Optional – for coating:
- Desiccated coconut
- Crushed nuts
- Sprinkles
- Other coating of choice
Ingredient Notes & Substitutions
Chocolate chips: Chips are convenient, but they’re formulated to hold their shape, so they can melt thicker than couverture chocolate. If you want the thinnest, glossiest coat, a good couverture has more cocoa butter and flows like satin, though chips still work beautifully here.
Vegetable oil: A neutral oil helps the melted chocolate loosen for dipping and keeps an anti-bloom look as it sets. I prefer grapeseed oil when I have it, Vitis vinifera oil is especially clean tasting and stays invisible behind the cocoa.
Strawberries: Choose berries with perky leaves and no soft spots, since bruises leak juice and weaken the coating. I also avoid berries straight from the fridge because condensation is a sneaky saboteur.
Instant espresso powder and cornstarch: The “Snap” trick uses 1/4 teaspoon instant espresso powder stirred into the chocolate, plus a microscopic dusting of cornstarch on the berries. The espresso reads as “more chocolate,” not coffee, and the cornstarch helps keep the surface dry enough for the chocolate to grab.
Shortening vs coconut oil: If your chocolate thickens mid-dip, a tiny bit of shortening smooths it without adding flavor. Coconut oil can work too, but it may leave a faint coconut note and can soften the set in a warm room.
How to Make chocolate covered strawberries
Prep the tray and set yourself up
- Line a tray with baking paper (parchment paper), so the dipped berries lift cleanly once set.
Melt the chocolate until silky
- Place chocolate in a microwave proof bowl.
- Microwave on high in 30 second bursts, stirring in between, until smooth, stopping while a few lumps remain so residual heat can finish the job.
Dip with a steady hand
- Pick up a strawberry by its stem, or gather up the leaves around the stem to get a grip hold on the strawberry.
- Dip into the chocolate, rolling to coat most of it, then place onto the tray with a gentle little twist so it doesn’t “tail.”
- Repeat with remaining strawberries.
- If using coconut / nuts or other coating, dip into the coating then lay on tray while the chocolate is still wet.
Set, chill, and serve at the peak
- Refrigerate for 30 minutes or until chocolate is firm.
- Best served within 12 hours of making.
Secrets for a Professional Finish

The secret to a true snap is less about fancy tools and more about moisture control. Chocolate is fat-forward, thanks to cocoa butter, and it hates water, even a few droplets can trigger seizing or a slippery coat.
That’s why the cornstarch “barrier” matters, it acts like a tiny wick on the berry’s surface so the chocolate bonds to something dry instead of fighting a damp, glossy skin. It’s subtle, but I notice the shell clings better and cracks less when you bite.
Espresso powder is my quiet weapon in anything chocolate. It doesn’t make the strawberries taste like coffee, it nudges the cocoa into tasting rounder and more complex, the same kind of flavor layering I love when playing with bold chocolate desserts like a pistachio chocolate bar where texture and aroma do the heavy lifting.
Room-temperature berries are non-negotiable in my house. Cold berries warm up fast, the surface sweats, and that condensation turns your beautiful glossy dip into a dull, streaky coat that can slide right off.
Pro Tips & Troubleshooting
Pro Tips
- The toothpick trick: A toothpick in the stem end lets you dip cleanly without fingerprints and gives you a full 360-degree coat.
- Rescue mission for thick chocolate: If the bowl starts to tighten up, stir in a half teaspoon of shortening or oil until it relaxes again.
- Obsessive drying: After washing, let berries air-dry on paper towels for hours, not minutes, then pat again right before dipping.
- Microwave discipline: Stop heating while it’s almost melted, then stir, overheating is a fast road to grainy texture.
Common Mistakes to Avoid
- Washing right before dipping: Moisture trapped near the leaves is the classic cause of chocolate sliding off.
- Using stabilizer-heavy chocolate: Some cheap eating bars melt thick and stubborn, making a clumpy coat that won’t set cleanly.
- The airtight container trap: Sealed lids create condensation and “sweat,” crack the lid slightly instead.
- Dipping fridge-cold berries: The temperature gap creates moisture, and moisture ruins the bond.
If you end up with a handful of smaller berries that feel awkward to dip, they disappear beautifully baked into a strawberry coffee cake. I like that option because it uses imperfect fruit without wasting a thing.
Serving & Storage

Elegant Serving Ideas
For parties, I nestle each berry into a mini paper cupcake liner so guests can grab one without smudging chocolate. A tiered stand makes them look instantly “event ready,” even if you dipped them in ten minutes flat.
For pairing, something crisp and dry like Prosecco or Champagne cuts through the richness and makes the strawberry taste even fruitier. If you’re building a full dessert table, a chilled slice of strawberry tres leches alongside these berries feels festive without being heavy.
Storage & Transport Tips
The best window is 12 hours, because strawberries naturally start to break down and leak as they sit. If you must hold them longer, keep them cool and dry, and avoid humid spots like the back of a crowded fridge.
Condensation is the real villain during storage. University-backed refrigeration and moisture control guidelines echo the same idea, airflow and avoiding trapped moisture protect food quality.
For transport, use a flat, parchment-lined container so they don’t roll and crack. I leave the lid slightly cracked until arrival, then close it loosely once everything has settled and cooled.
Master the Perfect Berry
Once you get the berries truly dry and keep the temperature steady, the rest is easy confidence. That’s the heart of the Double-Barrier method, moisture managed on the berry, flavor boosted in the chocolate, and a shell that sets with a clean snap.
If you feel like playing, roll a few in coconut or nuts, drizzle another batch with a contrasting chocolate, and keep notes on what you love. In my kitchen, the best batches are always the ones made patiently, with dry berries and a calm stir.

Chocolate Covered Strawberries Recipe
Equipment
- Baking paper or parchment paper
- Microwave-proof bowl
- Baking tray
Ingredients
- 1 cup (175g) chocolate chips
- 2 tsp vegetable oil (or grapeseed oil, canola, peanut or other neutral oil
- 500 g / 1 lb strawberries (~25 strawberries, depends on size)
Optional – for coating
- Desiccated coconut
- Crushed nuts
- Sprinkles
- Other coating of choice
Instructions
Prep the tray and set yourself up
- Line a tray with baking paper (parchment paper), so the dipped berries lift cleanly once set.
Melt the chocolate until silky
- Place chocolate in a microwave proof bowl.
- Microwave on high in 30 second bursts, stirring in between, until smooth, stopping while a few lumps remain so residual heat can finish the job.
Dip with a steady hand
- Pick up a strawberry by its stem, or gather up the leaves around the stem to get a grip hold on the strawberry.
- Dip into the chocolate, rolling to coat most of it, then place onto the tray with a gentle little twist so it doesn’t “tail.”
- Repeat with remaining strawberries.
- If using coconut, nuts, or other coating, dip into the coating then lay on tray while the chocolate is still wet.
Set, chill, and serve at the peak
- Refrigerate for 30 minutes or until chocolate is firm.
- Best served within 12 hours of making.
Notes
Nutrition
Frequently Asked Questions
How do I stop my chocolate covered strawberries from sweating?
Start with room-temperature strawberries, cold berries create condensation as they warm. After chilling to set, don’t leave them sealed in an airtight container, trapped moisture turns into “sweat” on the shell.
Can I make these a day in advance?
You can, but the texture is best within 12 hours, because the fruit starts to soften and leak. If you need 24 hours, keep them cool, lightly covered, and accept that the snap may fade a bit.
What is the best type of chocolate for dipping fruit?
Couverture chocolate is the gold standard because it has more cocoa butter and dips thinner and glossier. Quality chips work well too, and if you like learning deeper chocolate handling, techniques like those used in a Dubai chocolate bar show how melt behavior changes with different chocolates.
How do I dry strawberries properly before dipping?
Wash them early, then air-dry on paper towels for at least 2 hours, turning once or twice. Right before dipping, I pat around the leaves again, that’s where water likes to hide.
Should I store them at room temperature or in the fridge?
In a cool, dry room, short room-temperature holding is great for texture. In a warm or humid home, refrigeration is safer for the fruit, just keep them lightly covered and avoid sealed containers that cause condensation.