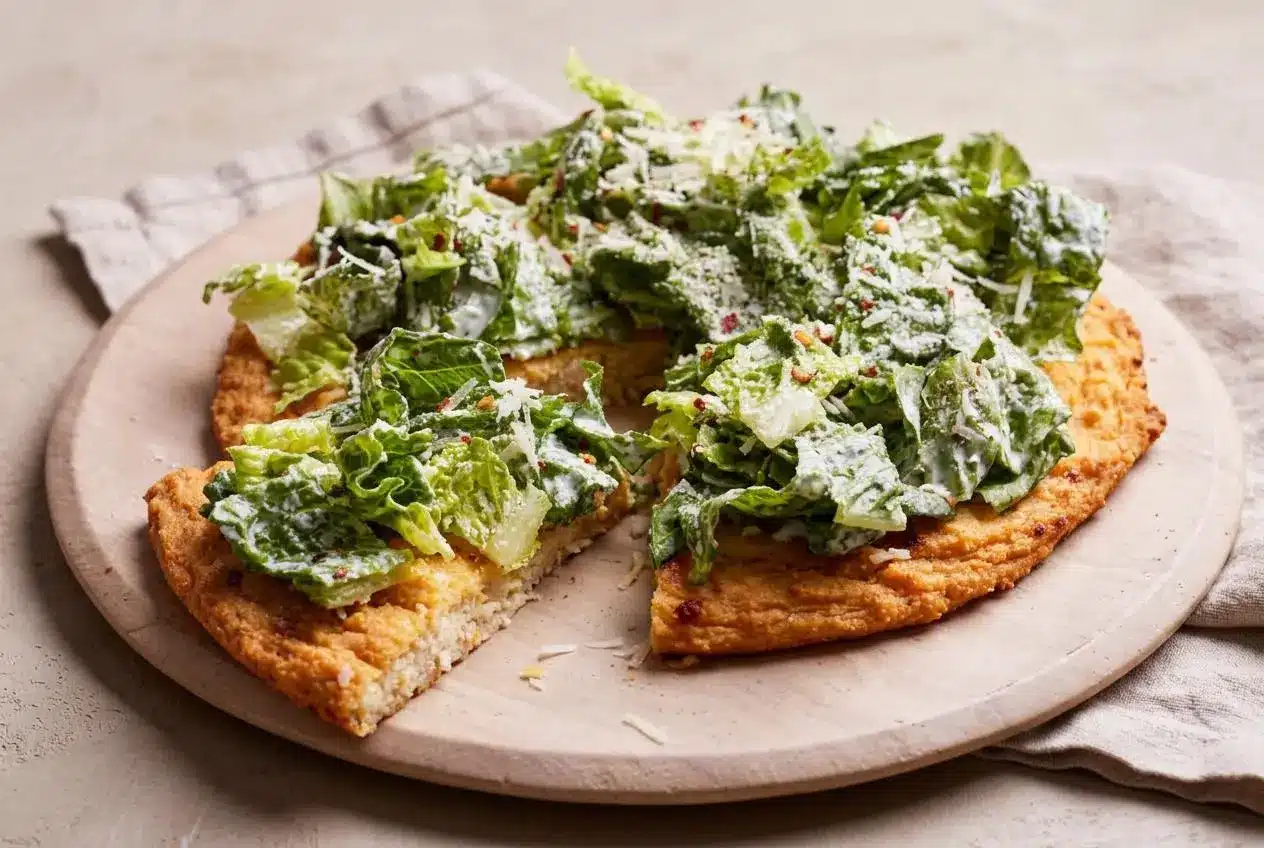
A chicken crust Caesar salad pizza combines canned chicken, egg, Parmesan, and seasonings in a baked, grain-free crust. Cool the crust slightly, then pile on crisp romaine tossed with creamy Greek yogurt Caesar dressing for a savory base and cool, tangy crunch.
This chicken crust caesar salad pizza puts the chicken underneath the salad instead of scattering it over dough. The thin, cheesy crust makes a satisfying foundation, with enough structure for a firm, foldable slice when you control the moisture.
If you’re craving crispy pizza edges and fresh Caesar flavor in a protein-rich dinner, this combination delivers both. The food processor handles the crust mixture, and the blender takes care of the dressing. The trick starts with dry chicken.
Drain the rinsed chicken thoroughly before mixing; water hiding between the shreds can leave the center soft.
Ingredients You Need and Why Each One Matters
Chicken gives the crust its structure, while egg and Parmesan hold it together. Garlic and pepper add warmth, yogurt and lemon bring creamy tang, and romaine supplies the cool crunch that balances the savory baked crust.
For the Chicken Pizza Crust
- 20 Ounces Canned Chicken, drained and rinsed well
- 1 Egg
- 2/3 Cup Parmesan Cheese, grated
- 1 Teaspoon Garlic Powder
- 1/2 Teaspoon Crushed Red Pepper Flakes
For the Dressing
- 1 1/2 Cups Plain Greek Yogurt
- 1 Lemon, juiced
- 1 Anchovy
- 3 Cloves Garlic
- 3/4 Cup Parmesan Cheese, grated
- 1/2 Teaspoon Ground Black Pepper
For the Salad
- 2 Heads Romaine Lettuce, washed and chopped
- Parmesan Cheese, grated
Canned chicken: Its cooked shreds form the flourless foundation. Rinsing washes away packing liquid, but draining afterward matters just as much. The chicken should feel moist, not dripping, before it goes into the processor.
Egg and Parmesan: The egg sets during baking and joins the chicken particles together. Parmesan adds another layer of binding, along with salty, nutty flavor and browned edges. Freshly grated cheese distributes evenly through the mixture without leaving large pieces between the shreds.
Greek yogurt and lemon: Plain Greek yogurt provides a thick, creamy dressing without making mayonnaise the foundation. Its tang pairs with lemon juice, while Parmesan rounds out the acidity. Use plain yogurt rather than a sweetened or flavored variety.
Anchovy, garlic, and black pepper: Blending the anchovy into the dressing spreads its savory flavor throughout. For an optional alternative, use a splash of Worcestershire sauce or a few briny capers. Worcestershire often contains anchovies, so check the label if avoiding fish is your goal.
Romaine: Its sturdy ribs hold up to the thick dressing. Dry the washed leaves well so water doesn’t dilute the sauce or collect on the crust. For a traditional dressing comparison, try this classic Caesar salad.
I favor freshly grated Parmesan here, and I’d give the rinsed chicken a thorough squeeze before mixing so moisture doesn’t work against the crust.
How to Make the Chicken Crust Caesar Salad Pizza Step by Step
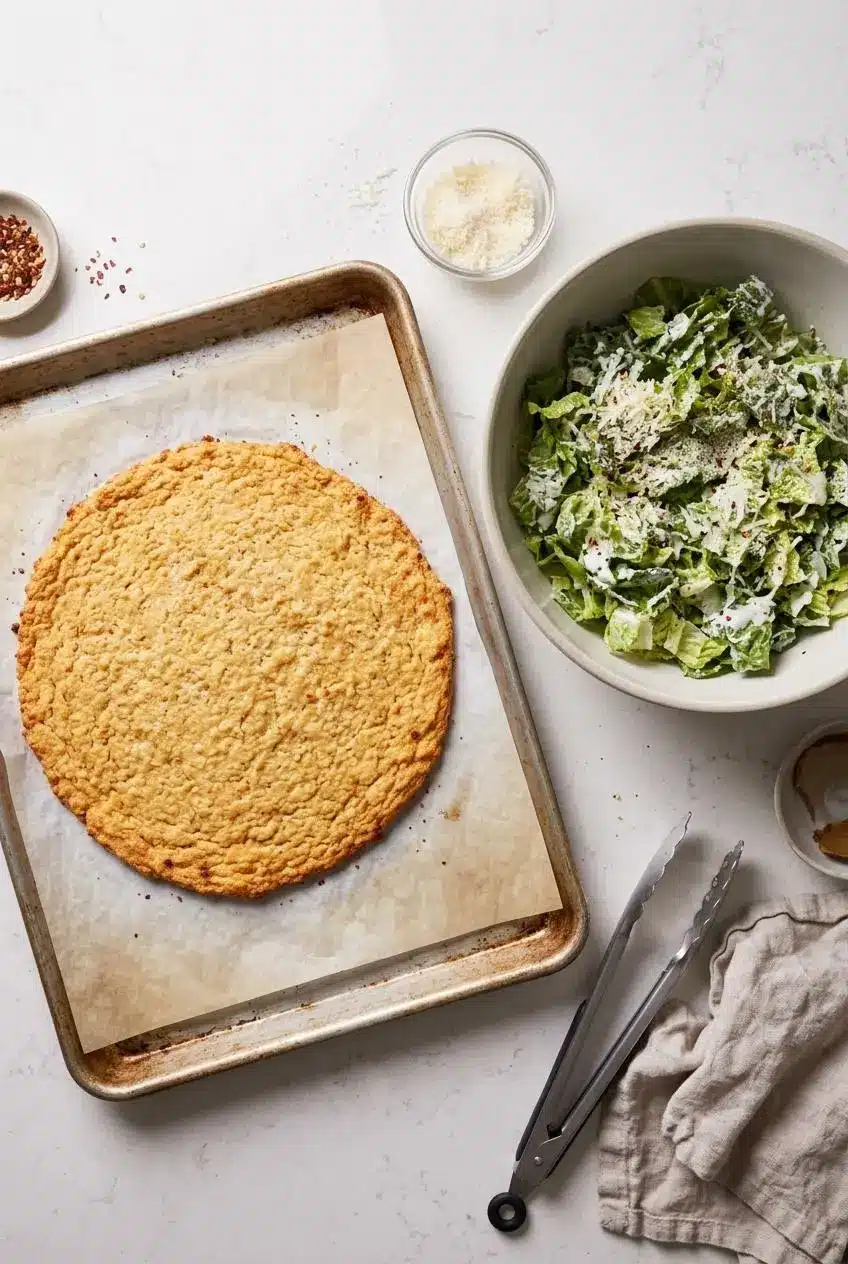
Shape the mixture evenly and judge the baked crust by its center as well as its edges. You’ll need a baking sheet, parchment paper, food processor, and blender. This recipe makes 6 servings, with 15 minutes of prep, up to 45 minutes of baking, and 5 minutes of cooling.
- Heat the oven to 375 °F.
A fully heated oven helps the thin chicken mixture begin setting when it goes in. - Cover a baking sheet with parchment paper.
The paper provides a release surface for the cheese-rich crust. - Pulse the drained, rinsed chicken, egg, Parmesan, garlic powder, and crushed red pepper flakes together in a food processor.
Stop when the ingredients form a cohesive, slightly tacky mixture without separate pockets of egg or cheese. - Move the mixture onto the lined sheet and use clean hands, lightly oiled if needed, to shape a circle about 1/4 inch thick.
An even layer prevents a thick, soft middle surrounded by overly thin edges. - Bake for 40 to 45 minutes, checking for a golden-brown surface and a firm center.
The crust should feel set across the middle rather than soft or spongy. - Take the baking sheet out and let the crust cool for 5 minutes.
Allowing the strongest heat to subside helps the lettuce stay crisp after assembly. - During the crust’s baking time, blend the Greek yogurt, lemon juice, anchovy, garlic, Parmesan, and black pepper.
The finished dressing should look creamy and smooth, with no visible garlic or anchovy pieces. - Wash and chop the romaine, then place it in a bowl with the salad Parmesan and dressing.
Well-drained leaves keep the dressing creamy rather than watery. - Turn the salad gently until the dressing coats the chopped leaves.
Aim for an even coating throughout, including the crunchy rib pieces at the bottom of the bowl. - Distribute the dressed salad over the slightly cooled chicken crust.
Spread the topping across the surface rather than leaving one heavy mound in the center. - Finish with additional Parmesan and ground black pepper if desired, then serve.
The finished pizza should combine a firm savory crust with cool, crunchy greens.
The mixture won’t behave like stretchy bread dough. Press it into place instead of trying to pull or stretch it. If it follows your fingers when you lift them, a light coating of oil on your palms helps release it without changing the mixture.
Watch for deep golden edges, but don’t let edge color make the decision alone. The center needs to feel firm too. Cooling gives the crust a little time to settle before the weight of the salad goes on top.
Expert Tips and Troubleshooting for a Crispy Crust
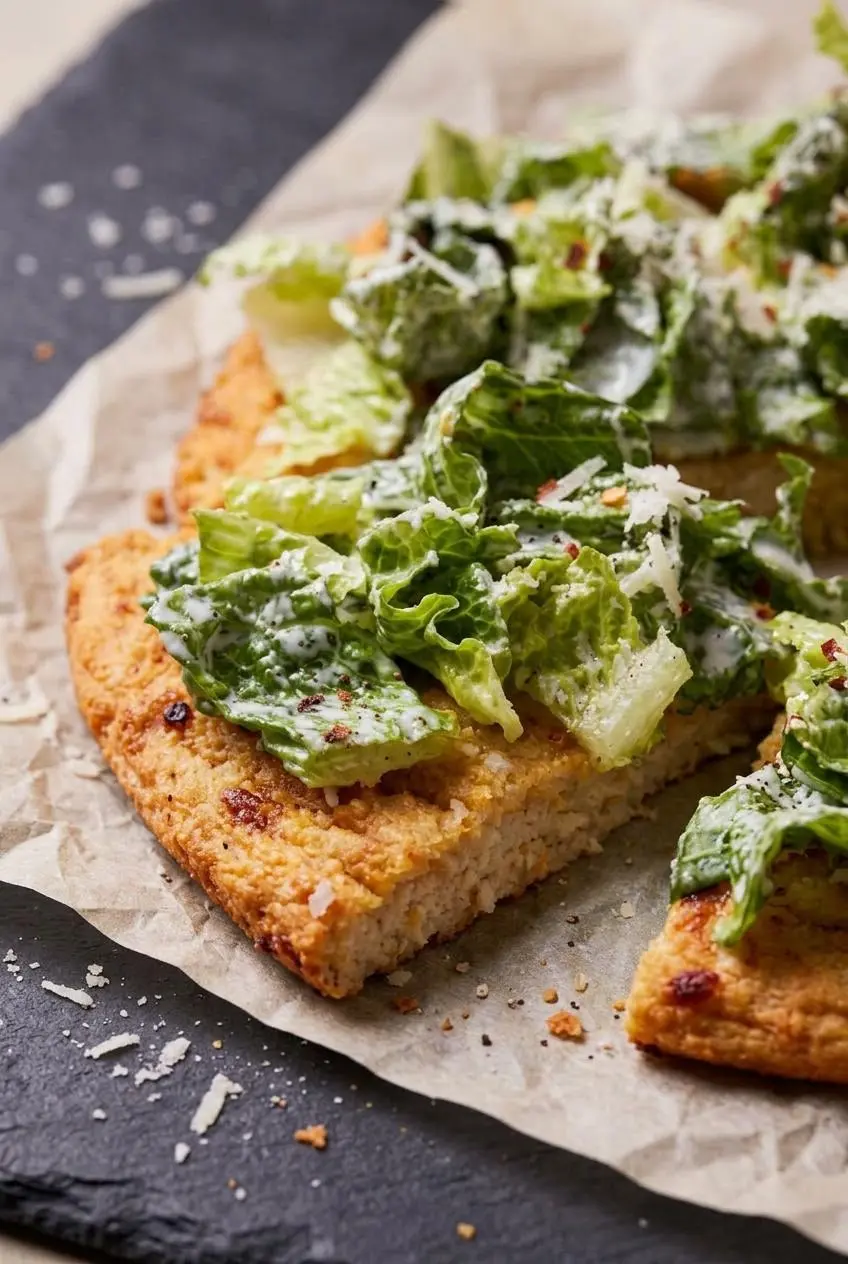
Moisture and thickness determine whether this crust eats like a thin pizza or a soft chicken patty. Address both before baking rather than trying to rescue the texture after topping.
The Secret to Removing Moisture From Canned Chicken
After rinsing, put the chicken in a clean kitchen towel and squeeze it over the sink. Open the towel and loosen the compacted shreds before processing. You’re removing trapped water, not trying to make the chicken completely dry.
Towel-squeezing is the quickest option because it removes water without another baking stage. An optional alternative is to spread the drained chicken on a parchment-lined sheet and pre-dry it in the oven for about 10 minutes before mixing. This adds preparation time, so it isn’t part of the main method.
Rinsing alone doesn’t dry chicken; it adds water that you then need to remove. Leaving that water in the mixture encourages steaming and makes browning harder, especially in the center.
For an optional richer edge, lightly brush the perimeter with garlic-flavored olive oil during the final minutes of baking. Keep the coating light. Extra oil won’t solve a wet center or a crust pressed too thick.
Troubleshooting Common Chicken Crust Mistakes
- Sticky mixture: Some tackiness is normal with egg and finely processed chicken. Lightly oil your palms rather than adding flour or more cheese.
- Wet or spongy center: Excess water or uneven thickness can leave the middle soft. Squeeze the chicken well and press the entire circle to about 1/4 inch.
- Dark edges, soft middle: A thick center takes longer to set than a thin perimeter. Concentrate on an even thickness when shaping the next crust.
- Crust stuck to the sheet: Melted Parmesan can cling to bare metal. Use parchment, then let the crust settle slightly before lifting it.
- Crumbly slices: Poorly combined ingredients or cutting immediately after baking can weaken the crust. Pulse until cohesive and allow the cooling time before slicing.
- Wilted greens: A piping-hot crust softens dressed lettuce. Cool the crust first and assemble close to serving.
Delicious Variations and Easy Shortcuts
You can change the chicken or simplify the topping, but treat these as optional adaptations. The canned-chicken version above provides the specified ingredient ratios and baking schedule.
Using Raw Ground Chicken or Fresh Shredded Chicken
- Canned chicken: Use the listed amount, rinse, drain, and remove excess water. Its already-cooked texture works well with the egg and Parmesan binder.
- Freshly cooked chicken: Cook the chicken first, shred it, and measure the recipe’s required amount before processing. Pulse until the shreds blend into a cohesive mixture rather than leaving long strands.
- Rotisserie chicken: Remove skin and bones, then shred and measure the meat. Its seasoning may change the flavor, so avoid automatically adding extra salty ingredients.
- Raw ground chicken: Lean ground chicken can form a thin crust, but it cooks and releases moisture differently from canned chicken. Press it evenly on parchment and follow the package’s poultry cooking directions, checking doneness with a food thermometer rather than relying on browning alone.
Don’t assume the canned-chicken baking schedule transfers unchanged to raw ground chicken. The easiest fresh-chicken adaptation is cooked, shredded meat because it starts in the same cooked state as the canned version.
Keto Two-Cheese Crust and Bagged Salad Kit Shortcut
For a two-cheese variation, add shredded mozzarella and Italian seasoning alongside the Parmesan. Mozzarella brings more stretch and a softer, cheesier bite, while Parmesan supplies the sharper flavor. Keep this change outside the official ingredient list.
If you’re adapting the meal for keto eating, check the carbohydrate content of your yogurt, dressing, and toppings rather than assuming every Caesar salad kit fits your needs.
Optional shortcuts and shaping changes include:
- Bagged Caesar kit: Toss the kit just before topping the cooled crust, and leave out croutons if you want to preserve the grain-free preparation.
- Store-bought dressing: Use it instead of blending the yogurt dressing when convenience matters more than matching the homemade flavor.
- Personal rounds: Divide the mixture into two circles while maintaining an even thin layer, and watch their color and firmness rather than assuming identical baking time.
For a different cheese-centered crust, try cottage cheese pizza crust as a separate recipe rather than substituting it into this chicken mixture.
Serving Suggestions and Meal Prep Storage
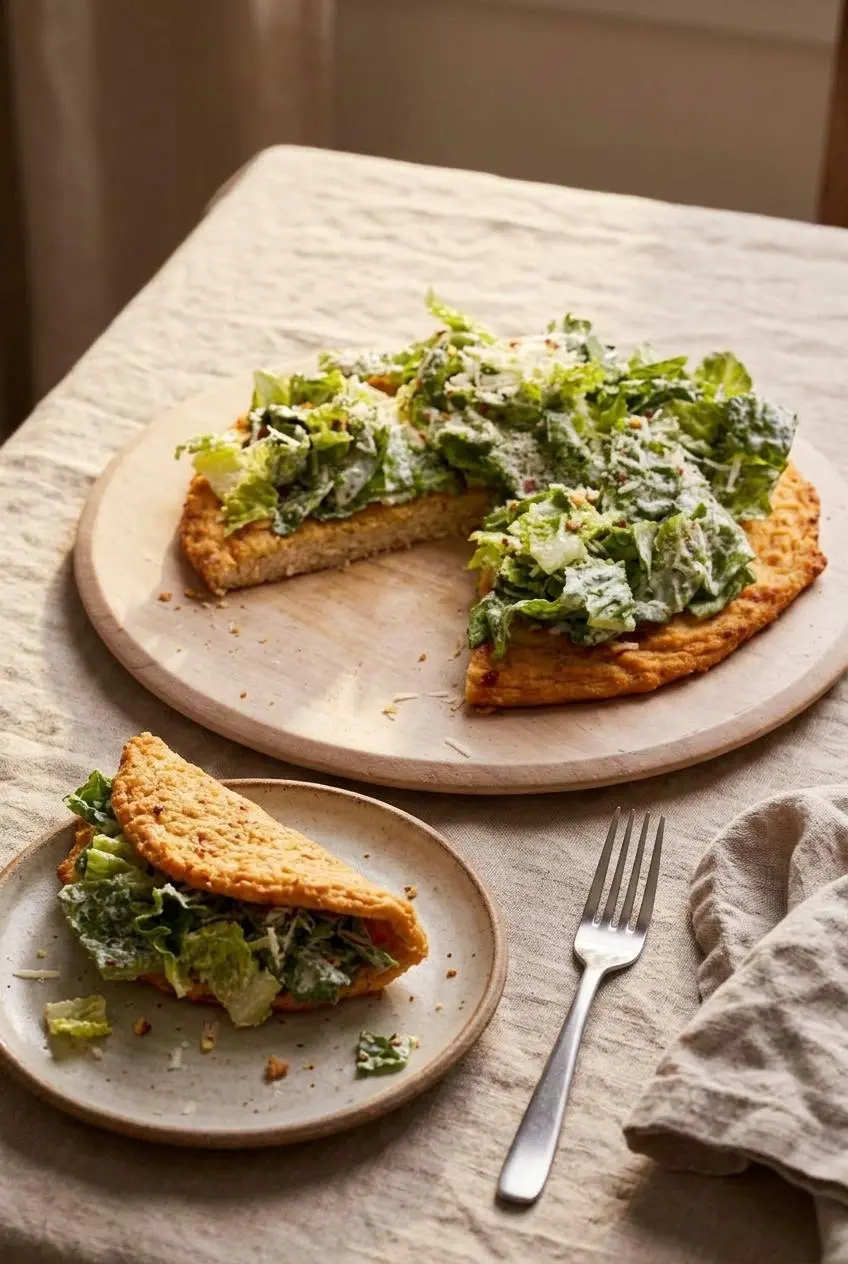
Assemble only what you plan to eat so the salad stays crunchy and the crust stays firm. Slice into wedges, then fold a heavily topped piece gently in half like a flatbread wrap to contain the romaine.
Keep the finishing touches focused on contrast: shaved Parmesan curls for richness, freshly cracked black pepper for warmth, or optional mild pepperoncini for a briny, tangy bite. Spread the salad evenly so every wedge gets both creamy leaves and crunchy ribs.
For another handheld meal with these flavors, a chicken Caesar wrap offers a different way to contain the filling.
For meal prep, keep the baked crust, blended dressing, and washed, dried romaine in separate covered containers in the refrigerator. Refrigerate the components promptly and follow applicable cooked-poultry storage limits; the homemade dressing doesn’t automatically share the crust’s storage life.
Don’t store the pizza with dressed lettuce piled on top if you want to preserve the texture. Dressing migrates into the crust, while the coated leaves lose their crunch. Pack lunch components separately and assemble when you’re ready to eat.
Reheat the plain crust in an oven or air fryer, monitoring it so the edges don’t scorch. Let it cool slightly again before adding freshly tossed salad. Avoid reheating the dressed greens with the crust.
Conclusion
This grain-free pizza brings together a savory chicken-and-Parmesan crust and a cool Caesar topping. Thoroughly drained chicken, an even thin circle, and a brief cooling period make the biggest difference to the finished texture.
Keep the components separate until serving, then enjoy the contrast of browned edges and tangy romaine. Leave a comment with your favorite customization, whether that’s extra pepper, a cheese variation, or a neatly folded wedge.
Frequently Asked Questions
Can I Use Ground Chicken or Fresh Chicken Instead of Canned Chicken?
Yes. Cooked shredded chicken or boneless rotisserie meat can be measured and pulsed for a texture similar to canned chicken. Raw ground chicken is a different adaptation: press it thin and check doneness with a food thermometer using the package’s poultry cooking directions.
How Do You Keep a Chicken Pizza Crust From Getting Soggy?
Drain the rinsed chicken and squeeze out trapped water with a clean towel. Press the mixture into an even 1/4-inch layer on parchment, bake until the center feels firm, and cool briefly before adding dressed romaine.
Can You Make Chicken Crust Caesar Salad Pizza Ahead of Time?
Yes, prepare and refrigerate the components separately rather than storing an assembled pizza. Reheat the plain crust, let it cool slightly, and toss the romaine with dressing just before topping.
What Can I Substitute for Anchovies in the Caesar Dressing?
A splash of Worcestershire sauce or a few briny capers can replace the anchovy’s savory contribution. Blend the substitute with the other dressing ingredients. Check Worcestershire labels if you need a fish-free option, since many versions contain anchovies.
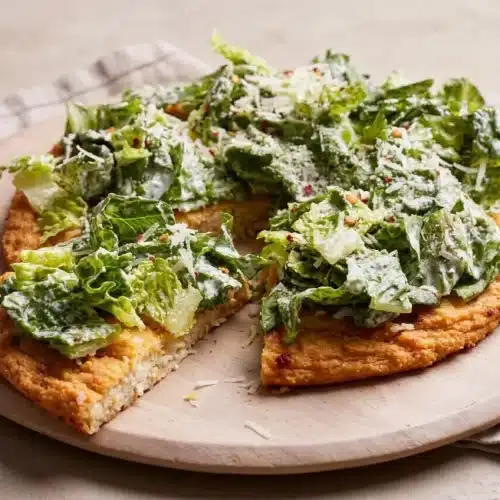
Chicken Crust Caesar Salad Pizza

Equipment
- Baking Sheet
- Parchment Paper
- Food processor
- Blender
Ingredients
For the Chicken Pizza Crust
- 20 Ounces Canned Chicken drained and rinsed well
- 1 Egg
- 2/3 Cup Parmesan Cheese grated
- 1 Teaspoon Garlic Powder
- 1/2 Teaspoon Crushed Red Pepper Flakes
For the Dressing
- 1 1/2 Cups Plain Greek Yogurt
- 1 Lemon juiced
- 1 Anchovy
- 3 Cloves Garlic
- 3/4 Cup Parmesan Cheese grated
- 1/2 Teaspoon Ground Black Pepper
For the Salad
- 2 Heads Romaine Lettuce washed and chopped
- Parmesan Cheese grated
Instructions
- Heat the oven to 375 °F. A fully heated oven helps the thin chicken mixture begin setting when it goes in.
- Cover a baking sheet with parchment paper. The paper provides a release surface for the cheese-rich crust.
- Pulse the drained, rinsed chicken, egg, Parmesan, garlic powder, and crushed red pepper flakes together in a food processor. Stop when the ingredients form a cohesive, slightly tacky mixture without separate pockets of egg or cheese.
- Move the mixture onto the lined sheet and use clean hands, lightly oiled if needed, to shape a circle about 1/4 inch thick. An even layer prevents a thick, soft middle surrounded by overly thin edges.
- Bake for 40 to 45 minutes, checking for a golden-brown surface and a firm center. The crust should feel set across the middle rather than soft or spongy.
- Take the baking sheet out and let the crust cool for 5 minutes. Allowing the strongest heat to subside helps the lettuce stay crisp after assembly.
- During the crust’s baking time, blend the Greek yogurt, lemon juice, anchovy, garlic, Parmesan, and black pepper. The finished dressing should look creamy and smooth, with no visible garlic or anchovy pieces.
- Wash and chop the romaine, then place it in a bowl with the salad Parmesan and dressing. Well-drained leaves keep the dressing creamy rather than watery.
- Turn the salad gently until the dressing coats the chopped leaves. Aim for an even coating throughout, including the crunchy rib pieces at the bottom of the bowl.
- Distribute the dressed salad over the slightly cooled chicken crust. Spread the topping across the surface rather than leaving one heavy mound in the center.
- Finish with additional Parmesan and ground black pepper if desired, then serve. The finished pizza should combine a firm savory crust with cool, crunchy greens.