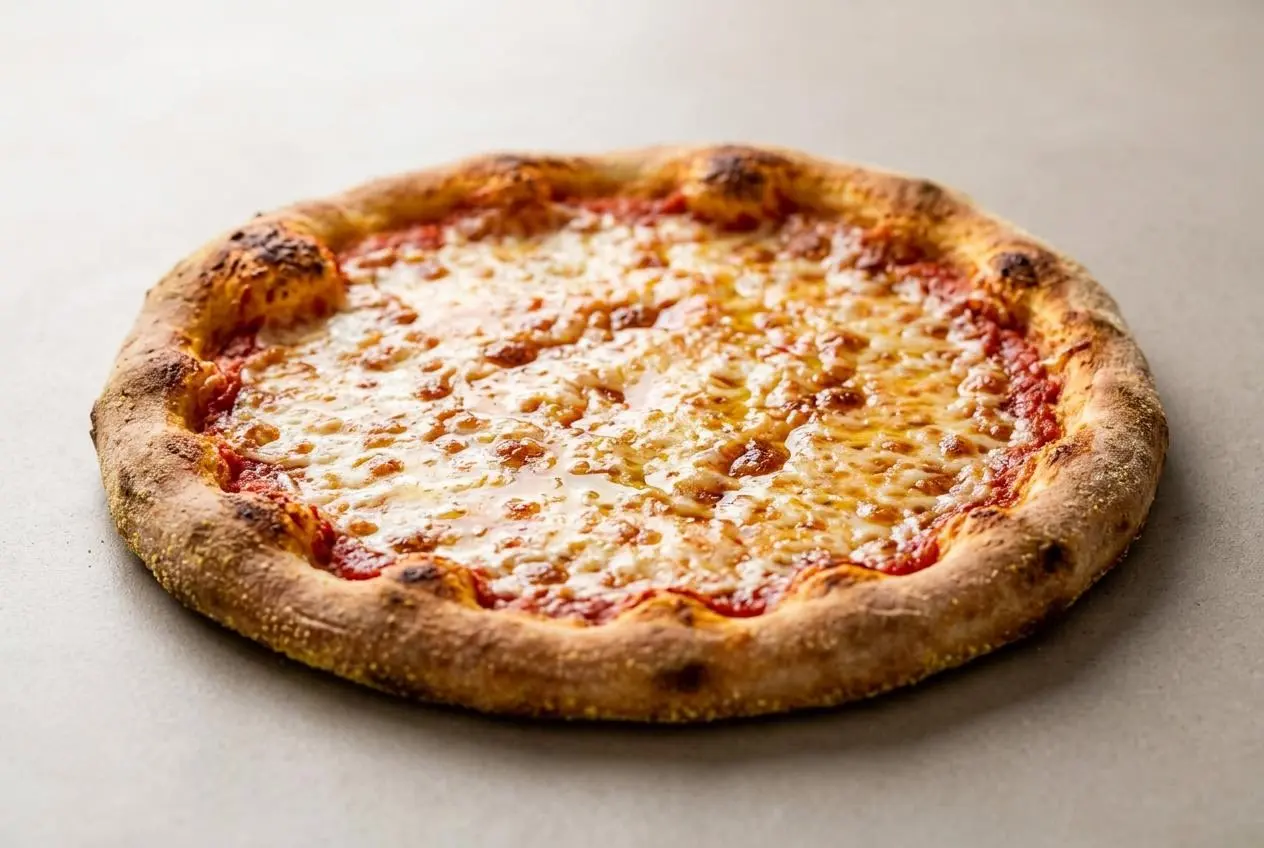
This pizza dough recipe makes two 12-inch pizzas with a crust that bakes up soft, chewy, crisp at the edges, and reliable for beginners. You can mix it with a stand mixer or knead it by hand.
Homemade pizza dough is mostly about good cues, not fancy technique. Once you know what the yeast should smell like, how the dough should feel, and when to stop adding flour, it gets much easier.
This version keeps the process clear and forgiving, while still giving you room to make a crispier, more flavorful crust if you want. The shaping tips alone can save a pizza night.
Use a thermometer for the water if you can. Getting close to 110°F makes the yeast much more predictable.
Why This Is the Best Beginner Pizza Dough Recipe
If you want a homemade crust that works without guesswork, this one hits the sweet spot. The ingredient list is straightforward, the timing is realistic, and the dough gives you clear signals at every stage.
You’ll know the yeast is active when it smells pleasantly sweet and a little beer-like. You’ll know the dough is ready to rise when it feels smooth, no longer shaggy, and springs back slowly when poked. Those cues matter more than trying to read the dough’s mind.
Ingredients for Pizza Dough
Each ingredient has a real job here, from building gluten structure to adding tenderness, flavor, and the crisp finish around the edges.
Dough
- 1 and 1/3 cups (320ml) warm water (about 110°F/43°C)
- 1 Tablespoon (13g) granulated sugar
- 2 and 1/4 teaspoons (7g) Platinum Yeast from Red Star instant yeast (1 standard packet)
- 3 and 1/2 to 4 cups (438–500g) unbleached all-purpose flour (spooned & leveled), plus more as needed
- 2 Tablespoons (30ml) extra-virgin olive oil, plus more for greasing
- 1 teaspoon salt
- sprinkle of cornmeal, for dusting the pan
Toppings
- extra-virgin olive oil, for brushing
- 2 garlic cloves, minced (optional)
- 1 cup (250g) store-bought pizza sauce
- 4 cups (1lb/454g) shredded mozzarella cheese
I always measure the flour carefully and hold back the upper end of the range until I see how the dough feels, because too much flour is the fastest way to lose that airy, chewy texture.
Key Ingredients Explained
Understanding what each ingredient does makes the dough much easier to handle. It also helps you fix problems before they turn into a dense or tough crust.
The Role of Flour: All-Purpose vs. Bread Flour
Flour gives pizza dough its structure. In this recipe, all-purpose flour makes a soft, tender crust with enough chew to still feel like pizza, not dinner roll territory.
If you want more chew and a slightly crisper bite, bread flour is a smart swap in the same amount. Its higher protein level builds stronger gluten, which helps the dough stretch well and bake with a more classic pizzeria feel.
Curious about 00 flour? It can produce a lighter, crisper crust, especially when baked on a very hot surface. In a typical home oven, though, all-purpose or bread flour usually gives more predictable results.
Yeast: The Secret to an Airy Rise
Yeast is what makes the dough rise and creates those airy pockets in the crust. This recipe uses instant yeast, which is especially beginner-friendly because it blends in easily and gets going quickly.
Active dry yeast can work too, but it benefits from a quick proof in the warm water with the sugar first. Wait until it looks foamy before moving on. If nothing happens, the yeast may be old or the water temperature may be off.
Water, Salt, and Oil: The Flavor and Texture Team
Warm water hydrates the flour and wakes up the yeast. Around 110°F is ideal here because it activates the yeast without pushing it too far.
Salt does more than season the dough. It also helps control yeast activity and strengthens the gluten so the dough feels more cohesive instead of loose and floppy.
Olive oil adds flavor, tenderness, and a softer crumb. Sugar helps feed the yeast and encourages browning, which is especially helpful in a home oven.
How to Make Pizza Dough
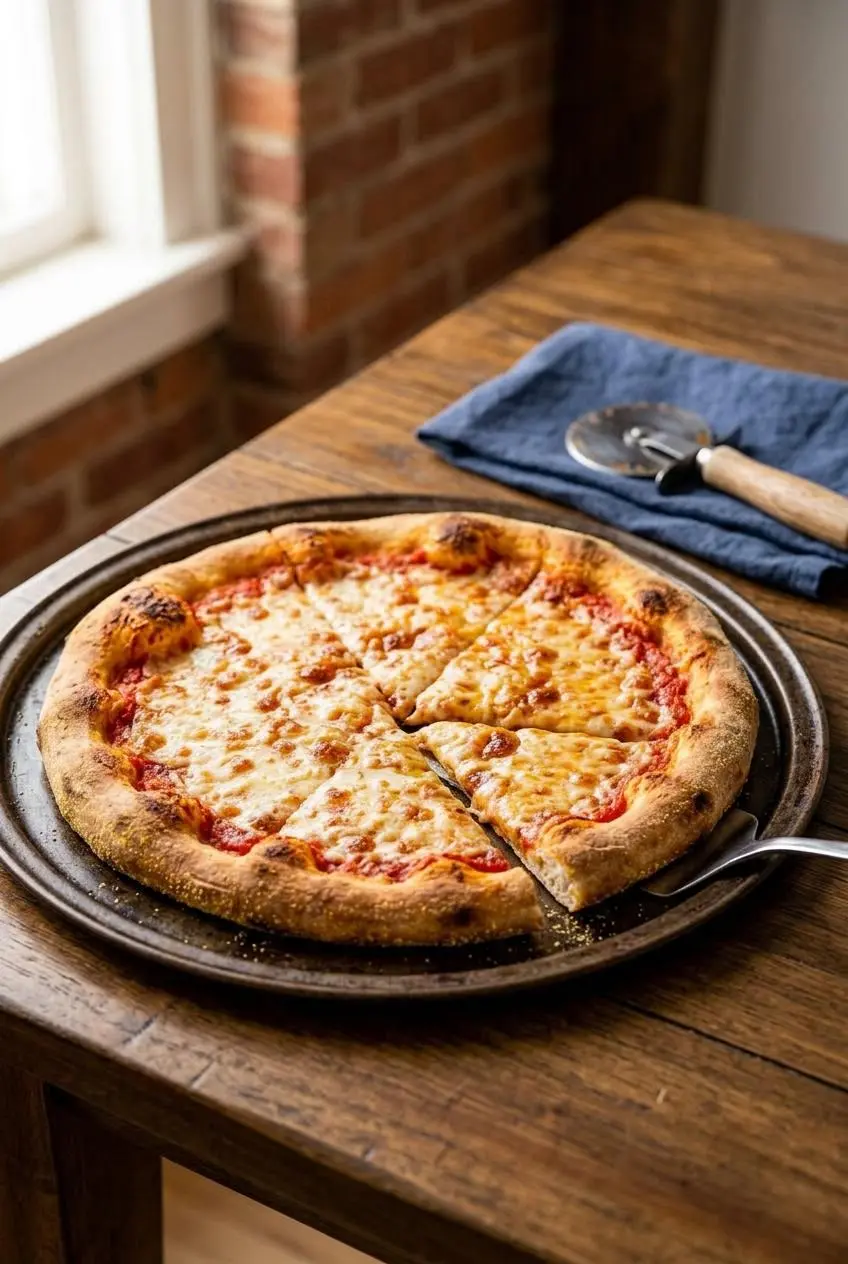
This is the heart of the recipe. The key is to stop chasing a perfectly dry dough and aim for one that feels soft and slightly tacky.
Method 1: Using a Stand Mixer
- Whisk the warm water, granulated sugar, and instant yeast in the bowl of a stand mixer fitted with a dough hook or paddle, then cover and let it sit for 5 minutes.
The mixture should smell lightly sweet and yeasty as it wakes up. - Add the flour, olive oil, and salt, then mix on medium speed for 2 minutes.
The dough should start gathering itself and pulling away from the sides of the bowl. - Knead the dough in the mixer for 5 full minutes, adding flour only 1 teaspoon at a time if it becomes too sticky to handle.
It should look smooth and elastic, feel soft, and spring back slowly when poked. - Test the dough by stretching off a small piece until it thins out enough for light to pass through.
If it stretches without tearing right away, the gluten is developed and the dough is ready to rise. - Lightly grease a large bowl, place the dough inside, and turn it so the surface is coated with oil, then cover it well.
Let it rise at room temperature for 60 to 90 minutes, until doubled in size. - Preheat the oven to 475°F (246°C) and let it heat for at least 15 to 20 minutes while you prepare the pan.
Lightly grease a baking sheet or pizza pan and dust it with cornmeal so the crust releases easily and gets a little extra texture underneath. - Punch down the risen dough, divide it in half, and gently flatten one portion into a disc on a lightly floured surface.
If it keeps shrinking back, let it rest for 5 to 10 minutes so the gluten can relax. - Stretch the dough into a 12-inch circle about 1/2-inch thick, then lift the edge slightly to form a rim.
The center should look even and the outer edge should be a little thicker for a better crust. - Cover the shaped dough lightly and let it rest for a few minutes while you get the toppings ready.
This short pause makes the dough easier to top without springing back. - Press small dents across the surface with your fingertips, brush the crust with olive oil, add minced garlic if using, spread on 1/2 cup (125g) pizza sauce, and top with 2 cups (227g) shredded mozzarella cheese plus any other toppings you like.
The dents help limit big bubbles, and the oil adds color while helping the crust stay less soggy under the sauce. - Bake for 13 to 15 minutes until the crust is golden brown.
The cheese should be melted and the edges should look browned and crisp. - Slice and serve the pizza hot, then repeat with the second half of the dough.
The crust is at its best while the edges are still crisp and the center stays chewy.
Method 2: Kneading by Hand (No Mixer)
No stand mixer? No problem. A bowl, a spoon, and a little patience are enough.
- Whisk the warm water, granulated sugar, and instant yeast in a large mixing bowl, then let it stand for 5 minutes.
You should notice a pleasant yeasty aroma and a slightly creamy look on the surface. - Stir in the flour, olive oil, and salt with a wooden spoon or silicone spatula until a rough dough forms.
At this stage it will look shaggy and uneven, which is exactly fine. - Turn the dough onto a lightly floured surface and knead for 5 full minutes, dusting with flour 1 teaspoon at a time only if it sticks badly.
By the end, it should feel smooth, elastic, and only lightly tacky instead of wet. - Poke the dough and check that it slowly springs back, or stretch a small piece thin to check for a windowpane.
If it tears quickly and feels tight, keep kneading a little longer. - Transfer the dough to a lightly greased bowl, turn it to coat, cover it, and let it rise at room temperature for 60 to 90 minutes.
When ready, it should look puffy and about doubled in size. - Shape, top, and bake the dough the same way as the mixer method.
Hand-kneaded dough should still stretch well and bake into a soft, chewy, airy crust.
If you want to use your dough for something beyond a classic round pizza, it also works beautifully for hot honey pizza once you’ve got the crust basics down.
Expert Tips for the Best Crust
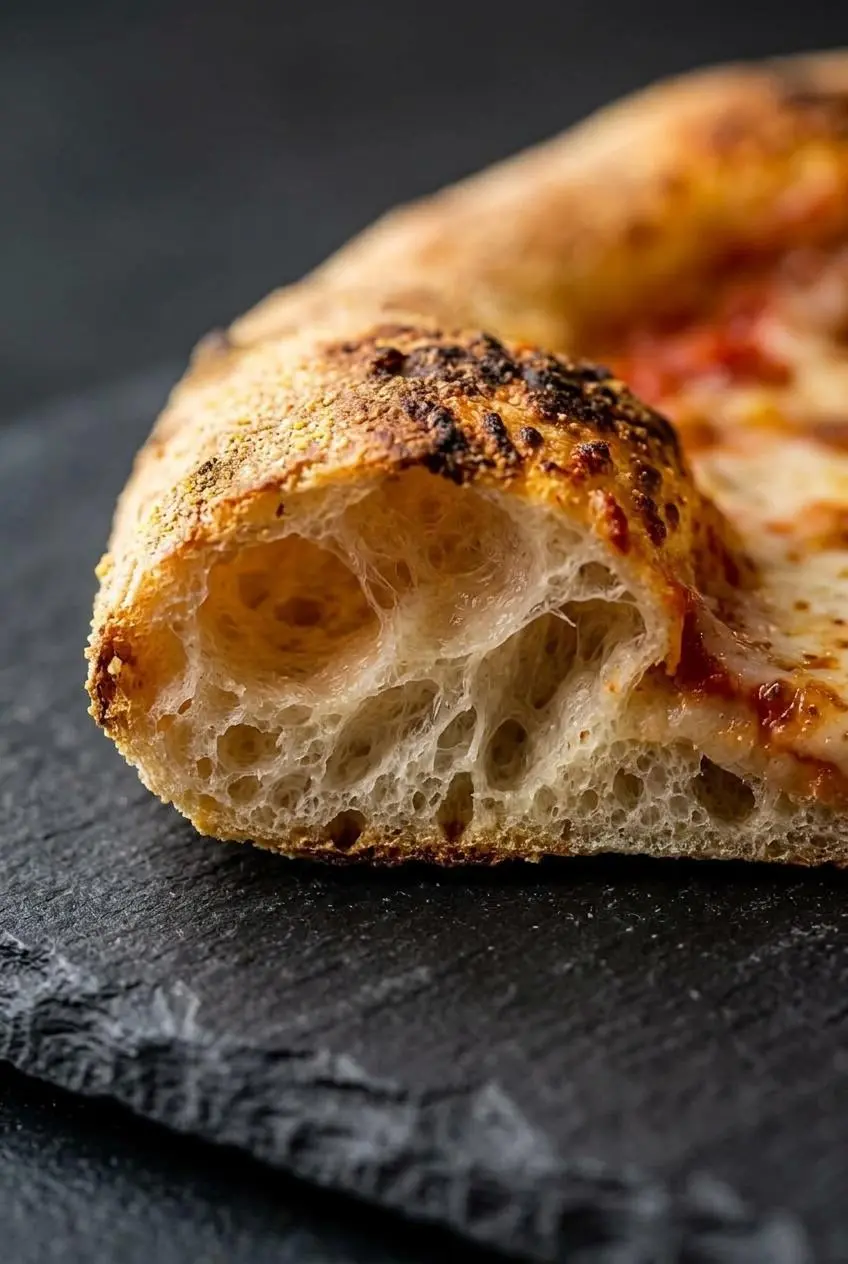
Small upgrades can change a good homemade pizza into a really memorable one. Most of them come down to heat, shaping, and giving the dough time to develop flavor.
The Secret to a Crispy Bottom
A crisp bottom needs strong heat from below, not just hot air around the pizza. If you have a pizza stone or steel, preheat it in the oven for at least 45 minutes at 475°F (246°C) or higher if your oven allows.
No stone or steel? An inverted baking sheet can help, and a cast iron skillet pizza setup is another great option when you want intense direct heat and a well-browned base.
Also watch the toppings. Too much sauce or too many wet vegetables can swamp the center before the bottom has time to crisp.
For Deeper Flavor: The Cold Fermentation Method
If you want a more developed, slightly tangy flavor, refrigerate the kneaded dough instead of letting it rise right away at room temperature. Place the oiled dough ball in a covered bowl or zip-top bag and chill it until you’re ready to use it.
The slower rise builds more flavor and often improves browning too. It does require planning ahead, but the payoff is a more complex crust with a better chew.
How to Stretch, Not Roll, Your Dough
A rolling pin presses out the gas bubbles that help create an airy rim. For better texture, flatten the dough gently with your fingertips, then stretch from the center outward with your hands or knuckles.
Leave a slightly thicker edge as you work. You should be able to stretch the center until it is thin and even, almost translucent in spots, while the rim stays fuller and ready to puff in the oven.
A Pro Trick for Better Browning and Flavor
If you like experimenting, you can add 1 teaspoon of diastatic malt powder to the dry ingredients. It’s completely optional, but it can help with rise, browning, and a crisper finish.
This is more of a tinker-with-your-dough move than a must-do step. The recipe works very well without it.
Troubleshooting Common Pizza Dough Problems
Most pizza dough issues are fixable. Usually the problem comes down to yeast activity, flour balance, kneading, or heat.
Problem: My Dough Didn’t Rise.
- Likely cause: The yeast was expired or inactive. Fix: Check the date before starting, and if you’re unsure, proof the yeast in the warm water with sugar until it looks foamy.
- Likely cause: The water was too hot or too cool. Fix: Aim for about 110°F so the yeast activates properly without getting knocked out.
- Likely cause: Your kitchen was chilly. Fix: Let the covered dough rise in a warmer spot until it looks doubled and puffy, not just because the clock says so.
Problem: My Dough Is Too Sticky.
- Likely cause: The dough is still under-kneaded. Fix: Keep kneading first, because a dough often gets smoother and less messy as the gluten develops.
- Likely cause: It truly has excess surface moisture. Fix: Add flour only 1 teaspoon at a time until the dough is soft and manageable but still slightly tacky.
- Likely cause: Too much flour was added too early. Fix: Stop as soon as the dough feels elastic and smooth, or the crust may turn dry and tough.
Problem: My Crust Is Too Tough or Dense.
- Likely cause: Too much flour. Fix: Measure carefully and resist the urge to keep dusting the dough until it feels dry.
- Likely cause: Not enough kneading. Fix: Knead until the dough becomes smooth, elastic, and able to pass a simple windowpane test.
- Likely cause: Shaping too aggressively. Fix: Stretch gently instead of pressing all the air out.
Problem: The Bottom of My Crust Is Soggy.
- Likely cause: The oven or baking surface was not hot enough. Fix: Give the oven enough preheat time and use a hot stone, steel, sheet pan, or cast iron surface when possible.
- Likely cause: Too many wet toppings. Fix: Go lighter on sauce and drain watery toppings before they hit the dough.
- Likely cause: Sauce soaked directly into the crust. Fix: Brush the shaped dough lightly with olive oil before adding sauce to create a small moisture barrier.
How to Store Pizza Dough
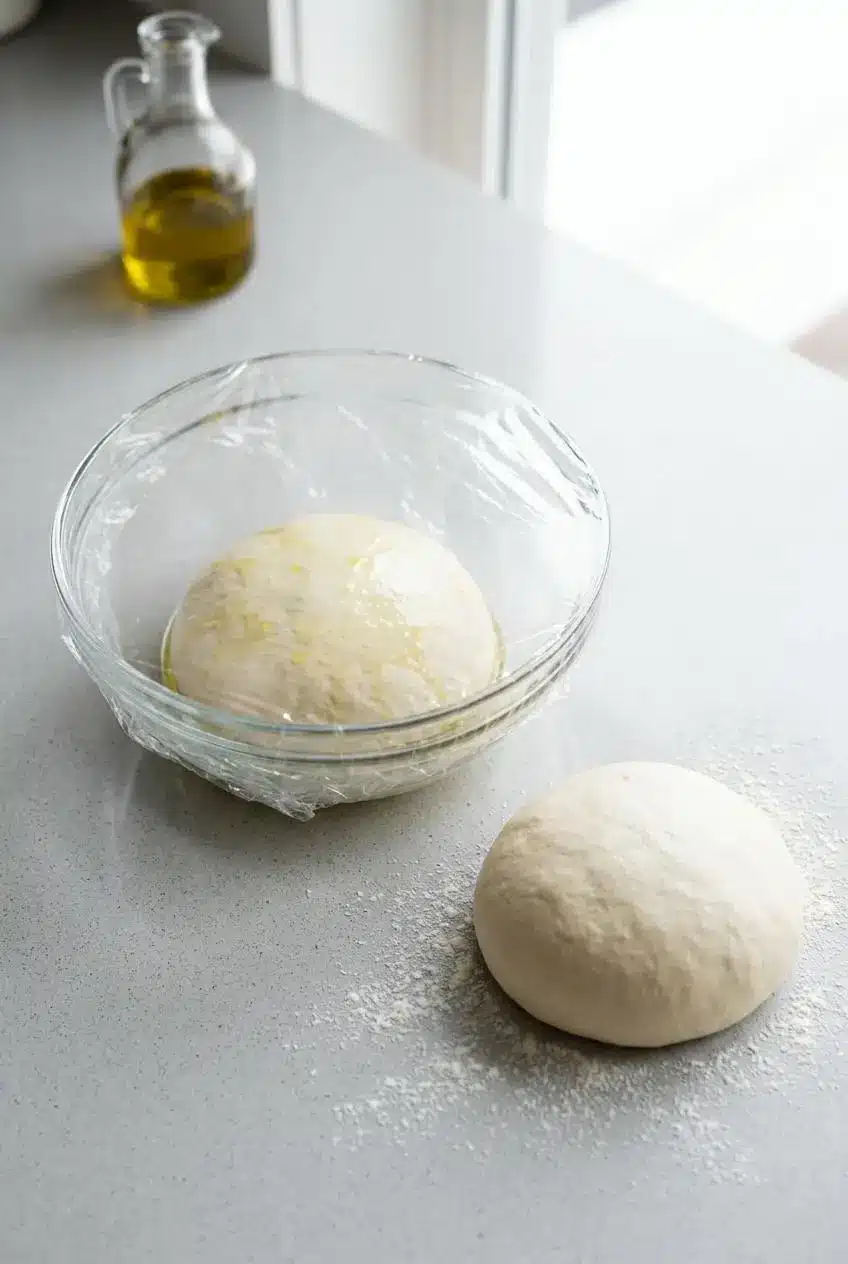
Since exact storage and freezing timelines are not supported here beyond the recipe’s main method, the most useful approach is to focus on handling. Keep the dough covered, lightly oiled, and chilled if you are not baking it soon.
Refrigerating Dough
After kneading, place the dough in an oiled bowl or container and cover it well so the surface does not dry out. Refrigeration also works as your cold fermentation method if you want more flavor from a slower rise.
When you are ready to bake, let the dough lose some of its chill so it stretches more easily. Cold dough tends to fight back and shrink.
Using Frozen Dough
If you freeze pizza dough, divide it into individual portions first and coat each ball lightly with oil before wrapping or bagging it well. That makes it easier to thaw only what you need and helps protect the surface from drying out.
Use frozen dough as a convenience option, not as a shortcut around proper handling. A well-wrapped dough ball can also be handy for turning into buffalo chicken pizza pockets later on.
How to Bring Dough Back to Baking Temperature
Thaw frozen dough in the refrigerator, then let it sit at room temperature until it softens enough to stretch without tearing. If it still feels tight or cold in the center, give it more time before shaping.
The dough is ready when it feels supple, stretches more willingly, and no longer snaps back hard under your hands.
Conclusion
This dough gives you a reliable path to homemade pizza with a crust that is soft, chewy, airy, and crisp where it counts. It also leaves room to level up with colder fermentation, hotter baking surfaces, and better shaping.
Once you get the feel of the dough, pizza night becomes much more fun and a lot less mysterious. Pick your toppings and make it your own.
Frequently Asked Questions
What Is the Best Flour for Homemade Pizza Dough?
Bread flour is the best choice for a chewier, crisper crust because it has more protein and builds stronger gluten. All-purpose flour still works very well and gives you a slightly softer, more tender crust. That’s why it’s a great fit for this recipe.
My Pizza Dough Didn’t Rise. What Went Wrong?
The three most common causes are inactive yeast, water that was too hot, or a room that was too cool. Check the yeast date, use water close to 110°F, and let the dough rise until it looks doubled rather than relying only on the clock.
Can I Make This Pizza Dough Ahead of Time?
Yes. The easiest way is to refrigerate the dough after kneading so it can rise more slowly and develop more flavor. You can also freeze divided dough balls for later use, then thaw them in the refrigerator and let them warm up before shaping.
How Do I Get a Crispy Crust in a Home Oven?
Use very high heat and preheat the baking surface thoroughly. A pizza stone, pizza steel, cast iron pan, or inverted baking sheet all help transfer strong heat to the bottom crust. It also helps to use a moderate amount of sauce and avoid piling on watery toppings, which can soften the center before the crust finishes baking.
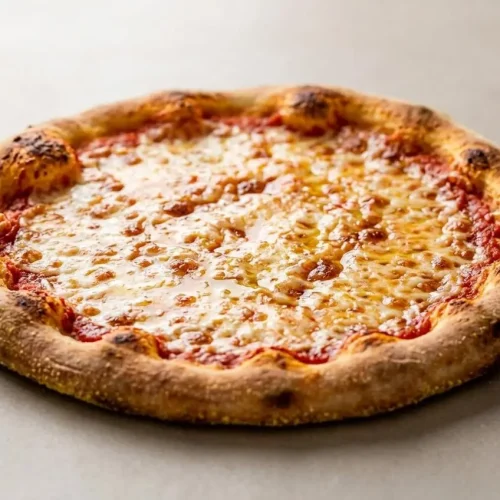
Pizza Dough Recipe

Equipment
- Stand mixer
- Dough scraper
- Pizza Pan
- Pastry brush
- Pizza Cutter
Ingredients
Dough
- 1 and 1/3 cups warm water (320ml) (about 110°F/43°C)
- 1 Tablespoon granulated sugar (13g)
- 2 and 1/4 teaspoons Platinum Yeast from Red Star instant yeast (7g) (1 standard packet)
- 3 and 1/2 to 4 cups unbleached all-purpose flour (spooned & leveled) (438–500g), plus more as needed
- 2 Tablespoons extra-virgin olive oil (30ml), plus more for greasing
- 1 teaspoon salt
- sprinkle of cornmeal for dusting the pan
Toppings
- extra-virgin olive oil for brushing
- 2 cloves garlic, minced (optional)
- 1 cup store-bought pizza sauce (250g)
- 4 cups shredded mozzarella cheese (1lb/454g)
Instructions
Method 1: Using a Stand Mixer
- Whisk the warm water, granulated sugar, and instant yeast in the bowl of a stand mixer fitted with a dough hook or paddle, then cover and let it sit for 5 minutes. The mixture should smell lightly sweet and yeasty as it wakes up.
- Add the flour, olive oil, and salt, then mix on medium speed for 2 minutes. The dough should start gathering itself and pulling away from the sides of the bowl.
- Knead the dough in the mixer for 5 full minutes, adding flour only 1 teaspoon at a time if it becomes too sticky to handle. It should look smooth and elastic, feel soft, and spring back slowly when poked.
- Test the dough by stretching off a small piece until it thins out enough for light to pass through. If it stretches without tearing right away, the gluten is developed and the dough is ready to rise.
- Lightly grease a large bowl, place the dough inside, and turn it so the surface is coated with oil, then cover it well. Let it rise at room temperature for 60 to 90 minutes, until doubled in size.
- Preheat the oven to 475°F (246°C) and let it heat for at least 15 to 20 minutes while you prepare the pan. Lightly grease a baking sheet or pizza pan and dust it with cornmeal so the crust releases easily and gets a little extra texture underneath.
- Punch down the risen dough, divide it in half, and gently flatten one portion into a disc on a lightly floured surface. If it keeps shrinking back, let it rest for 5 to 10 minutes so the gluten can relax.
- Stretch the dough into a 12-inch circle about 1/2-inch thick, then lift the edge slightly to form a rim. The center should look even and the outer edge should be a little thicker for a better crust.
- Cover the shaped dough lightly and let it rest for a few minutes while you get the toppings ready. This short pause makes the dough easier to top without springing back.
- Press small dents across the surface with your fingertips, brush the crust with olive oil, add minced garlic if using, spread on 1/2 cup (125g) pizza sauce, and top with 2 cups (227g) shredded mozzarella cheese plus any other toppings you like. The dents help limit big bubbles, and the oil adds color while helping the crust stay less soggy under the sauce.
- Bake for 13 to 15 minutes until the crust is golden brown. The cheese should be melted and the edges should look browned and crisp.
- Slice and serve the pizza hot, then repeat with the second half of the dough. The crust is at its best while the edges are still crisp and the center stays chewy.
Method 2: Kneading by Hand (No Mixer)
- Whisk the warm water, granulated sugar, and instant yeast in a large mixing bowl, then let it stand for 5 minutes. You should notice a pleasant yeasty aroma and a slightly creamy look on the surface.
- Stir in the flour, olive oil, and salt with a wooden spoon or silicone spatula until a rough dough forms. At this stage it will look shaggy and uneven, which is exactly fine.
- Turn the dough onto a lightly floured surface and knead for 5 full minutes, dusting with flour 1 teaspoon at a time only if it sticks badly. By the end, it should feel smooth, elastic, and only lightly tacky instead of wet.
- Poke the dough and check that it slowly springs back, or stretch a small piece thin to check for a windowpane. If it tears quickly and feels tight, keep kneading a little longer.
- Transfer the dough to a lightly greased bowl, turn it to coat, cover it, and let it rise at room temperature for 60 to 90 minutes. When ready, it should look puffy and about doubled in size.
- Shape, top, and bake the dough the same way as the mixer method. Hand-kneaded dough should still stretch well and bake into a soft, chewy, airy crust.