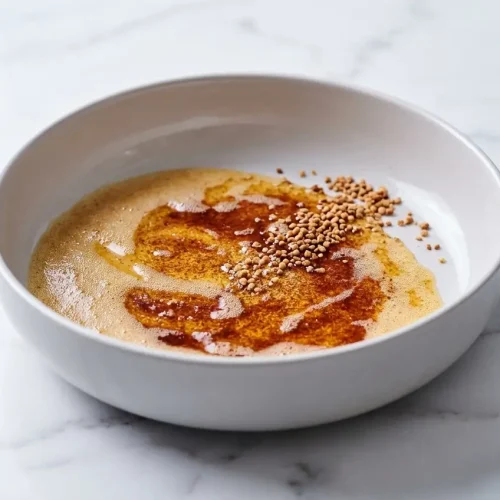
Perfect Beurre Noisette Recipe

Master this rich, caramelized liquid gold. This foolproof beurre noisette recipe uses a genius technique to unlock a deeper, toasted nutty flavor that elevates all your sweet and savory dishes.
Equipment
- Light-colored saucepan
- Silicone spatula or wooden spoon
- Heatproof bowl
Ingredients
- 250 grams unsalted butter
Instructions
Prep for Even Browning
- Cut the 250 grams of unsalted butter into small, even pieces so it melts at the same pace. This ensures you do not get some bits foaming hard while others are still solid.
Melt, Boost the Milk Solids, and Stir
- Add the butter pieces to a light-colored saucepan. White enamel or pale stainless steel is ideal because you can actually see the color shift under the foam.
- Right away, whisk in 1 to 2 tablespoons of dry milk powder if you are using it to boost the flavor. Then set the pan over medium heat and start stirring constantly with a heatproof silicone spatula or a wooden spoon.
- Let the butter melt gently, scraping the bottom as you go, until everything looks glossy and the foam begins to build, with a buttery, sweet dairy smell rising from the pan.
Read the Foam, Then Stop the Pan Fast
- Keep stirring until you notice the bubbles change. They will be big and loud at first as water evaporation happens, then smaller and quieter as the milk solids begin to toast.
- Watch for the color underneath the froth to turn deep golden. Trust your nose, it should smell nutty and warm, like toasted nuts and caramel.
- Remove the pan from the heat just before it looks perfect, because the butterfat holds heat and will keep cooking the milk solids for a moment.
- Pour immediately into a cold heatproof bowl so the browned bits stop darkening. This ensures your beurre noisette stays rich and fragrant, not bitter.
Notes
Equipment Tip: Use a light-colored stainless steel or ceramic pan. Dark non-stick pans hide the true color of the browning milk solids, making it easier to accidentally burn your butter.
Cooking Safety: Do not walk away from the stove. Beurre noisette can go from perfectly golden to burnt in a matter of seconds. Keep stirring constantly to prevent the solids from sticking and scorching.
Baking Adjustment: Because browning removes about 15 to 19 percent of the butter's volume through water loss, a direct swap can make your dough drier. Add a small splash of milk or water back into your cookie or cake batter to restore hydration.
Storage Guidelines: Store your brown butter in an airtight container in the refrigerator for up to 2 weeks, or freeze it in ice cube trays for up to 3 months. Always refrigerate it once it cools to keep the milk solids from spoiling.
Nutrition information is estimated based on common ingredients and serving sizes and may vary.
Nutrition
Calories: 112kcalFat: 12gSaturated Fat: 8gCholesterol: 31mgPotassium: 3mgVitamin A: 700IUCalcium: 3mg
Tried this recipe?Let us know how it was!