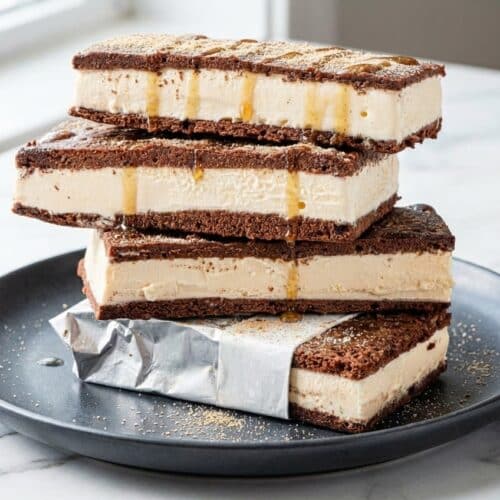
Classic Soft And Sticky Ice Cream Sandwiches

Enjoy the nostalgic taste of old-school ice cream truck sandwiches with this recipe. These malted chocolate wafers stay soft, tender, and perfectly tacky even after being frozen overnight.
Equipment
- Rimmed baking sheets
- Parchment Paper
- Offset spatula
- 9-inch by 13-inch baking pan
- Mixer
Ingredients
For the Chocolate Wafers
- 4 ounces (113 g) unsalted butter, room temperature
- 5 ounces (141 g) granulated sugar
- 2 ounces (57 g) brown sugar
- 2 teaspoons (9 g) vanilla extract
- 1 1/2 teaspoons (3 g) instant espresso powder
- 1 1/2 teaspoons (5 g) Diamond Crystal kosher salt; for table salt use half as much by volume
- 1/2 teaspoon baking powder
- 1/8 teaspoon baking soda
- 4 large egg yolks
- 5 1/4 ounces (148 g) all-purpose flour (1 cup plus 1 tablespoon) sifted; use rice flour for gluten free
- 4 ounces (112 g) unsweetened cocoa powder (1 cup) sifted
- 6 ounces (180 ml) hot coffee (3/4 cup)
- 2 quarts (1.9 L) vanilla ice cream store bought or homemade
Instructions
Mix the Wafer Batter
- Preheat your oven to 350°F (175℃) with the rack in the middle position. Line two rimmed baking sheets with parchment paper for easy removal.
- Cream the butter with both the granulated and brown sugars until light and fluffy, about 2 minutes. Mix in the vanilla, espresso powder, salt, baking powder, baking soda, and malted milk powder.
- Add the egg yolks one at a time on medium speed, scraping down the bowl to ensure the base is smooth and emulsified.
- Reduce the mixer speed to low and blend in the sifted flour and cocoa powder until no dry streaks remain, which should take about 1 to 2 minutes.
- Slowly drizzle in the hot coffee while continuing to mix on low speed. Scrape the bowl halfway through until the batter is dark, fluid, and glossy.
Bake, Cool, and Firm the Wafers
- Divide the batter between the two sheets, spreading it thin with an offset spatula. Tap the pans to level the surface. Bake one sheet at a time for 7 to 10 minutes until puffed but still soft.
- Cool the wafers on a rack for 30 minutes at room temperature, then move them to the refrigerator or freezer for another 30 minutes until firm.
Temper the Ice Cream and Build the Slab
- Soften the ice cream in the fridge for about 30 minutes until it reaches a spreadable, soft-serve consistency. Line a 9x13-inch pan with parchment paper, leaving an overhang.
- Spread the softened ice cream over the wafer in an even layer. Place the second wafer shiny side up on top, cover with wrap, and press gently to seal.
Freeze Overnight and Slice Cleanly
- Freeze the entire slab for at least 12 hours. Once firm, lift it out using the parchment overhang and place it on a cutting board.
- Using a knife warmed under hot water, cut the slab into twelve 4 1/4-inch by 2 1/2-inch rectangles. Wipe the blade clean between every cut for tidy edges.
Notes
Classic Look: Poke 10 to 12 holes in the top wafer with a chopstick before the final freeze to achieve a traditional factory appearance.
Clean Slicing: Always score the top wafer lightly before making full cuts and keep a hot, wet towel nearby to clean your knife between every slice.
Storage Tip: Wrap individual sandwiches in parchment and foil to prevent freezer burn. They are best enjoyed within 14 days for the softest texture.
Nutrition information is estimated based on common ingredients and serving sizes and may vary.