Chocolate Ice Cream

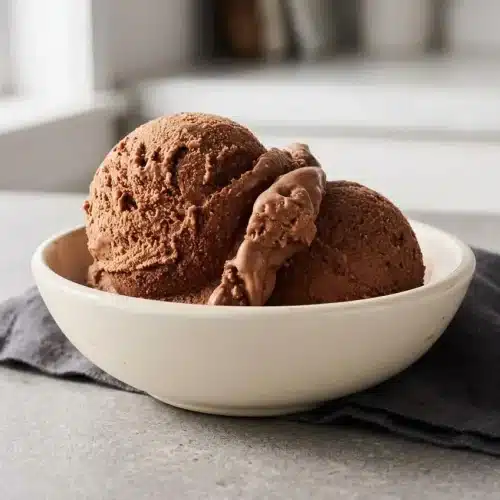
This homemade chocolate ice cream lands between fudgy and silky, using a blend of cocoa powder and real dark chocolate for a deep, velvety finish. Easy eggless method with no tricky custard steps.
Equipment
- KitchenAid Ice Cream Maker Attachment
- Medium saucepan
- Whisk
- Heatproof bowl
Ingredients
- 1 1/2 cups heavy cream
- 1/4 cup unsweetened cocoa powder
- 2/3 cup cane sugar
- 1/8 teaspoon sea salt
- 3 ounces dark chocolate 70% to 85% cacao, chopped (about 1/2 cup)
- 1 1/2 cups whole milk
- 2 teaspoons vanilla extract
Instructions
- Whisk the heavy cream, cocoa powder, cane sugar, and sea salt together in a medium saucepan over the stove. The mixture should look smooth and glossy, with no dry cocoa pockets left around the edges.
- Bring the pan to a gentle boil while whisking occasionally, then lower the heat and let it simmer for exactly 30 seconds. This short simmer dissolves the sugar and hydrates the cocoa, and the base will look darker and slightly fuller.
- Take the saucepan off the heat and add the chopped dark chocolate right away, then whisk until the mixture is completely smooth. You should smell a stronger chocolate aroma almost immediately, and the base should turn glossy and uniform.
- Whisk in the whole milk and vanilla extract until fully blended. The mixture will loosen slightly and look silky rather than thick or pasty.
- Pour the base into a heatproof bowl and let it cool to room temperature, then cover and refrigerate for at least 2 hours or overnight. By the time it is ready to churn, it should be thoroughly cold with no lingering warmth in the center.
- Whisk the chilled base well before pouring it into your ice cream maker. This brings everything back together so the texture stays even from the first minute of churning.
- Churn according to your machine’s directions, usually 20 to 30 minutes, until the ice cream reaches a soft serve consistency. It should mound softly on itself and hold gentle ridges from the paddle.
- Serve it right away for the softest texture, or transfer it to an airtight container and freeze for 2 to 4 hours for a firmer scoop. After the final freeze, it should look dense, smooth, and easy to portion with a slightly softened edge.
Notes
Texture tip: Stick with full fat heavy cream and whole milk. Substituting low fat or skim milk leads to an icy, watery mouthfeel.
Freezing prep: Freeze your ice cream maker bowl solid for 12 to 24 hours before churning. If you hear liquid sloshing inside the bowl walls, it is not ready.
Storage: Press plastic wrap or parchment paper directly onto the surface of the ice cream before sealing the airtight container. Store in the back of the freezer for up to one month.
Serving tip: If the ice cream is too firm to scoop straight from the freezer, let the container rest at room temperature for about 5 minutes before portioning.
Nutrition information is an estimate based on common ingredients and serving sizes. Values may vary depending on brands, portions, and substitutions.