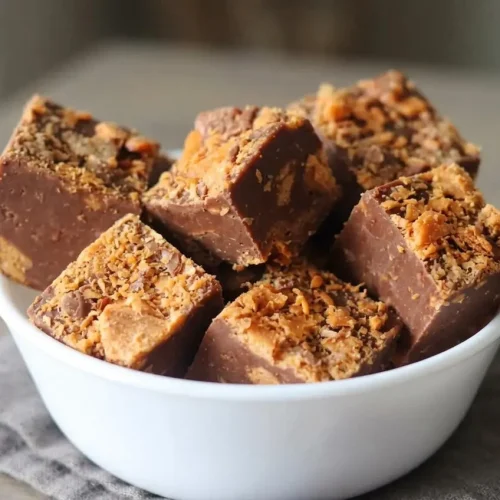
Butterfinger Fudge

Smooth milk chocolate and peanut butter fudge packed with crispy chopped Butterfinger bars. Made on the stove with sweetened condensed milk in 5 minutes of active time, then chilled and cut into 36 squares.
Equipment
- 8x8 baking dish
- Parchment Paper
- Medium saucepan
- Rubber spatula
- Sharp knife
Ingredients
- 1 12 oz. bag of milk chocolate chips
- 1 cup peanut butter chips
- 1 Tbsp. butter
- 1 14 oz. can sweetened condensed milk
- 1 1/2 cups chopped Butterfinger candies (about 12 fun size)
Instructions
- Fit parchment into an 8x8 baking dish, leaving enough above the sides to grip later, or grease the dish with butter instead. The parchment should cover the bottom and create a sling for lifting the firm fudge.
- Measure 1/2 cup of chopped Butterfingers into a separate bowl for the topping. The remaining 1 cup will provide the candy pieces inside the chocolate mixture.
- Combine both kinds of chips, the sweetened condensed milk, and butter in a medium saucepan, stirring over low heat until fully melted, then take the pan off the burner. The finished mixture should look glossy and uniform, with no chip-shaped lumps or bubbling.
- Fold the remaining 1 cup of chopped candy into the melted mixture while the saucepan is off the heat. Stop once the pieces are distributed throughout, with crispy chunks still visible.
- Transfer the thick fudge to the prepared dish and use a rubber spatula to guide it into the corners and level the surface. An even layer gives the finished squares a consistent thickness.
- Distribute the reserved 1/2 cup of candy over the warm surface and gently settle it into the fudge with the rubber spatula. The pieces should sit partly embedded rather than resting loosely on top.
- Place the filled dish in the refrigerator for about 1 hour, allowing the fudge to cool and firm. The center should hold its shape rather than shift when you gently move the dish.
- Lift the set block onto a cutting board using the parchment handles, then use a sharp knife to divide it into 36 pieces. A six-by-six cutting pattern produces evenly sized squares with candy throughout.
Notes
Ingredient tip: Chill the candy bars briefly before cutting them on a board with a sharp knife so you get distinct crispy chunks instead of fine crumbs, and make sure to use sweetened condensed milk rather than evaporated milk.
Texture tip: Keep the stove on low heat and never let the mixture boil; pull the pan off the burner if only tiny soft lumps remain so residual heat finishes melting the chips smoothly before folding in the candy.
Serving tip: For clean squares without crumbled edges, press the top layer of candy gently into the warm fudge with a spatula and wipe your knife blade between downward cuts.
Storage: Store the firm squares chilled in a tightly closed container with wax paper separating the layers, and serve soon after setting for the crispest candy texture.
Nutrition information is an estimate based on common ingredients and serving sizes. Values may vary depending on brands, portions, and substitutions.