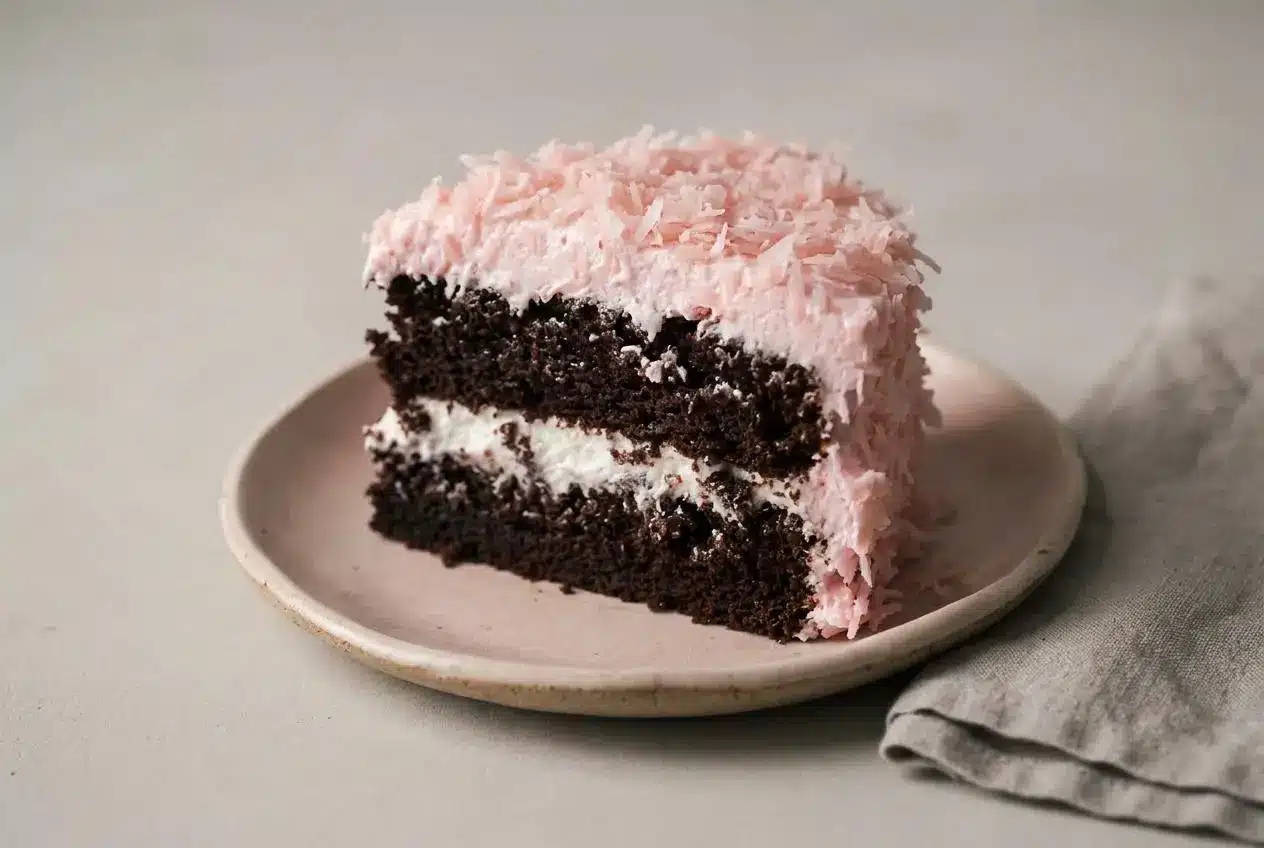
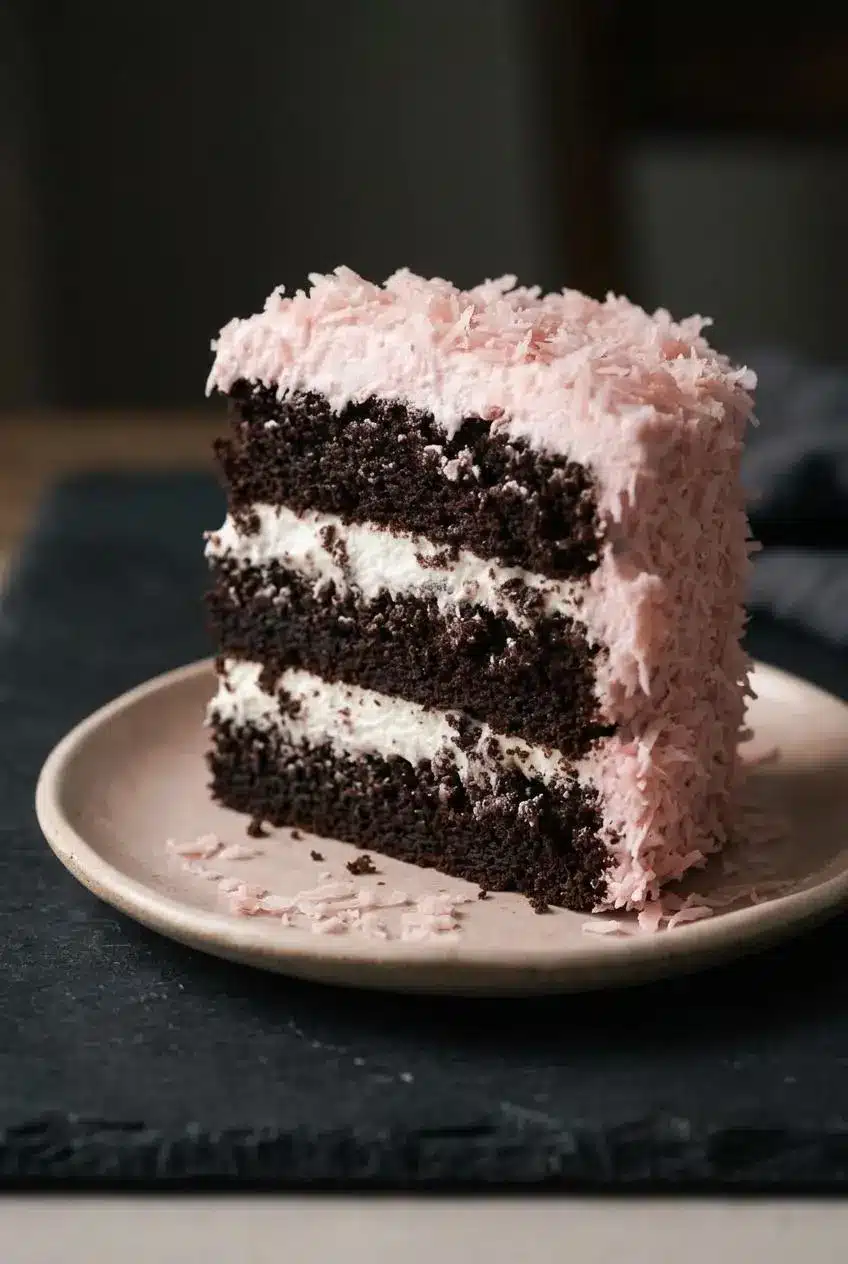
This hostess snowball cake recipe layers moist chocolate buttermilk cake with billowy 7-minute marshmallow frosting and pink coconut. Make a tall three-layer 6-inch cake or a wider two-layer 8-inch cake, with individual dome cakes as an optional variation.
Bright pink coconut gives this homemade celebration cake its snack-cake charm. Underneath, tender chocolate layers meet a light, marshmallow-style frosting that contrasts beautifully with the chewy coconut coating.
The batter comes together in one bowl, and the coconut hides any uneven frosting swirls. The stage that needs your attention is whipping the egg whites over simmering water. Watch for those glossy peaks.
Cut parchment circles for the pan bottoms before mixing; this moist chocolate cake can cling to bare metal.
Key Ingredients and Their Roles
Cocoa and espresso deepen the chocolate flavor, buttermilk and egg yolk support a tender crumb, and whipped egg whites give the frosting its airy structure. Coconut adds chew, while food coloring creates the familiar pink finish.
Cake
- 1 cup plus 2 tablespoons all-purpose flour
- 1 cup plus 2 tablespoons white granulated sugar
- 1/2 cup cocoa powder
- 1 1/2 tsp instant espresso powder
- 1 teaspoon baking soda
- 3/4 teaspoon baking powder
- 3/4 tsp kosher salt
- 1 egg, plus 1 egg yolk
- 1/2 cup buttermilk, shaken
- 1/2 cup warm water
- 2 1/2 teaspoons olive oil
- 2 teaspoons vanilla extract
7-Minute Frosting
- 3 tablespoons water
- 1 cup white granulated
- 3 large egg whites
- 1/4 teaspoon cream of tartar
- Pinch kosher salt
- 1/4 teaspoon pure vanilla extract
Coconut Topping
- 1 1/2 cups sweetened or unsweetened coconut flakes
- 2 drops red food coloring
Chocolate Cake Ingredients
Use instant espresso powder, not ground coffee. This dehydrated coffee product dissolves in the batter; coffee grounds leave gritty particles. Whisk the powder directly into the dry ingredients rather than preparing a separate cup of espresso. Its role here is to deepen the cocoa flavor, not turn the cake into a coffee dessert.
Shake the buttermilk before measuring so its thicker solids mix back into the liquid. Its acidity works with the baking soda, while the extra egg yolk contributes richness and helps the wet ingredients blend.
Warm water hydrates the cocoa and loosens the mixture. Along with buttermilk and olive oil, it produces a noticeably fluid batter that bakes into a moist crumb. Don’t add flour to make it resemble a thick butter-cake batter.
7-Minute Frosting and Pink Coconut Ingredients
The frosting ingredient listed as “white granulated” means white granulated sugar. Sugar gives the whipped egg whites sweetness and body. Cream of tartar helps stabilize their foam and discourages sugar crystallization, supporting a smoother, glossier finish.
Sweetened coconut gives the cake a sweeter, chewy snack-cake coating. Unsweetened coconut keeps the finish less sweet without changing the assembly method. Standard red food coloring produces soft pink; optional neon pink coloring gives a brighter retro shade.
I keep a separate, clean bowl for the egg whites so traces of olive oil or egg yolk from the cake batter don’t interfere with whipping.
How to Make Hostess Snowball Cake Step by Step
Prepare the pans first, then bake the chocolate layers before whipping the frosting. Let the cake cool completely before assembly; warm layers can soften the frosting and slide.
To Make the Cake
- Heat the oven to 350 °F and prepare three 6-inch or two 8-inch cake pans with butter, flour, and parchment circles on the bottoms.
The parchment helps release the sticky cake without tearing its tender underside. - Combine the flour, sugar, cocoa, espresso powder, baking soda, baking powder, and salt in a large bowl, or use a stand mixer fitted with its paddle.
An evenly colored dry mixture helps distribute the cocoa and leavening throughout the batter. - Add the egg, egg yolk, buttermilk, warm water, olive oil, and vanilla, then mix for about 1 minute.
Stop when the batter looks smooth and fluid, without visible pockets of dry ingredients. - Portion the batter evenly among the prepared pans and bake for 27 to 30 minutes, checking the centers with a skewer.
A clean skewer signals doneness, while wet batter means the layers need more time. - Leave the baked layers to cool and thoroughly wash and dry the mixing bowl before preparing the frosting.
The cake must feel completely cool before filling, and the bowl must have no oily residue.
To Make the Frosting
- Whisk the water, sugar, egg whites, cream of tartar, and salt together in a large metal bowl, then position it over a pan of barely simmering water.
The mixture will initially look loose and foamy rather than thick or spreadable. - Beat with a handheld electric mixer, starting on low and gradually increasing to high, for about 5 minutes until stiff peaks form.
The foam should become glossy and dense enough that a lifted peak stands upright instead of folding over. - Move the bowl onto a folded kitchen towel on the counter, beat for about 2 minutes more, and mix in the vanilla.
The finished frosting should feel cool and look billowy, with enough body to spread over the layers.
To Make the Coconut Topping
- Combine the coconut and red food coloring in a bowl, then cover your hand with a clean zip-top bag and gently rub the flakes together.
Keep mixing until the pink color looks even and no concentrated red patches remain.
To Assemble the Cake
- Spread a few tablespoons of frosting from the center to the edge of the first cooled layer, add the second layer, and repeat before adding the third layer if making the 6-inch cake.
Keep the rounds centered so the cake stands straight rather than leaning. - Cover the top and sides with the remaining frosting, smoothing it into an even coating.
Small ridges are fine because the coconut will cover them. - Press coconut gently against the frosted sides, scatter it over the top, then slice and serve.
The finished coating should cling to the frosting without being pressed deeply into it.
Tips and Troubleshooting for Perfect Results
Judge the frosting by its texture rather than the clock alone. Mixer strength and heat level affect how quickly the egg whites build volume.
How to Fix 7-Minute Frosting That Will Not Set
- Runny from grease or yolk: Fat interferes with the egg whites’ ability to trap air. If the mixture won’t build volume and you know it contains oil or yolk, restart with clean equipment and fresh whites.
- Loose over insufficient heat: Check for a gentle simmer beneath the bowl. Water that isn’t simmering provides less heat, while a hard boil makes the mixture harder to control.
- Soft peaks from stopping early: Keep whipping over the simmering water until the peaks stand upright. Then complete the counter-whipping stage to cool and thicken the frosting.
- Grainy texture: Undissolved sugar is a likely cause. Maintain gentle heat while beating rather than removing the bowl as soon as the mixture turns white.
- Deflating during assembly: Warm cake can soften the foam. Cool the layers fully, handle the frosting gently, and avoid repeatedly spreading and scraping the same area.
This frosting gives a different texture from a gelatin-based marshmallow coating:
- 7-minute frosting: Light, airy cooked meringue that spreads easily between layers and needs no gelatin.
- Gelatin marshmallow coating: A separate preparation that creates a stretchier, bouncier shell for individual domes; it isn’t a direct swap within these instructions.
6-Inch vs 8-Inch Cake Pan Guide
- Three 6-inch pans: Use these for a tall cake with three chocolate layers and two filling layers.
- Only two 6-inch pans: Bake the first two layers while the remaining batter waits, then cool and prepare a pan again before baking the final layer.
- Two 8-inch pans: Divide the same batter between them for a wider two-layer cake, with frosting between the rounds and over the exterior.
- Doneness for either size: Use the same 27 to 30 minute baking window and check with a skewer rather than relying on the cake’s dark surface color.
Don’t skip the parchment even after buttering and flouring. These layers contain relatively little oil, and forcing a stuck cake out of its pan can split it before assembly.
Fun Variations and Individual Sno Ball Option
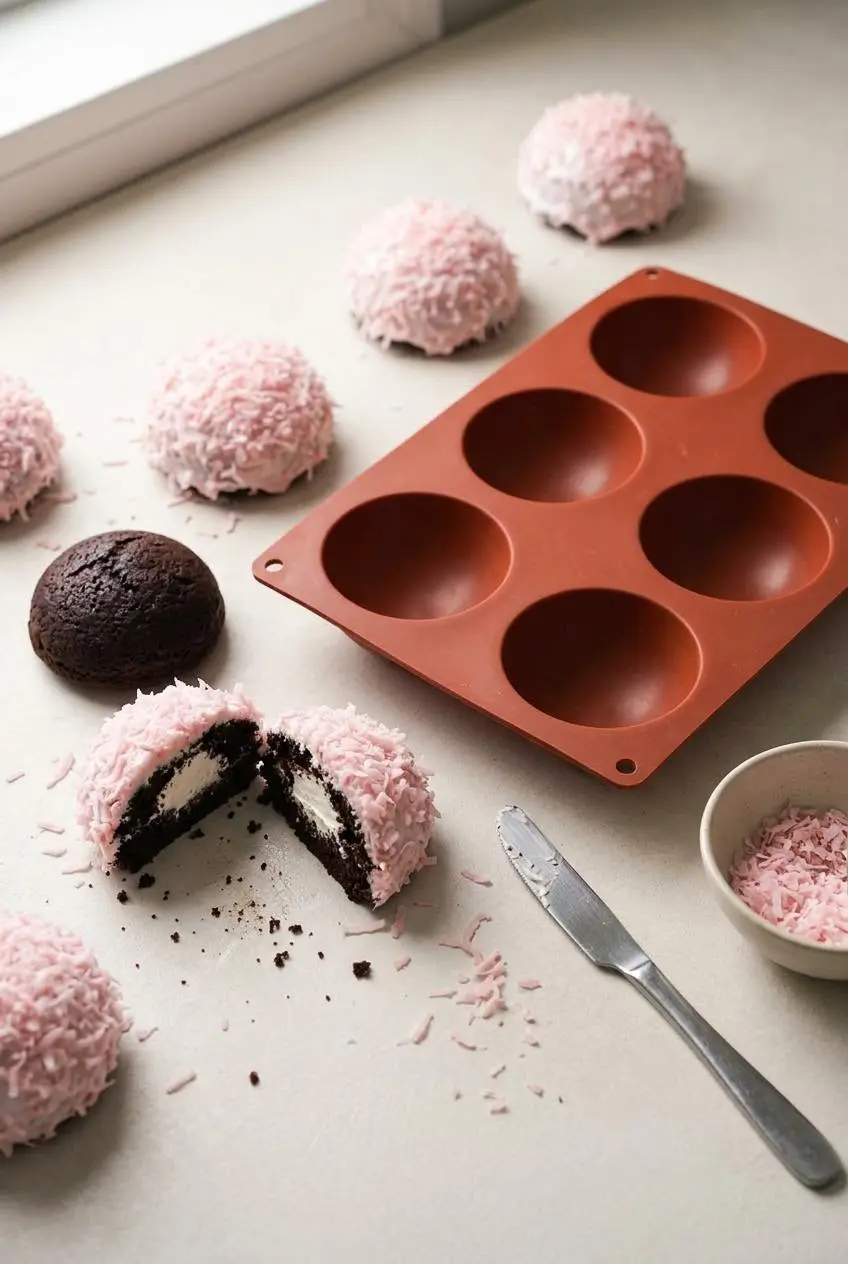
Keep these optional changes separate from the cake method so you can choose between a sliceable centerpiece and individual filled treats.
Adding a Marshmallow Cream Filling Core
For a richer center, spread or pipe a thin layer of prepared marshmallow fluff buttercream between the cooled chocolate rounds. Keep the filling inside the edges, then cover the exterior with the 7-minute frosting and coconut.
This creates two distinct textures: a creamy filling inside and airy marshmallow-style frosting outside. Avoid a thick mound of filling, which can squeeze outward as you stack the cake.
Making Individual Dome Sno Balls in Silicone Molds
For individual cakes, use greased, oven-safe half-sphere silicone molds supported on a baking sheet. Check the manufacturer’s instructions; some molds sold for chocolate aren’t intended for baking.
Divide the batter among the cavities, leaving room for expansion. Small domes may bake in about 12 to 15 minutes at 350 °F, but mold dimensions vary, so check for a clean skewer.
Cool completely before unmolding and adding an optional cream center through the flat underside. Pipe gently or hollow a small space first. Stop before the dome bulges, since too much filling can crack the cake. Spread frosting over each dome and coat with coconut.
Seasonal Colors and Flavor Swaps
- White winter snowballs: Omit the coloring for a snowy finish; a classic coconut cake offers another coconut-covered celebration option.
- Holiday pastels: Try green, yellow, or blue coconut for spring gatherings and baby showers.
- Extract changes: Add a tiny touch of peppermint for Christmas or almond extract for a different aroma, tasting cautiously because both can overpower the frosting.
Storage, Make-Ahead, and Serving Ideas
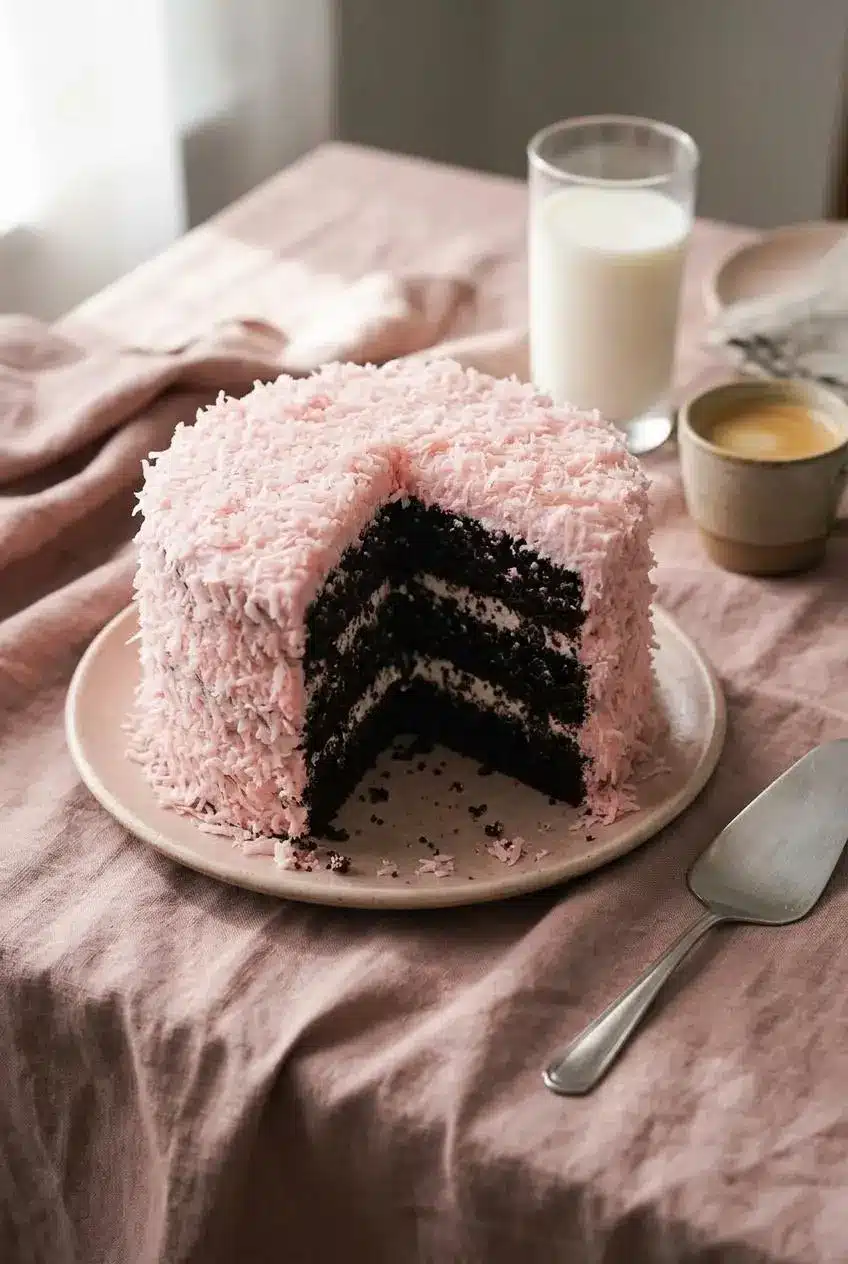
For the fluffiest texture, assemble the cake close to serving and protect the frosting from heat and moisture.
You can prepare the frosting up to 4 hours ahead and refrigerate it, covered. Use a container with enough headroom that the cover doesn’t press into the peaks.
Keep the assembled cake covered in the refrigerator as a cautious storage choice. A tall cake carrier protects the coconut without dragging plastic wrap through the frosting. Refrigeration won’t preserve the freshly whipped texture indefinitely, so avoid preparing the finished cake far in advance.
Homemade meringue frosting can soften or release moisture as it sits. For a party, plan around the freshly assembled cake rather than counting on it to behave like shelf-stable packaged frosting.
Set the tall pink cake on a stand for birthdays or a retro dessert table. For another pink celebration idea, try a festive Valentine’s cake. Cold milk balances the chocolate and coconut sweetness, while hot espresso makes a pleasantly bitter contrast.
Conclusion
Rich chocolate, billowy frosting, and chewy pink coconut give this cake its nostalgic appeal. A grease-free bowl and properly formed stiff peaks make the biggest difference to the marshmallow finish.
Keep the first version classic, or try the optional cream center when you want a richer slice. Let the layers cool fully, then enjoy covering every frosting swirl with coconut.
Frequently Asked Questions
Why Did My 7-Minute Marshmallow Frosting Not Set Properly?
The most likely causes are grease or yolk in the bowl, insufficient heat beneath it, or stopping before stiff peaks form. Check for a gentle simmer and upright peaks before moving to the counter-whipping stage.
What Is Instant Espresso Powder and Do I Add It Dry or as Liquid?
Instant espresso powder is dehydrated coffee made to dissolve. Add it dry with the flour and cocoa in this recipe; don’t substitute coffee grounds or add brewed espresso.
Can I Make This Hostess Snowball Cake Recipe as Individual Snack Cakes?
Yes. Use greased, oven-safe half-sphere molds and follow the optional dome guidance above. Cool the cakes completely before adding a small cream center, frosting, and coconut.
Why Are Hostess Snowballs Pink Instead of White?
The pink appearance comes from tinted coconut, not the chocolate cake or marshmallow underneath. For this homemade version, pink is a decorative choice; leaving out the coloring gives you white snowballs with the same flavor.
How Do You Store Homemade Snowball Cake So the Frosting Stays Fluffy?
Keep it covered and chilled, using a tall container that doesn’t touch the frosting. Assemble close to serving for the best texture, since storage can soften the airy meringue.
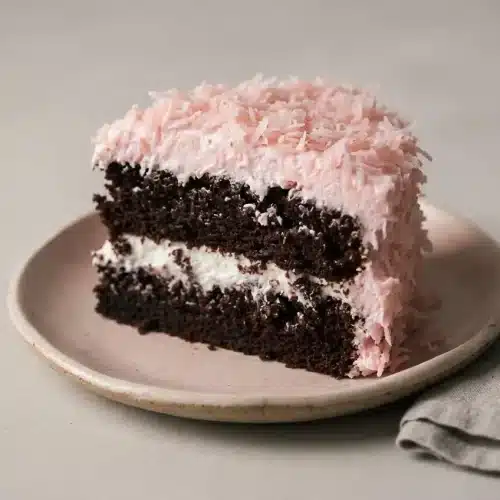
Hostess Snowball Cake Recipe

Equipment
- 3 (6-inch) cake pans OR 2 (8-inch) cake pans
- stand-up mixer
- large metal bowl
- handheld electric mixer
Ingredients
Cake
- 1 cup plus 2 tablespoons all-purpose flour
- 1 cup plus 2 tablespoons white granulated sugar
- 1/2 cup cocoa powder
- 1 1/2 tsp instant espresso powder
- 1 teaspoon baking soda
- 3/4 teaspoon baking powder
- 3/4 tsp kosher salt
- 1 egg plus 1 egg yolk
- 1/2 cup buttermilk shaken
- 1/2 cup warm water
- 2 1/2 teaspoons olive oil
- 2 teaspoons vanilla extract
7-Minute Frosting
- 3 tablespoons water
- 1 cup white granulated
- 3 large egg whites
- 1/4 teaspoon cream of tartar
- Pinch kosher salt
- 1/4 teaspoon pure vanilla extract
Coconut Topping
- 1 1/2 cups sweetened or unsweetened coconut flakes
- 2 drops red food coloring
Instructions
To Make the Cake
- Heat the oven to 350 °F and prepare three 6-inch or two 8-inch cake pans with butter, flour, and parchment circles on the bottoms. The parchment helps release the sticky cake without tearing its tender underside.
- Combine the flour, sugar, cocoa, espresso powder, baking soda, baking powder, and salt in a large bowl, or use a stand mixer fitted with its paddle. An evenly colored dry mixture helps distribute the cocoa and leavening throughout the batter.
- Add the egg, egg yolk, buttermilk, warm water, olive oil, and vanilla, then mix for about 1 minute. Stop when the batter looks smooth and fluid, without visible pockets of dry ingredients.
- Portion the batter evenly among the prepared pans and bake for 27 to 30 minutes, checking the centers with a skewer. A clean skewer signals doneness, while wet batter means the layers need more time.
- Leave the baked layers to cool and thoroughly wash and dry the mixing bowl before preparing the frosting. The cake must feel completely cool before filling, and the bowl must have no oily residue.
To Make the Frosting
- Whisk the water, sugar, egg whites, cream of tartar, and salt together in a large metal bowl, then position it over a pan of barely simmering water. The mixture will initially look loose and foamy rather than thick or spreadable.
- Beat with a handheld electric mixer, starting on low and gradually increasing to high, for about 5 minutes until stiff peaks form. The foam should become glossy and dense enough that a lifted peak stands upright instead of folding over.
- Move the bowl onto a folded kitchen towel on the counter, beat for about 2 minutes more, and mix in the vanilla. The finished frosting should feel cool and look billowy, with enough body to spread over the layers.
To Make the Coconut Topping
- Combine the coconut and red food coloring in a bowl, then cover your hand with a clean zip-top bag and gently rub the flakes together. Keep mixing until the pink color looks even and no concentrated red patches remain.
To Assemble the Cake
- Spread a few tablespoons of frosting from the center to the edge of the first cooled layer, add the second layer, and repeat before adding the third layer if making the 6-inch cake. Keep the rounds centered so the cake stands straight rather than leaning.
- Cover the top and sides with the remaining frosting, smoothing it into an even coating. Small ridges are fine because the coconut will cover them.
- Press coconut gently against the frosted sides, scatter it over the top, then slice and serve. The finished coating should cling to the frosting without being pressed deeply into it.